Admin Content
As a 12d Synergy Administrator, you will be able to perform all the procedures listed on this page.
You can set the following on folders and their constituent files from the 12d Synergy Administration application.
Structures
Notifications
1.1. How to Create Folders
1.1.1. From the 12d Synergy Administration application
In the 12d Synergy Administration application, select the Jobs tab.
Select the Find tab and search for the job whose folders you want to define.
Click the Find button.
The Edit Jobs window is displayed.Select the required job and click the Edit button.
The Job Tree window is displayed.Right-click the Job and select the Create Folder option.
The Create a Folder window is displayed.
1.1.2. From the 12d Synergy Client application
In the 12d Synergy Client application, right-click the required job or folder from the tree structure under which you want to create a new folder.
Select the New > Folder option.
The Create a Folder window is displayed.
1.1.3. Create a Folder
In the Create a Folder window, do the following:
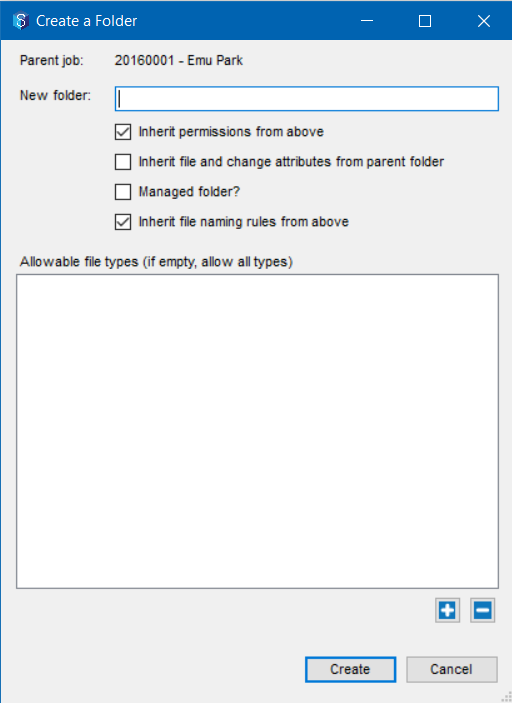
Enter a name for the new folder in the New folder box.
Do any of the following:
Select the Inherit permissions from above checkbox if you want the new folder to inherit permissions from the above job/folder.
Select the Inherit file and change attributes from parent checkbox to inherit the file and change attributes from the parent job.
Select the Managed Folder? checkbox if you are creating a managed folder.
Select the Inherit file naming rules from above checkbox to inherit the file naming rules from the above job/folder.
Select the Is a federated model folder checkbox to mark the folder as one that houses related IFC files and IFCzip files. You can visualise such a folder wherein all the individual files constitute a complete model in the Model Viewer.
In the Allowable file types field, enter the extensions of the file types that can be used in this folder. If no extensions are mentioned, then all file types are permitted.
To exclude files of a specific type, enter an exclamation mark before the file type. For example, entering !.xls and !xls in the Allowable file types field would mean that Excel Spreadsheets cannot be worked upon in this newly created folder.
Click the Create button.
A new folder is created.
You can also create folders from a template folder.
1.2. How to Edit Folders
1.2.1. From the 12d Synergy Administration application
In the 12d Synergy Administration application, select the Jobs tab.
Select the Find tab and search for the job whose folders you want to define.
Click the Find button.
The Edit Jobs window is displayed.Select the required job and click the Edit button.
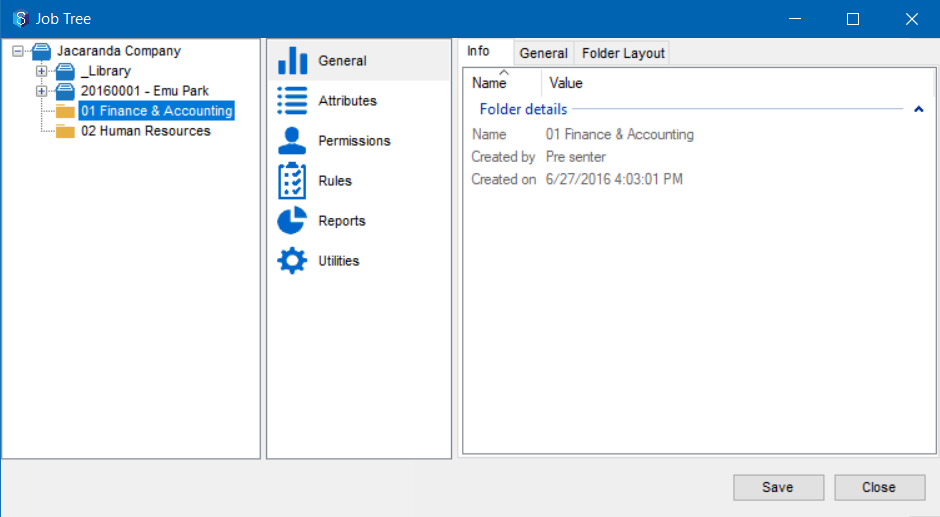
The Job Tree window is displayed.Expand the job to see its folders.
Select the folder that you want to edit.
1.2.2. From the 12d Synergy Client application
In the 12d Synergy Client application, select the required job from the tree structure.
Expand the job to see its folders.
Right-click the folder that you want to edit and select the Edit Folder option.
The following tabs are displayed.
1.2.2.1. General
Info – You can view the basic details about the selected folder in this tab.
General – You can view and modify some of the basic inheritance properties from this tab. You can also restrict the type of files this folder can hold.
Folder Layout – You can design the display of folder details using this tab.
1.2.2.2. Attributes
Folder Attributes – You can add, modify, or delete folder attributes that apply to the selected job.
File Change Attributes – You can add, modify, or delete file change attributes that apply to the selected folder. You can also specify the default values of these attributes from this tab.
File Attributes – You can add, modify, or delete file attributes that apply to the selected job. You can also specify the default values of file change attributes from this tab.
1.2.2.3. Permissions
Users – You can add users to the folder and select them to apply either permission sets or explicit permissions to them. You can also generate a report of the permissions that are applied to all users by clicking the Report button.
Groups – You can add user groups to the folder and select them to apply either permission sets or explicit permissions to them. You can also generate a report of the permissions that are applied to all users by clicking the Report button.
Roles – You can add roles to the selected folder and select them to apply either permission sets or explicit permissions to them. You can also define the number of positions of a specific role for the selected folder. This is the most recommended way to define permissions as it makes the system role-dependent instead of it being user-dependent.
Collaborators – You can create or add collaborators to the selected folder and also configure their access details from this tab. This tab is displayed only if you have a valid Collaborators license.
This tab is displayed only if you have a valid Collaborators license.
1.2.2.4. Rules
Naming Rules
You can specify naming rules that apply to the files within the selected folder. A naming rule defines how entities, such as files, must be named.
You can also configure the naming rules for jobs using the 12d Synergy Administration application > Jobs tab > Naming Rule tab.
Notifications– You can manage the notification subscriptions for a user, a role, or a group from this tab.
You cannot edit your own notification subscriptions from this tab. You can do that by right-clicking on the required job and selecting the Notifications option.
CAD Layout Templates – You can create or edit a CAD Layout Template and define the attributes that apply to it from this tab.
CAD Layout templates are used to import a set list of fields/attributes into 12d Synergy from a drawing file. If additional fields/attributes not listed in the layout template are found within the drawing, they will be ignored and not imported.
1.2.2.5. Reports
Report Schedules – You can configure the inputs, schedule, and delivery format and the recipients of folder-specific reports from this tab.
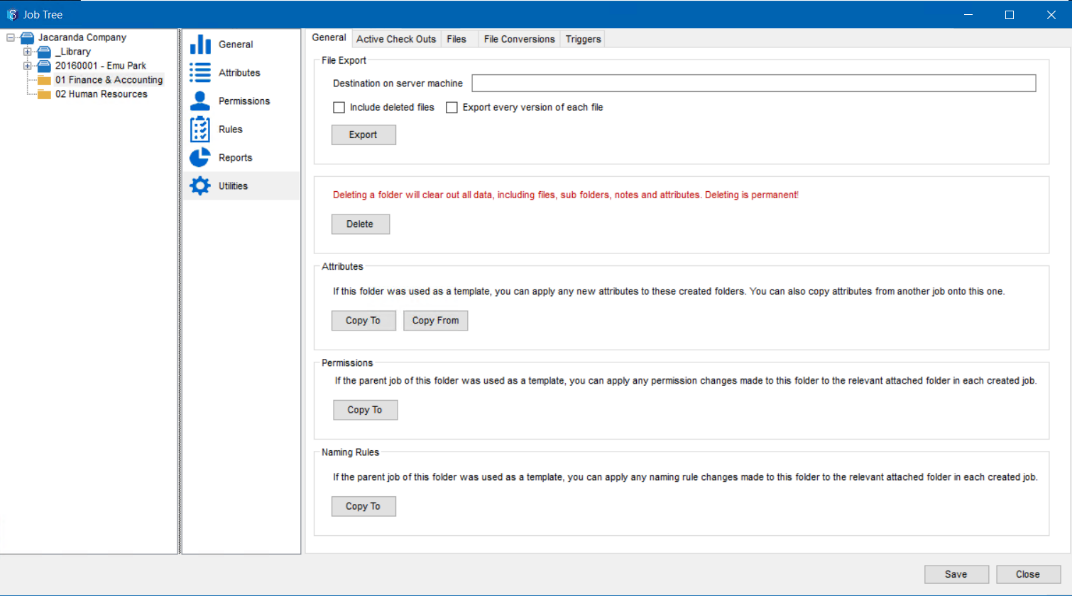
1.2.2.6. Utilities
General– You can do the following maintenance tasks from this tab:
Export data from 12d Synergy to a location on the server or your network
All references are resolved while exporting data.
Copy the attributes of this folder to other folders
Copy the permissions applied to this folder to other folders
Copy the naming rules applied to this folder to other folders
Active Check Outs – Sometimes you may need to cancel a checkout. This may happen if a staff member goes on leave without releasing a check-out. You can select the file to be released and click the Cancel Checkout button.
Cancelling an active checkout may result in loss of data for the original owner of the checkout.
Files – You can remove a file permanently from the system using this tab. This cannot be undone.
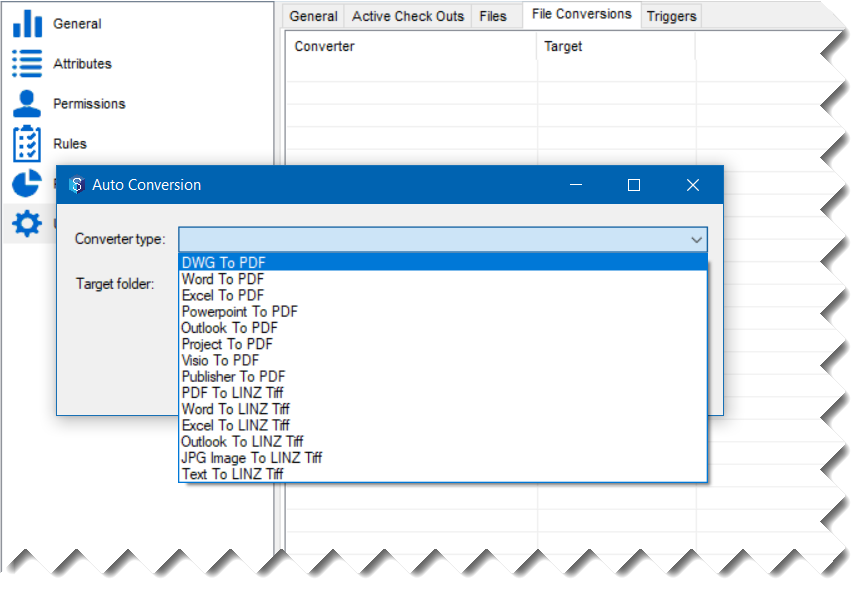
File Conversions – You can convert files of one extension to another and save them in a location of your choice using this tab.
Triggers – You can design triggered activities for various changes in the system, and their conditions, using this tab.
1.3. How to Move a Folder
Available in version 5.1.7 or later
You can move a folder to any different location in the tree structure by simply dragging and dropping the folder from its source location to the destination location in the 12d Synergy Client application (detailed procedure given below). You can also move multiple folders at once by following the procedure in this section.
You must be a 12d Synergy Administrator to perform this procedure.
1.3.1. Drag and Drop folder
In the 12d Synergy Client application, drag the folder you want to move and drop it at the destination location.
The following prompt is displayed.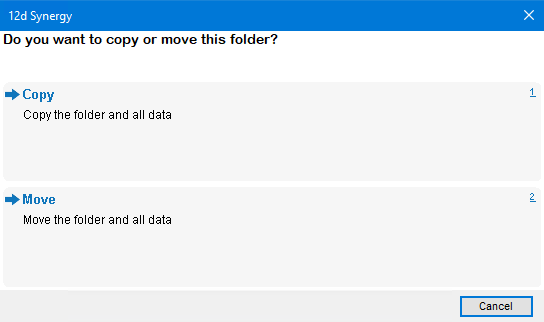
Select the Move option.
The selected folder is moved to the selected destination.
1.3.2. Moving Multiple Folders
You can directly move multiple folders from one location to another in the job tree structure at one go.
In the 12d Synergy Client application, select one of the folders you want to move.
Right-click the folder and select the Other > Move many option.
The Select Entities to Move window is displayed. It displays the selected tree structure of the job you are accessing.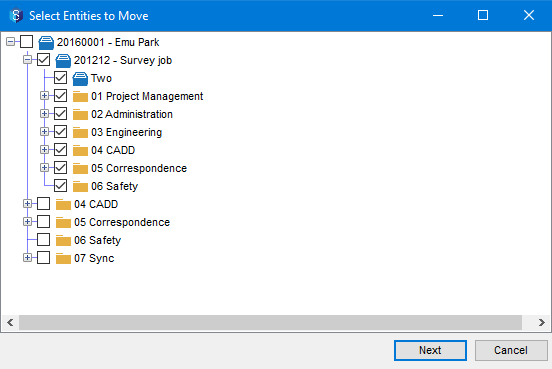
Select the checkboxes against all the folders you want to move. If you select a job, then all its constituent folders are selected.
Click the Next button.
The Select a Destination window is displayed..bmp)
Use the provided options (Recent folders tab, Change job button) to select the destination for the folders you are moving.
Click the Select button.
The folders are moved, and the updated tree structure is displayed in the 12d Synergy Client application.
1.4. How to Delete a Folder
1.4.1. From the 12d Synergy Client application
In the 12d Synergy Client application, select the required job from the tree structure.
Expand the job to see its folders.
Right-click the folder that you want to edit and select the Edit Folder option.
1.4.2. From the 12d Synergy Administration application
In the 12d Synergy Administration application, select the Jobs tab.
Select the Find tab.
Enter the search parameters for the required job (optional) and click the Find button.
The Edit Jobs window displays the matching jobs based on the entered search criteria.Select the required job and click the Edit button.
The Job Tree window is displayed.Expand the job to see its folders.
Right-click the folder that you want to edit and select the Edit Folder option.
1.4.3. Delete the Folder
Select the Utilities tab.
In the Delete section, click the Delete button.
The following confirmation message is displayed.
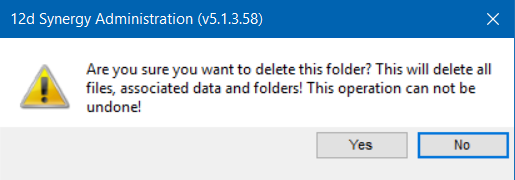
Click the Yes button.
The folder, including all its files, is deleted.Click the Close button.
1.5. How to Export a Folder
12d Synergy also gives you an option to export the files out of the 12d Synergy space so that they can be permanently exported. These exported files cannot be checked back into the 12d Synergy system.
Right-click the folder you want to check out and select the Data Out > Offline/Export option.
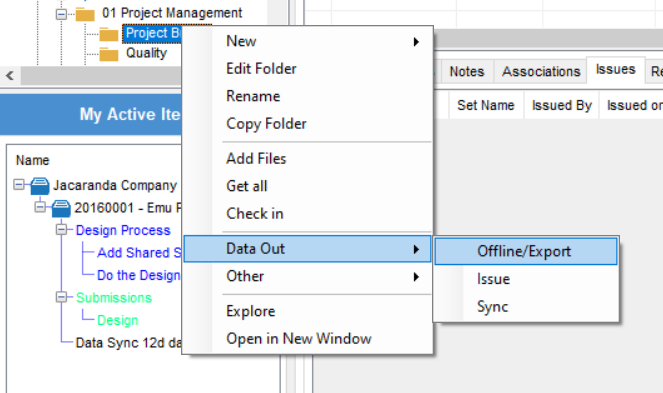
The following prompt is displayed.
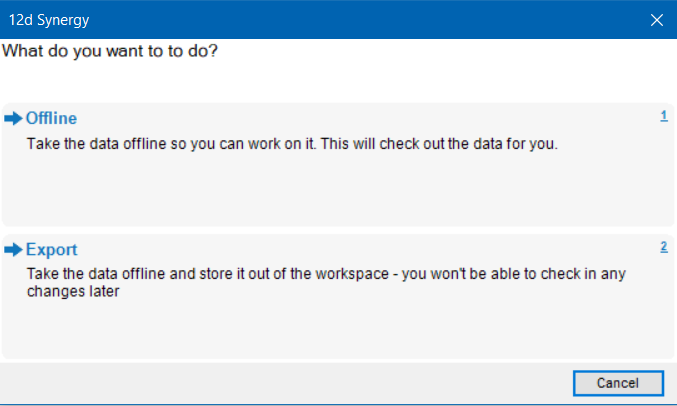
Select the Export option to check out the data but save the data out of the workspace. After working on the data, since it is outside your workspace, you will not be able to check in the data.
You will be prompted to browse for the location where you want to save the exported files.
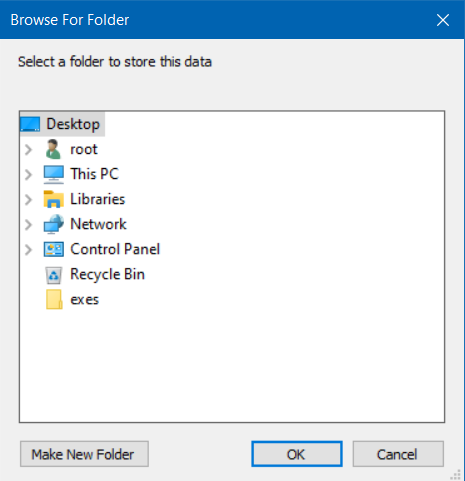
Select the location where you want to export the data and click the OK button.
The following 12d Synergy prompt is displayed.
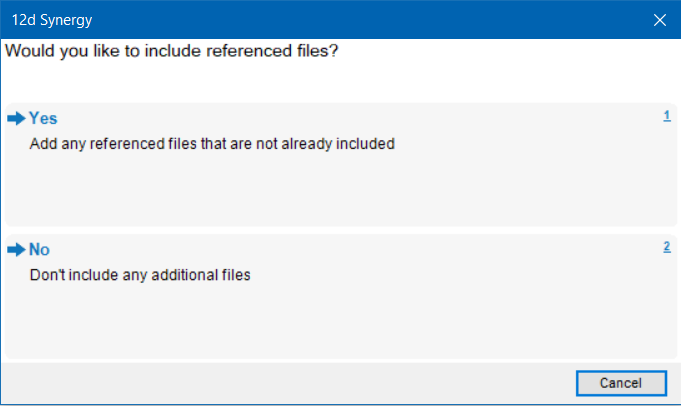
Do one of the following:
Select the Yes option to download any referenced files that are not in your workspace yet.
Select the No option to just continue with the already checked-out / exported files.
The files are accordingly exported.
A prompt informing you about the successful export is displayed.
1.6. How to Check-In All the Files of a Folder
You can check-in all the files of a folder that you have offlined or exported using the Data Out > Offline/Export option.
Right-click the folder you want to check-in and select the Check in option.
The Check in files? prompt is displayed.
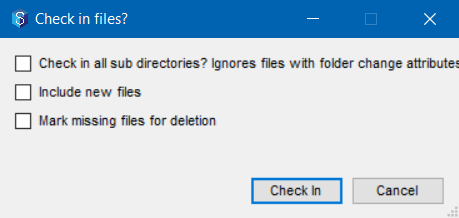
Do any of the following:
Select the Check in all sub directories? checkbox to include all the sub-directories while checking in the folder.
Select the Include new files check box to include any new files that you have added to your workspace after checking out the folder.
Select the Mark missing files for deletion check box if you have deleted any files in your workspace after checking out the folder.
Click the Check In button.
The folder is checked in, and a prompt informing you about the completion status is displayed.
1.7. How to Copy a Folder
You can copy a folder from one location to another in the following two ways.
1.7.1. Method 1 - Drag and Drop folder
In the 12d Synergy Client application, drag the folder you want to copy and drop it in the destination location.
The following prompt is displayed.Select the Copy option.
The selected folder is copied to the selected destination. Note that the original folder still exists in its primary location.
1.7.2. Method 2 - Copy Folder option
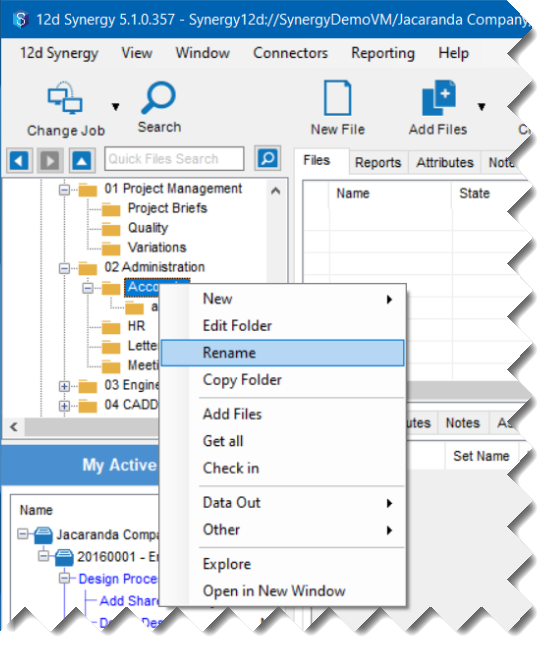
Right-click the folder you want to copy and select the Copy Folder option.
The following 12d Synergy prompt is displayed.
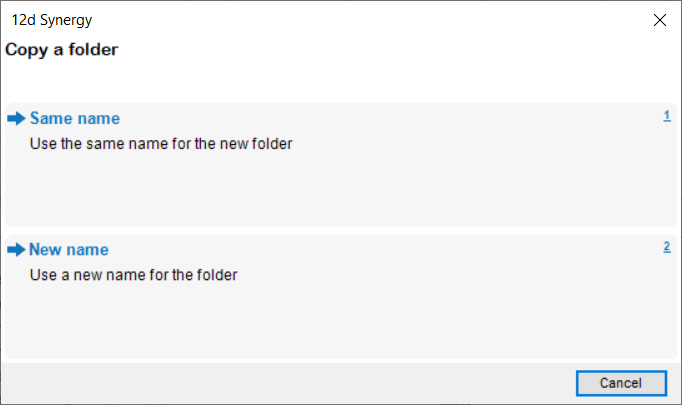
Do one of the following:
To use the same name for the copied folder, click the Same name option.
To use a different name for the copied folder, click the New name option, enter the New name in the Copy folder - Rename prompt and click the Copy button.
The Select a folder window is displayed.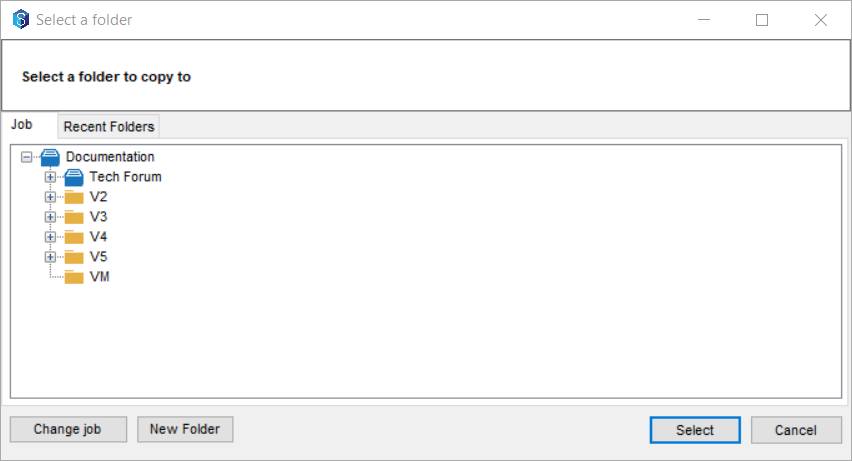
Browse and select the required job and folder and click the Select button.
The folder is copied to the selected location. Note that the attributes, inheritance properties, and permissions defined for the selected folder are also copied.
1.8. How to Rename a Folder
Do one of the following:
Select the folder you want to rename and click the F2 key.
Right-click the folder you want to rename and select the Rename option.
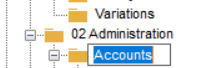
The folder name is highlighted and is editable.
Enter the new name for the folder and click the ENTER key.
The folder is renamed.