Admin Content
Permissions control which actions a user can perform. Any user with Admin permissions can set permissions for users, groups of users, and job team roles. These permissions are related to the visibility, access, and management of entities in 12d Synergy.
Below is the list of permissions that can be applied throughout the system..png)
For example, to view a file in 12d Synergy, the user must be granted the View permission. It can be given using a Permission Set (that has the View permission enabled) or as an Explicit Permission.
The permissions can be applied to the user in one of the following ways:
Directly to the selected user
To the group of users of which the specific user is a member
To the job team role that is assigned to the specific user
By inheritance from the parent entity (job or folder)
Without the View permission, the user will not be able to see a file in the system.
Permissions are thus a great way of controlling data security throughout an organisation.
The following three permissions are by far the most important when it comes to providing permissions for your users to interact with any files within your system. These permissions are:
Permission | Action Involved |
|---|---|
View? | To see the entity (if it exists) in their 12d Synergy Client application. |
Read? | To open and view the contents of the entity |
Write? | To edit/update the entity |
General permissions are applied to entities at the following levels:
Job level
Folder level
File level (less commonly used)
Additionally, we have permissions that apply to the features listed below:
Tasks
Forums
Teams
Notes
12d Model
Transmittals
Web drops
Publishing
Issues
1.1. Permission Application States
A permission, when applied to an entity, can be in one of the following states:
Undefined –This is the default state of any permission. Undefined is essentially a soft denial. When considering a permission, Undefined means that the user is prevented from the action. However, that user could be given the Allowed permission further down the structure (when permissions are inherited) or by being allowed through another applied permission, such as through a group or permission set.
Allowed – This is the permission state when the user, job team role, or group of users is permitted to perform the action for which the permission is applied.
Denied – This is the permission state when a user, job team role, or group of users is NOT allowed to perform the action for which the permission is applied. The denied permission is also the priority permission.
We generally discourage organisations from explicitly denying a permission, unless necessary. Because if denied at a higher level in the structure and inherited down, it cannot then be allowed further down the chain. If we leave the permission as Undefined at the top level (this defaults to denied automatically), then we can allow it at sub-levels, if needed. The exception to this is if the permission is related to a sensitive area or subject, then utilising the Denied permission is appropriate.
1.2. Inferred Permissions
There are some explicit permissions that, when applied to a user, provide the user with some additional permissions. Such inferred permissions are listed in the table below.
Explicit Permission | Inferred Permissions | Granted Abilities |
|---|---|---|
Read? |
|
|
Write? |
|
|
Can moderate forums and categories? |
|
|
1.3. Merging Permissions
In some cases, a user may be given permissions from different sources, like the following:
A combination of permission sets and/or explicit permissions applied directly to the user
Inherited permissions
Applied permissions from a group of users
Applied permissions from a job team role
In such cases, the permissions are merged/amalgamated using the following rules:
The Allowed state always overrides the Undefined.
The Denied always overrides the Undefined and Allowed.
For example, if a user has been defined an Allowed state and an Undefined state for the same permission from two different sources, then the permission is set to Allowed based on the first rule stated above.
Similarly, if a user has been defined the Undefined, Allowed and Denied states for the same permission from three different sources, then the permission is set to Denied based on the second rule stated above.
1.4. Permissions Inheritance
When creating a job or a folder, 12d Synergy gives you the option to inherit permissions from the parent job or parent folder. This saves you, the 12d Synergy Administrator, from manually applying permissions to every job or folder.
Due to the availability of permissions inheritance, most organisations adopt a structure that inherits at least a group with View permission from a single top-level job down to all sub-level jobs. From a management perspective, this group can be updated to include all users when they are onboarded into the organisation, thus allowing for a single location update for the bulk of the general access permissions throughout the structure.
.png)
Even after you inherit permissions, you can still change or update the permissions for the newly created child job or folder. The permissions updated at the child level will have precedence over the inherited permissions.
If you change or update the permissions of the parent job or folder after creating a child job or folder with inherited permissions, then the permissions of the child job or folder also get updated.
After applying or updating permissions, ensure to save the permissions and evaluate them by clicking the Evaluate button to view and understand the permissions applied to the selected user, group of users, or job role.
1.5. Types of Permissions
1.5.1. Explicit Permissions
An explicit permission is an independent permission applied directly to a user, group of users, or job team role.
Permissions can be applied to entities in the system entirely as explicit permissions or explicit permissions can be used to add or remove permissions from a Permission Set for a specific entity in the system.
Below is a list of entity-specific explicit permissions that can be applied to users when needed.
Entity | Explicit Permission | Granted Permissions |
|---|---|---|
Tasks |
|
|
Forums |
|
|
Teams |
|
|
Notes |
|
|
12d Model |
|
|
Transmittals |
|
|
Web Drops |
|
|
Publishing |
|
|
Issues |
|
|
1.5.2. Permission Sets
Permission Sets are bundles of explicit permissions tied logically. For instance, a Data Reader permission set includes all the explicit permissions that are needed for a user, group of users, or a job team role to be able to read any entity.
You can assign more than one permission set to a user, group of users, or a job team role. When more than one permission set is applied, then the permissions that define both the permission sets are amalgamated.
12d Synergy gives you the option of creating permission sets. However, the following permission sets are shipped to you by default. If they do not exist in your system, then your 12d Synergy Administrator may have chosen to remove or replace them with sets that match your environment and requirements more closely.
The default permission sets shipped with 12d Synergy are detailed below:
Permission Set | Explicit Permissions | Granted Permissions |
|---|---|---|
Data Reader |
|
|
Data Writer |
|
|
Job Creator |
|
|
Task Manager |
|
|
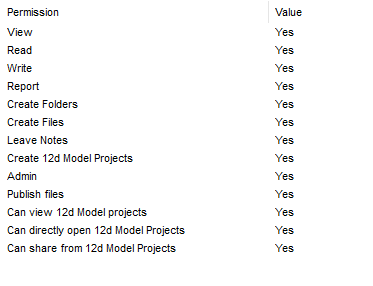
Admin |
|
|
12d Model Operator |
|
|
12d Model Sharer |
|
|
As part of these permission sets, any explicit permissions that are NOT noted above for a permission set are set to Undefined.
As an example, let us take a closer look at the Data Writer permission set and understand its concept in detail.
If the Data Writer permission set is applied to a specific user, job team role, or group of users, then the user(s) will be granted the abilities listed in the table below.
Permission | Granted Abilities |
|---|---|
View? | Can view data along with its metadata |
Write? | Can edit and update data |
Create Folders? | Can create folders |
Create Files? | Can create files |
Leave Notes? | Can leave notes on entities |
Continuing with the example above, say if you have applied the Data Writer permission set to a User, but you do not want the user to create folders, then you can deny the explicit permission “Create Folders?” in the Explicit Permissions section. So now the user will have the Data Writer permission set applied minus the right to create folders. You can check and confirm the permissions applied to the user by evaluating the user’s permissions by clicking the Evaluate button.
Similarly, you can add more explicit permissions to the user by selecting the needed explicit permissions from the Explicit Permissions section. In this way, the user will have all the permissions listed in the Data Writer permission set, and also the explicit permissions that you have selected.
Ensure to click the Save button before you evaluate the permissions set for a user.
It is a good practice to evaluate the permissions applied to a selected user to ensure that you have applied the permissions as per your requirement.
1.5.3. How to Create your Own Permission Set
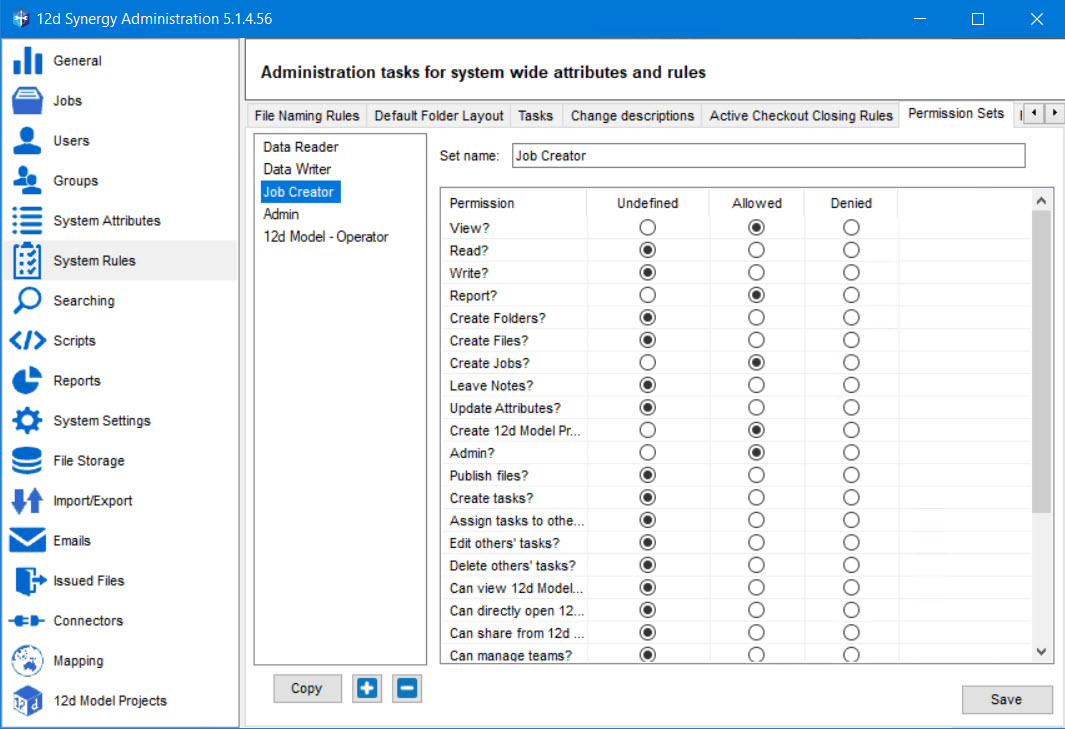
In the 12d Synergy Administration application, select the System Rules tab > Permission Sets tab.
Click the
 button.
A new permission set titled New Permission Set is displayed in the list of existing permission sets in the left panel..png)
If you want to build a new permission set as an extension of an existing permission set (say, primary permission set), select the required permission set (primary one) and click the Copy button.
A new permission set titled New Permission Set is displayed in the list of existing permission sets in the left panel. This new permission set will include all the explicit permissions included in the primary permission set on which you want to base the new permission set.
Select the New Permission Set from the left panel.
In the right panel, enter a name for the new permission set in the Set Name value field.
From the permissions listed, select the option (Undefined, Allowed, or Denied) that applies to each of the explicit permissions which you want to include in the new permission set.
Click the Save button.
The new permission set is created based on your requirements.When applying a permission set to a user, it is recommended to evaluate the permissions afterwards to ensure they meet your requirements.
1.5.4. How to Edit a Permission Set
In the 12d Synergy Administration application, select the System Rules tab > Permission Sets tab.
Select the permission set you want to edit from the list of permission sets displayed in the left panel of the Permission Sets tab.

From the explicit permissions listed in the right panel of the Permission Sets tab, add/edit the option (Undefined, Allowed, or Denied) that applies to the explicit permissions that you want to add to/edit in the selected permission set.
Click the Save button.
The selected permission set is updated based on your requirements.
1.5.5. How to Delete a Permission Set
In the 12d Synergy Administration application, select the System Rules tab > Permission Sets tab.
Select the permission set you want to delete from the list of permission sets displayed in the left panel of the Permission Sets tab.
Click the
 button.
Click the Save button.
The selected permission set is deleted.
1.6. How to Provide Permissions to Users for Various Entities
1.6.1. Jobs
Do one of the following:
In the 12d Synergy Client application, right-click the job in which you want to apply permissions to the related entities and click the Edit option.
The Edit a Job: <job name> window is displayed.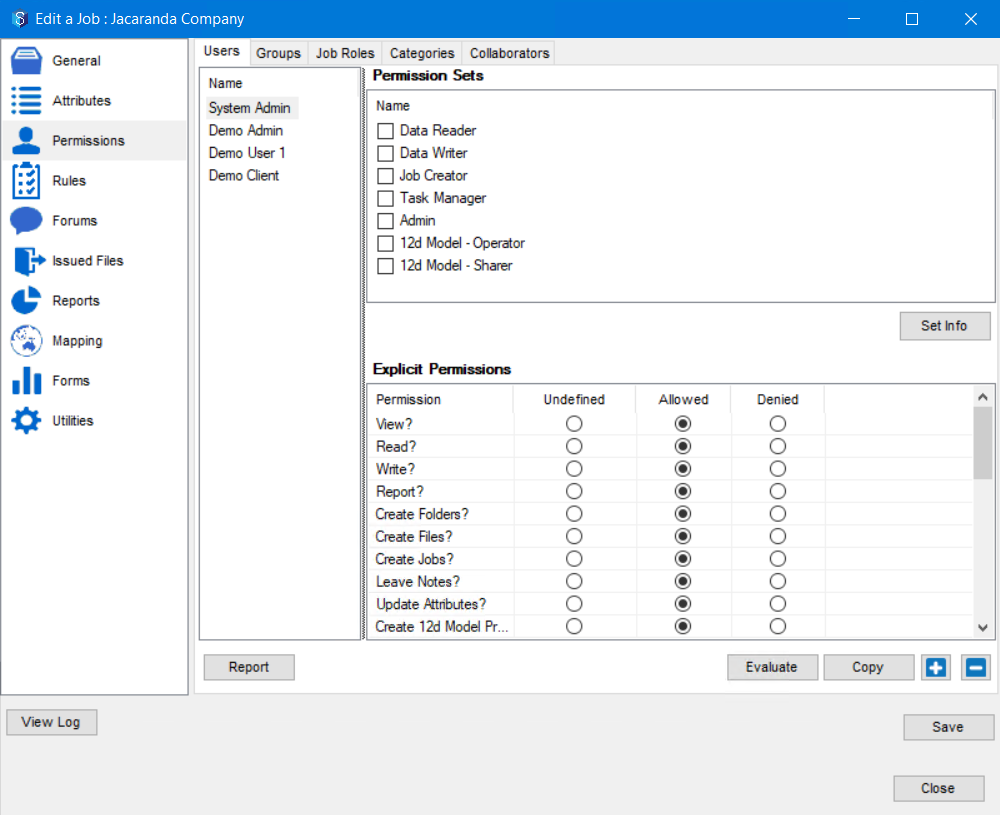
In the 12d Synergy Administration application, select the Jobs tab > Find tab to find the job in which you want to apply permissions, and then click the Edit button in the Edit Jobs window.
The Job Tree window is displayed.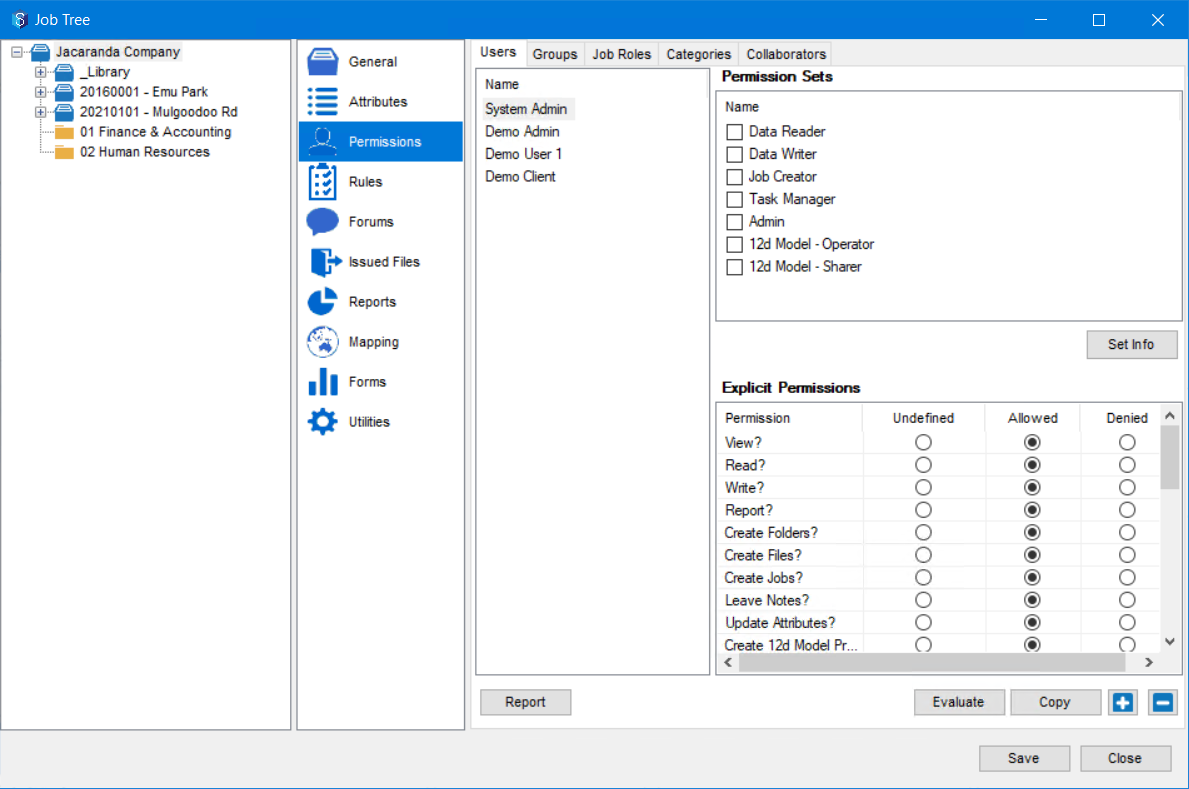
Select the Permissions tab from the left panel.
The permissions tab consists of the following tabs.Users – Allows you to apply permissions to the job for specific users
Groups – Allows you to apply permissions to the job for specific groups
Job Roles – Allows you to apply permissions to the job for specific job roles
Categories – Allows you to apply permissions to the job for a specific category of users
Collaborators – Allows you to provide or deny access to the selected job or its constituent folders for collaborators
To apply permissions to a specific user(s), do one of the following:
Select the Users tab and select the required user from the Name panel.
Select the Groups tab and select the required group of users from the Name panel.
Select the Job Roles tab and select the required role from the Name panel.
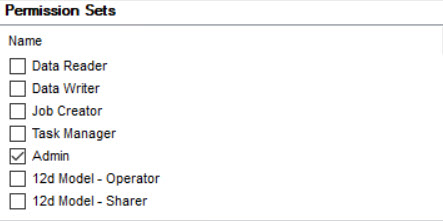
If required, in the Permission Sets section, select the check boxes displayed against the permission sets that you want to apply for the selected user, group, or job role.
You can select the check box against a permission set and click the Set info button to view the explicit permissions included in that permission set.
You cannot edit or update the permissions displayed in the Permission Set Info window.
If required, in the Explicit Permissions section, select the Undefined, Allowed, or Denied options displayed against the individual permissions.
If any of these explicit permissions are a part of a permission set, updating them in the Explicit Permissions section will override what is defined in the permission set for this entity in the structure.
Click the Save button.
It is always recommended that you now click the Evaluate button to view all the merged/amalgamated permissions provided to the selected user, group of users, or job team role. To further understand the permissions, you can click the Explain button in the Evaluate Permissions window.
If an explicit permission is a part of two permission sets, and if in one of the permission sets the explicit permission is set to Denied, then irrespective of what it is set to in the other permission set, the permission will be denied at that level and its sub-levels (if inherited). This is because Denied is at the top of the hierarchy while merging permissions
1.6.2. Folders
Do one of the following:
In the 12d Synergy Client application, right-click the folder for which you want to apply permissions and click the Edit option.
The Edit a Folder:<folder name> window is displayed.In the 12d Synergy Administration application, select the Jobs tab > Find tab to find the job that holds the folder for which you want to apply permissions, click the Edit button in the Edit Jobs window and select the required folder from the job tree structure in the Job Tree window.
Select the Permissions tab from the left panel.
The permissions tab consists of the following tabs.Users – Allows you to apply permissions to the folder for specific users.
Groups – Allows you to apply permissions to the folder for specific groups.
Job Roles – Allows you to apply permissions to the folder for specific job roles.
Collaborators – Allows you to provide or deny access to the selected job or its constituent folders for collaborators.
To apply permissions to set users, do one of the following:
Select the Users tab and select the required user from the Name panel.
Select the Groups tab and select the required group of users from the Name panel.
Select the Job Roles tab and select the required role from the Name panel.
If required, in the Permission Sets section, select the check boxes displayed against the permissions sets that you want to apply for the selected user, group of users, or job role.
You can select the check box against a permission set and click the Set info button to view the explicit permissions included in that permission set.
You cannot edit or update the permissions displayed in the Permission Set Info window.
If required, in the Explicit Permissions section, select the Undefined, Allowed, or Denied options displayed against the individual permissions.
If any of these explicit permissions are a part of a permission set, updating them in the Explicit Permissions section will override what is defined in the permission set for this entity in the structure.
Click the Save button.
It is always recommended that you now click the Evaluate button to view all the merged/amalgamated permissions provided to the selected user, group of users, or job team role. To further understand the permissions, you can click the Explain button in the Evaluate Permissions window.
If an explicit permission is a part of two permission sets, and if in one of the permission sets the explicit permission is set to Denied, then irrespective of what it is set to in the other permission set, the permission will be denied at that level and its sub-levels (if inherited). This is because Denied is at the top of the hierarchy while merging permissions.
1.6.3. Files
In the 12d Synergy Client application, browse the required job and folder to get to the file for which you want to apply permissions.
Right-click the file and select the Properties option, or via the Properties button on the ribbon.
The File Details window is displayed.Do one of the following:
Select the Users tab and select the required user from the Name panel.
Select the Groups tab and select the required group of users from the Name panel.
Do one of the following:
To apply the permissions for a specific user, do one of the following:
Select the required user to whom you want to provide or deny permissions from the Name panel.
Click the
 icon to find and select the required user.
To apply the permissions for a specific group of users, do one of the following:
Select the required group of users to whom you want to provide or deny permissions from the Name panel.
Click the
 icon to find and select the required user.
If required, in the Permission Sets section, select the check boxes displayed against the permission sets that you want to apply for the selected user or group of users.
You can select the check box against a permission set and click the Set info button to view the explicit permissions included in that permission set.
You cannot edit or update the permissions displayed in the Permission Set Info window.
.png)
If required, in the Explicit Permissions section, select the Undefined, Allowed, or Denied options displayed against the individual permissions.
If any of these explicit permissions are a part of a permission set, updating them in the Explicit Permissions section will override what is defined in the permission set for this entity in the structure.
Click the Save button.
It is always recommended that you now click the Evaluate button to view all the merged/amalgamated permissions provided to the selected user, group of users or job team role. To further understand the permissions, you can click the Explain button in the Evaluate Permissions window.
If an explicit permission is a part of two permission sets, and if in one of the permission sets the explicit permission is set to Denied, then irrespective of what it is set to in the other permission set, the permission will be denied at that level and its sub-levels (if inherited). This is because Denied is at the top of the hierarchy while merging permissions.
1.7. Administrative Permissions
Administrative Permissions can be executed either at the system-level or entity-level.
1.7.1. System-level Admin Permissions
At the system-level, you can have the following administrative permissions defined for users at the time of their creation:
1.7.1.1. System Administrator (also known as the 12d Synergy Administrator)
There is a minimum of one user who has complete access to your system, to be able to perform any action in both, the 12d Synergy Client and Administration applications. Most actions that a 12d Synergy System Administrator can perform are mentioned with the Admin Content tag.
The following table shows how to create a System Administrator and the permissions granted based on this role.
Checkbox to select at the time of User Creation | Granted Permissions |
|---|---|
|
There is a system setting in the 12d Synergy Administration application > System Settings tab called System Admins have access to all data. This setting controls the reading and writing rights of the System Administrator. It is set to False, by default. Hence, the System Administrator does not have Read or Write rights. This means that a System Administrator can view the data, but not update it. Your 12d Synergy System Administrator can update this system setting based on your company’s requirements. |
.png)
There are some system settings in the 12d Synergy Administration application > System Settings tab which can overwrite some of the permissions of a 12d Synergy System Administrator. These settings are detailed further below:
System Setting | Default Value | Description |
|---|---|---|
System Admins have access to all data | No | Yes – This option means that 12d Synergy System Administrators can read and update any data in the system. No – 12d Synergy System Administrators can see(view) that data exists in the system but they cannot open (access) it without having the appropriate read and write permissions applied. |
Only System Admins can purge jobs | Yes | Yes – This option means that only the 12d Synergy System Administrator can purge jobs (delete jobs permanently) from the system. No – This option means that any user with the Admin, read and write data permissions to a job, like a Job Administrator, can purge the job (delete jobs permanently). |
Only System Admins can purge folders | No | Yes – This option means that only the 12d Synergy System Administrator can purge folders (delete folders permanently) from the system. No – This option means that any user (non-admin or admin users) with the create folders, read and write data permissions to a folder can purge folders (delete folders permanently).
|
Only System Admins can purge data | Yes | Yes – This option means that only the 12d Synergy System Administrator can purge data (delete data permanently) from the system. No – This option means that any user, including 12d Synergy System Administrator, with the Admin, read and write data permissions can purge the data (delete data permanently). |
Only System Admins can delete tasks | Blank (No) | Yes – This option means that only the 12d Synergy System Administrator can delete tasks from the system. No – This option means that any user, with the delete tasks permission including 12d Synergy System Administrator, can delete tasks. |
Only System Admins and Contact/Company creators can modify contacts and companies. | Yes | Yes – This option means that only the 12d Synergy System Administrator and Contact/Company creator can update contacts and companies. No – Any user, including 12d Synergy System Administrator can update contacts and companies. |
Only allow System Admins to add JavaScript to dashboards | Yes | Yes – This option means that only the 12d Synergy System Administrator can add Java scripts to the job dashboard. No – All users including the 12d Synergy System Administrator who have Admin permissions can add Java scripts to the job dashboard. |
Require System Admin access to create Layout Attributes | No | Yes – This option means that only the 12d Synergy System Administrator can create Layout attributes when importing CAD files. No – Any user, including 12d Synergy System Administrator, can create Layout attributes when importing CAD. |
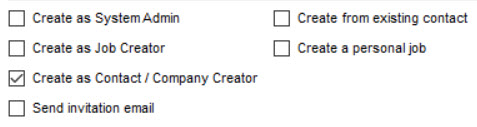
1.7.1.2. Company/Contact Creator
A company/contact creator is a user with limited permissions to create and edit companies and contacts. Please note that the System Administrators have these permissions by default.
Checkbox to select at the time of User Creation | Granted Permissions |
|---|---|
| A Contact/Company Creator does not have access to any files, folders, or jobs. He/She can only create and edit contact and company details. |
However, these rights can be overwritten by the following system settings displayed in the 12d Synergy Administration application > System Settings tab:
Setting | Defaults to | Description |
|---|---|---|
Only System Admins and Contact/Company creators can modify contacts and companies. | Yes | Yes – This option means that only the 12d Synergy System Administrator and Contact/Company creator can update contacts and companies. No – Any user, including 12d Synergy System Administrator can update contacts and companies |
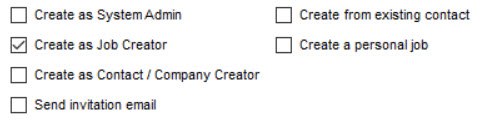
1.7.1.3. Job Creator
A Job Creator is a user with limited permissions to create jobs. Please note that the System Administrators have this permission by default.
How to Create a Job Creator | Granted Permissions |
|---|---|
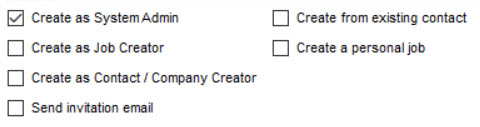
While creating a user, select the following check box.
|
|
While editing a job, select the following check box. |
|
.png)
Additionally, these rights can be amended by the following system setting displayed in the 12d Synergy Administration application > System Settings tab.
Setting | Defaults to | Description |
|---|---|---|
Job creators get Admin permissions. | Yes | Yes – This option means that only the Job creators also get administrative rights on the jobs they have created. No – Only System Administrators have administrative rights on jobs created by Job creators and other jobs in general too. |
1.7.2. Entity-level Admin Permissions (Jobs and Folder level)
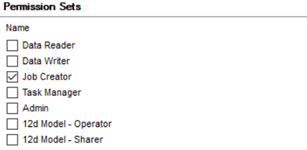
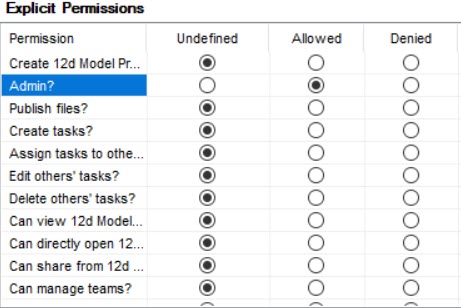
1.7.2.1. Job Administrator
A Job Administrator is a user with limited permissions to manage jobs and assign users to these jobs. While editing a job, you can set the Admin rights for a user either from the permission set or from the explicit permissions. This will make the user a Job Administrator with the following job-related permissions.
How to Create a Job Administrator | Granted Permissions |
|---|---|
While editing a job, select the following permission set. | |
While editing a job, select the Allowed option for the Admin explicit permission. |
|

.png)
.png)
1.7.2.2. Folder Administrator
A Folder Administrator is a user with limited permissions to manage folders and assign user permissions to these folders. While editing a folder, you can set the Admin rights for a user either from the permission set or from the explicit permissions. This will make the user a Folder Administrator with the following folder-related permissions.
Checkbox to Select while Editing Folders | Granted Abilities |
|---|---|
Select the following permission set while editing a folder. |
|
Select the Allowed option for the Admin explicit permission. |
|
| |

.png)