The Layout Tracking feature enables you to auto detect the changes made to CAD Layouts. Changes such as adding, deleting, renaming, or changing a layout within CAD are detected when the layout file is checked-in to 12d Synergy.
1.1. How to Enable Layout Tracking using the 12d Synergy Administration Application
- In the 12d Synergy Administration application, click the System Settings> General tab.
- In the Filter box, enter the search word CAD.
All the settings related to CAD are displayed.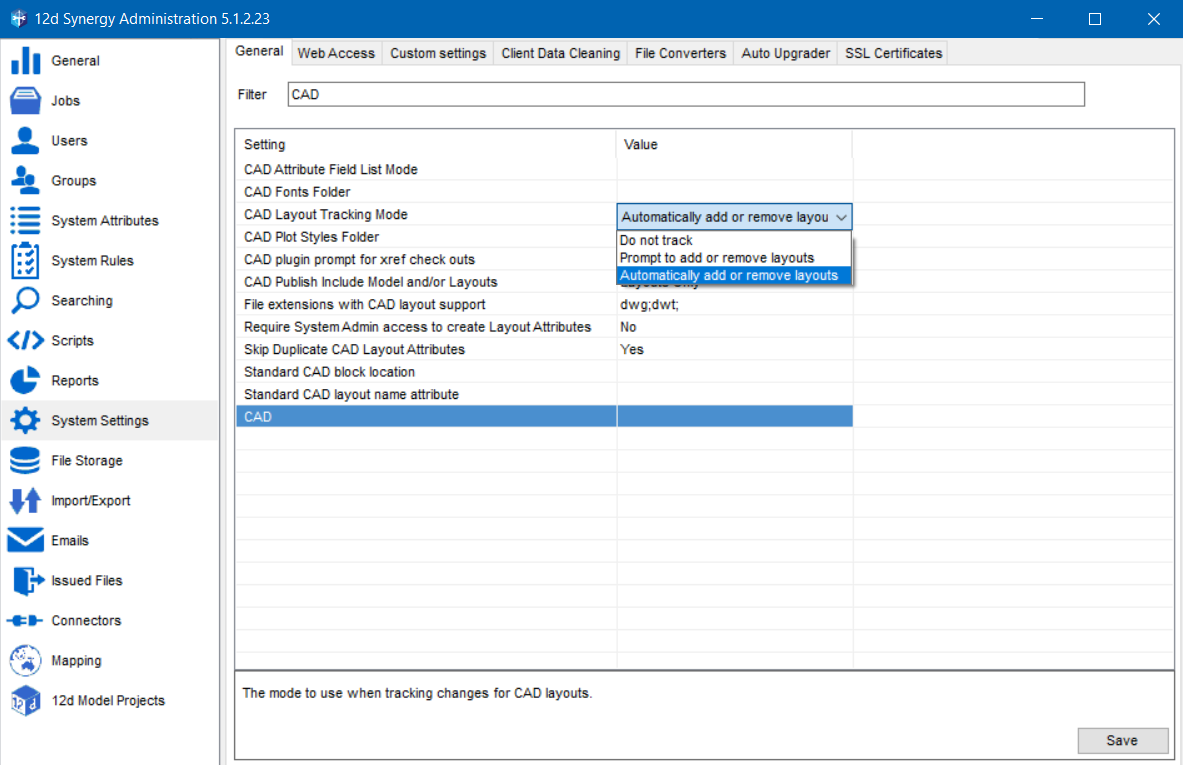
- For the CAD Layout Tracking Mode setting, select one of the following value options:
- Do not track - Ignores all the changes made to the layout in the CAD application
- Prompt to add or remove layouts – Displays a prompt when adding or removing a layout
- Automatically add or remove layouts - Automatically updates the changes made to the layout without displaying any prompts
1.2. Layout Tracking in Use
- When you close the drawing with the updated layout file in the CAD application, a prompt to check the file into 12d Synergy is displayed.
- Click the Yes button.
The Layout Changes window is displayed. You can view all the layouts that are either not in 12d Synergy or have been removed from the drawing.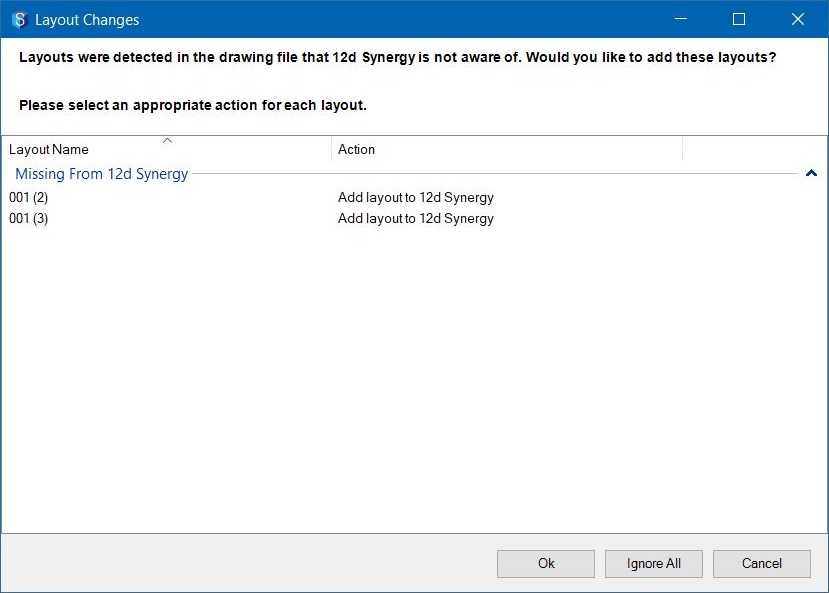
- Click the Action column against each of the layout displayed in this window and select one of the following actions for the selected layout:
- Add layout to 12d Synergy
- Ignore
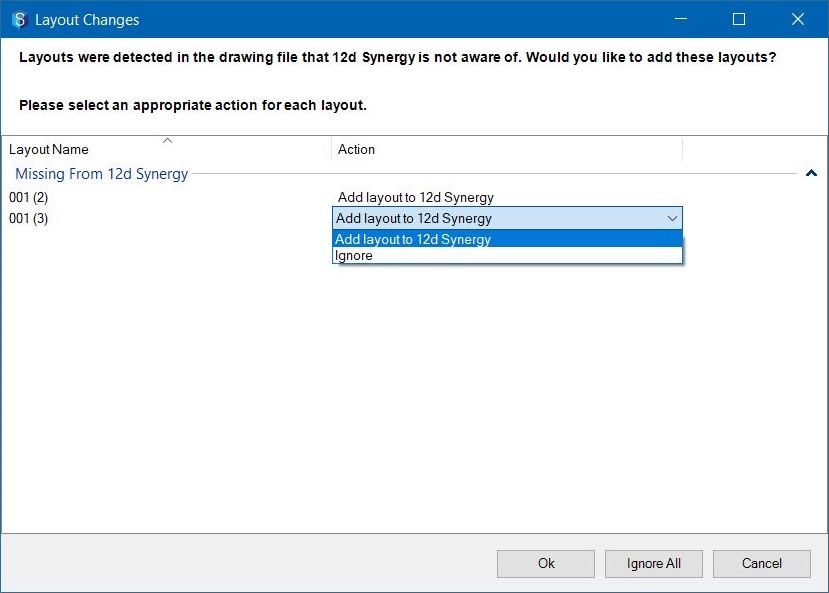
- Click the OK button.
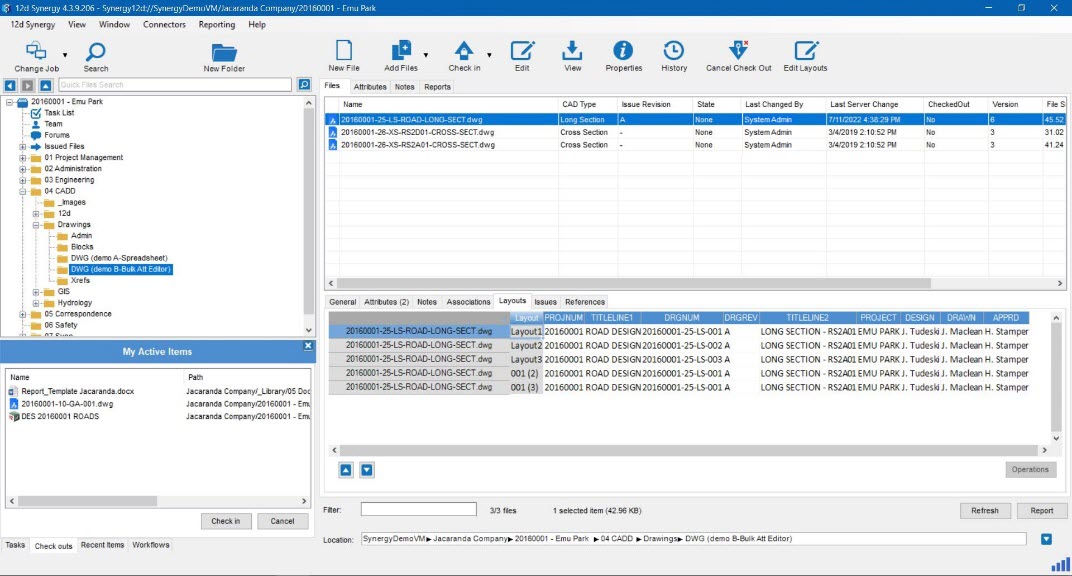
The newly added/removed layouts will get uploaded into 12d Synergy and the changes are displayed under the Layouts tab.