A Trigger is a function that is initiated by an action occurring in your system. As an example of a potential trigger, whenever you check in a file, there may be a single activity or series of activities that must be performed. The activities that you can define for a trigger are similar to those that you can define in a workflow. You can also add conditions to the triggers, just as we do in workflows. Triggers can also be inherited.
You need a Workflows license to use Triggers.
Triggers can be prompted by managed folders. However, activities that could affect the contents of a managed folder are not supported. For example, you cannot copy files into an existing managed folder based off a trigger.
1.1. How to Define a Trigger
Select a job or folder in one of the following ways:
From the 12d Synergy Client application, select the job or folder from the job tree on which you want to create a trigger.
From the 12d Synergy Administration application, search and select the required job from the Jobs tab, click the Edit button and select the required job or folder from the job tree.
Right-click the folder and select the Edit folder option.
The Edit a folder: <Folder Name> window is displayed.Select the Utilities tab > Triggers tab.
.png)
Select the Inherit triggers from above check box if you want to inherit the triggers defined on the job or folder above.
Click the
.png "plus(8).png") button.
button.
The Edit a trigger window > Activities tab is displayed.
From the Type list, select any one action for which you want to define a trigger.
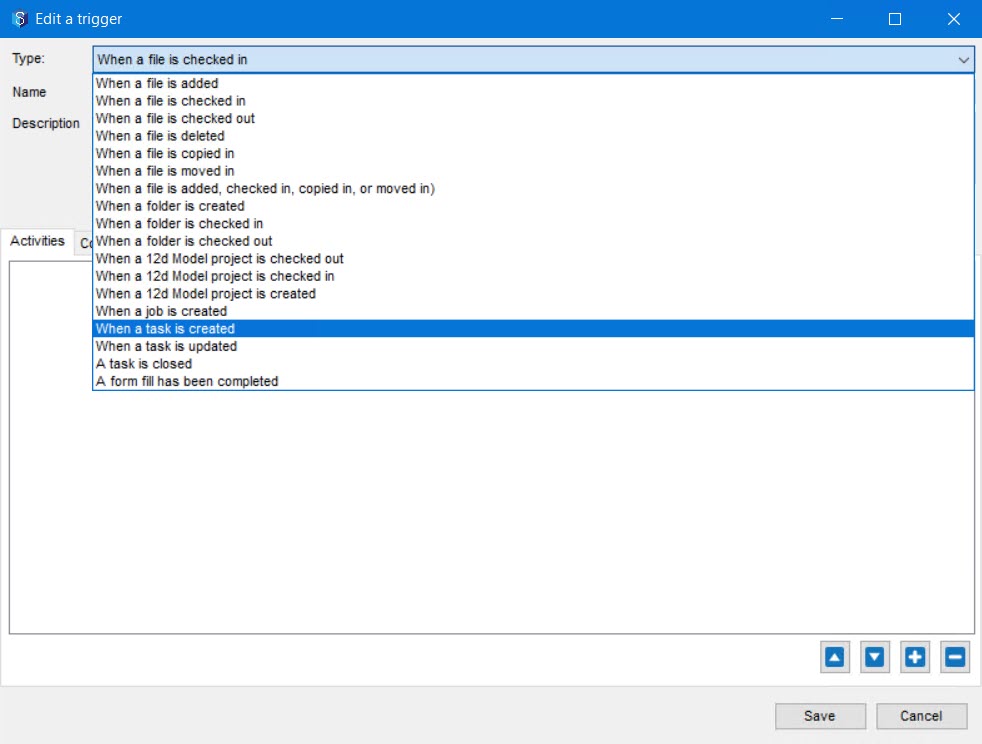
By default, the action you select is displayed in the Name box. If you want to have a name of your choice, type it in the Name box.
Enter a brief description of the trigger in the Description box.
Select the Fail on activity error check box if you want the trigger to fail when errors occur while the activity is running.
To define an activity, do the following in the Activities tab:
Click the
button.The Add a New Transition Activity window is displayed. All categories are displayed in this window.

Select the required category from the left panel.
The activities related to the selected category are displayed in the right panel. A list of all the activities is listed here.
Double-click the required activity or select it and click the Add button.
The <activity name> panel is displayed on the right side in the Activities tab, and a new entry, New <activity name> activity, is displayed in the left panel. By default, the same name is displayed in the Name box. You can rename the activity in the Name box..png "activitityadd(2).png")
If the triggered activity encounters an error because of which you want to fail the activity and not proceed any further, then select the Treat error as critical checkbox. Note that if there are any other activities that are a part of the trigger in the subject, they are rolled back.
Double-click each cell under the Value column and enter the required inputs. When you select a cell in the Value column, the entry for the cell is described below the input-value table in the application for your reference. They are also listed in this table of activities.
.png "addcondn(3).png")
Click the Save button.
The activity that has to be performed when the trigger occurs is defined and saved.You can add multiple activities to the trigger by repeating step 9 of this procedure.
To define a condition for the trigger, do the following in the Conditions tab:
Click the
button.The Add a New Transition Condition window is displayed.
Select the category (General) from the left panel.
All the conditions that you can choose from are displayed in the right panel of this window and are explained in the table below..jpg "con2(1).jpg")
Category
Condition
Description (parameters involved)the
General
Compare property
The activities occur only when comparing two properties results in TRUE.
Compare String Property
The activities occur only when comparing two properties of String data type results in TRUE.
Is member of
The activities occur only when the contact is a member of a mentioned group or is designated a mentioned role.
Task
The activities occur only if the task is in the mentioned state.
Double-click the required condition or select it and click the Add button.
The <condition name> panel is displayed on the right side in the Conditions tab, and a new entry, New <condition name> condition, is displayed in the left panel. By default, the same name is displayed in the Name box. You can rename the condition in the Name box..png "addcondn(4).png")
Double-click each cell under the Value column and enter the required inputs. The value that needs to be entered is described below the input-value table (in the application) for your reference.
If you want to negate the condition you are defining, select the Not? check box.
Click the Save button.
The defined condition is saved.You can add multiple conditions by repeating step 10 of this procedure.
The Edit a folder: <Folder Name> window > Utilities tab > Triggers tab is displayed with the defined trigger. You can see the defined condition, if any, in the Conditions tab.
.png)
Click the Save button.
The defined trigger is saved.
If you want to edit a created trigger, select the trigger and click the Edit button in the Edit a folder: <Folder Name> window > Utilities tab > Triggers tab.
Click the Save button after you make the edits.
.png)
If you want to delete a trigger, select the trigger in the Edit a folder: <Folder Name> window > Utilities tab > Triggers tab, and click the
as shown in image below.
Click the Save button after deleting the trigger.
.png)