Admin Content
12d Model Projects can be created at the Job or Folder level. They can be created directly or from 12d Model Project templates. This can be managed by Job Administrators and 12d Synergy Administrators, if required.
1.1. How to Create a 12d Model Project
1.1.1. From the 12d Synergy Administration application
In the 12d Synergy Administration application, select the Jobs tab.
Select the Find tab and search for the job whose folders you want to define.
Click the Find button.
The Edit Jobs window is displayed.Select the required job and click the Edit button.
The Job Tree window is displayed.Right-click the Job and select the Create 12d Model Project option.
The Create a 12d Model Project window is displayed.
If you are creating a project using 12d Model project templates, follow this process.
1.1.2. From the 12d Synergy Client application
In the 12d Synergy Client application, right-click the required job from the tree structure.
Select the New > 12d Model Project option.
The Create a 12d Model Project window is displayed.
If you are creating a project using 12d Model project templates, follow this process.
1.1.3. Create a 12d Model Project
In the Create a 12d Model Project window, do the following:
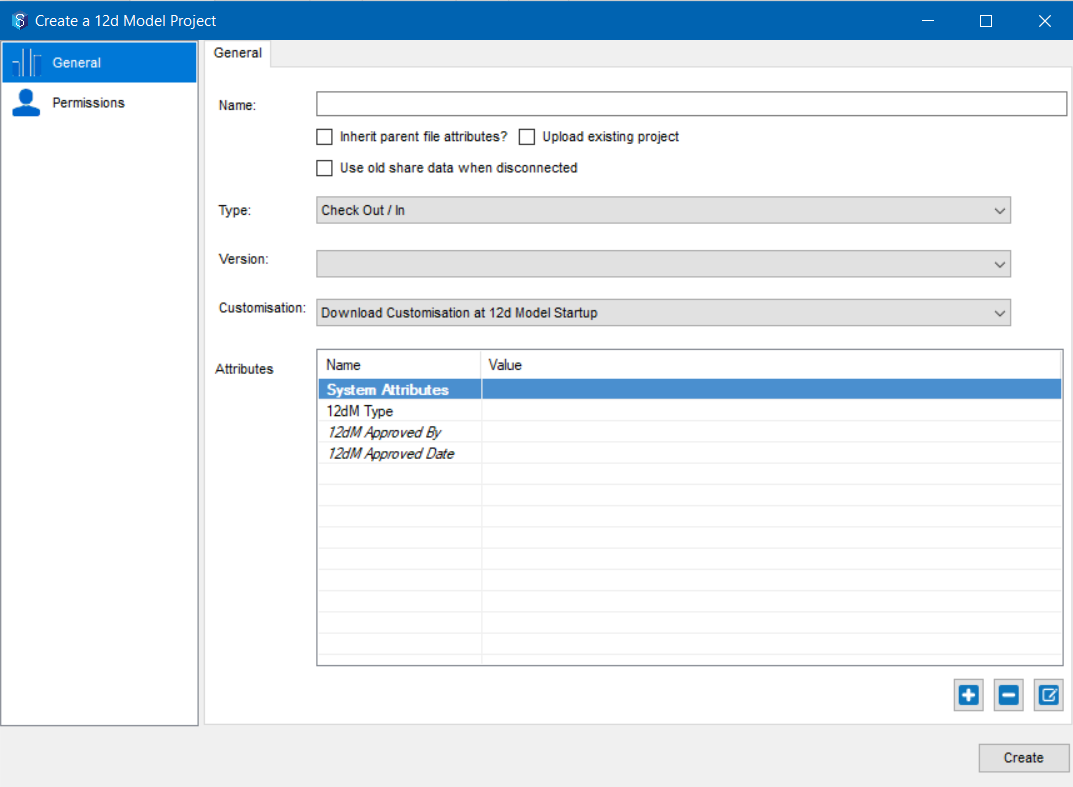
Enter a name for the new 12d Model project in the Name box.
Do any of the following:
Select the Inherit parent file attributes? checkbox to inherit the file attributes from the parent job.
Select the Upload existing project checkbox to upload an existing project. If selected, you will later be prompted to upload an existing 12d Model project into the new 12d Model folder you are creating.
You can alternatively drag and drop an existing 12d Model project into the 12d Model folder you create.
Select the Use old share data when disconnected check box to be able to operate the 12d Model in a semi-disconnected state. Please refer to Disconnected Shares for more details on this checkbox.
Select the Check Out/In option from the Type list.
Select the version of the 12d Model that you are working with from the Version list.
This is a mandatory selection.
Select the required form of customisation for the 12d Model folder you are creating from the Customisation list.
In the Attributes section, enter the values for the mandatory attributes. Optional attributes are displayed in italic font. You can also add more attributes to the 12d Model project you are creating using the
 button.
Optional attributes are displayed in italic font.
In the Permissions tab, do the following:
Users – You can add users to the 12d Model project and select them to apply either permission sets or explicit permissions to them.
Groups – You can add user groups to the folder and select them to apply either permission sets or explicit permissions to them.
Roles – You can add roles to the selected folder and select them to apply either permission sets or explicit permissions to them. You can also define the number of positions of a specific role for the selected folder. This is the most recommended way to define permissions, as it makes the system role-dependent rather than user-dependent.
Click the Create button.
A new 12d Model project is created. The 12d Model icon is displayed as a prefix to the folder name.

1.1.4. Create Using a 12d Model Project Template
In the Create a 12d Model Project window, do the following:
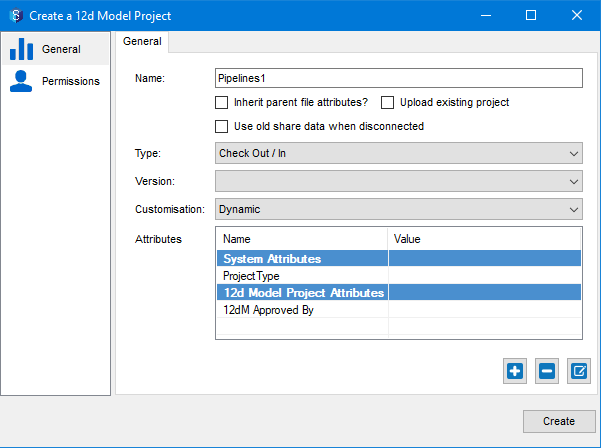
In the Attributes section, enter the value for the attribute that lists all the created 12d Model Project templates. In the above image, Project Type is the 12d Model attribute that lists all available 12d Model Project templates.

Based on the selected template, all its values are displayed in the General tab. In the image above, Survey is selected as the value for the Project Type list attribute. So, all the fields in the General tab are filled with the values of the Survey template that is created in the 12d Synergy Administration application.If any details in the 12d Model Project template are not set while creating either the template or the 12d Model project folder on which the template is based, then those details can be filled in now.
Click the Create button.
The 12d Model Project folder is created, and the following message is displayed.
1.2. How to Edit a 12d Model Project
1.2.1. From the 12d Synergy Administration application
In the 12d Synergy Administration application, select the Jobs tab.
Select the Find tab and search for the job whose folders you want to define.
Click the Find button.
The Edit Jobs window is displayed.Select the required job and click the Edit button.
The Job Tree window is displayed.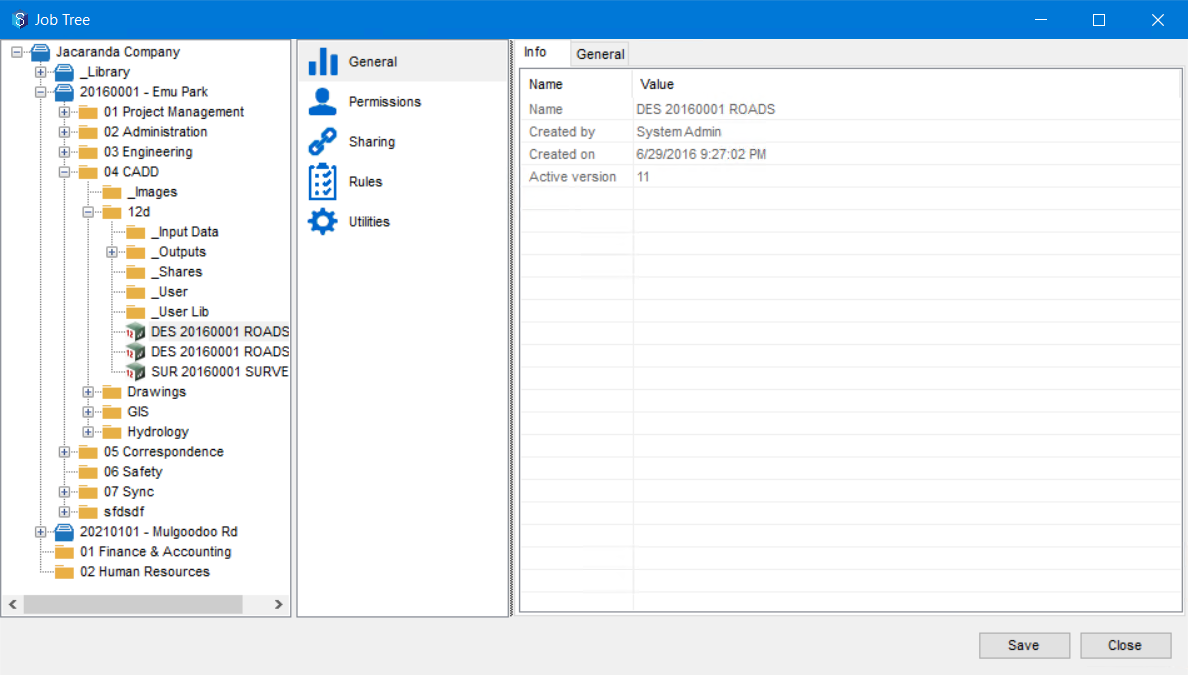
Expand the job to see its folders.
Select the 12d Model folder that you want to edit.
1.2.2. From the 12d Synergy Client application
In the 12d Synergy Client application, select the required job from the tree structure.
Expand the job to see its folders.
Right-click the required 12d Model project that you want to edit and select the Edit 12d Model Project option.
The Edit a 12d Model Project window is displayed.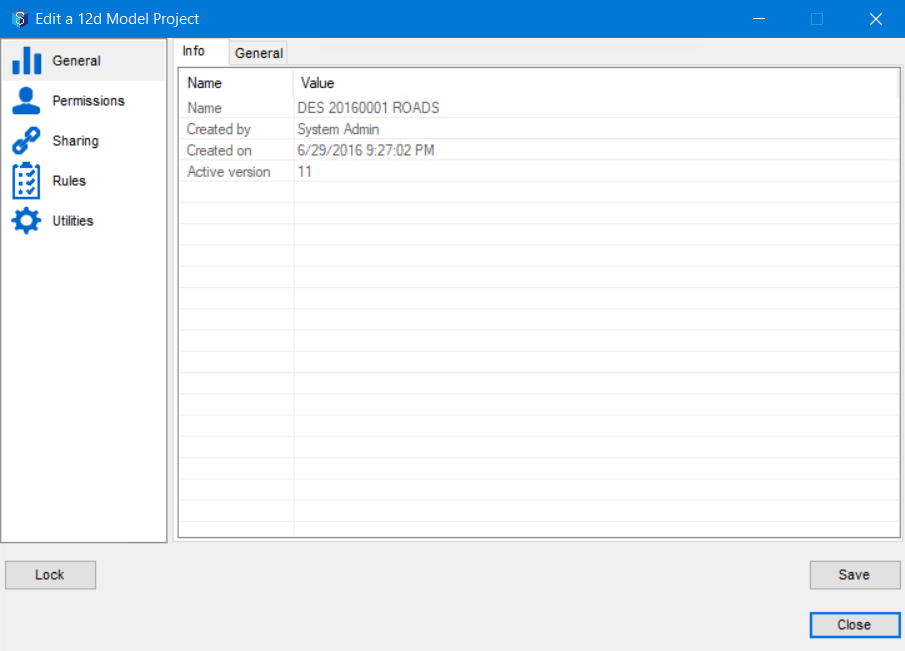
1.2.3. Edit a 12d Model Project
You can edit the details displayed in the following left-hand navigation tabs.
General
Info tab – As the name suggests, this is an information tab, meaning you can ONLY view the details about the selected folder.
General tab – Some details in this tab are editable, such as the project name, basic inheritance properties, customisation mode and attribute values. Other details, such as the type of project and the version number, cannot be edited.
Permissions
Users tab – You can add users to the folder and select them to apply either permission sets or explicit permissions.
Groups tab – You can add user groups to the folder and select them to apply either permission sets or explicit permissions.
Roles tab – You can add roles to the selected folder and select them to apply either permission sets or explicit permissions to them. You can also define the number of positions of a specific role for the selected folder. This is the most recommended way to define permissions, as it makes the system role-dependent rather than user-dependent.
Sharing – You can share Models and Tins from a different 12d Model project with specific users or groups. Based on the version of the 12d Model you are using, the sharing setup differs.
12d Model
Sharing Setup
10
Set up sharing from within the 12d Model Project
11 and beyond
Set up sharing by editing the 12d Model Project directly from 12d Synergy
A model or a tin has to be checked in at least once for it to be shareable.
If you do not select any users or groups to share the selected tins and models, then they are accessible to all users.
Rules
Notifications tab – You can manage the notification subscriptions for a user, a role, or a group from this tab.
You cannot edit your own notification subscriptions from this tab. You can do that by right-clicking the required job and selecting the Notifications option.
Download Dependency Rules tab – You can define rules for downloading dependencies when working with 12d Model projects. You can set rules so that when working with files of specified extensions, their dependent files are automatically downloaded. For instance, when working with a .dwg file, you can set a rule to download the necessary customisation files.
Utilities
General tab – You can do the following maintenance tasks from this tab:
Delete the selected 12d Model project permanently
Cancel checkouts
Cancelling a checkout might result in the loss of data for the original owner of the checked-out file.
Copy the download dependency rules of this project to other projects
Triggers tab – You can design triggered activities for various system changes and their conditions using this tab.
Access Log tab – You can track access details for the selected 12d Model project, either for editing or to share data. You must have administrative permissions to see this list.
History tab – You can view the history of a 12d Model Project. You can see details such as who made the change, when it was made, and why.
Audit Trail tab – You can view more details about the project’s history in this tab. These details may be used for auditing purposes when an issue occurs in the project.
Lock button in the left corner of the window – You can click the Lock button to prevent other users from checking out a 12d Model project while it is locked. You can lock a project to a specific user, a group of users, or a specific role.
1.3. How to Move a 12d Model Project
1.3.1. Drag and Drop folder
In the 12d Synergy Client application, drag the 12d Model project you want to move and drop it at the destination location.
The following prompt is displayed.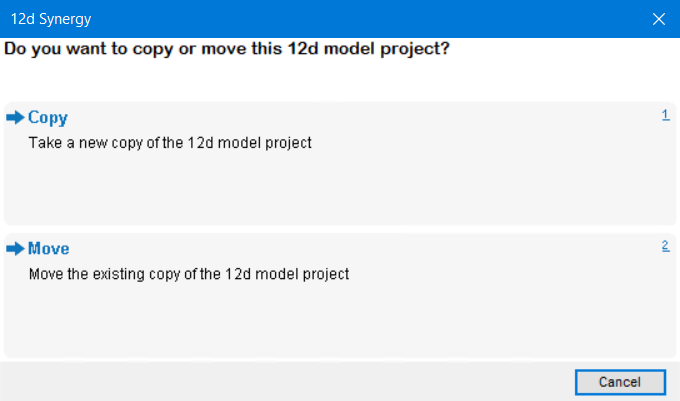
Select the Move option.
The selected 12d Model project is moved to the selected destination.
1.3.2. Moving Multiple 12d Model Projects
Available in version 5.1.7 or later
You can move multiple 12d Model projects to any other required destination on the job tree.
In the 12d Synergy Client application, select one of the 12d Model projects you want to move.
Right-click the 12d Model project and select the Other > Move Many option.
The Select Entities to Move window is displayed..png)
Select the checkboxes displayed against the multiple 12d Model projects you want to move.
Click the Next button.
The Select a Destination window is displayed.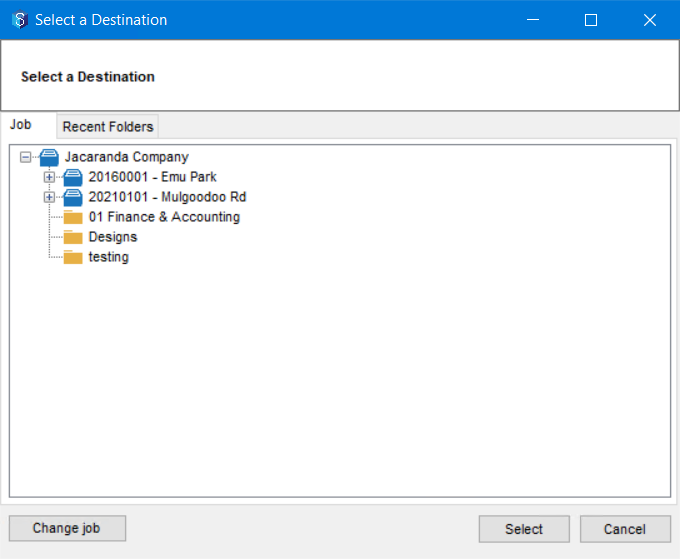
Select the required destination in the displayed structure under which you want to move the 12d Model projects. If you want to select a destination from another parent job, then click the Change job button.
Note that you might want to check the Recent Folders tab to see if your required destination folder is in there.
Click the Select button.
The selected 12d Model projects are moved to the selected destination.
1.4. How to Create Issues in a 12d Model Project
If you have the necessary permissions, you can create an issue in the Issues tab of a 12d Model project.
.png)