To create a 12d Model project template, you must follow the following procedure in sequence.
1.1. How to Create a 12d Model Project Template
1.1.1. How 12d Model Templates Work
One of the ways to create a 12d Model project is to create it using a 12d Model Project template. The 12d Model Project template has some predefined system attributes. When creating a 12d Model project, the value you select or enter for these predefined attributes determines which 12d project template must be used for creating the 12d Model project. These predefined attributes are called Match attributes. They are basically system attributes created from the 12d Synergy Administration application > System Attributes tab.
For example, let’s assume that you have three pre-defined 12d Model project templates - one for drainage, one for survey and one for design projects. How does a user select which 12d Model Project template to use when creating a 12d Model Project folder?
Let’s assume you already have a list attribute called 12dMProjectType, which has the following three values.
- Drainage
- Survey
- Design
By using this 12dMProjectType attribute as a Match Attribute, you will have to select a value from the 12dMProjectType list when creating a 12d Model project. This will result in using the required template for that project.
To use 12d Model Project templates, you must add at least one match attribute per template.
1.1.2. Updating the Match Attribute
Continuing with the example above, if you want to create a new 12d Model project Template for say Utilities, then you have to add the value Utilities to the 12dMProjectType list attribute. By doing so, you can create a 12d Model project that deals with Utilities.
- In the 12d Synergy Administration application, select the System Attributes tab > 12d Model Project Attributes tab to add the template to the 12d Model attribute (system attribute) that lists all the types of 12d Model templates.
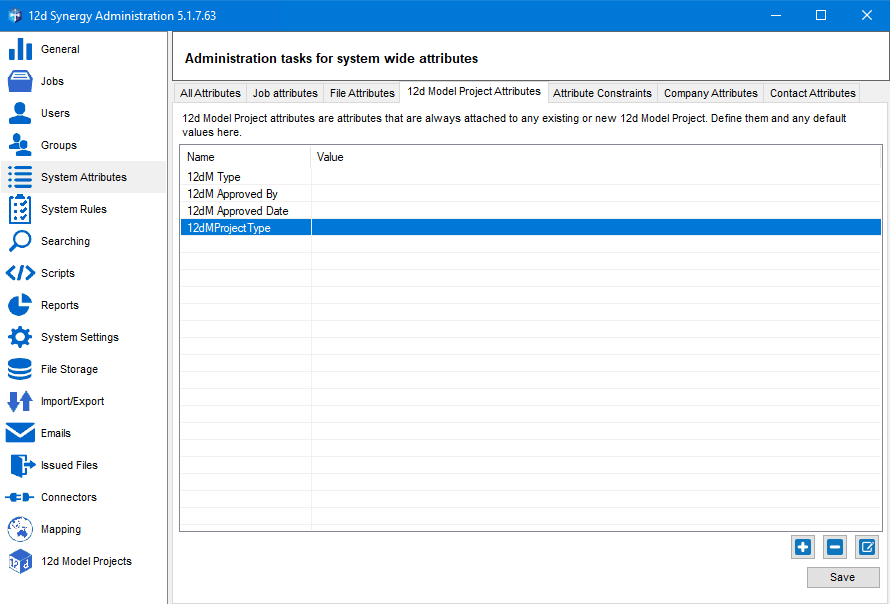
- Select the attribute that lists all the types of 12d Model templates and click the Edit button.
The Create/Edit an Attribute window is displayed.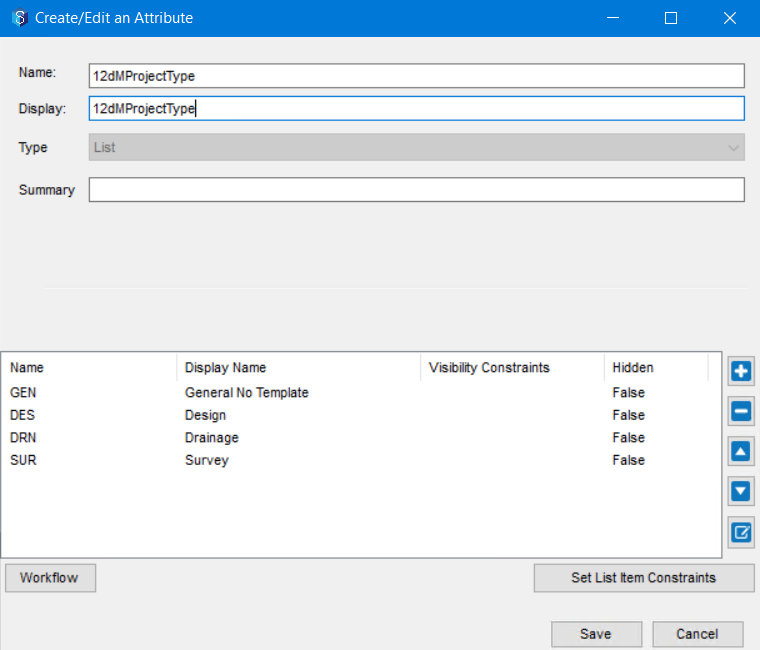
- Click the
 icon.
icon.
The Create/Edit an Attribute List Item prompt is displayed.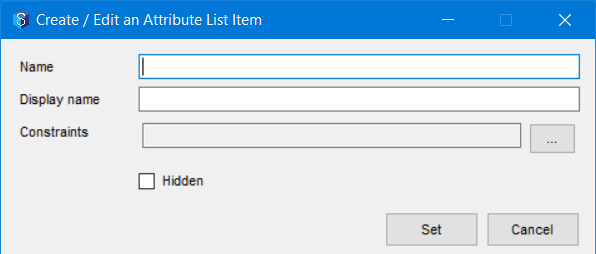
- Enter the details of the newly created template and click the Set button.
If you want to add any constraints to the usage of the template that you have just created, click the
 button against the Constraints button to add a constraint.
 - Click the Save button.
The 12d Model Project template is now ready for use with the new Match attribute value added to the Match attribute (12dMProjectType list attribute).
1.1.3. Creating a 12d Model Project
For you to create a 12d Model Project template, you must first create a 12d Model Project using the 12d Synergy Client application. The project thus created serves as a base for the 12d Model Project template you want to create.
1.1.4. Creating a 12d Model Project Template
After creating a 12d Model project as mentioned in the above procedure, do the following to create a 12d Model Project Template in the 12d Synergy Administration application.
- In the 12d Synergy Administration application > 12d Model Projects tab > 12d Model Project Templates tab, click the
 icon under the list of existing templates.
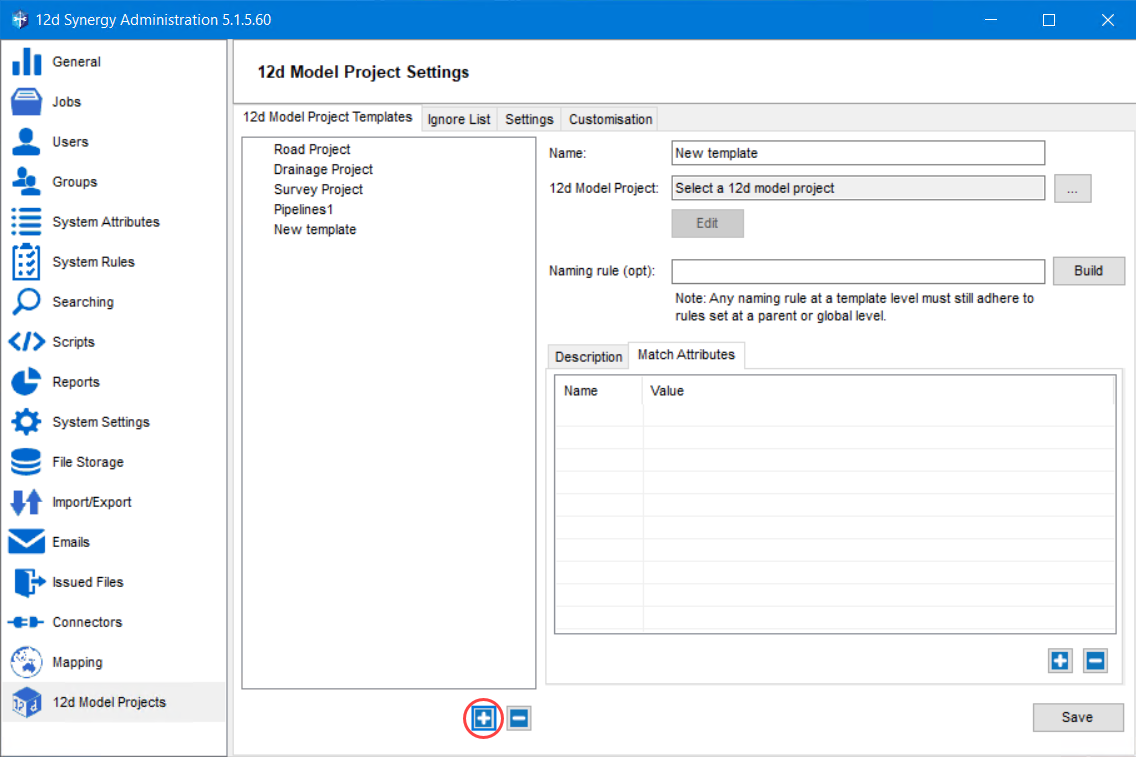
A New template entry is added to the list of existing templates in the left panel. The template details on the right side of the tab are refreshed. - Enter the name for the new template you are creating in the Name: box.
- Click the ellipsis
 button against the 12d Model Project box to select a job and its 12d Model project.
The name of the selected project is displayed in the 12d Model Project box, and it forms the base for the new 12d Model Project template you are creating. - Do any of the following (optional):
- Click the Edit button to edit the selected 12d Model Project before saving it as a 12d Model project template.
- Click the Build button to create a job naming rule.
- Click the
 icon under the Match attributes tab to add a 12d Model attribute (12dMProjectType system attribute) of the selected project as a Match attribute.
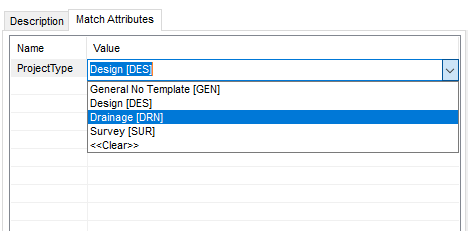
- Enter a value for the Match attribute in the Value column against the Match attribute.Repeat steps 5 and 6 to add more Match attributes, if required.
- Click the Save button.
The template is successfully created and saved. It is added to the list of templates on the left panel. you can now use it while creating a 12d Model project.