There are some features of 12d Synergy that need access to the Web, such as Publishing files over the net, using Web File Drops, and accessing the 12d Synergy Web App. For these to function, your 12d Synergy Administrator must configure the following in the 12d Synergy Administration application.
1.1. How to Configure Web Access
In the 12d Synergy Administration application, click the System Settings tab.
Click the Web Access tab.
.jpg)
Select the Enable 12d Synergy Web Server check box.
If this check box is disabled, then you will not be able to configure access to the Web App, publishing, or Web file drops.
Enter the address of your external server in the External server address: checkbox.
Enter your external port address in the External Port box.
Select the Use HTTPs for secure transfer check box if you are using secure transfer. For more details on setting up HTTPs refer to section 1.5 How to Configure HTTPs.
Click the Save button.
1.2. Configuring the Web App
In the 12d Synergy Administration application, click the System Settings tab.
Click the Web Access tab.
Select the Allow 12d Synergy Web App checkbox.
The Load Web App Remotely (CDN) checkbox is selected by default. When this checkbox is selected, the Web App is served from the 12d Synergy Cloud Server for faster performance. However, you can clear the checkbox to serve the Web App from a local server.
.jpg)
Ensure that the Enable 12d Synergy Web Server checkbox is enabled to configure access to the Web App.
In the Web Access tab, click the Advanced tab.
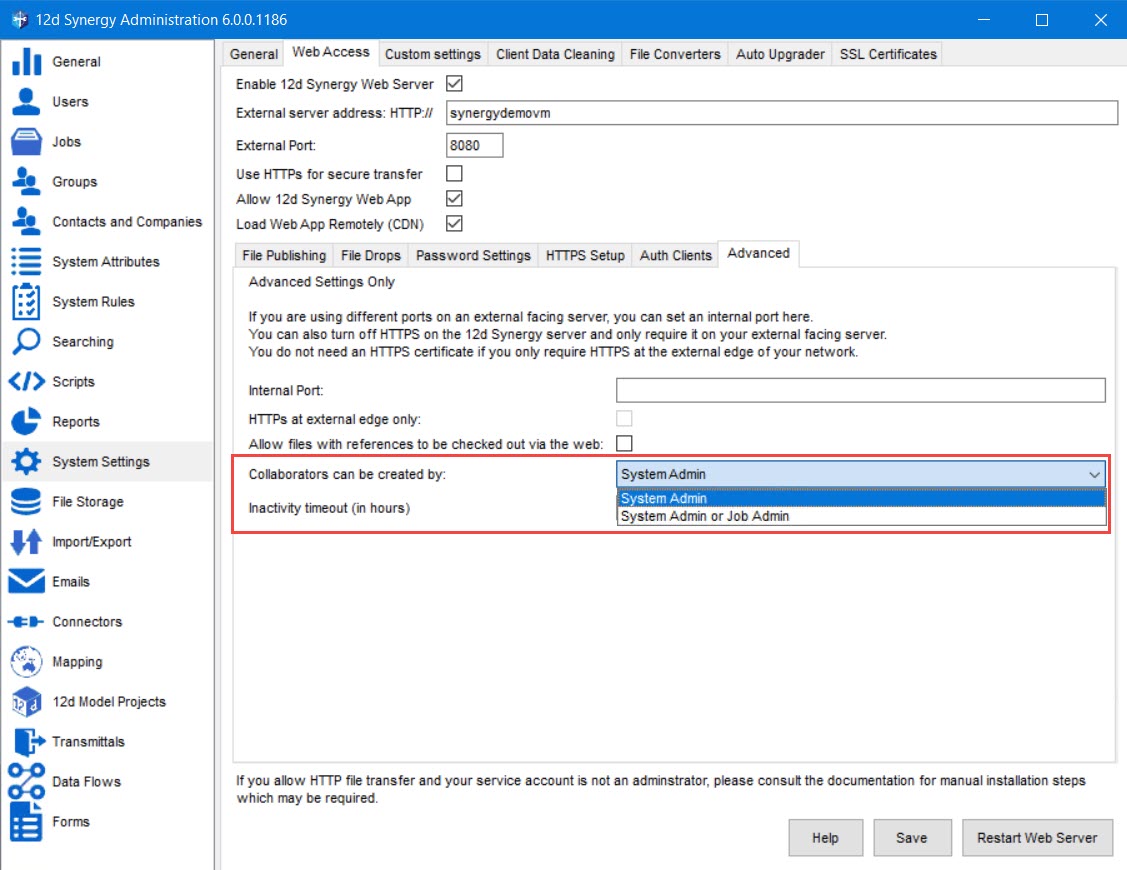
Select one of the following options from the Collaborators can be created by list.
System Admin - This option allows only the System Administrator to create a collaborator using the 12d Synergy Administration application.
System Admin or Job Admin - This option allows both the System Administrator and Job Administrator to create a collaborator using the 12d Synergy Administration and Client applications, respectively.
If you do NOT select the System Admin or Job Admin option, a Job Admin will not be able to view or create collaborators.
Click the Save button.
Open any of the supported browsers and type the Web App address provided by your 12d Synergy Administrator in the address bar and press the Enter key.
Supported Browsers |
Safari |
Mozilla Firefox |
Microsoft Edge |
Google Chrome |
The login page is displayed.

1.3. How to Configure Publishing
In the 12d Synergy Administration application, click the System Settings tab.
Click the Web Access tab.
Ensure that you have set up access to the Web using How to Configure Web Access.
Click the File Publishing tab.
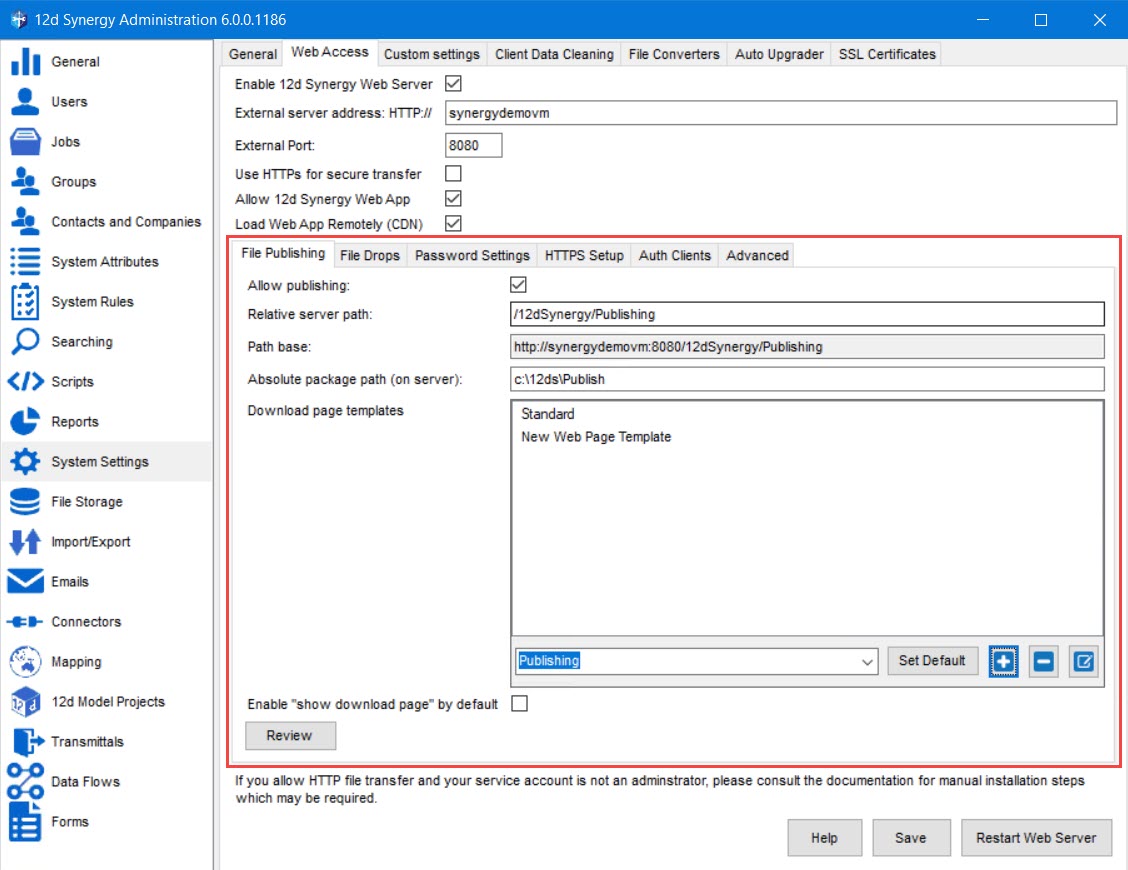
Select the Allow Publishing check box.
Enter a URL base for any publishing request in the Relative Server Path box.
The final URL will be displayed in the Path base box.Enter a location on the server or a network drive via a UNC path where all the zipped published files will be saved in the Absolute package path (on server) box.
In the Download page templates box, you can do any of the following:
From the list in the Download page templates box, select the method of publishing files for which you want to set a download page template.
Add a new template you might use as a download page while publishing files using the
 button. It gets displayed in the Download page templates box.
Select a template from the Download page templates box that you want to use as the default download page while publishing files, and click the Set Default button. The word DEFAULT is displayed against the selected template.
Select a template to edit the format of the template using the
 button.
Select the Enable “show download page” by default check box to always show a download page while downloading published files.
Click the Save button.
1.4. How to Configure Web File Drops
In the 12d Synergy Administration application, click the System Settings tab.
Click the Web Access tab.
Ensure that you have configured access to the Web using How to Configure Web Access.
Click the File Drops tab.
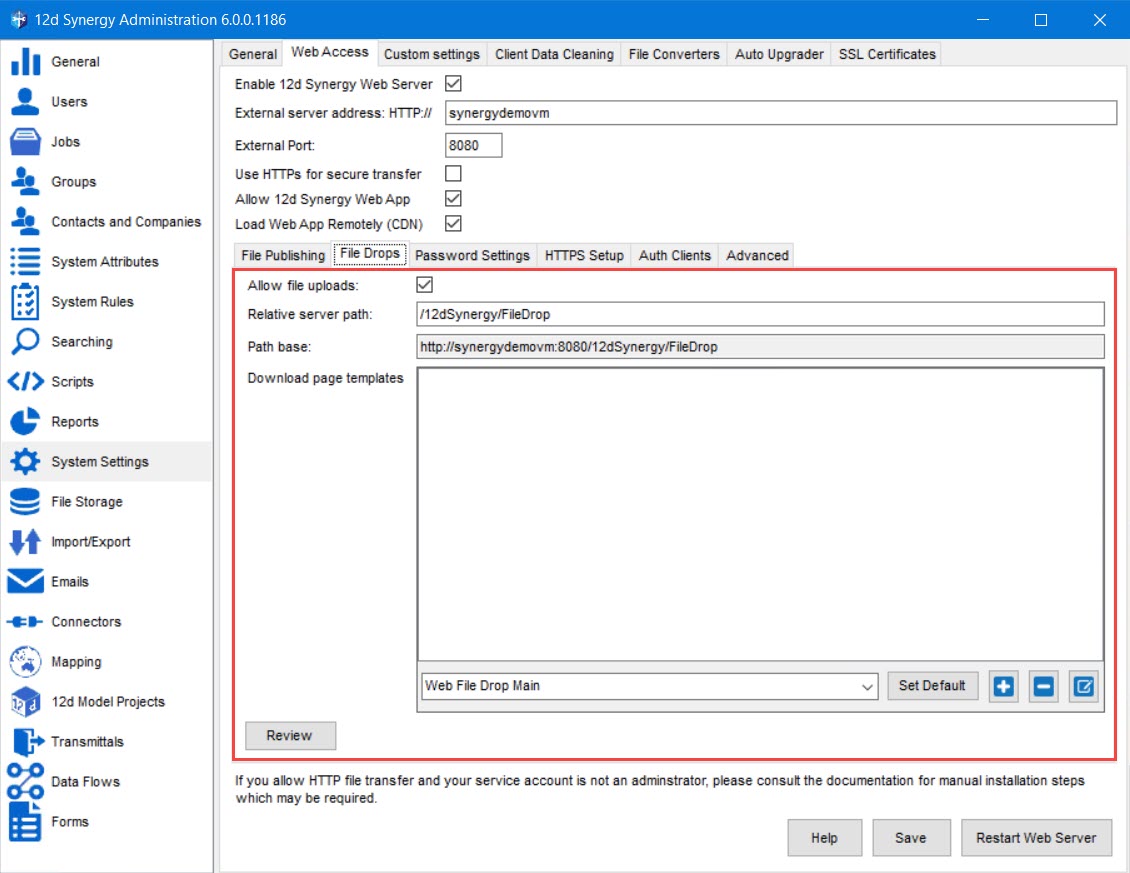
Select the Allow file uploads check box.
Enter a URL base for any web drop requests in the Relative Server Path box.
The final URL will be displayed in the Path base box.In the Download page templates box, you can do any of the following:
From the list in the Download page templates box, select the method of publishing files for which you want to set a download page template.
Add a new template you might use as a download page while publishing files using the
 button. It gets displayed in the Download page templates box.
Select a template from the Download page templates box that you want to use as the default download page while publishing files and click the Set Default button. The word DEFAULT is displayed against the selected template.
Select a template to edit the format of the template using the
 button.
Click the Save button.
1.5. How to Configure HTTPs
To configure HTTPs, you will need to register the certificate with 12d Synergy. You can do this using the 12d Synergy Administration application > System Settings tab > Web Access tab > HTTPS Setup tab. 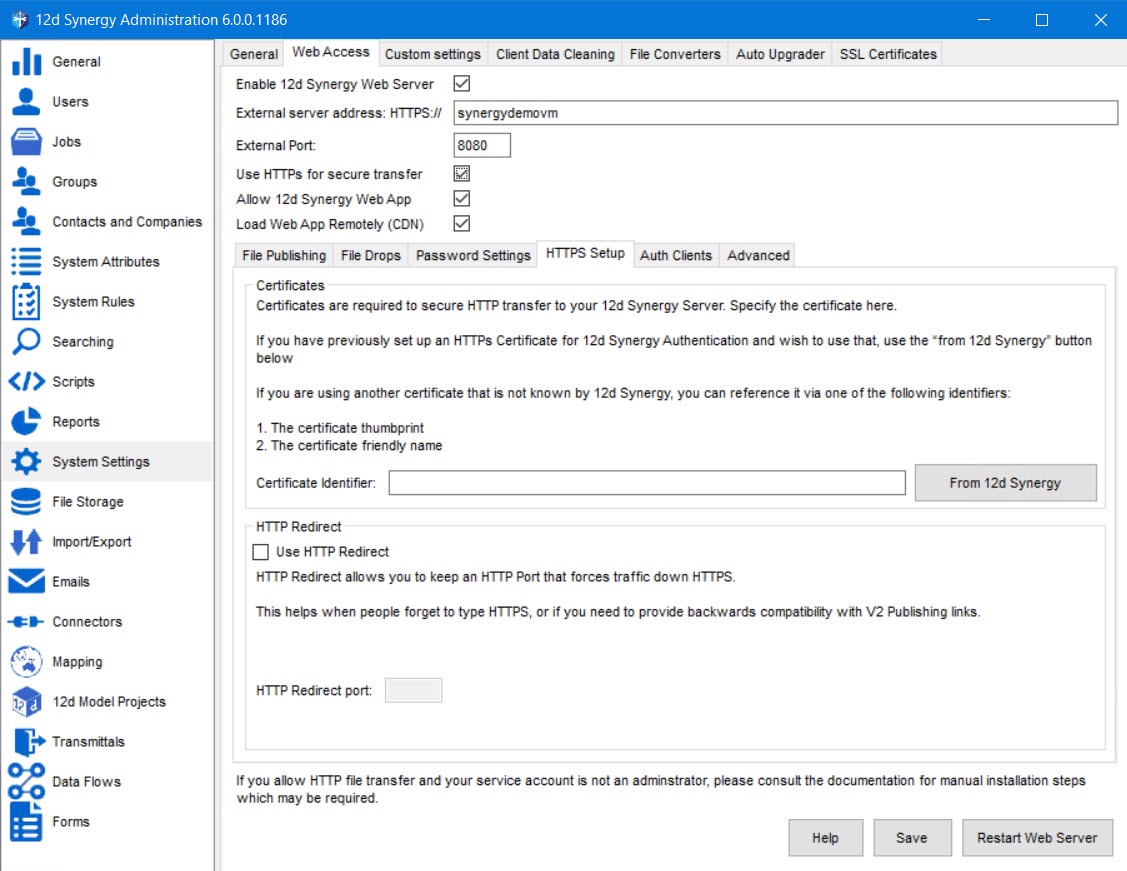
Whether we help you procure the certificate, you self-sign it, or you bring your certificate, the certificate identifier is required. This is a unique identifier required by MS Windows for setting up your certificate. You can reuse the same certificate that is set in the SSL Certificates tab.
For more information on certificates, please see Managing Certificates.
1.5.1. How to Preserve Old HTTP Links
If you have previously used HTTP links and want to preserve them after turning on HTTPS, you should set up an HTTP Redirect using the following steps:
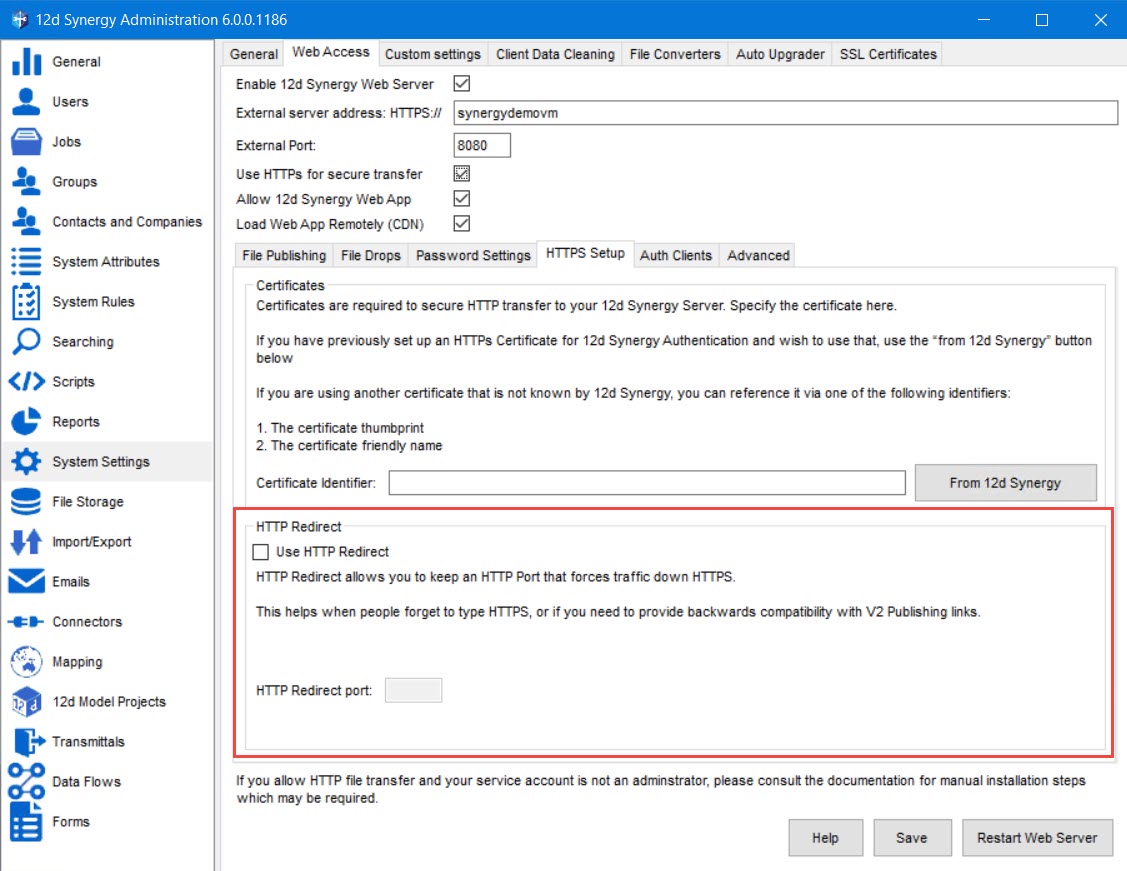
Identify a new, unique port for HTTPs.
Setup HTTPs using the new port.
Select the Use HTTP Redirect checkbox.
Set the HTTP Redirect port to the port number you were using previously.
1.5.2. How to Register your HTTPs Certificate Manually
The service account that runs 12d Synergy must have admin permissions to set up HTTPs. If the service account does not have admin permissions, you will need to register your HTTPs certificate manually using the following steps.
Open Windows Command Prompt as an Administrator.
Run the following command, substituting the appropriate values for your certificate thumbprint and the HTTPs Port.
netsh http add sslcert ipport=0.0.0.0:PORT_NUMBER certhash=CERTIFICATE_THUMBPRINT appid={f2010563-a376-4202-baec-6cd269839269}
You can view the certificate thumbprint in your Windows certificate store.For more information on obtaining the thumbprint (certificate identifier), please see Use an existing Certificate.
In the 12d Synergy Administration application, click the System Settings tab > Custom Settings tab.
Add a new setting - SkipHTTPSCertificateRegistration and set its value to 1.
This will stop 12d Synergy from automatically registering the certificate for you.
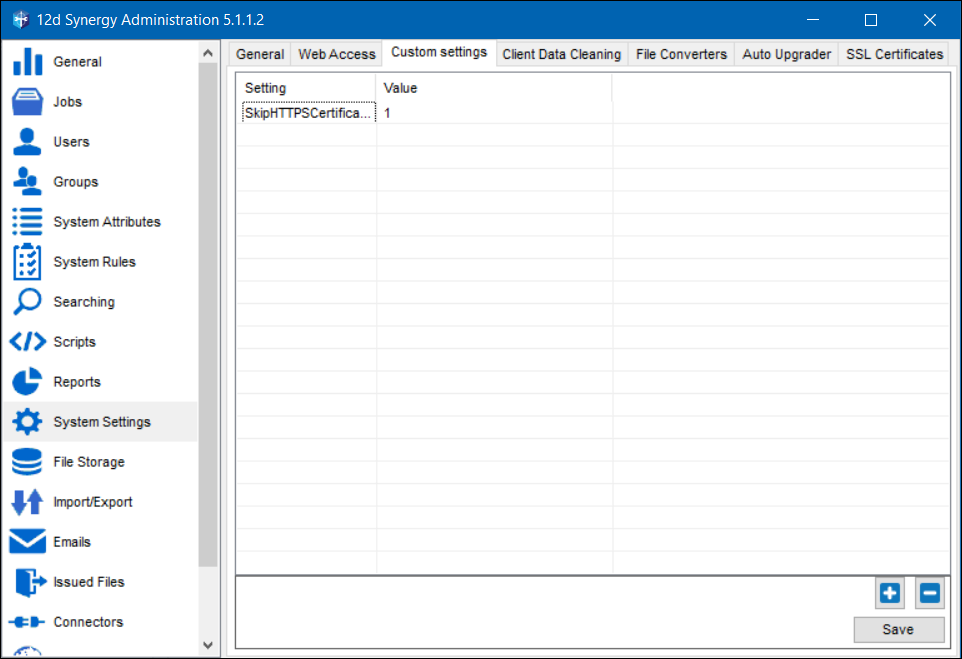
Click the Save button.
Restart the 12d Synergy Server service by doing the following:
Click the Windows Start button > Run prompt > type services.msc. Alternatively, press the Windows+R key simultaneously and then type services.msc.
The Services window is displayed.Right-click the 12d Synergy Server service and select the Restart option.
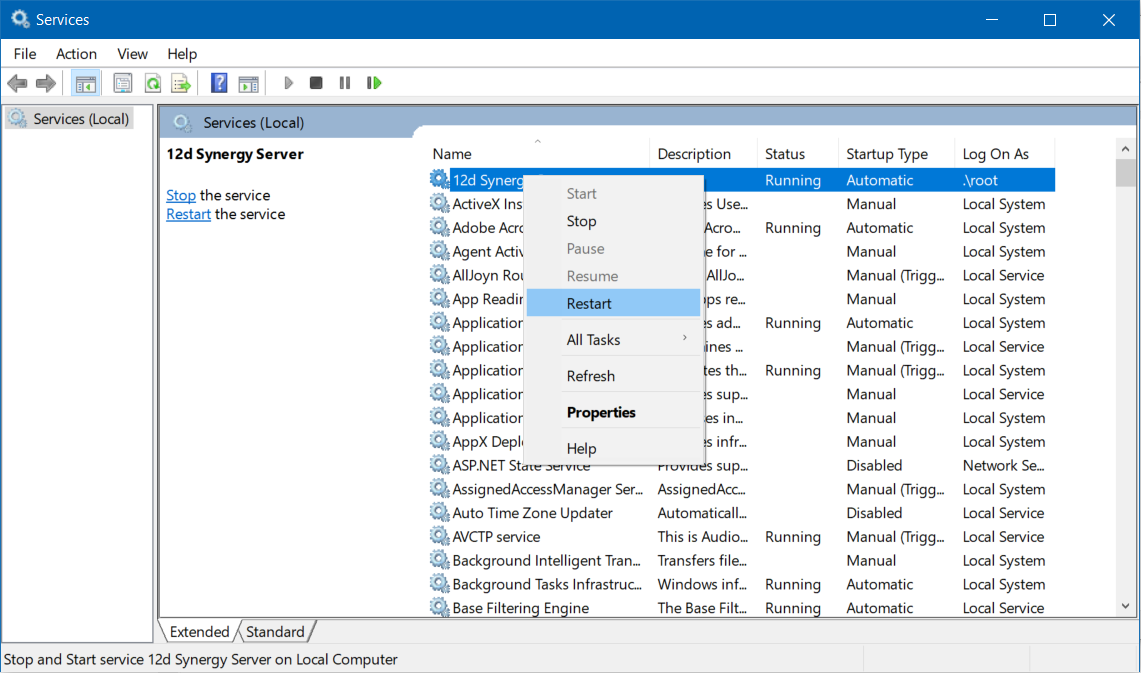
The 12d Synergy Server service is restarted.
1.6. How to Restart the Web Server
In the 12d Synergy Administration application > System Settings tab > Web Access tab, click the Restart Web Server button.

The Web Server is restarted, and a confirmation is displayed.