Admin Content
File Naming rules provide the option to control how files should be named when they are created in or added to the system. These rules are based on the type of file (its extension) and its location.
They can be applied at the following levels:
System level – to apply to all the files in all the jobs in the system for which the file naming rule has been created
Job level – to apply to all the files in the job for which the file naming rule has been created
Sub-job level – to apply to all the files in the sub-job for which the file naming rule has been created
Folder level – to apply to all the files in the folder for which the file naming rule has been created
They can also be inherited from the levels above.
1.1. File Naming Rules Inheritance
File Naming rules can be inherited from the level above in the tree structure. Inheritance can happen at the following levels:
A sub-folder can inherit file naming rules from its parent folder
A folder can inherit file naming rules from its parent job
A folder can inherit file naming rules from its parent folder
A sub-job can inherit file naming rules from its parent job
To inherit these rules from one level above, select the Inherit file naming rules from above check box either while editing or creating a job/sub-job/folder/sub-folder. If this check box is selected for top-level job, then it has no affect, as there is no structure above to inherit from.
1.2. How to Create a File Naming Rule
1.2.1. From the 12d Synergy Administration Application
When a file naming rule is created in the 12d Synergy Administration application, the rule applies to all the files created in your system.
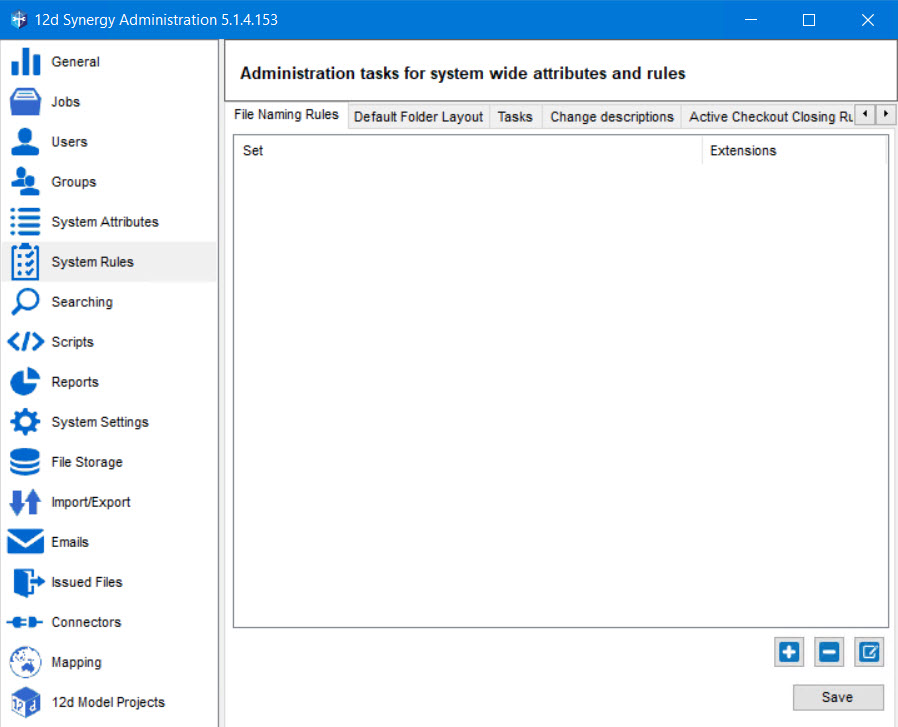
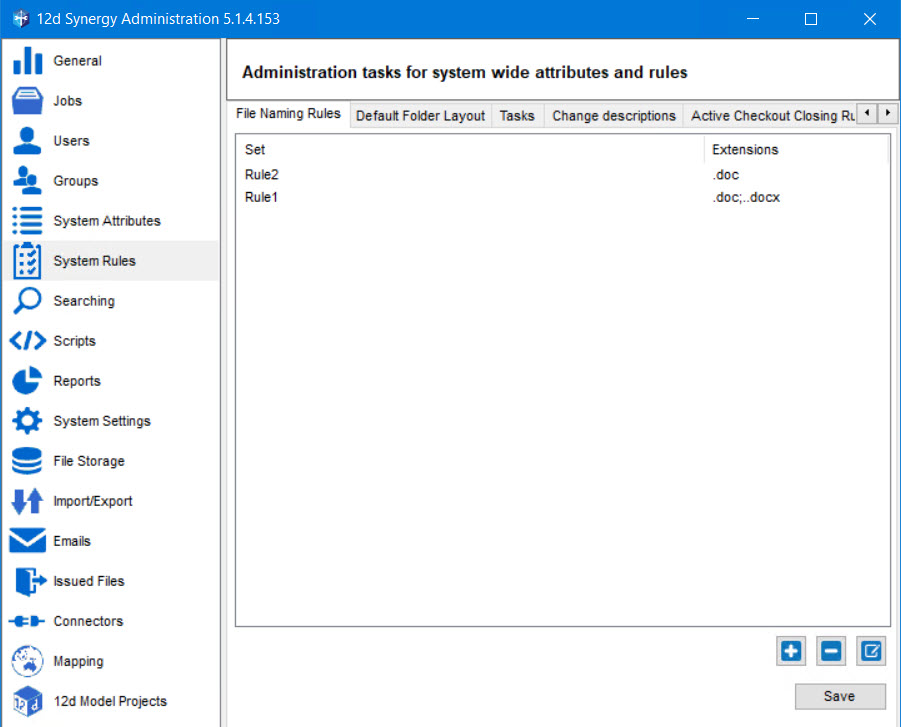
In the 12d Synergy Administration application, select the System Rules tab > File Naming Rules tab.
1.2.2. From the 12d Synergy Client Application
When a file naming rule is created while editing a job or a folder, then the rule applies to all the files in the jobs or folders respectively. If this rule is not created, and if there is a system-level file naming rule created in the 12d Synergy Administration application or a rule is created and inherited from a parent level, then the latter is applied to all the files being created.
Right-click the job or folder for which you want to create the file naming rule, and select the Edit option.
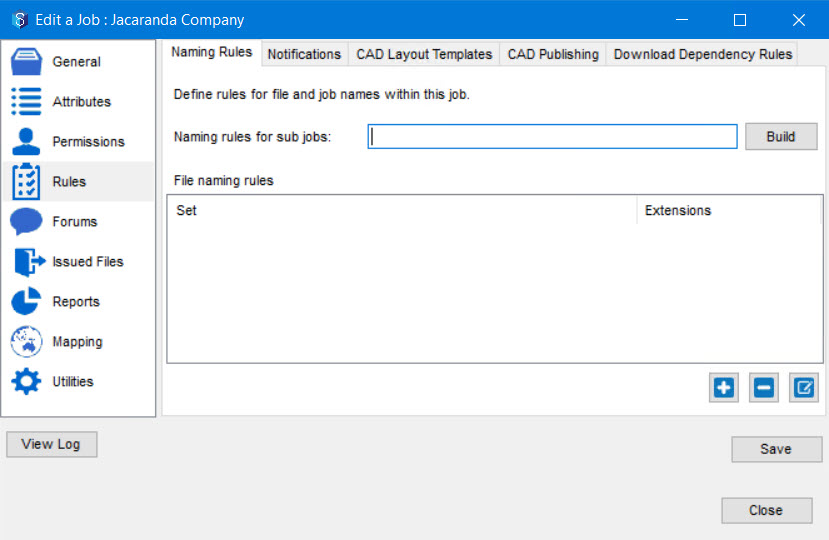
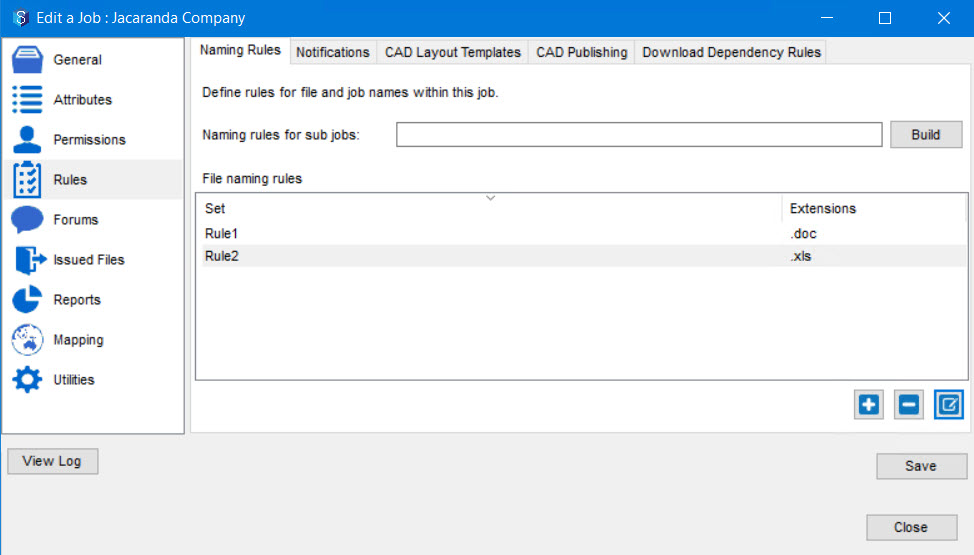
The Edit a Job: <Job Name>window or Edit a Folder: <Folder Name>window is displayed accordingly.Select the Rules tab > Naming Rules tab.
If you are editing a job, the following window is displayed.
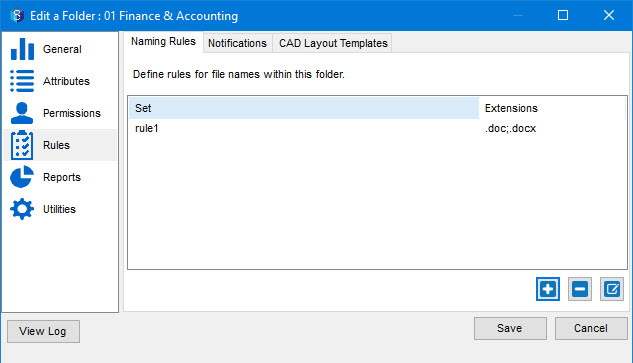
If you are editing a folder, the following window is displayed.
1.2.3. Creating a File Naming Rule
If you have created a naming rule using the 12d Synergy Administration application, you can view, edit or delete it only from there. Similarly, if you create one for a specific folder in the 12d Synergy Client application, it can only be viewed, edited or deleted while editing that specific folder only in the 12d Synergy Client application.
Click the
 icon button.
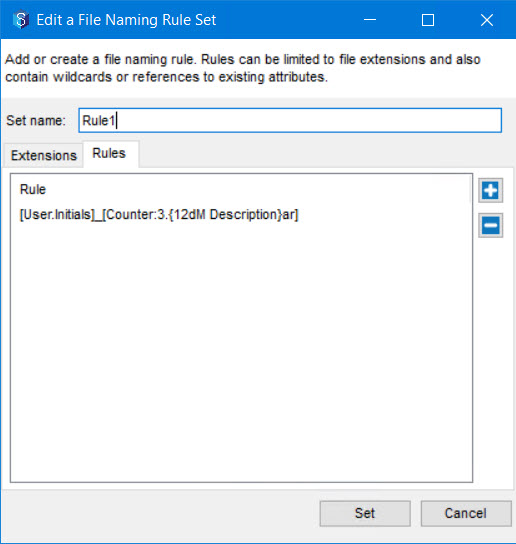
The Edit a File Naming Rule Set window is displayed. You can create or edit an existing file naming rule from this window.
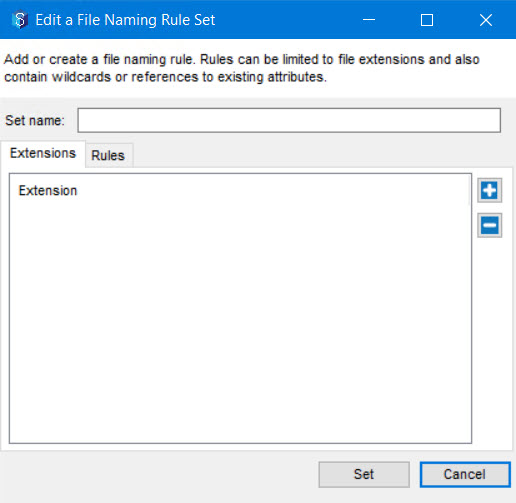
Enter a name for the file naming rule set in the Set name: box.
In the Extensions tab, click the
 icon button to add the file extension types to which this file naming rule set is applicable.
A New Extension placeholder box is displayed in the Extensions tab.
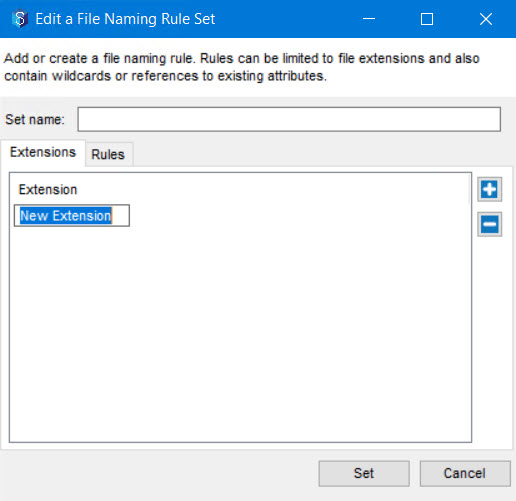
Enter the extension of the files for which this rule has to apply in the New Extension placeholder box.
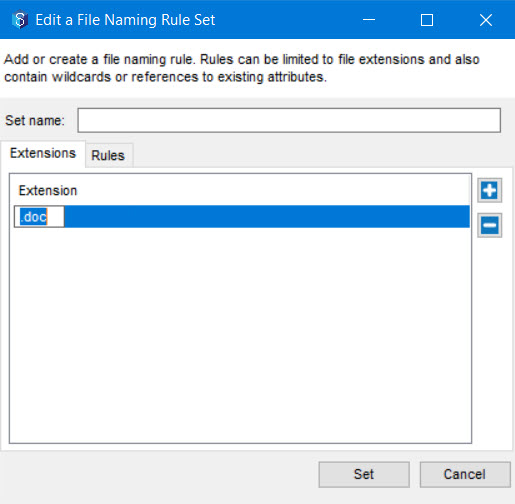
For files that may have multiple extensions like Microsoft Word, ensure to enter both .doc and .docx as entries in the Extensions tab.
If you wish to ignore specific file types, simply prefix the extension with a ! (exclamation mark). For instance, if you enter !MSG, then the rule will apply to all files other than .MSG files.
Select the Rules tab to define the file naming rule.
Click the
 button.
The File Naming Rule Builder prompt is displayed.Click the
 button.
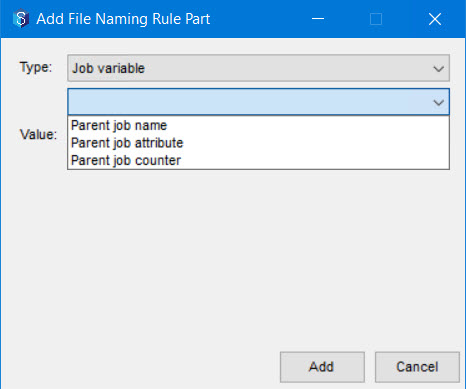
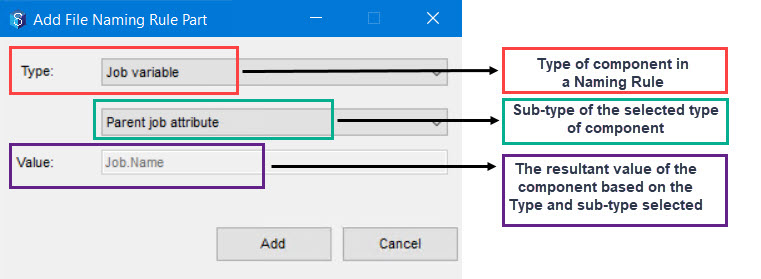
The Add File Naming Rule Part prompt is displayed.
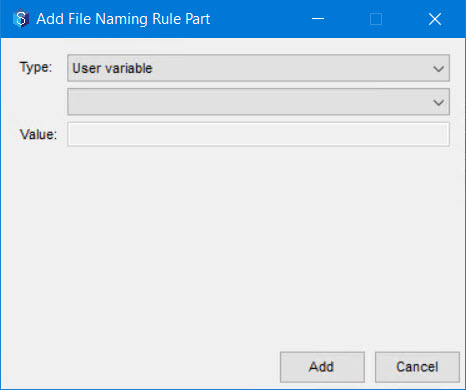
From the Type list, select the required type of component that you want to include in the file name.

If the component selected in step 8 of this procedure has a sub-type, then those sub-types are displayed in the list below the Type list. Select the required sub-type component that you want to include in the file name.
Refer to the Naming Rule Parts section below for more details about the naming rule components.
Based on your selections in steps 8 and 9 of this procedure, one of the following happens in the Value box.
The value (syntax) of the naming rule part is calculated and displayed.

If user input is required for the type and/or sub-type that you have selected, then enter the required value in the Value box.
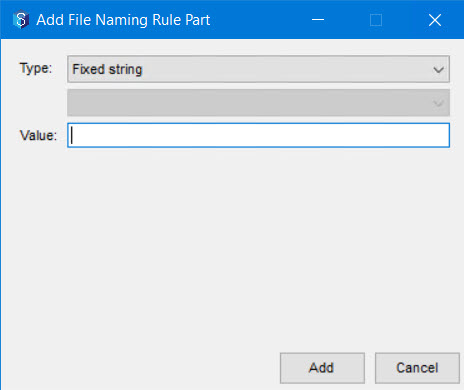
Click the Add button.
The naming rule part is displayed in the Naming Rule Builder prompt.
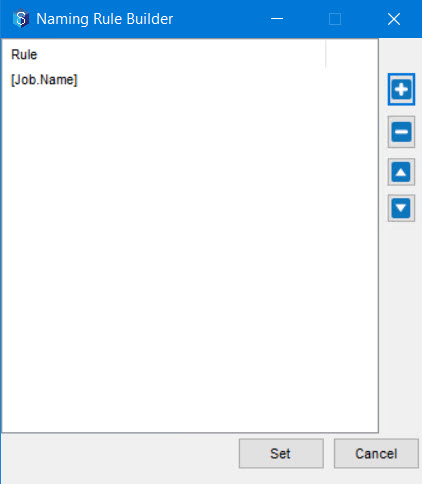
Repeat steps 7 to 11 to add more components to the naming rule to complete it as per your requirement and then click the Set button.
The created rule is displayed in the Edit a File Naming Rule Set window.
Click the Set button.
Based on the application that you are using for creating the file naming rule, the created rule is displayed in the following location.In the 12d Synergy Administration application > System Rules tab > File Naming Rules tab.
In the 12d Synergy Client application, right-click a job or folder and select the Edit option.
The Edit a Job: <Job Name> or Edit a folder<Folder Name> window (shown below) is displayed accordingly. Select the Rules tab > Naming Rules tab.

Click the Save button.
The file naming rule is set.
1.3. How Naming Rules Work
File naming rules are processed in the following instances:
When you move/add a file to a folder or a job that has the naming rules defined for its files
When creating a new file in a folder or a job that has the naming rules defined for its files
When renaming the files in a folder or a job that has the naming rules defined for its files
Note that the naming rules apply only to the file extensions for which the rules have been defined.
When you do any of the above-listed actions with a file of the type for which the naming rule has been defined, the following prompt is displayed.
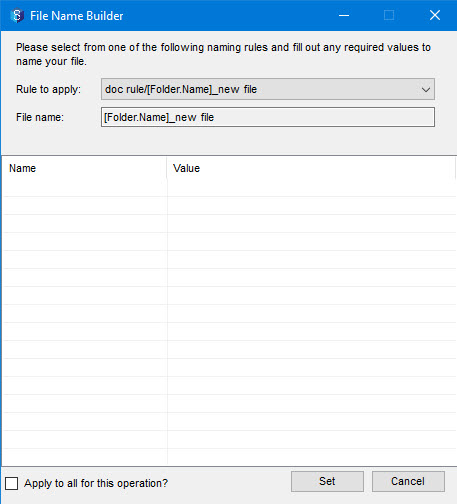
If there are multiple rules created for the same file type and the Prompt for multiple file naming rules setting is set to Yes, then the rules are displayed as options in the Rule to apply: list. You can select which rule to apply and click the Set button to name the file accordingly.
If you have configured data flows on the folder which has the naming rules set, and the Combined Filename and Attribute Editor feature is enabled for your project, then the Combined File name and Attribute Editor is displayed when you perform any of the above listed file operations.
1.4. File Naming Rule Settings
There are some system settings in the 12d Synergy Administration application > System Settings tab which are related to file naming rules. These settings are detailed below:
System Setting | Default Value | Description |
|---|---|---|
Enforce naming rules for linked files | On | This setting decides whether or not to apply file naming rules to linked files. |
Free text prompt behaviour | Prompt except for CAD Publishing | This setting decides whether or not to prompt for a value for the text component of the rule. The initial value of the free text component is always the file name, regardless of this setting. |
Naming rule value priority | File name | This setting determines whether to give precedence to file name or attribute value when processing the file naming rules. |
Prompt for multiple file naming rules | No | This setting determines whether or not to prompt the user with an option to select from multiple file naming rules when processing file naming rules. This setting applies only when multiple file naming rules are created for the same type of files. |
Skip naming rule checks for managed folders | No | This setting determines whether or not to ignore naming rules for managed folders. |
1.5. Naming Rule Parts
The File Naming Rule is made up of the following components:
Type of component
Sub-type of the selected type of component
Value of the component based on the Type and sub-type selected
The following table displays the characters or symbols that cannot be used in file names.
? question mark | / forward slash | < left angle bracket |
" double quotes | : colon | > right angle bracket |
| pipe | \ back slash | * asterisk |
An attribute value can have special characters, but when it is included in a file naming rule, only ., -, _ and <space> are permitted.
Type of Component | Sub-type of the Component, if applicable | Value of the component | Description | Syntax |
|---|---|---|---|---|
Attribute | NA | The value of the component is displayed based on the selected Type and/or Sub-type of the component. | In the Find an Attribute window, select the required attribute from the displayed list of attributes in the system. The value of this attribute is added to the file name. | [AttributeName] |
Job Variable | Parent job name | The value of the component is displayed based on the selected Type and/or Sub-type of the component. | The name of the parent job is included in the file name. | [Job.Name] |
Parent job attribute | The value of the component is displayed based on the selected Type and/or Sub-type of the component. | Select a job attribute from the list of job attributes displayed in the Select an Attribute window. The value of this job attribute is added to the file name. | [Job.Attribute Name] | |
Parent job counter | Enter a name for the counter. | If you want to add an attribute value to the file name, then click the Select button and choose the required attribute from the Find an Attribute window. You can also enter the number of digits in the counter, in the Zero Padding (Total number of digits): box. | [Job.Counter:Zero Padding.Counter Name] | |
User Variable | Creating user name | The value of the component is displayed based on the selected Type and/or Sub-type of the component. | The name of the user creating the file is included in the file name. | [User.Name] |
Creating user initials | The value of the component is displayed based on the selected Type and/or Sub-type of the component. | The initials of the user creating the file is included in the file name. | [User.Initials] | |
Creating user attribute | The value of the component is displayed based on the selected Type and/or Sub-type of the component. | You can select a contact attribute from the list of attributes displayed in the Select an Attribute window. The value of this contact attribute is added to the file name. | [User.Attribute Name] | |
Creating user counter | Enter a name for the counter. | If you want to add an attribute value to the file name, then click the Select button and choose the required attribute from the Find an Attribute window. You can also enter the number of digits in the counter, in the Zero Padding (Total number of digits): box. | [User.Counter:Zero Padding.{AttributeName}.Counter Name] | |
Folder Variable | Parent folder name | The value of the component is displayed based on the selected Type and/or Sub-type of the component. | The name of the parent folder is included in the file name. | [Folder.Name] |
Parent folder attribute | The value of the component is displayed based on the selected Type and/or Sub-type of the component. | Select a folder attribute from the list of folder attributes displayed in the Select an Attribute window. The value of this folder attribute is added to the file name. | [Folder.Attribute Name] | |
Parent folder counter | Enter a name for the counter. | If you want to add an attribute value to the file name, then click the Select button and choose the required attribute from the Find an Attribute window. You can also enter the number of digits in the counter, in the Zero Padding (Total number of digits): box. | [Folder.Counter:Zero Padding.{AttributeName}.Counter Name] | |
Named Value | NA | Enter any name of your choice. The name can include alphabets, special characters, and numbers. | The value you enter in the Value box is a name for a masked value. You can also choose to define the format of named value by using the Mask. To do so, click the ellipsis
| (Named Value {Mask}) |
Fixed String | NA | Enter the string of characters that you want to have in every file name. | The entered fixed string of characters become a part of the job/sub-job name when a job/sub-job is created. It can include alphabets, numbers and delimiters such as _ , . , - and <space>. | Text |
Free text | NA | NA | You can add a name of your choice to the job/sub-job name when creating the job/sub-job. It can include alphabets, numbers and delimiters such as _ , . , - and <space>. | * |
File name | NA | NA | When you want to rename the file utilising its existing file name as one of the naming rule parts, then you can select this component | {File Name} |
Timestamp | NA | The time stamp format that you create to add to the file name. | To create the required timestamp, click the ellipsis | [Timestamp.Timestamp format string] |
Counter | NA | Enter a name for the counter.
| You can enter the number of digits in the counter, in the Zero Padding (Total number of digits): box. To understand zero padding, please read the note below this table. | [Counter:Zero Padding.Counter Name] |
 button and then double-click the required components of the mask from the Build Naming Rule Mask window. Then click the Add button to add the selected format to the Mask box. When a file is created, you are prompted to enter the values for the mask and that value is included in the file name.
  button and then double-click the required components of the timestamp from the Build Naming Rule Time Stamp window. Then click the Add button to add the selected format to the Value box.
 To understand zero padding, say if you enter 4 in the Zero Padding (Total number of digits): box, then it means that the counter's value is prefixed by zeroes to make it a 4-digit number like 0001.
Attribute types such as list, date/time, text, user, company, contact, etc. need you to enter a value for it at run time. So if you select such an attribute for the file naming rule, then you will be prompted to enter its value when you are creating a file.