Admin Content
1. What are Connectors?
Connectors help 12d Synergy integrate with third-party software products by allowing information to be mapped into them. This decreases the effort and time involved in manually adding the same data to 12d Synergy to reflect the data in the third-party software.
Every third-party software product listed in this article has its own connector, which is configured based on the data it imports into 12d Synergy. The imported data may consist of job, contact or/and company entities and their corresponding fields.
You need to be a 12d Synergy Administrator to install, update, configure and load connectors. If a connector is configured incorrectly, it could lead to importing a large amount of bad-quality data. We encourage you to configure some connectors under our supervision.
You can download any version of a connector from the version-wise list displayed at http://www.12dsynergy.com/downloads/connectors/. They are downloaded as .dll files. A brief installation procedure is also mentioned on that page.
2. Available Connectors
There are many connectors available to help you import data from corresponding third-party software products into 12d Synergy. The list of available connectors is given below.
Most of these connectors need a 12d Synergy license module that authorises the required connector. If you have the license to a connector, then that connector is displayed in the list of modules in the 12d Synergy Administration application > General tab > License tab > Available Modules list.
.png "avlbconnlic(1).png")
3. Data Imported via Connectors
Every third-party software product, listed in this article, has its own connector which is configured to import its data into 12d Synergy.
For example, you may identify the need to import data such as follows:
Job entities such as Job Name, Job Address, Job Type, etc.
Company entities such as Company Postal Code, Phone Number, Fax, Address, etc.
Contact entities such as Contact Phone, Contact Mobile Number, Contact Address, etc.
4. License for Setting Up Connectors
Please check with your Account Manager for the license module required to set up Connectors. Each connector has a unique license of its own.
5. Installing or Upgrading a Connector
In the 12d Synergy Administration application, select the Connectors panel.
.png "avlblconn1(1).png")
In the list of connectors displayed, select the connector you want to install or upgrade.
The connectors displayed in grey font in the list are those that have never been installed on your system. The connectors displayed in black font are those that have been installed on your system.
Do one of the following:
To install a new connector, click the required connector in grey font and then click either the "Download Connector” link displayed in the right panel or the "Install or Upgrade Connectors” link displayed below the list of connectors as shown in the below image.

The 12d Synergy Connectors page is displayed.To upgrade a connector, do the following:
click on the required connector, and then click the “Install or Upgrade Connectors” link displayed below the list of connectors as shown in the above image.
The list of existing .dll files is displayed in a window..png "dllfileslist(1).png")
Click the https://files.12dsynergy.com/downloads/connectors link that is shown in the above image.
The 12d Synergy Connectors page is displayed.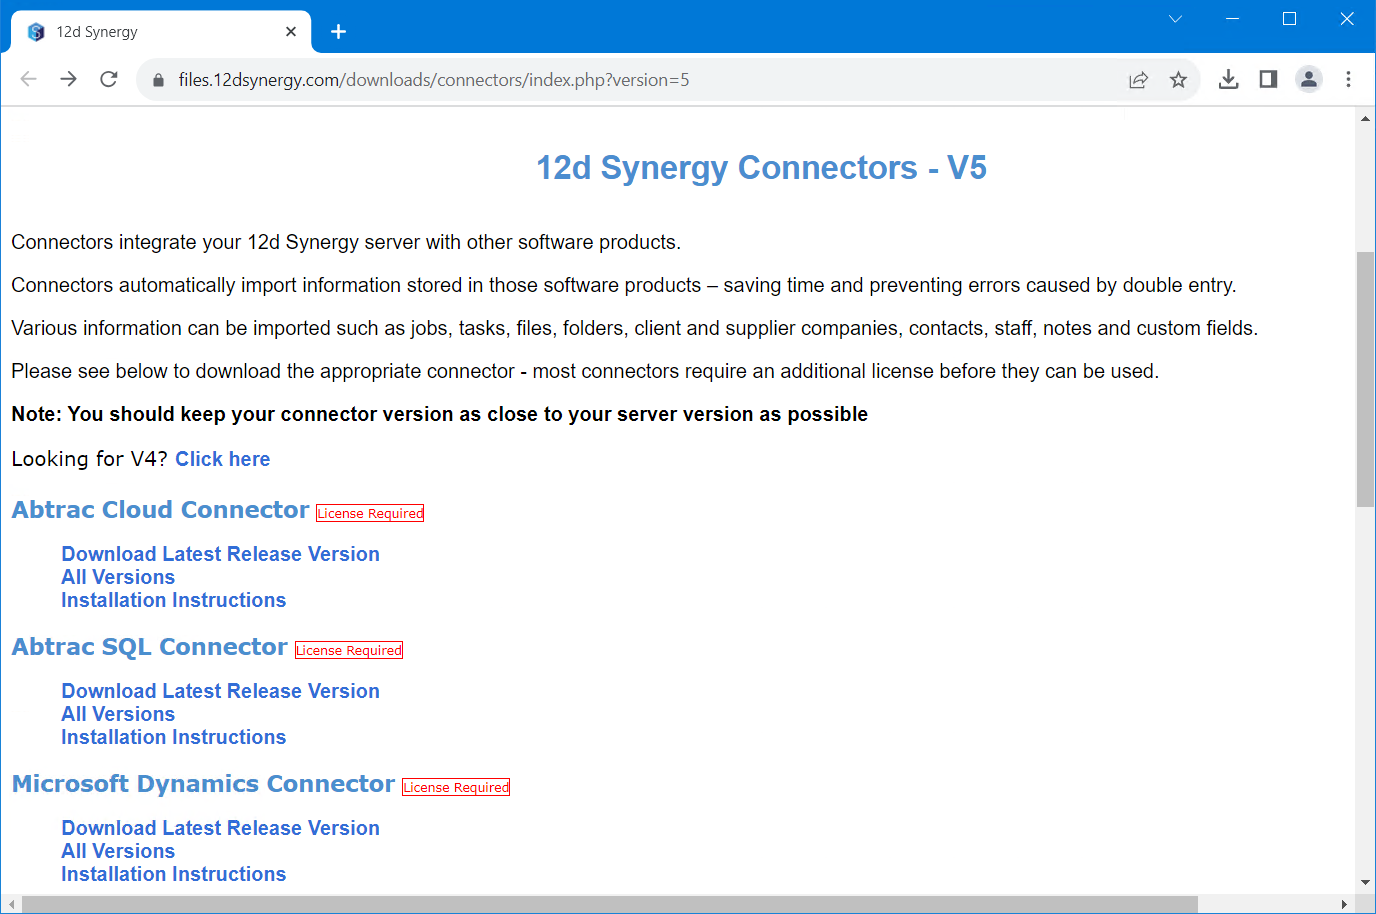
On the 12d Synergy Connectors page, a link to each connector's latest release version, all existing versions and their basic installation instructions are provided.
You should download the version that matches your 12d Synergy Server version closely.
Do one of the following:
To download the latest version of a connector, click the "Download Latest Release Version" link and close the window after the download.
The latest .dll gets downloaded into your system's Download folder. The downloaded version is displayed in the window displayed in step 8 below.
To download any specific version of the connector, click the "All Versions" link and click the required version in the resulting window. Close the window after the download.
The .dll file of the selected version gets downloaded into your system's Download folder. The downloaded version is displayed in the window displayed in step 8 below.Now, in the following window, click the Upload Connector
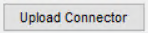 button.
This below window is also displayed when you click the "Install or Upgrade Connectors" link in the 12d Synergy Administration application > Connectors tab.
.png "dllfileslist(2).png")
The Select a .NET assembly to upload prompt is displayed.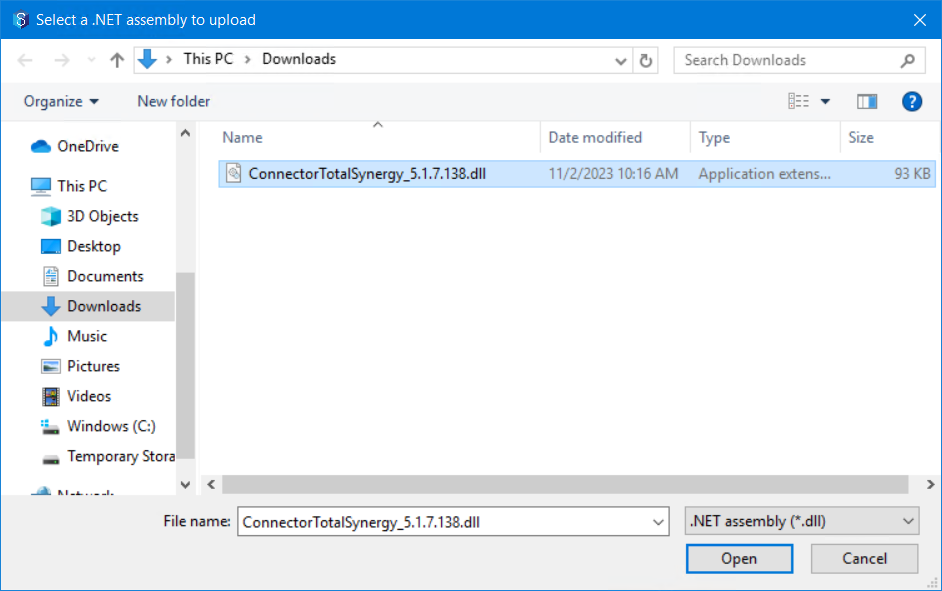
Browse and select the installation file of the connector you have downloaded which now resides in your system's Downloads folder and click the Open button.
The following prompt is displayed.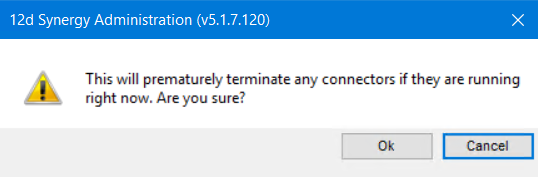
Click the Ok button.
The selected connector is installed or upgraded. Close the window shown in step 5.To confirm if you have installed or upgraded to the right version of the connector, select it from the list of connectors displayed in the 12d Synergy Administration application > Connectors tab. Check for the version number as displayed below.
.png)
If you are attempting to use a version of the connector that is incompatible with the version of the 12d Synergy Server running on your system, then the following message is displayed.
.png "incompatiblever(2).png")
6. Data Mappings
6.1. Data Mappings tab
Data mappings provide the link between source fields in the third-party software application and target attributes in 12d Synergy. Data mappings are one of the most important things to setup on a connector. Note that some values are mandatory for the connector to run while some are optional. They are mentioned wherever applicable.
.png "datamapping1(1).png")
The mappings are broken down into entity mappings such as Job Mappings, Contact Mappings and Company Mappings.
The Source Field is the information available from the third-party software application.
The Target Attribute is a 12d Synergy attribute that will store the information imported from the third-party software application.
If the Target Attribute is not mentioned for a Source Field, then that data is not mapped and will not be imported.
You can map the source to target attributes either manually or automatically.
6.1.1. Manually Mapping the Source Fields to the 12d Synergy Attributes
In the 12d Synergy Administration application > Data Mappings tab, click in the corresponding Target Attribute column of the Source Attribute you want to map.
The Map <source attribute name> prompt is displayed.
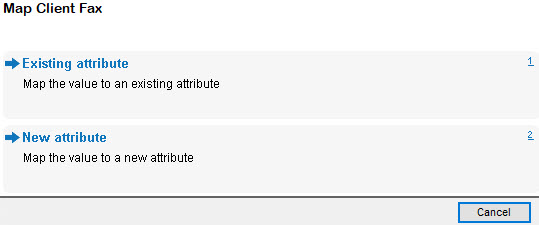
Do one of the following:
Select the Existing attribute option to find and select an existing 12d Synergy attribute that corresponds to the selected Source Attribute.
Select the New attribute option to create a new attribute that will correspond to the selected Source Attribute.
If the Target Attribute has a saved value already, then a third option to Clear the value is displayed.

Click the Save button.
The mapping is saved.
6.1.2. Automatically Mapping the Third-Party Fields to 12d Synergy Attributes
Utilising this option allows you to populate all available source fields at once. However, the activity assumes that target attributes are named something standard in order to find them. This option will only be available if at least one of the Source Attributes is not set to a target attribute.
In the Data Mappings tab, the following question is displayed.

Click the Yes button.
The Create unmapped connector attributes window is displayed.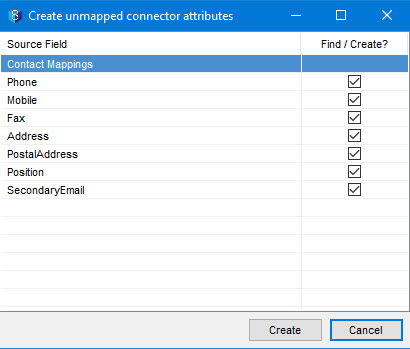
This method can populate many attributes in your system to map values that you may not ultimately want. It is recommended that after the fields are populated, any non-required mapping values are cleared.
If you want to ignore any attribute during the import process, clear the check box displayed against the corresponding attribute.
Click the Create button.
The target attributes are created or selected from the existing 12d Synergy attributes and displayed in the Target Attributes column in the Data Mappings tab.All automatically mapped values should be reviewed to ensure their suitability in your system. Check if any adjustment needs to be made.
Click the Save button.
The mapping is saved.
6.1.3. Importing External Fields
You can choose to import or not import fields of a certain type of entity. For instance, you want to import only Job-related fields and ignore contact related fields.

In the table in the Data Mappings tab, under the Import? column, observe that each entity type heading row only has the Import link displayed against it. This is because you can choose to either import the entire set of fields of that entity type or not import them. Click the Import link displayed in the Import? column displayed against the type of entity heading row for which you want to make this setting.
The following prompt is displayed.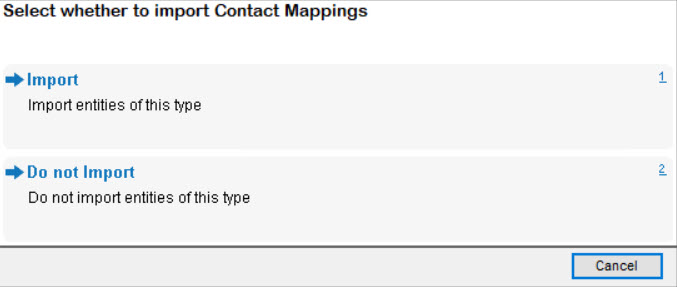
Do one of the following:
Select the Import option to enable import on all entities (fields) of the selected entity type.
Select the Do not Import option to ignore (not import) all entities (fields) of the selected entity type.
The fields in the selected entity type are greyed out and the Import link in the Import column is changed to Do not Import link.
Click the Save button.
The import settings are saved.
7. Connector Set Up
Any compulsory fields will be detailed for each specific connector below. However, when mapping jobs into 12d Synergy, any non-optional job attributes that exist on the intended template will also need to mapped before running the connector.
To see the set up Configuration and Data Mapping details for the connectors, click the respective link below.
8. Constants tab
While mapping data for any connector, if you want to add a 12d Synergy attribute(field) with a constant value to an entity type, you can do so using the Constants tab of the selected Connector selected in the Connectors list of the 12d Synergy Administration application > Connectors tab.
An example of a common use of constants is to add an attribute called “Data Source” with a value of “Connector”. This explains that all attributes (fields) of an entity type are originating from an external application or document.
Another use of constants is to set a job attribute to match a job template. This will make the connector create any job with the specified job template.
.png)
In the Constants tab, select the required entity from the Entity Type panel for which you want to add an attribute with a constant value.
In the table on the right, you can add an attribute and its constant value. Click the
 button to create or add an attribute.
Click the Save button.
The attribute and its constant value are added to the entity type mappings.
To map jobs into 12d Synergy, you will need to set a job template in the Job field of the Constants tab. 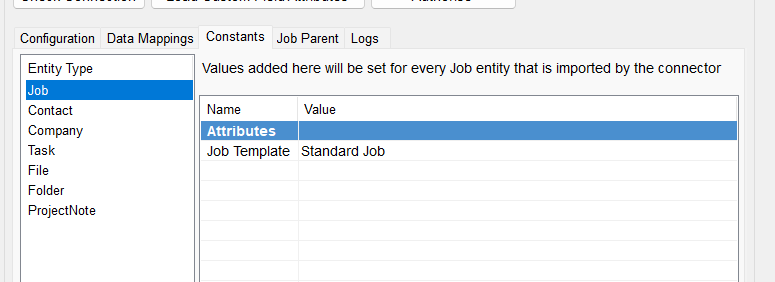
9. Job Parent
When mapping jobs (ultimately creating a corresponding job in 12d Synergy), you have the option to set the parent job to ensure that new jobs are created at the correct location in your job structure.
There are three options available for this setting.
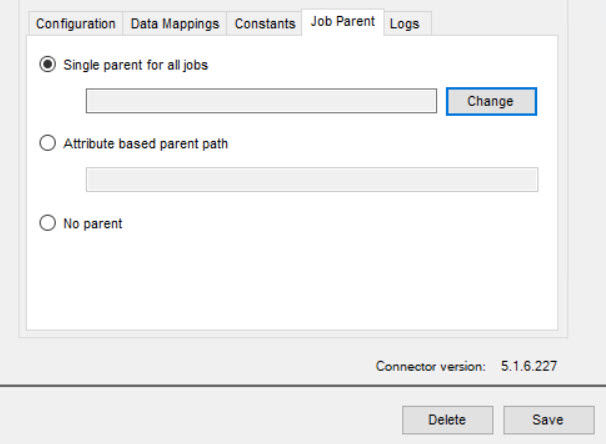
9.1. Single Parent for All Jobs
This option sets a single parent top-level job. All your mapped jobs will live under this top-level job. This arrangement is commonly used.
9.2. Attribute based Parent Path
This option is used to change the parent job dynamically based on the value of the mapped attributes.
Example: Let’s say, we have mapped job source field ‘A’ to an attribute ‘att1’ attribute. If we want to decide the parent job based on the value of the attribute ‘att1’, we can define an attribute-based parent path as below.
{Job. Att1 }_Parent
9.3. No Parent
This option is used when you want all your jobs to be imported as top-level jobs. This arrangement is less commonly used.
10. Logs tab
The Logs tab is used to view logging. This can help you understand the progress of runs and investigate any issues that may arise when importing data from the third-party software application.
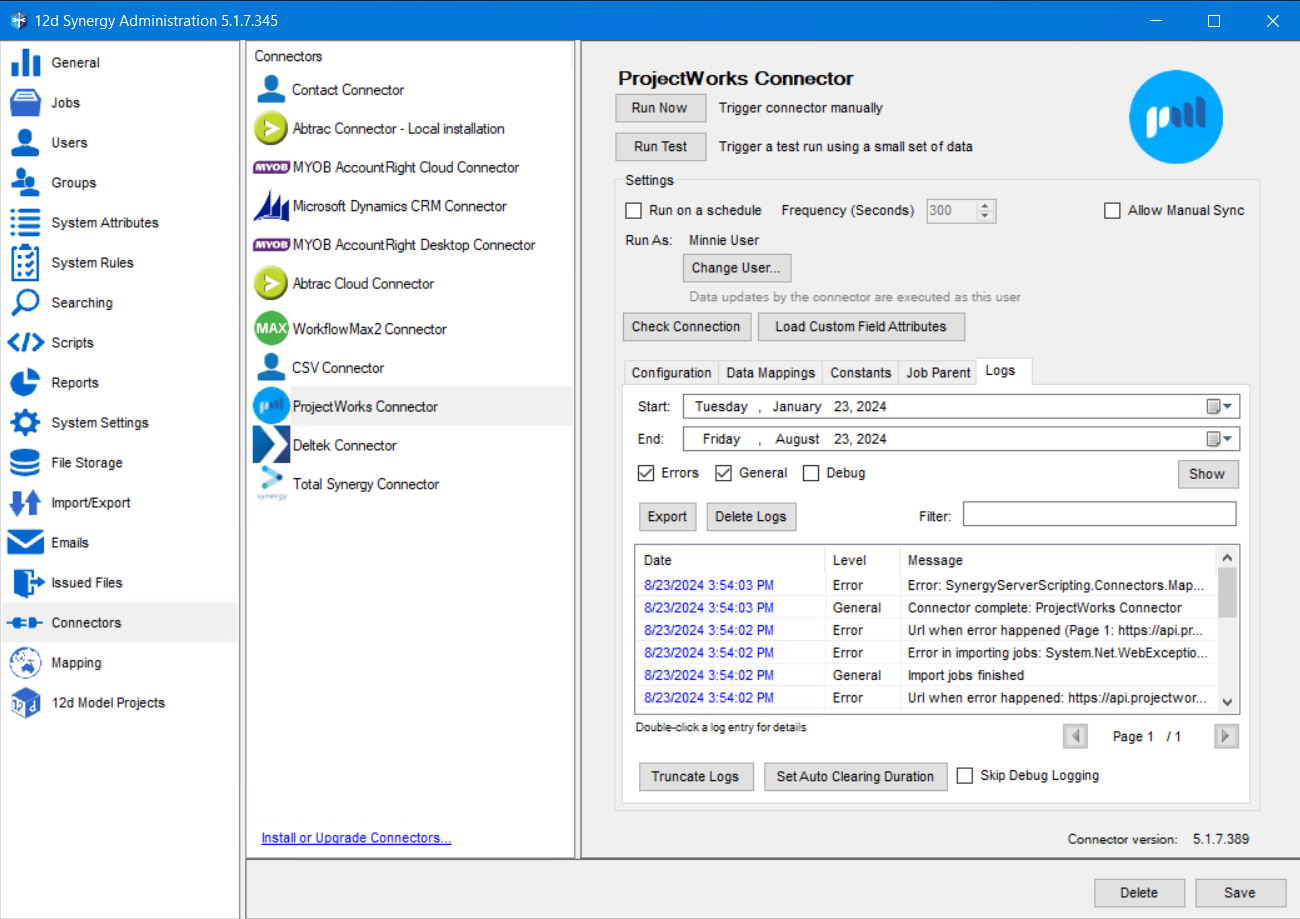
In the Logs tab, use any of the following settings:
Select the start and end dates of the period for which you want to generate the logs from the Start and End list.
If you want the logs to include details of the errors encountered while importing data using this connector, select the Errors checkbox.
If you want the logs to include general details such as the beginning and completion of a data import using this connector, select the General checkbox.
If you want the logs to include the debugging details while importing data using this connector, select the Debug checkbox. If you do not want to include these details in your log file, select the Skip Debug Logging check box. It is recommended to select this checkbox.
Click the Export button to create a log file for a selected period and export it to a location in the 12d Synergy Client application.
Click the Delete Logs button to delete the logs created while importing data using this connector.
Click the Truncate Logs button to permanently delete the logs created by this connector.
Click the Show button to generate the log file based on the set configuration and display it on the screen for viewing.
Click the Set Auto Clearing Duration to set the number of days after which the log entries will automatically be deleted. It is highly recommended that you set this field to five days.
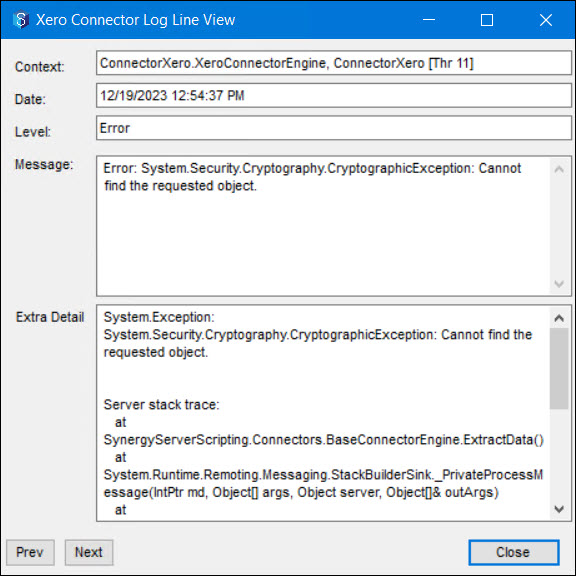
Double-click a log entry for more details about the run.
You can filter the logs with a keyword by entering it in the Filter: box.
11. Running Connectors
11.1. Run Now
You can trigger a connector manually any time by clicking the Run Now button. Execution happens within the 12d Synergy Server application. You can view the results of the run in the Logs tab.
It is highly recommended that you do a test run, if applicable, prior to running the connector. Doing a test run first allows you to confirm if the connector is configured as per your requirements.
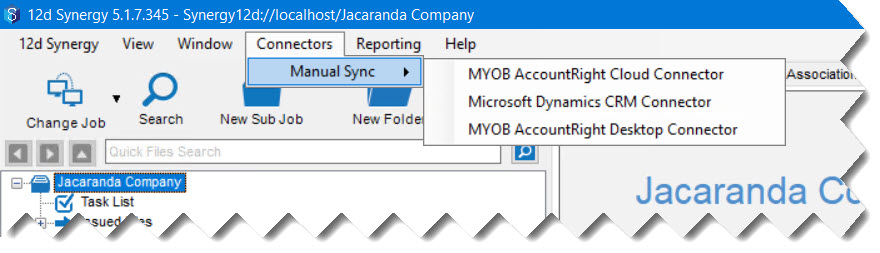
Select the Allow Manual Sync check box to be able to dynamically run the connector manually. You can run the connector from one of the following options.
12d Synergy Administration application > Connectors tab > Select the required Connector > Run Now button.
.bmp "run now1(1).bmp")
12d Synergy Client Application > Connectors menu option > Manual Sync > <Connector to be run>
11.2. Run a Test
You can perform a test run before setting up a schedule to run the connector or before manually triggering a run. Note that all connectors do not support the test mode. Performing a test run will allow you to confirm that the connector is configured as per your requirements.
When a test run is not performed, and the connector is directly run in real time, you risk populating your 12d Synergy database with a large amount of bad quality data. Reversing this change involves a lot of manual effort, especially if a backup of the database is not taken prior to the run.
In the 12d Synergy Administration application > Connectors tab, select the required Connector from the list of connectors displayed.

Click the Run Test button.
The Connector Test Settings window with the list of settings that you can include in the test is displayed.
Select any one of the setting and enter a specific value in the Value column for it to run the test.
Though you can select all the settings displayed in the Connector Test Settings window to run a test, it is recommended that you select any one setting. Not only will this check whether the mappings are done correctly in 12d Synergy, but it also saves the time in running all settings throughout the system. Note that this is just a test run to check if the imports are per your requirement.
For example, you can select Client Name, then click on the corresponding Value cell and enter the name of the client whose data you want to import and verify in the test run.
If you select a job filter (like Job Number or Job Name) option for a test run, then all the companies and contacts mapped as attributes to that job are also imported.
Click the Run button.
Note that only a limited amount of data from the external system is imported into 12d Synergy during a test run.
If you do not select a setting in the above window then no entities of that setting type are imported.
After running a test, select the 12d Synergy Administration application > Connectors tab > Select the required Connector > Logs tab to ensure that the connector has run successfully. Verify the imported entities and fields by accessing the imported entities in 12d Synergy. For example, access the jobs or clients and check if the attributes are correctly imported.
You can run tests as many times as required until your data mapping is done as per your requirement and the imported data is of good quality.
11.3. Run on a Schedule
You can set up a schedule for a connector to run at a certain frequency in seconds. Execution happens within the 12d Synergy server. You can view the results of the run by selecting the Logs tab.
Connectors take a varying period of time from start to finish. This time is spent in either retrieving data from the external systems and/or writing it to the 12d Synergy database. It is important to set the connector schedule to be higher than the time taken to complete an import.
It is recommended to set this to a minimum of 5 minutes (300 seconds).
11.4. Run As
You must choose the user, contact, or team, under whose name all the imports from the connector are executed. The details of this user are displayed in the import log entries throughout 12d Synergy. You may wish to create a user specific to the connector in order to make its log entries more easily trackable.
The Run As user is usually a System Administrator in 12d Synergy. However, if you have to create jobs in 12d Synergy while importing data from the third-party application, you need to be a Job Creator.
11.5. Miscellaneous Options
There are some buttons that are displayed for certain Connectors only. They are explained below.
Button | Connector | Description |
|---|---|---|
Load Custom Field Attributes | Contact Connector, WorkflowMax Connector, Abtrac Cloud Connector, Total Synergy Connector | Custom fields can be imported for contacts, companies, and jobs, if required. Set the path to the applicable CSV in the selected connector’s configuration details in the 12d Synergy Administration application > Connectors tab > selected connector’s configuration page and click the Save button. Then click the Load Custom Field Attributes button and select the fields and attribute names that you want to import. |
Authorise | MYOB AccountRight Cloud Connector, Total Synergy Connector | This button enables you to authorise the API key and API secret codes entered in the Configuration tab and generate an authorisation code to connect to the cloud. |
Select Input File | Contacts Connector | When using the Contacts connector, click this button to select either a CSV file or an XML file that has the data to import into 12d Synergy. |