Admin Content
The 12d Synergy application sometimes needs to interact and exchange data with other external applications such as BIM 360, Projectwise.
You need to have a Data Flows license to be able to use Data Flows.
Data flows must be configured by you, the 12d Synergy System Administrator, or a User granted with suitable permissions, with a degree of caution and good judgment, whilst keeping the business protection in mind. Simply put, the data flow will read or write from/to anywhere it has been configured to point. This could include sensitive files and/or directories, if configured in such a way. You are ultimately responsible for ensuring data integrity and security. 12d Synergy takes no responsibility for poorly configured Data Flows. If you need further clarification or guidance, please reach out to our support team for assistance.
The Data Flows feature enables this exchange of data in either direction. A Data Flow Type must be configured for all applications that are communicating with 12d Synergy. A Data Flow Type includes the following two Data Flows. You can configure an Ingress data flow on a top-level managed folder. This means that the managed folder cannot be a subfolder to any other folder.
Ingress – A data flow that is created to import data from an external source to a 12d Synergy folder. This folder in 12d Synergy is referred to an Ingress folder.
Egress – A data flow that is created to export data from a 12d Synergy folder to an external source. This folder in 12d Synergy is referred to an Egress folder.
A folder or a top-level managed folder in 12d Synergy can have only one Ingress data flow configured. You cannot add or delete any files in the Ingress folder.
However, an Egress folder can have multiple Egress data flows configured. This permits the sharing of data from 12d Synergy to multiple external applications. A single ingress and multiple egress on the same folder is also permitted.
If the original copies of such files are deleted in 12d Synergy, there will be no effect on the previously egressed files in the external application or drive.
A data flow can be enabled or disabled at two levels.
Global level, using the 12d Synergy Administration application.
Local Folder level, using the 12d Synergy Client application.
The data flow needs to be configured to allow for the differences between the following.
Naming in 12d Synergy and the external application
Pathing in 12d Synergy and the external application
How each system handles metadata and attributes
Configuring data flows has two parts.
Adding and configuring a Data Flow Type from the 12d Synergy Administration application.
Setting up either an Ingress or Egress for a Data Flow Type on a folder from the 12d Synergy Client application.
1.1. How to Add and Configure a Data Flow Type
You must have a data flow license that corresponds with the system you are attempting to exchange data with.
In the 12d Synergy Administration application, select the Data Flows > Data Flows tab.
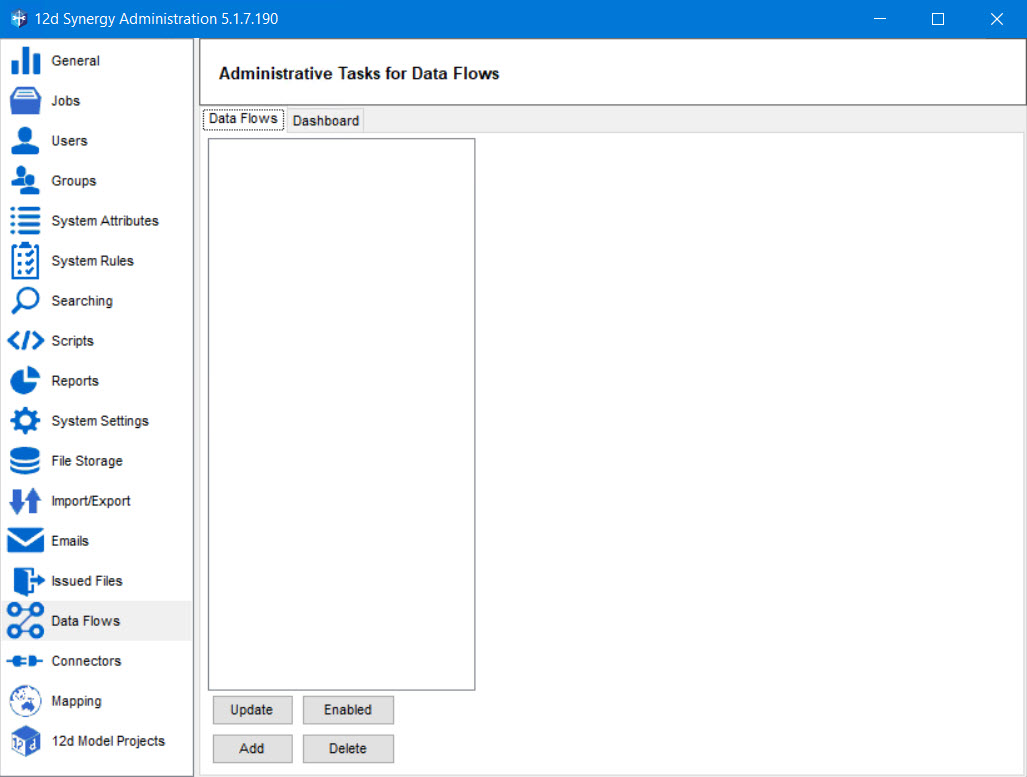
Click the Add button.
The Upload a data flow window is displayed.

Click the ellipsis
 button in the Upload a data flow window.
The Select a task library prompt is displayed.
Do one of the following:
You can add multiple Data Flow Types for an external application if there are multiple companies using the same application for content management at their end.
1.1.1. Add and Configure a Projectwise Data Flow Type
Select the ProjectwiseDataFlow.dll file in the Select a task library prompt and click the Open button.

The path to the selected ProjectwiseDataFlow.dll file is displayed in the Path box of the Upload a data flow window.
Click the Upload button.
The data flow type is added, and a confirmation message is displayed.
Click the Ok button.
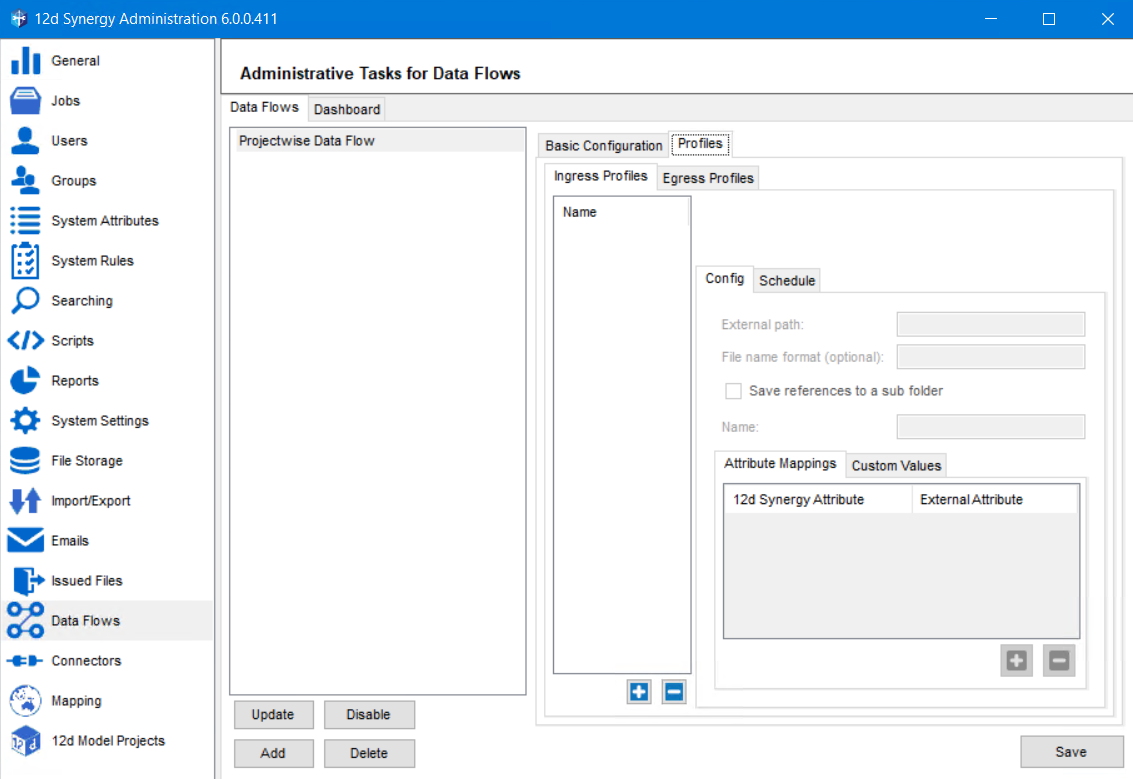
The Basic Configuration and Profiles tab are added to the 12d Synergy Administration application > Data Flows > Data Flows tab.
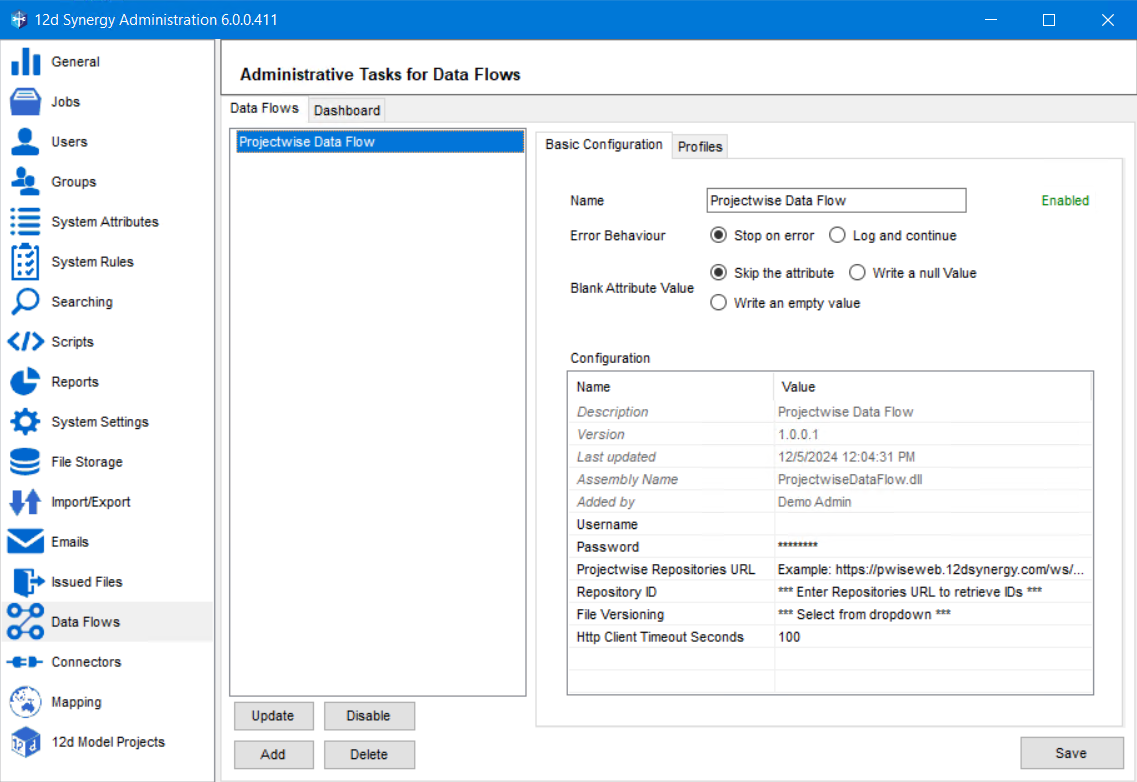
By default, the added data flow type is enabled, and the name of the data flow type is displayed in the Name box. The configuration details of the added data flow type are displayed in the Configuration section.
Select one of the following:
Stop on error option as the Error Behaviour.
When an error occurs while working with the Projectwise Data Flow Type, selecting this option will stop the process and write an error message in the log files.
Log and continue option as the Error Behaviour.
When an error occurs while working with the Projectwise Data Flow Type, selecting this option will write an error message in the log files and continue processing the data flow, if it can.
When the system encounters a blank value for an attribute, you can choose its reaction to it. Select one of the following options for the Blank Attribute Value field.
Skip the attribute
Write a null value
Write an empty value
In the Configuration section, enter a username and password in the Value column adjacent to Username and Password boxes for accessing the Projectwise Data Flow Type in the 12d Synergy Client application.
These are mandatory fields and without entering the correct username and password, a user cannot run a data flow.
The Username and Password to be entered here are the credentials made up by the Projectwise Administrator for a Logical Projectwise account (also known as a Projectwise native account). Your account is NOT to be confused with a Windows or IMS (Identity Management Service) account.
Enter the URL of Projectwise repositories in the Value column of the Projectwise Repositories URL row.
All the repositories at the mentioned URL are retrieved and displayed as a list in the Value column of the Repository ID row.
Select the required repository from the list displayed in the Value column of the Repository ID row.
You can create profiles for the selected data flow type in the Profiles tab.
Click the Save button.
The Projectwise Data Flow Type is configured.
1.1.2. Add and Configure a BIM360 Data Flow Type
Warning: BIM360/ACC (Autodesk Construction Cloud) uses AWS to store their files. However, when 12d Synergy requests data for ingress via their API, they provide a separate URL to download the associated files directly from their stores in AWS. This is a different/new connection that the 12d Synergy Server needs to create for the file download. Please ensure that the 12d Synergy Server can access AWS resources via HTTPS.
There are two steps involved in this configuration.
Step 1 - Create and Set up an App for BIM360 Data flow in Autodesk Construction Cloud and Autodesk Platform Services
Access and login to Autodesk Platform Services at https://aps.autodesk.com/.
Click the Go to my apps
 button and then click the Create application
  button. The Create Application prompt is displayed.
Enter a name for the application in the Name box. For example, say BIM360 12dSynergy Dataflow.
Select the Server-to-Server App option as the Application Type (as shown in the image above).
Click the Create button. A Server-to-Server app with the provided name is created.
.jpg "27009e1b-4656-4e21-918e-908f0927fd52(2).jpg")
Click the Copy
.jpg "copy(1).jpg") icon displayed against the Client ID and Client Secret credentials, and make a note of them.
icon displayed against the Client ID and Client Secret credentials, and make a note of them.Click the Save changes button.
Access Autodesk Construction Cloud at https://acc.autodesk.com/projects to view all your projects.
Click the Account Admin link > Custom Integrations tab as shown below.
(1).jpg "custint(1)(1).jpg")
Also, make note of the Autodesk Construction Cloud Account Name, TDSynergyDev in the above example. This Account Name has to be entered in the 12d Synergy Administration application > Data Flows > Data Flows tab > Basic Configuration tab for BIM360 Data Flow > BIM360 Docs Account Name configuration detail’s Value column. (Please refer to step 7 in Step 2 - Configure a BIM360 Data Flow type in the 12d Synergy Administration application)Click the Add custom integration button.
The Add custom integration prompt is displayed.
Enter the copied Client ID from step 6 of this procedure in the Autodesk Platform Services Client ID box.
Enter the name of the server-to-server app you created, BIM360 12dSynergy Dataflow, in the Custom integration name box.
Enter a brief description of the custom integration that you are setting up. The custom integration is added and displayed in the Custom Integrations tab shown in step 9 of this procedure.
Select the app you just created from the displayed list (BIM360 12dSynergy Dataflow). The details of the BIM360 12dSynergy Dataflow are displayed to the right of the page.
When adding the custom integration, you must be a member of the project you want to connect to.
Step 2 - Configure a BIM360 Data Flow type in the 12d Synergy Administration application
Continuing from the procedure mentioned in 1.1, select the BIM360DataFlow.dll file in the Select a task library prompt and click the Open button.
.png "uploadadf(1).png")
The path to the selected BIM360DataFlow.dll file is displayed in the Path box of the Upload a data flow window.Click the Upload button.
The data flow type is added and a confirmation message is displayed.
Click the Ok button.
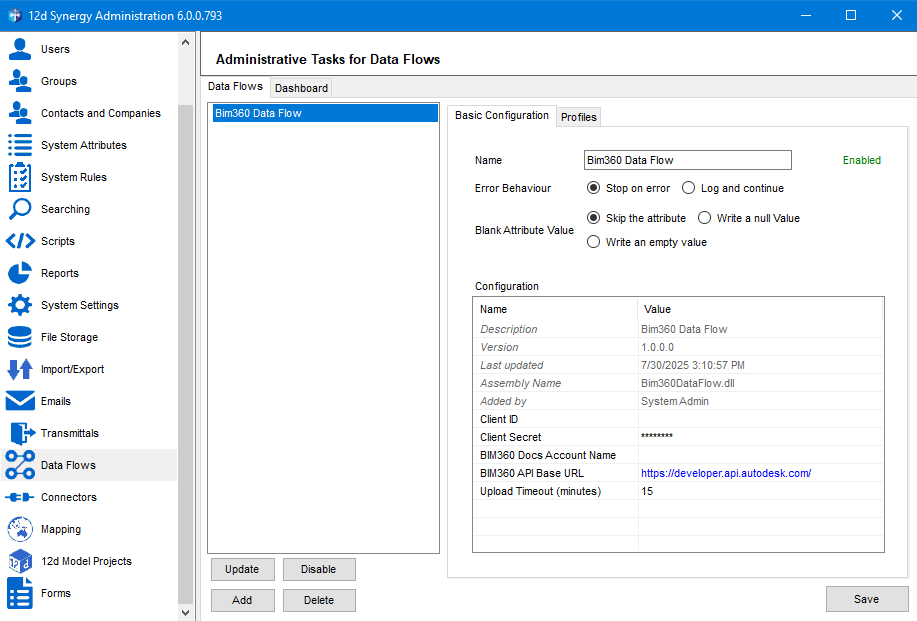
The Basic Configuration and Profiles tab are added to the 12d Synergy Administration application > Data Flows > Data Flows tab.
.jpg "admin(1).jpg")
By default, the added data flow type is enabled and the name of the data flow is displayed in the Name box. The configuration details of the added data flow type are displayed in the Configuration section.Select one of the following:
Stop on error option as the Error Behaviour.
When an error occurs while working with the BIM360 Data Flow Type, selecting this option will stop the process and write an error message in the log files.
Log and continue option as the Error Behaviour.
When an error occurs while working with the BIM360 Data Flow Type, selecting this option will write an error message in the log files and continue processing the data flow, if it can.
When the system encounters a blank value for an attribute, you can choose its reaction to it. Select one of the following options for the Blank Attribute Value field.
Skip the attribute
Write a null value
Write an empty value
In the Configuration section, enter the Client ID and Client Secret code in the Value column adjacent to Client ID and Client Secret boxes for accessing the BIM360 Data Flow Type in the 12d Synergy Client application. You can get these details from the copied content in step 6 of the Create and set up an app for BIM360 Dataflow in Autodesk Construction Cloud and Autodesk Platform Services above.
Also enter the Autodesk Construction Cloud Account Name, TDSynergyDev, from the example shown above, in the Value column adjacent to the BIM360 Docs Account Name. (Please refer to step 9 of the Create and set up an app for BIM360 Dataflow in Autodesk Construction Cloud and Autodesk Platform Services above.
Enter the URL of API base of BIM360 (https://developer.api.autodesk.com/) in the Value column of the BIM360 API Base URL row.
Client ID, Client Secret, BIM360 Docs Account Name and BIM360 API Base URL are all mandatory fields and without entering the correct details, a user cannot run a BIM360 data flow.
You can create profiles for the selected data flow type in the Profiles tab.
Click the Save button.
The BIM360 Data Flow Type is configured.
1.2. How to Set up an Egress or Ingress
After you add a data flow type in the 12d Synergy Administration application and configure its basic details, you have to create an Ingress or Egress data flow from the 12d Synergy Client application.
1.2.1. How to Create and Configure an Egress Data Flow
Egressing a file means to share a file from 12d Synergy to a third-party tool such as Projectwise or BIM 360.
You can configure multiple egress data flows for a folder.
If the original copies of the egressed files are deleted in 12d Synergy, there will be no effect on the egressed files in the external application or drive.
Create a folder and name it Egress folder or anything similar.
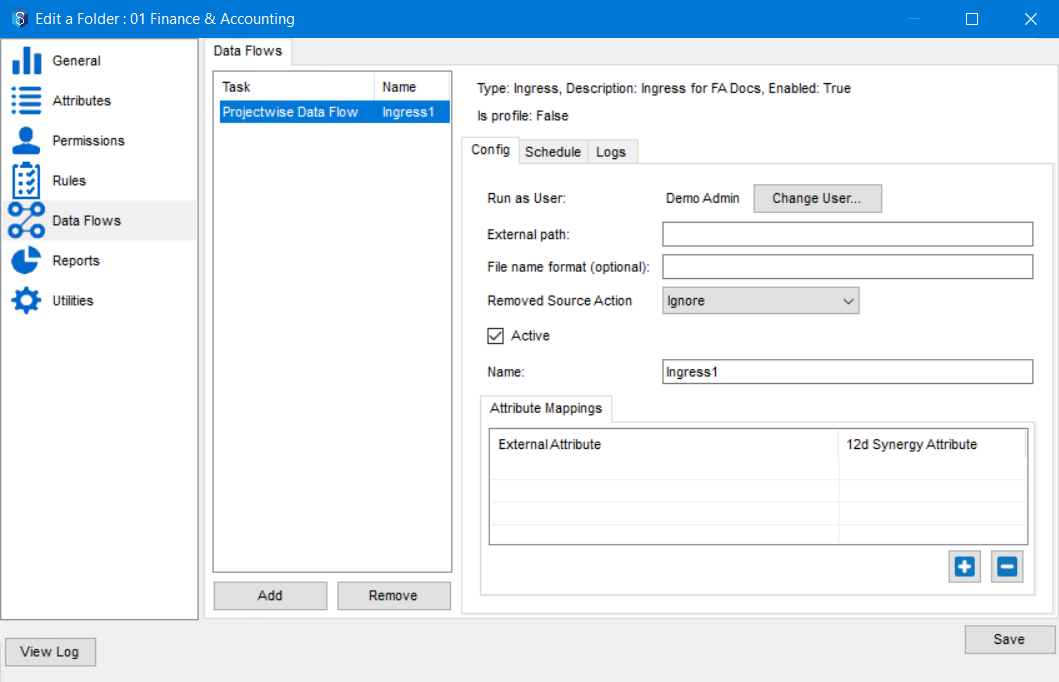
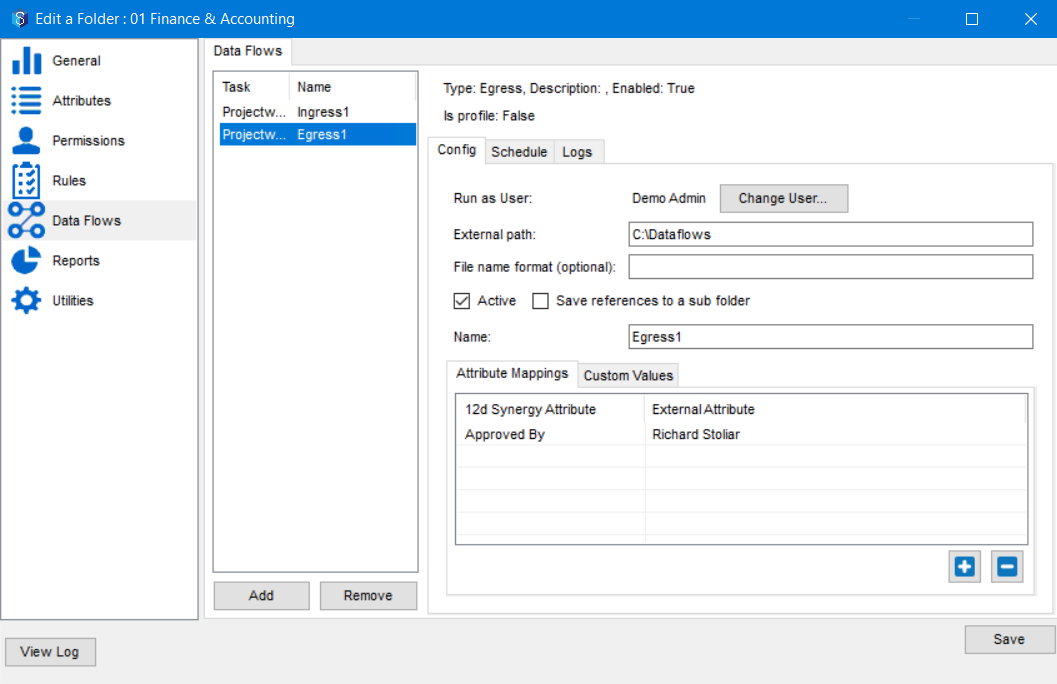
Edit the Egress folder and select the Data Flows tab in the Edit a Folder: <folder name>.
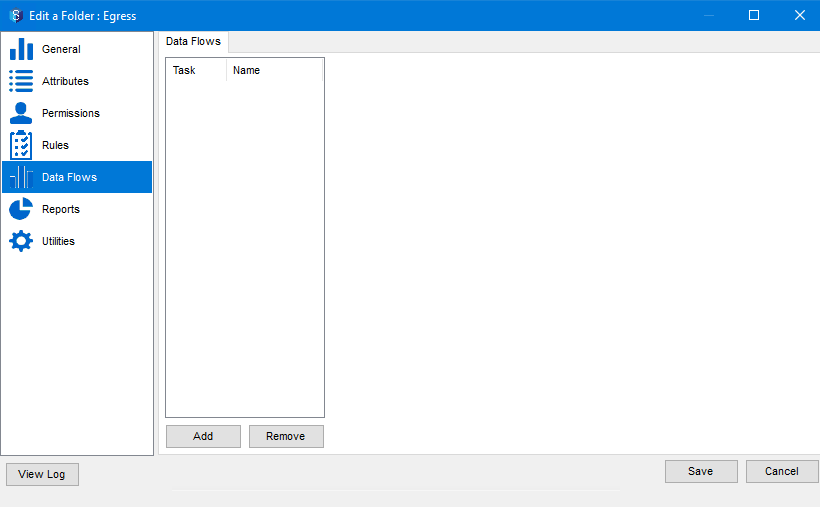
Click the Add button.
The Add New Data Flow Configuration window is displayed.
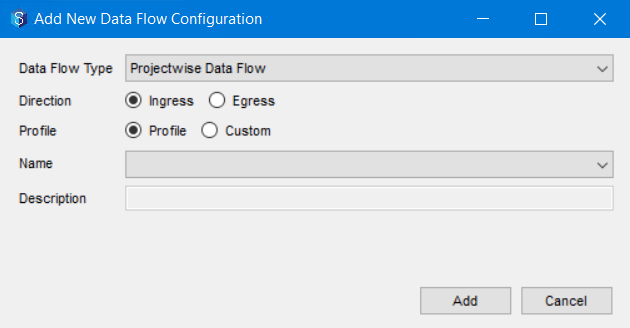
Select the required data flow type that you want to use for egressing files from the Data Flow Type list.
The data flow types configured in the 12d Synergy Administration application are displayed as options in the Data Flow Type list.
Select the Egress option for Direction.
Do one of the following:
Profile – If you want to configure the data flow using a profile, select this option and select the required profile from the Name list.
Custom – If you want to configure all the details of the data flow explicitly, select this option and enter a name for the data flow you are creating in the Name box.
Enter a description of the Egress you are creating in the Description box.
Click the Add button.
The created Egress is added to the left panel in the Data Flows tab.
Select the newly added Egress from the left panel.
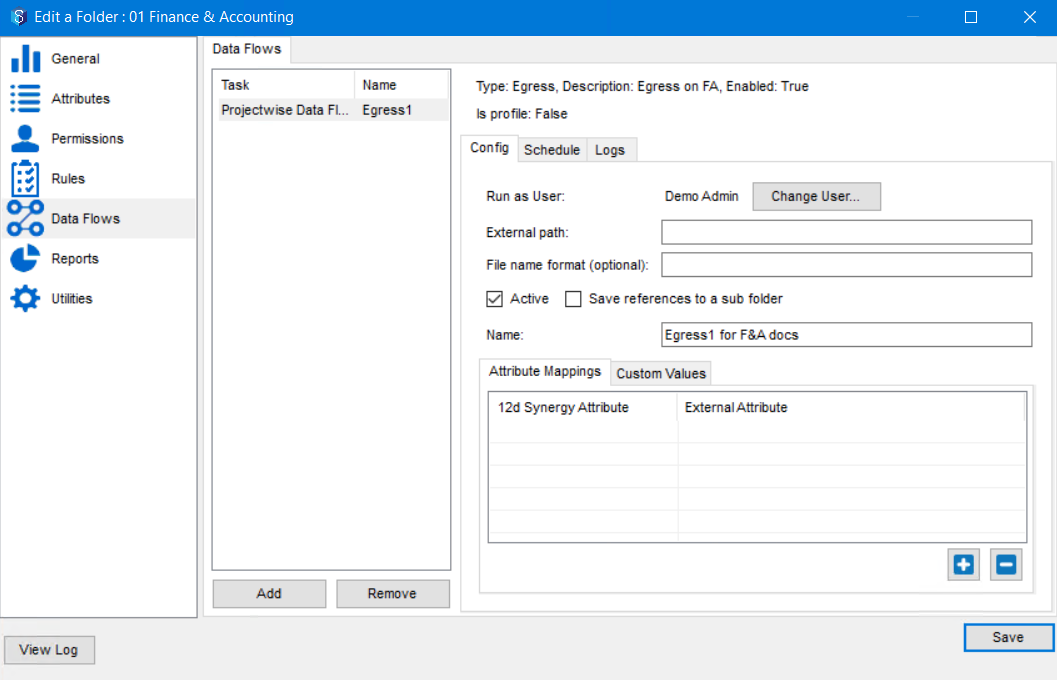
The Config, Schedule and Logs tabs are displayed on the right side of the Data Flows tab. By default, the data flow you are configuring is active as the Active check box is selected.
In the Config tab, do the following:
You can choose the user who is entitled to manually run this data flow by clicking the Change User button and selecting the required user. Ensure that the selected user has the necessary read permissions to be able to run the egress.
In the External path box, specify the path to the folder on the external application to which you want to egress (send out) data. You can also add an expression using the attributes of any entity mentioned in the table below to dynamically create a folder for egressing the files.
The format of the Expression has to be - {Entity.Entity Detail}, where the Entity and Entity Details are listed in the table below.
An example of an Expression is {User.FirstName}.
An example of an external path with an expression - {Folder.Name}\Project Files\{User.Name}.
The External path box is the only mandatory box that needs to be filled while configuring a data flow. All the other fields are optional.
If you mention only the entity as an expression such as {Folder} or {Job}, then the folder's name or job's name is considered.
If you mention only the entity as an expression, such as {User} or {Contact}, then the full name of the user or contact is considered.
Entity
Entity Details / Attributes
Description (What is added to the path)
{Folder}
CheckOut
CreatedDate
Name
ParentFolder (folder)
Job (job)
CreatedBy
A new folder named after the folder's details mentioned in the Entity Details column of this table, is created at the location mentioned in the External path box.
{Job}
ID
Parent (job)
Name
CreatedDate (date/time)
CreatedBy (contact)
Description
A new folder named after the job's details mentioned in the Entity Details column of this table, is created at the location mentioned in the External path box.
{User}
FirstName
LastName
Email
Name
Initials
A new folder named after the user's details mentioned in the Entity Details column of this table, is created at the location mentioned in the External path box.
{Contact}
FirstName
LastName
Email
Name
Initials
A new folder named after the contact's details mentioned in the Entity Details column of this table, is created at the location mentioned in the External path box.
While pointing to a location in an external application, ensure that there are no sensitive files or directories involved in the configured data flow. You are ultimately responsible for ensuring data integrity and security. 12d Synergy takes no responsibility for poorly configured Data Flows. If you need further clarification or guidance, please reach out to our support team for assistance.
While mentioning the External path details when creating a profile, ensure to use expressions to create folders so that the Ingress or Egress folders are created dynamically for separate jobs or folders.
Sample entries in the External Path box while Egressing files in Projectwise and BIM360 applications


If you want to name the egressed files in any specific format, refer to the Job and Folder entities and their attributes in the table above and enter an expression for the file name in the File name format (optional) box.
You can use only the Job and Folder entities (listed in the above table) alone with their attributes for naming a file.
If you egress files, change the file name format and perform an egress again, then the files are duplicated but with new names that now match the new file name format.
If you want to save any external references in a sub folder, then select the Save references to a sub folder check box. When this check box is not selected, the external references are saved in the same folder as the egressed files.
An external reference is when you have a file that references data which is not within the same folder as the file.
In the Attribute Mappings tab, you can map the file attributes in 12d Synergy to the file attributes used in an external application such as Projectwise.
.png)
Do the following:
Click the
 button to search and select the required 12d Synergy file attribute.
The selected attribute is displayed in the 12d Synergy Attribute column.
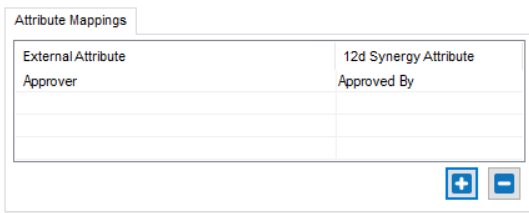
Double-click the corresponding cell in the External Attribute column and enter the name of the corresponding file attribute from the external application.
In the image above, Approved By is a file attribute in 12d Synergy, and it is mapped to a similar file attribute named Approver in the external application.
When mapping attributes, please be aware of the limitations of your chosen external application, as not all systems can handle the same metadata types as 12d Synergy.
Mapped attributes can have display names that are different from the actual attribute name. For example, an attribute called U_CAD_Type_SewerDrainage may have a display name of CAD Type Sewer Drainage in the user interface. Please contact your external CDE Administrator to get the actual attribute name for mapping, as using the display name will not work.
In the Custom Values tab, click the
 button to add an attribute from the external application such as Approver and its default value in the corresponding cell of the External Attribute Value column. In the example below, Rob Marker is the approver.
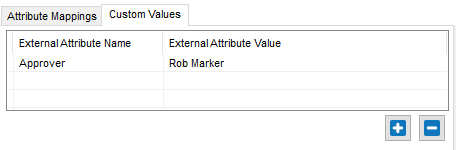
Whenever the added attribute is mapped, the default value is overwritten by the newly mapped value.
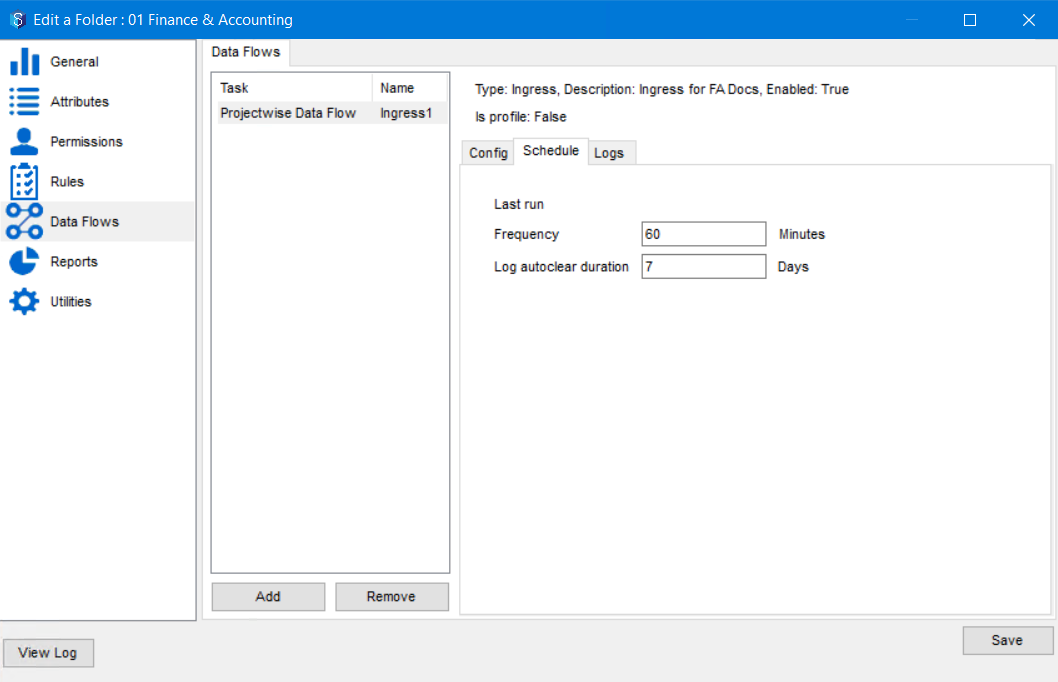
In the Schedule tab, do the following:
.png)
The time at which the last egress data flow was run is displayed against the Last run label.
Enter the time interval in minutes after which the egress data flow has to be run in the Frequency box. You must necessarily enter a value greater than zero in this field.
Enter the number of days after which the egress log has to be cleared in the Log autoclear duration box.
In the Logs tab, you can configure the criteria for generating egress log files.
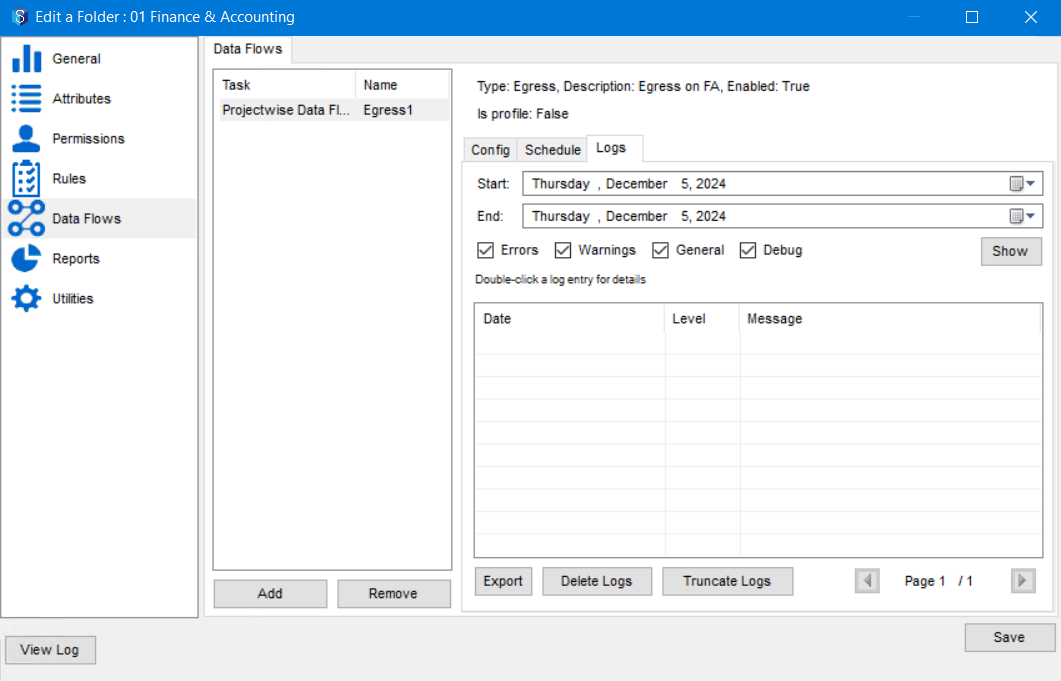
Select the start and end dates of the period for which you want to generate the logs from the Start and End list.
If you want the logs to include details of the errors encountered while egressing files, select the Errors check box.
If you want the logs to include the warnings encountered while egressing files, select the Warnings check box.
If you want the logs to include general details such as the beginning and completion of a data flow while egressing files, select the General check box.
If you want the logs to include the debugging details while egressing files, select the Debug check box.
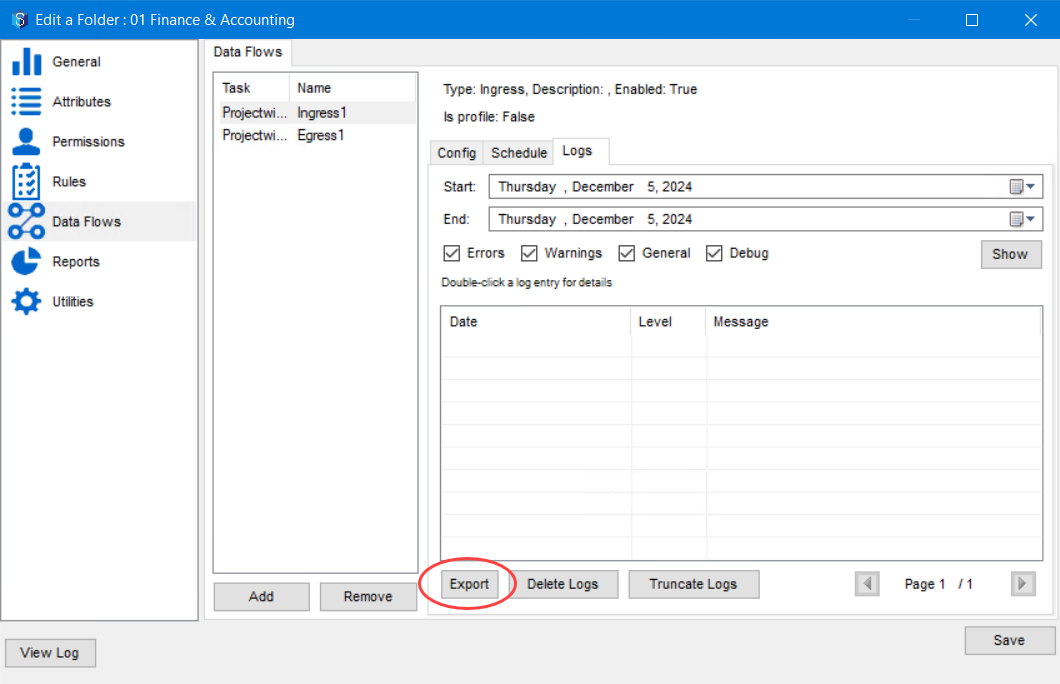
Click the Export button to create a log file for a selected period and export it to a location in the 12d Synergy Client application.
Click the Delete Logs button to delete the logs created only for this data flow.
Click the Truncate Logs button to permanently delete the logs created for all the data flows.
Click the Show button to generate the log based on the configuration. The details are displayed in the table.
If you double-click any log entry in the table to see all details of the log entry in the <Dataflow name> Log Line View window.

You can delete a data flow by simply selecting it from the left panel of the Data Flows tab and clicking the Remove button.
Click the Save button.
The Egress data flow is configured.
1.2.2. How to Create and Configure an Ingress Data Flow
Ingressing a file means to import a file from an external application such as Projectwise to 12d Synergy.
You can have only one Ingress data flow configured for a folder or a top-level managed folder.
An Ingress folder is read-only. Files in an ingress folder or its sub-folders cannot be edited. Sub folders can only be created if they are part of the data pulled in from the external system.
Create a folder or a top-level managed folder and name it Ingress folder.
Edit the Ingress folder and select the Data Flows tab in the Edit a Folder: <folder name>.
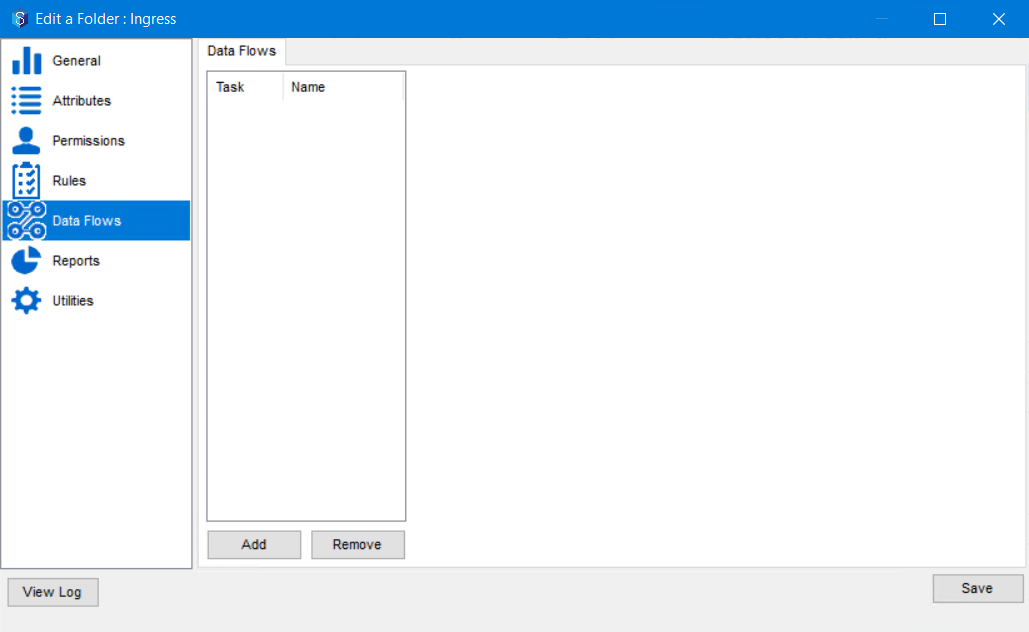
Click the Add button.
The Add New Data Flow Configuration window is displayed.
.png)
Select the required data flow that you want to use for egressing files from the Data Flow Type list.
The data flow types configured in the 12d Synergy Administration application are displayed as options in the Data Flow Type list.
Select the Ingress option for Direction.
Do one of the following:
Profile – If you want to configure the data flow using a profile, select this option and select the required profile from the Name list.
Custom – If you want to configure all the details of the data flow explicitly, select this option and enter a name for the data flow you are creating in the Name box.
Enter a description of the data flow you are creating in the Description box.
Click the Add button.
The created data flow is added to the left panel in the Data Flows tab.
Select the newly added data flow from the left panel.
The Config, Schedule and Logs tabs are displayed on the right side of the Data Flows tab. By default, the data flow you are configuring is active as the Active check box is selected.
In the Config tab, do the following:
You can choose the user who is entitled to manually run this data flow by clicking the Change User button and selecting the required user. Ensure that the selected user has the necessary read permissions to run the ingress.
In the External path box, specify the path to the folder on the external application from which you want to ingress (receive) data. You can also create expressions using the attributes of any entity mentioned in the table below to dynamically locate the apt folder in 12d Synergy for ingressing the files.
The format of the Expression has to be - {Entity.Entity Detail}, where the Entity and Entity Details are listed in the table below.
An example of an Expression is {User.FirstName}.
An example of an external path with an expression - {Folder.Name}\Project Files\{User.Name}.
The External path box is the only mandatory box that needs to be filled while configuring a data flow. All the other fields are optional.
If you mention only the entity as an expression such as {Folder} or {Job}, then the folder's name or job's name is considered.
If you mention only the entity as an expression, such as {User} or {Contact}, then the full name of the user or contact is considered.
Entity
Entity Details
Description (What is added to the path)
{Folder}
CheckOut
CreatedDate
Name
ParentFolder (folder)
Job (job)CreatedBy
A new folder, named after the folder's details mentioned in the Entity Details column of this table, is created at the location mentioned in the External path box.
{Job}
ID
Parent (job)
Name
CreatedDate (date/time)
CreatedBy (contact)
Description
A new folder, named after the job's details mentioned in the Entity Details column of this table, is created at the location mentioned in the External path box.
{User}
FirstName
LastName
Email
Name
Initials
A new folder, named after the user's details mentioned in the Entity Details column of this table, is created at the location mentioned in the External path box.
{Contact}
FirstName
LastName
Email
Name
Initials
A new folder, named after the contact's details mentioned in the Entity Details column of this table, is created at the location mentioned in the External path box.
While pointing to a location in an external application, ensure that there are no sensitive files or directories involved in the configured data flow. You are ultimately responsible for ensuring data integrity and security. 12d Synergy takes no responsibility for poorly configured Data Flows. If you need further clarification or guidance, please reach out to our support team for assistance.
Sample entries in the External Path box while Ingressing files in Projectwise and BIM360 applications
.png "projectwise_ingress(2).png")
.png "bim360ingress(1).png")
If you want to name the ingressed files in any specific format, refer to the Job and Folder entities and their attributes in the table above and enter an expression for the file name in the File name format (optional) box.
You can use only the Job and Folder entities (listed in the table above) alone with their attributes for naming a file.
If you ingress files, change the file name format and perform an ingress again, then the files are duplicated but with new names that now match the new file name format.
When you ingress data in to 12d Synergy, all the files that are ingressed are displayed in the Files tab of the Ingress Folder dashboard view. Consider a case where after you ingress a file from an external source, which after ingressing is deleted in the external source. When the ingress is run the next time, the deleted file can be shown as a deleted file in 12d Synergy, or it can be simply ignored and remain as a file in the Ingress folder. This setting can be made using the Removed Source Action list.
Select the Ignore option to let the file be as it was in the Ingress folder before its deletion in the external drive.
Select the Mark As Deleted option to mark the file as deleted in the State column of the Folder dashboard view.
.png "dataflows.doc-image-0d5zvxdu(1).png")
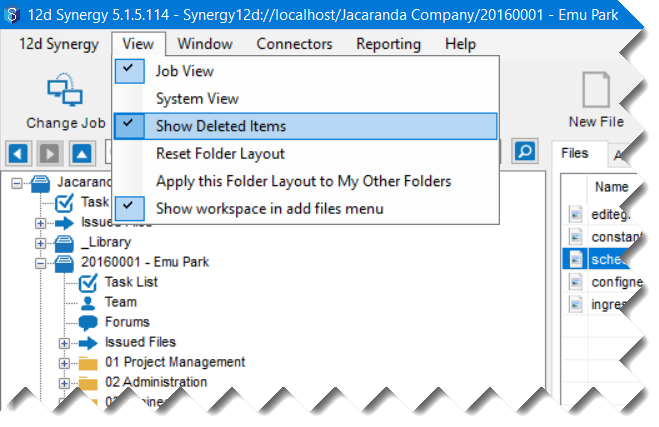
To view the deleted files, ensure that the 12d Synergy Client application > View menu option > Show Deleted Items option is selected. A tick mark is displayed against the option when it is selected. Only if this option is selected and the Mark As Deleted option is selected in the Removed Source Action list of the Edit a Folder: <folder name> , you will be able to view the Deleted status in the State column of the Folder dashboard view.
In the Attribute Mappings tab, you can map the file attributes in 12d Synergy to the file attributes used in an external application such as Projectwise.
Do the following:
Click the
 button to search and select the required 12d Synergy file attribute.
The selected attribute is displayed in the 12d Synergy Attribute column.
Double-click the corresponding cell in the External Attribute column and enter the name of the corresponding file attribute from the external application.
In the image above, Approved By is a file attribute in 12d Synergy and it is mapped to a similar file attribute named Approver in the external application.
When mapping attributes, please be aware of the limitations of your chosen external application, as not all systems can handle the same metadata types as 12d Synergy. Mapped attributes can have display names that are different from the actual attribute name. For example, an attribute called U_CAD_Type_SewerDrainage may have a display name of CAD Type Sewer Drainage in the user interface. Please contact your external CDE Administrator to get the actual attribute name for mapping, as using the display name will not work.
In the Schedule tab, do the following:
The time at which the last ingress data flow was run is displayed against the Last run label.
Enter the time interval in minutes after which the ingress data flow has to be run in the Frequency box. You must necessarily enter a value greater than zero in this field.
Enter the number of days after which the ingress log has to be cleared in the Log autoclear duration box.
In the Logs tab, you can configure the criteria for generating ingress log files.
.png)
Select the start and end dates of the period for which you want to generate the logs from the Start and End list.
If you want the logs to include details of the errors encountered while ingressing files, select the Errors check box.
If you want the logs to include the warnings encountered while egressing files, select the Warnings check box.
If you want the logs to include general details such as the beginning and completion of a data flow while ingressing files, select the General check box.
If you want the logs to include the debugging details while ingressing files, select the Debug checkbox.
Click the Export button to create a log file for a selected period and export it to a location in the 12d Synergy Client application.
Click the Delete Logs button to delete the logs created only for this data flow.
Click the Truncate Logs button to permanently delete the logs created for all the data flows.
Click the Show button to generate the log file based on the configuration.
If you double-click any log entry in the table, you will see all details of the log entry in the <Dataflow name> Log Line View window.

You can delete a dataflow by simply selecting it from the left panel of the Data Flows tab and clicking the Remove button.
Click the Save button.
The Ingress data flow is configured.
1.3. How to Disable a Data Flow Type
1.3.1. Globally using the 12d Synergy Administration application
In the 12d Synergy Administration application, select the Data Flows > Data Flows tab.
All the added data flows are displayed in the left panel.
.png)
Select the data flow type you want to disable from the left panel and click the Disable button under the left panel.
The following confirmation message is displayed.

Click the Yes button.
All the data flows created for the selected type across all your jobs in 12d Synergy are disabled.
1.3.2. Locally using the 12d Synergy Client application
In the 12d Synergy Client application, access the folder for which you want to disable a data flow type.
Right-click the folder and select the Edit Folder option.
The Edit a folder: <Egress folder name> window is displayed.
Select the Data Flows tab.
Select the data flow type you want to disable from the left panel of the Data Flows tab.
Clear or deselect the Active check box in the Config tab.
Click the Save button.
All the data flows created on the folder for the selected external application are disabled.
1.4. How to Update a .dll File for a Data Flow
When you receive a new .dll file from us for an external application you are already connected to, you will need to update the existing one. It is recommended that this procedure be done after business hours, as it requires a restart of the 12d Synergy Server.
Save the new .dll file in a local location.
In the 12d Synergy Administration application, select the Data Flows > Data Flows tab.
Select the data flow for which the .dll needs an update.
Click the Update button.
The Update task library window is displayed.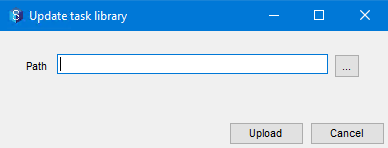
Click the ellipsis
button against the Path box.Browse and select the new .dll file from the local location and click the Upload button.
The new .dll file is uploaded and the following confirmation message is displayed.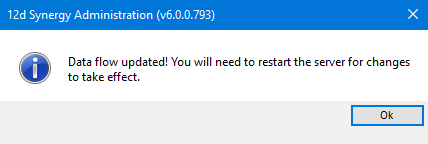
Click Ok.
To restart the 12d Synergy Server, click the Restart button in the 12d Synergy Administration application > General tab > Maintenance tab > Restart tab.
Once the restart is done, the new .dll will take effect.
It is recommended that this procedure be performed after business hours, as it requires restarting the 12d Synergy Server.
1.5. Profiles
A profile is like a template for defining a data flow. When you configure and create a data flow that has to be replicated for different folders in the same job or in different jobs, then instead of entering all the configuration details multiple times, you can just create a profile and use that profile whenever you are creating a data flow. However, some details still have to be configured when creating the data flow.
1.5.1. How to Create and Configure a Profile
In this procedure, we have demonstrated creating an ingress profile. The procedure for creating an egress profile is very similar to this one. The only difference is in steps 3 and 7, where you have to select Egress Profiles tab.
In the 12d Synergy Administration application, select the Data Flows > Data Flows tab.
The added data flow types are displayed in the left panel.
.png)
Select the data flow type for which you want to create a profile from the left panel and click the Profiles tab.
The Ingress Profiles and Egress Profiles tabs are displayed. Let us create an Ingress profile in this procedure.
Click the Ingress Profiles tab.
Click the
 button to create an ingress profile.
The Create Data Flow Profile window is displayed.
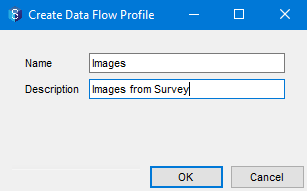
Enter a name and description for the data flow profile in the Name and Description boxes.
Click the OK button.
The profile is created and is displayed in the left panel of the Ingress Profiles tab.
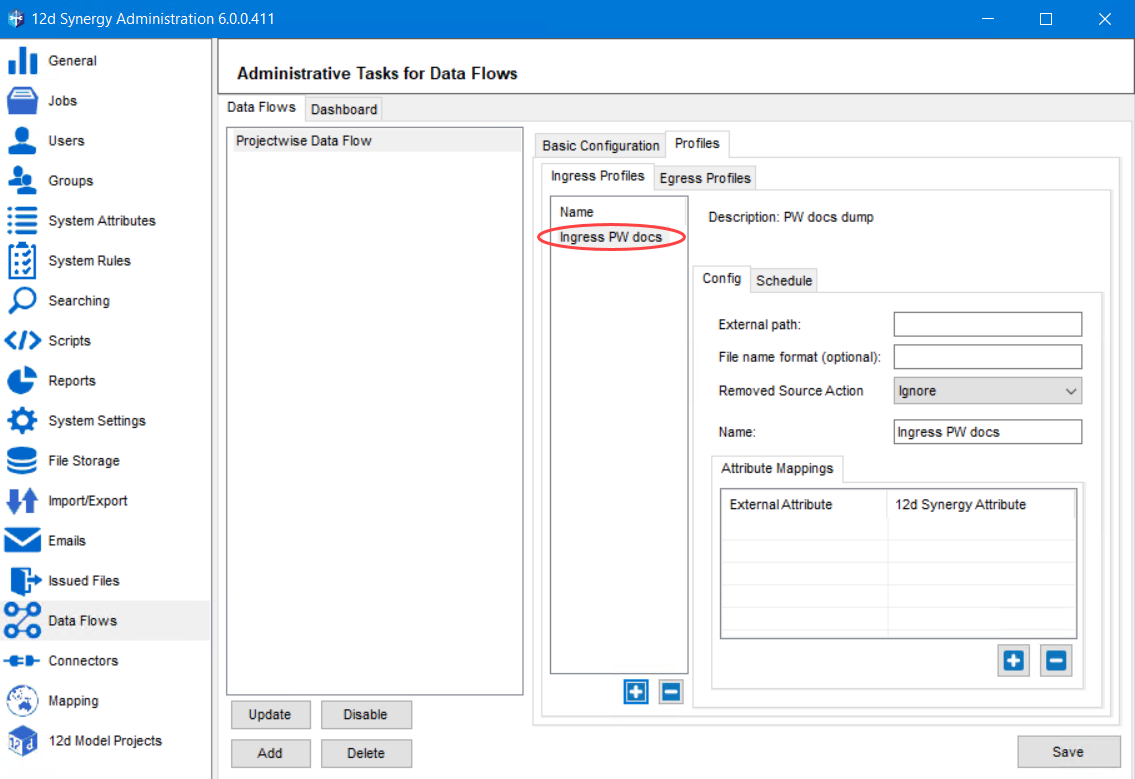
Select the newly created profile from the left panel of the Ingress Profiles tab.
The Config and Schedule tabs are displayed in the right side of the Ingress Profiles tab.
Configure the fields displayed in the Config tab. (Please refer to step 10 of section 1.2.2.)
While mentioning the External path details for a profile, ensure to use the expressions to create folders so that the Ingress or Egress folders are created dynamically for separate jobs or folders.
Configure the fields displayed Schedule tab. (Please refer to step 11 of section 1.2.2.)
Note that while creating profiles, there are only some fields to configure when compared to the fields that are displayed while configuring a data flow in the 12d Synergy Client application.
Click the Save button.
The ingress profile is now created.
You can create multiple ingress or egress profiles for a data flow.
A profile created for one data flow type is applicable only to that data flow type. This means that if you create a profile for a BIM360 data flow type, it will NOT be applicable to the Projectwise data flow type.
If you want to have ingress and egress profiles for a data flow type, you must create them explicitly for that data flow type.
1.6. How to Export Data Flow Logs
After generating a log in the Edit a Folder window > Data Flows tab > Logs tab for either an Egress or Ingress folder, click the Export button.
The Export Settings window is displayed.
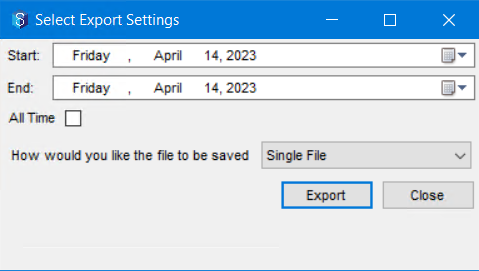
Do one of the following:
Select the period for which you want to generate a log using the Start and End calendar lists.
Select the All Time check box to generate a log from the time that data flow created.
In the How would you like the file to be saved list, select one of the following options:
Single File – to export the report as a one off instance
Daily – to export day-wise report for the set period
Monthly – to export a month-wise report for the set period
Yearly – to export a year-wise report for the set period
Click the Export button.
The Find a job window is displayed.
Browse and select the required job and folder to which you want to export the log, enter a file name for the log and click the Select button.
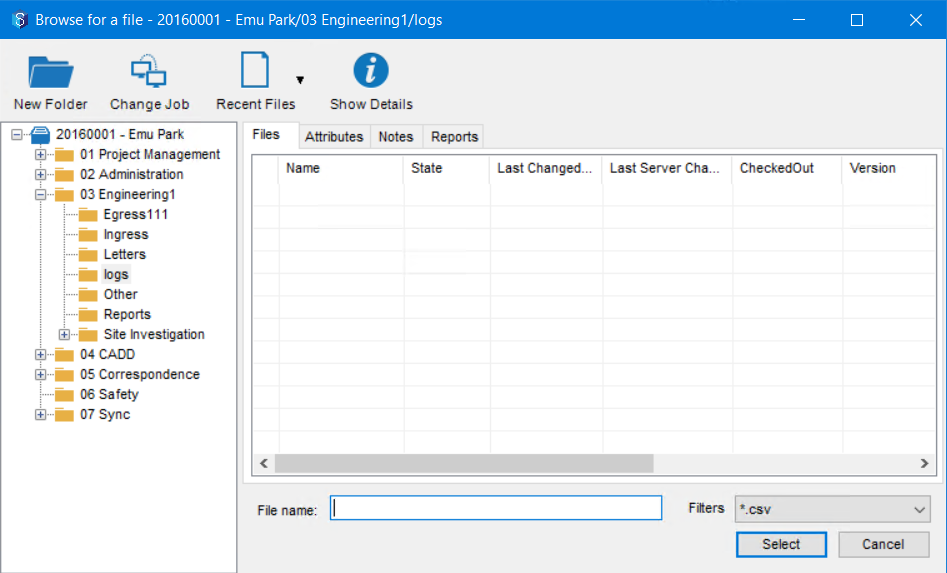
The data flow log is created and is saved at the selected location and a confirmation message is displayed.
1.7. How to Manually Run a Data Flow
While the 12d Synergy Administrator can schedule when a data flow runs, an end user can also manually run it from the 12d Synergy Client application.
To run a data flow, right-click the Ingress or Egress folder and select the Data Flows > Run Ingress option (or Run Egress, Run All Egress option).
Based on the folder you select, and the number of data flows configured on it, the right-click options change.

1.8. How to View a Summary of Dataflows
This feature is available in 12d Synergy version 5.1.7 or later.
In the 12d Synergy Administration application, select the Data Flows tab > Dashboard tab. All the Ingress and Egress data flows that are created in your project (jobs) are displayed. You can view all the details of each dataflow in the table.
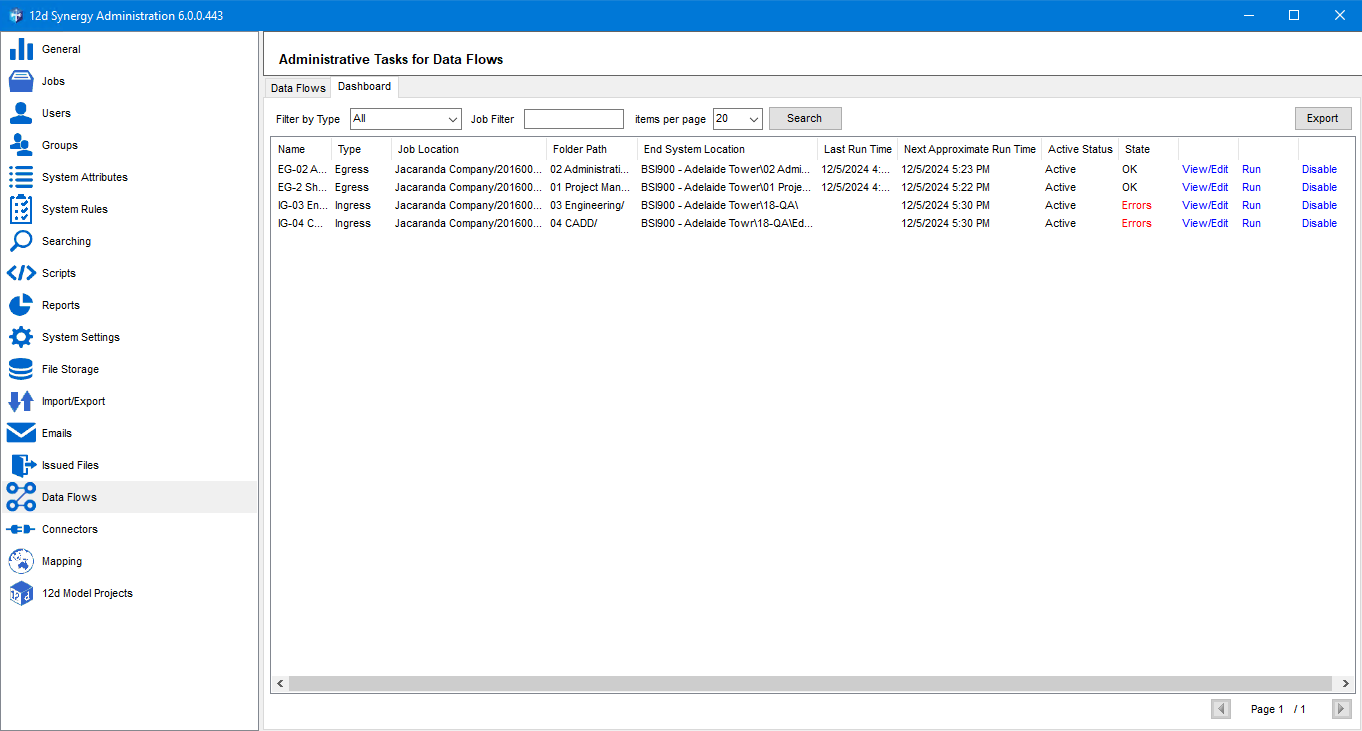
You can do any of the following from this window.
Filter by the type of data flow by selecting the required option from the Filter by Type list and click the Search button.
Filter the data flows by the job in which they are created by entering the name of the required job in the Job Filter box.
Select the number of items you want to see in each page from the Items per page list.
Check the status of each data flow by seeing the State column. You can have only three states for a data flow. They are OK, Errors and Running.
Double-click a row or click the View/Edit link to view or/and edit the details of the data flow in the Edit a Folder: <Folder Name> window. (Refer to step 9 of 1.2.2.)
Click the Run link to run the data flows. The link is changed to Abort and you can click that link if you want to stop the data flow from running further.
Click the Disable link to disable the data flow. Once disabled, the link is then displayed as Enable and you can enable the data flow by clicking on the Enable link.
Click the Export button to export the data flows dashboard to a .csv file and save it in any chosen location in your jobs.