v6 feature
Forms are used to collect information from your users, customers and/or clients. You can have forms for collecting data for many reasons, such as field surveys, registration processes, customer satisfaction surveys, handling client requirements, etc. 12d Synergy gives you the capability to collect the required data in a customised form built with a drag-and-drop editor. You can control the display of data elements and process them as per your dynamic needs. These forms are designed by the 12d Synergy Administrators and accessed by 12d Synergy users, based on the rights given to them by the 12d Synergy Administrators.
1.What can you do from the 12d Synergy Web application
1.1. Create and Share a Link to the Form for Form Fills
1.2. Generate a QR Code and Share it for Form Fills
1.3. Fill out a Form as an Anonymous or Authorised User
.png)
1.4. Review Anonymous Form Fills
Anonymous users are non-12d Synergy users with whom the form is shared via a link or a QR code for a form fill. When they submit a form, its status is displayed as Pending Review in the Anonymous Form Fills tab..png)
These forms must be reviewed by either the 12d Synergy user who shared the form or your 12d Synergy Administrator. The review comes into play only if your 12d Synergy Administrator has NOT enabled the CAPTCHA feature. You can review and submit it by clicking the Review ![]() icon displayed against the form, and then the Submit
icon displayed against the form, and then the Submit ![]() button in the form. The status of the form is now displayed as Completed.
button in the form. The status of the form is now displayed as Completed.
However, if your 12d Synergy Administrator has enabled the CAPTCHA feature, then forms filled by an anonymous user need not be reviewed. The status of a submitted form is directly displayed as Completed in the Anonymous Form Fills tab.
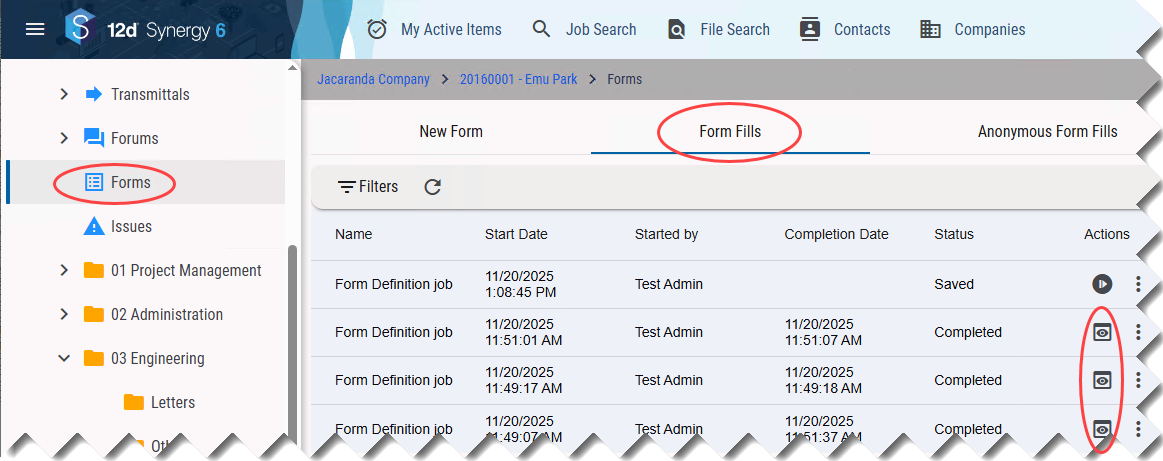
1.5. View all the Saved or Completed (filled and submitted) Forms by Authorised Users
You can view a submitted or saved form by clicking the View ![]() icon or Continue
icon or Continue  icon displayed against the filled-out forms.
You can do this from the following pages:
In the Forms link of the job tree > Form Fills tab.

When you view the output file in the file view > Forms tab > Form Fills tab.
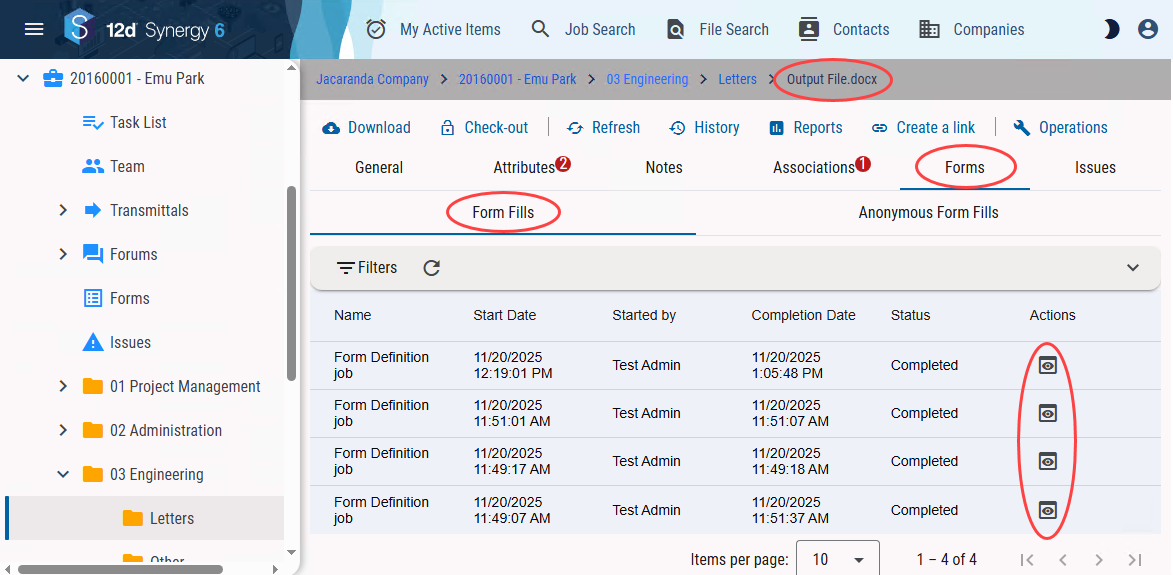
1.6. View the Output Files
You can view the output files by clicking the vertical ellipsis  icon > Output files option.
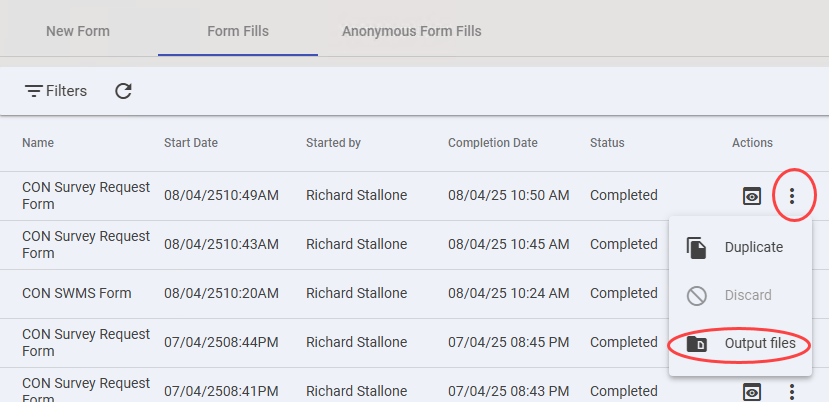
If the Output files icon is greyed out, it can mean one of the following:
You have not mentioned the path to the output file in your form definition. So, no output file would have been created.
You are viewing a form that has not yet been submitted (it may be pending review, or it needs to be continued and submitted).
The Output files prompt is displayed.
.png)
Click the file name to open the output file. If you have embedded any files in the form, a link to those files is displayed in the output file.
1.7. Re-submit Completed Forms
If you want to create an output file again for a completed form, you can resubmit the form by clicking the View ![]() icon displayed next to the completed form.
icon displayed next to the completed form.
You can then click the Resubmit ![]() button displayed in the form.
button displayed in the form.
You can do this from the following pages:
In the Forms link of the job tree > Form Fills tab.
When you view the output file in the file view > Forms tab > Form Fills tab.
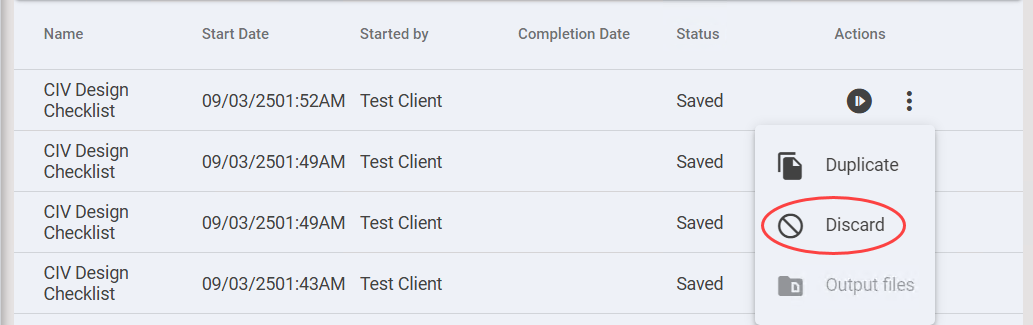
1.8. Discard the Saved (but not Submitted) Forms
You can discard the following by clicking the vertical ellipsis
icon > Discard option in the Forms link of the job tree.an anonymous form fill that is not yet reviewed in the Anonymous Form Fills tab
a saved form that is not yet submitted in the Form Fills tab
1.9. Duplicate Form Fills
You can duplicate a completed form or a saved form. In the duplicated form, all fields are editable.
.png)
2.How to Fill Out a Form
You can fill out a form in any of the following ways.
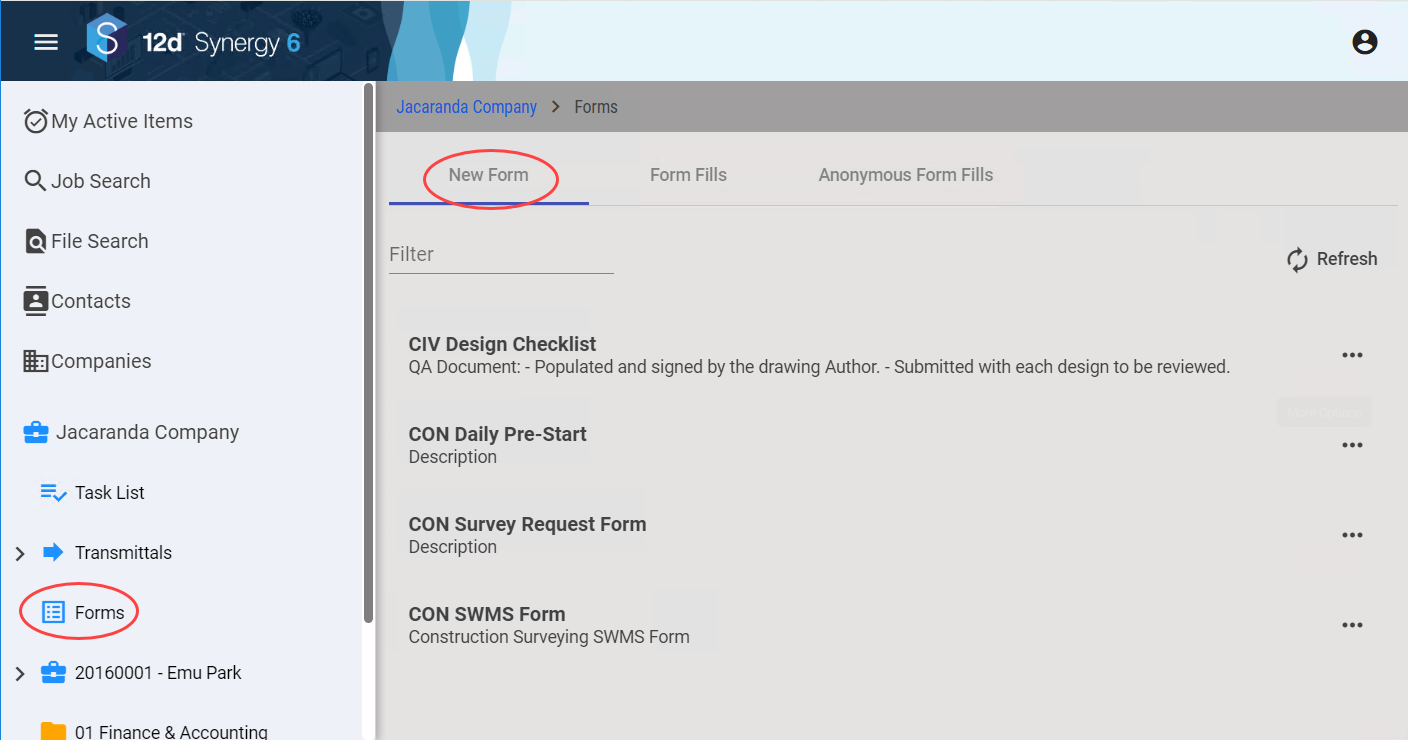
By selecting a form in the Forms link of the job tree > New Form tab.
By clicking the link to a form that is generated and shared with you by another 12d Synergy user.
By scanning the QR code that is generated and shared with you by another 12d Synergy user.
All forms filled up by authorised users are displayed in the Forms tab of the job > Form Fills tab, and those filled out by anonymous users are displayed in the Anonymous Form Fills tab.
Forms that are filled out by using a link or a QR code can be submitted by both anonymous and authorised users. It is based on which user you select for sharing the link or QR code.
Note the following:
A question marked with a red asterisk (*) in the form means that it is a mandatory question and must be answered.
If you try to submit a form with unanswered mandatory questions, it will not be submitted.
You can save a form to come back to it later for submission. Such forms are displayed in the Form Fills tab with a Continue
icon to complete the form.
.png)
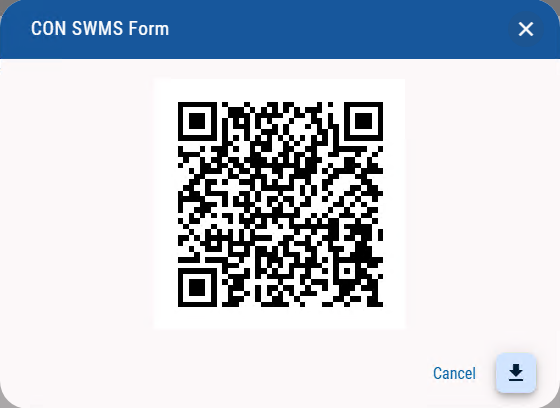
3.How to Create a Link/QR Code and Share it for Form Fills
In the 12d Synergy Web application, select the Forms tab from the job tree and then select the New Form tab.
Click the ellipsis
 button displayed against the form for which you want to generate a link/email a link/create a QR code.
The following three options are displayed.
.png)
Do one of the following:
To create a link to the form click the Create Link option.
To directly email the link to the form to someone, click the Email Link option.
To create a QR Code, click the QR code option and follow this procedure.
For any option you select above, the following two options are displayed.
.png)
Do one of the following:
Select the Authorised option if you want the user to log in to 12d Synergy to do the form fill.
Select the Anonymous option if anyone can do a form fill, and the form fill is displayed under
If you select the Anonymous option for a form that includes any data that needs to be retrieved from the 12d Synergy Server in its definition, then the following message is displayed.
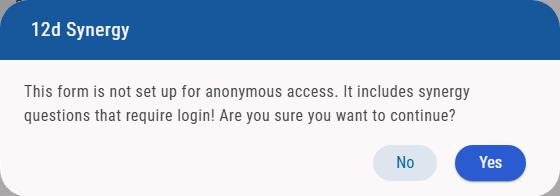
This means you cannot have an anonymous user fill out such a form. This is done to protect the privacy of the 12d Synergy data in your system. Clicking Yes will redirect you to the Login page.
Based on the option you select in step 3, the following actions occur.
If the Create Link option is selected, a link is created for the type of user you select in step 4 above and is copied to the clipboard.
If the Email Link option is selected, you will be prompted to add the contacts to whom you want to email the link to the form fill.
If the Create QR code option is selected, a QR code is generated and displayed. You can also download the QR code onto your system using
 icon and share it with the persons/contacts for a form fill.