Client Content
Each 12d Synergy job can contain tasks to describe work that must be completed. A Task List is used to assign tasks to users and to track their progress. Tasks can be linked together with actions or associated with other entities in your system. You can set reminders and prompt users of upcoming tasks and their due dates. Filling out forms can also be a part of a task. You can also create dependent tasks which can be used to trigger other tasks or actions such as emails being sent.
For example, consider a parent task called “Create OPW set of drawings”. The primary sub-task for this parent task would be to complete a set of drawings. At its completion, a secondary task is triggered for the drawings to be reviewed, which could be assigned to a project engineer. As the secondary task is completed, a tertiary task is triggered to send the drawings to the RPEQ Engineer for approval.
You must have the Task Manager permission set applied or the equivalent explicit permissions needed to create, edit or delete tasks. To view the tasks in the Task List you must necessarily have the Data Read permission set applied. Your 12d Synergy Administrator can give you these permissions.
1.1. How to View a Task
In the 12d Synergy Client application, click the Task List link in the tree structure of the job.
The Task list is displayed.

To view the Task list without the tree hierarchy, right-click any parent task and select the Show Flat option.
To view the tasks created by you only, select the Show my tasks only? checkbox on the 12d Synergy banner.
To view sub-job tasks only, select the Show sub job tasks? checkbox on the 12d Synergy banner.
To view open tasks only, select the Show open tasks only? checkbox on the 12d Synergy banner.
You can sort each column by clicking the header row. Click the Refresh button to return to its original view.
1.2. How to Create a Task
In the 12d Synergy Client application, select the job in which you want to create a task.
Click the Task List link in the tree structure of the job.

Click the New
 button.
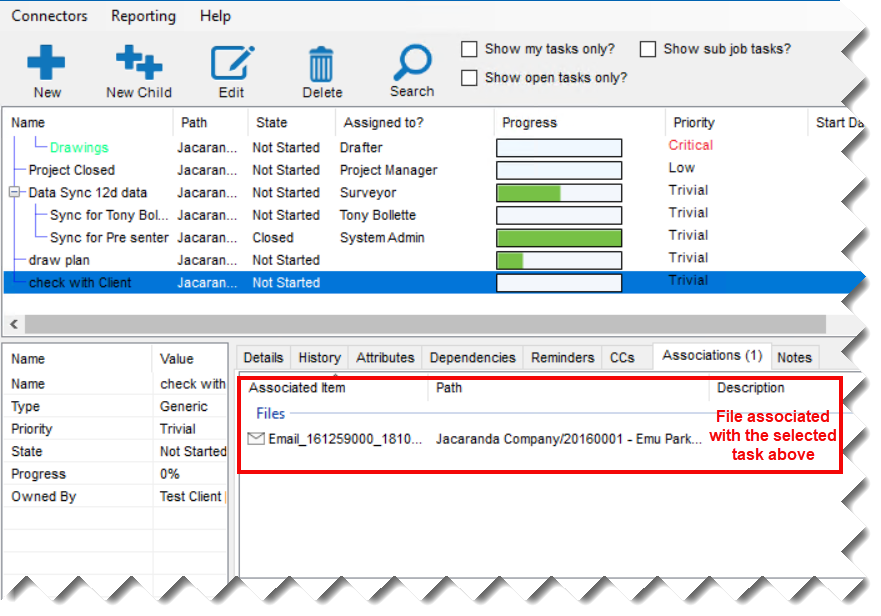
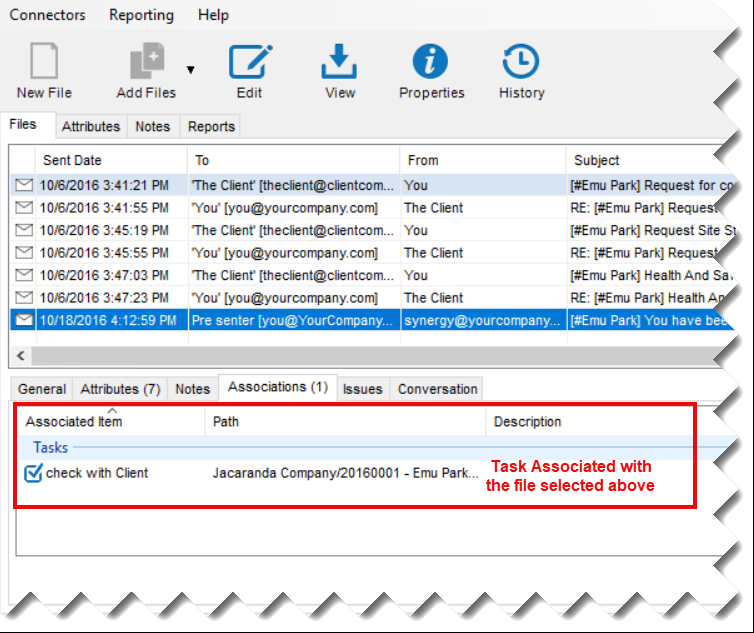
The Create Task window is displayed.You can also create a task directly from a file by selecting a file and using the right-click option Other > Create task. When you create a task through this feature, the file gets added as an association of the task, and the task gets added as an association for the file. Please note that you must necessarily have the Data Reader permissions for viewing the tasks in the Task List.
File associated to the task
Task associated with the file
In the Create Task window, enter the name of the task in the Name box.
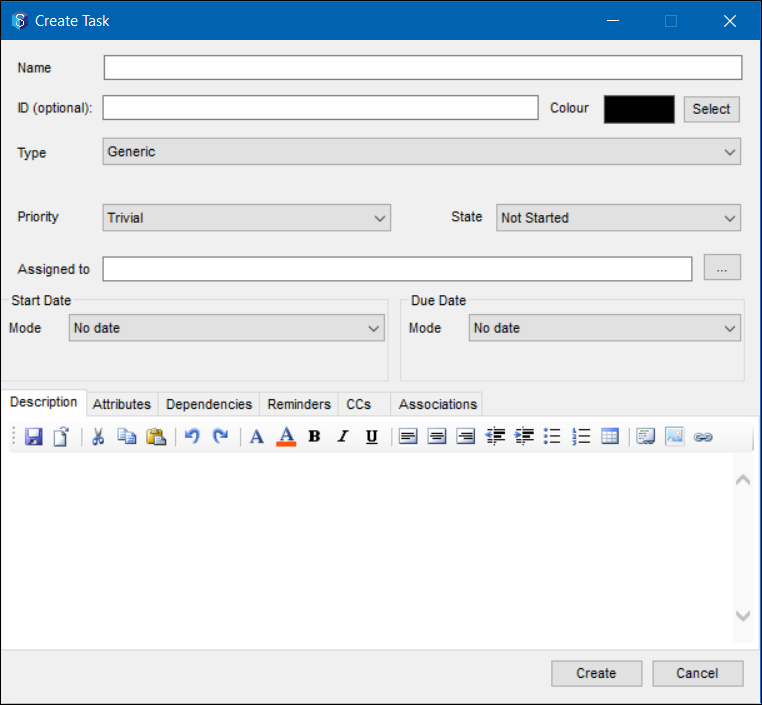
Enter a task identification number, if required, in the ID box.
Click the Colour box and select the font colour for the display of the new task.
Select the type of task from the Type list.
12d Synergy comes with only the Generic task type. However, your 12d Synergy Administrator can create more task types from the 12d Synergy Administration application to define what the task is for. These newly created types will then be displayed in the Type list while creating a new task. A task must have a type - this helps define information about what the task is for, and may include other information such as attributes or even create a series of sub-tasks automatically.
Select the priority level of the task from the Priority list.
Select the completion status of the task from the State list.
Your 12d Synergy Administrator can configure and define the status options and their order from the 12d Synergy Administration application. The movement of the task from one state to the other can also be defined by your 12d Synergy Administrator. For example, you may not be able a move a Task from 'Open' state to 'Closed' state without it going through a 'Review' state first.
Click the ellipsis
 button against the Assigned To box to do one of the following:
Select a contact – Select this option to assign the task to a specific person.
Select a team role – Select this option to assign the task to a specific team role that exists on the job.
It is a good practice to assign tasks to a team role instead of a contact. If a contact leaves a job, you can easily reassign their work simply by updating the new contact to the team role. If you don't use a team role, you will need to manually reassign all their tasks to the contact. For more info on Teams, refer to the Teams.
In the Start Date section, select an appropriate start date from the Mode list. It can be a fixed date or a date relative to the initiation or completion of another task or a parent task.
If a fixed date is selected, select a date by clicking the calendar
 icon against the Date list.
In the Due Date section, select an appropriate due date from the Mode list. It can be a fixed date, a day relative to the start date of the same task, or a date relative to the initiation or completion of another task.
If a fixed date is selected, select a date by clicking the calendar
 icon against the Date list.
Click the ellipsis button against the Assigned To box to do ONE of the following:
In the Description tab, enter an optional description for the task in the text editor.
In the Attributes tab, you can view and update the attributes that your 12d Synergy Administrator has defined for the type of task you have selected.
You can create a dependency for a task in the Dependencies tab.
You can create a reminder in the Reminders tab.
You can notify others of changes and updates to the tasks in the CCs tab.
You can associate the task with other entities such as a file, folder, project, etc. in the Associations tab. If you associate a task with a file, checking in that file will prompt you with the option to update the task as well.
You can attach a form to the task in the Forms tab.
Click the Create button.
The task is created and is displayed in the task list in the selected font colour.
1.3. How to Search for a Task
You can perform a search for tasks at two levels - the system-level, and the job-level.
1.3.1. System-level Search
A system-level search searches across all the jobs in your 12d Synergy system. The search results are then displayed job-wise.
In the 12d Synergy Client application, select the View > System View menu option.

The System View > Files tab is displayed.Select the Tasks tab.

In the Task Attributes section, double-click in the Value column of the attribute(s) to mention the task search parameters.
You can select the value for the attribute accordingly.Select the Show collapsed list? checkbox to display only the job(s) containing the search results. This means the search results are displayed as a collapsed tree structure of the jobs which include the search results.
Click the Search button.
The search results are displayed in the right panel accordingly.
Click the Reset button to start a new search.
1.3.2. Job-level Search
A job-level search searches only the Task List of the selected job for the required task(s). The search results display all the tasks in the job that match the search criteria.
Click the Task List tab in the job tree.
The Task list view is displayed.
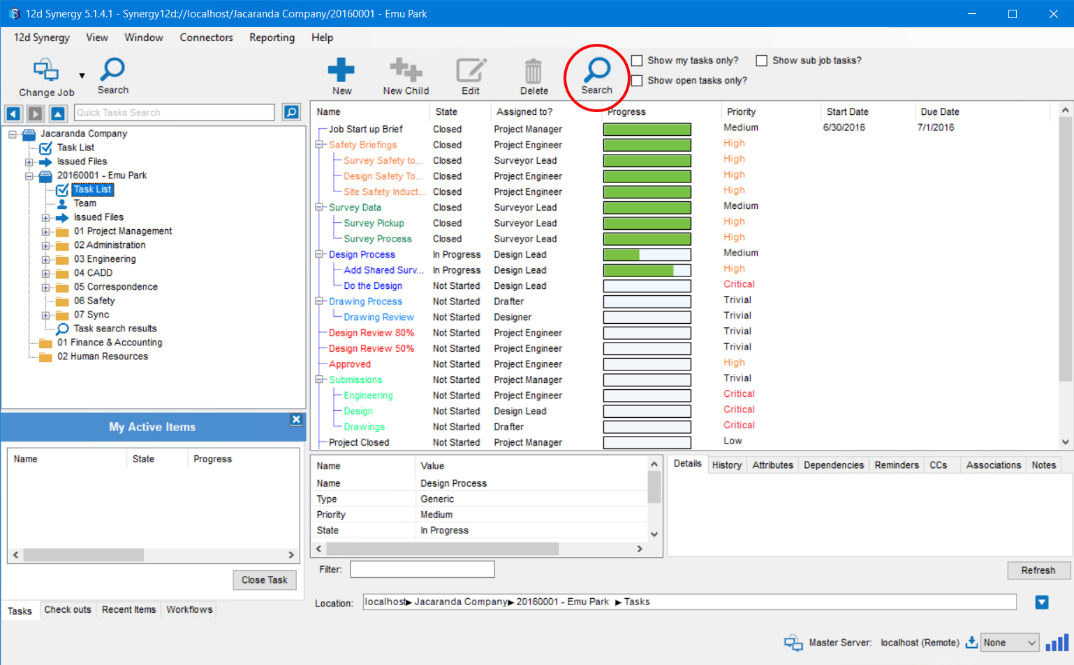
Click the Search
 icon displayed above the task list.
The Search for tasks window is displayed.
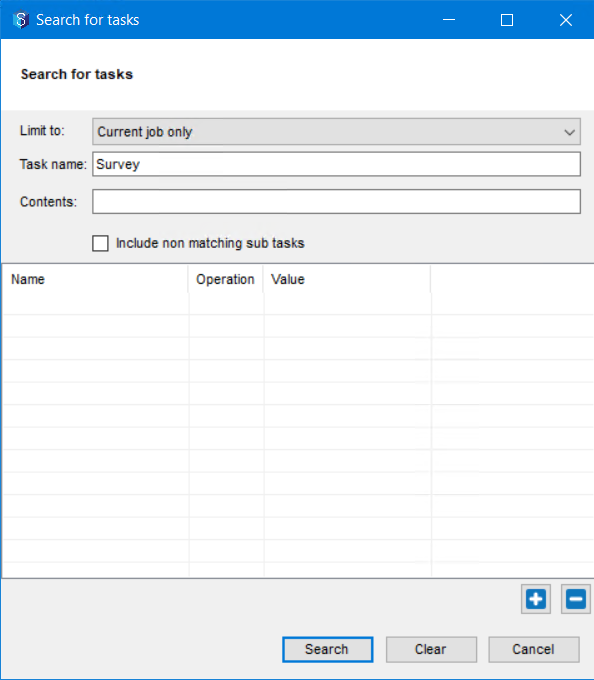
Enter the search criteria in the relevant boxes.
In the panel below, click the
 button to add attributes and the search criteria related to those attributes.
Click the Search button.
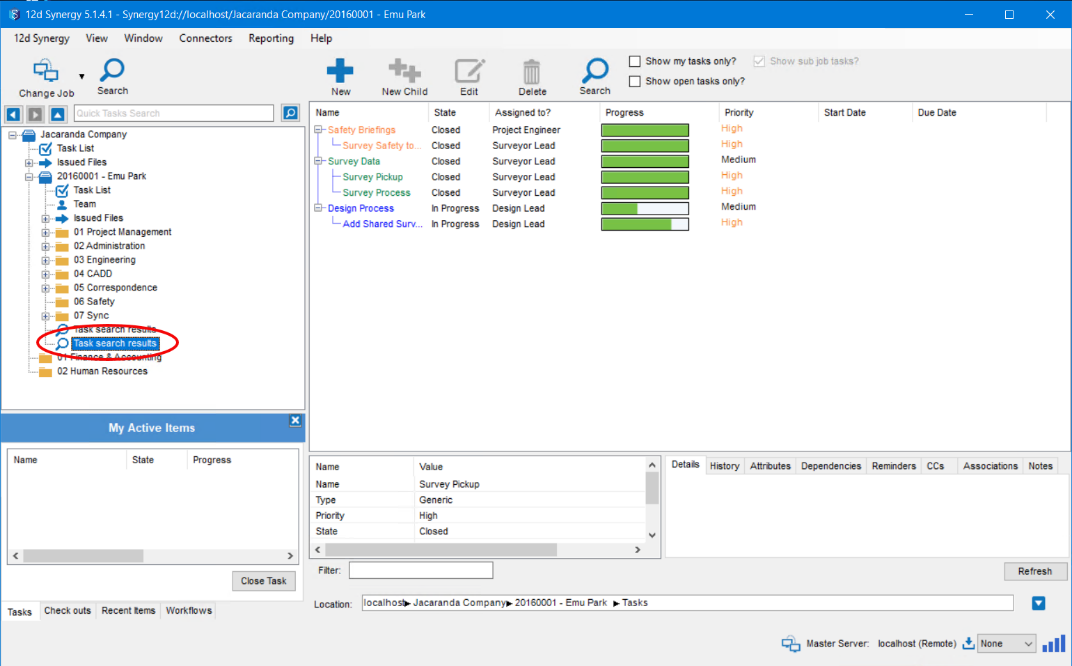
The search results are displayed as the Task search results tab in the tree structure. The list of tasks that match the search criteria are displayed in the right panel when the Task search results tab is selected.
1.4. How to Edit a Task
Click the Task List tab in the job tree.
The Task list view is displayed.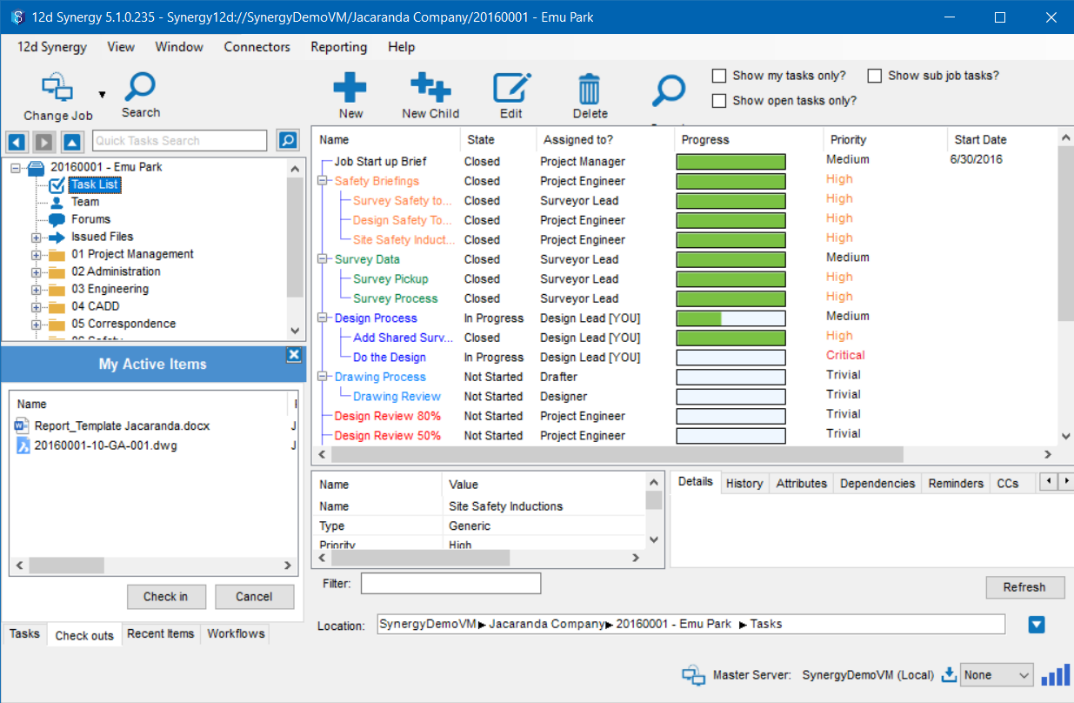
Click the task you want to edit.
Click the Edit
 button.
The Edit<task name> window including the Task History is displayed. The Task History panel describes how the task has changed over time.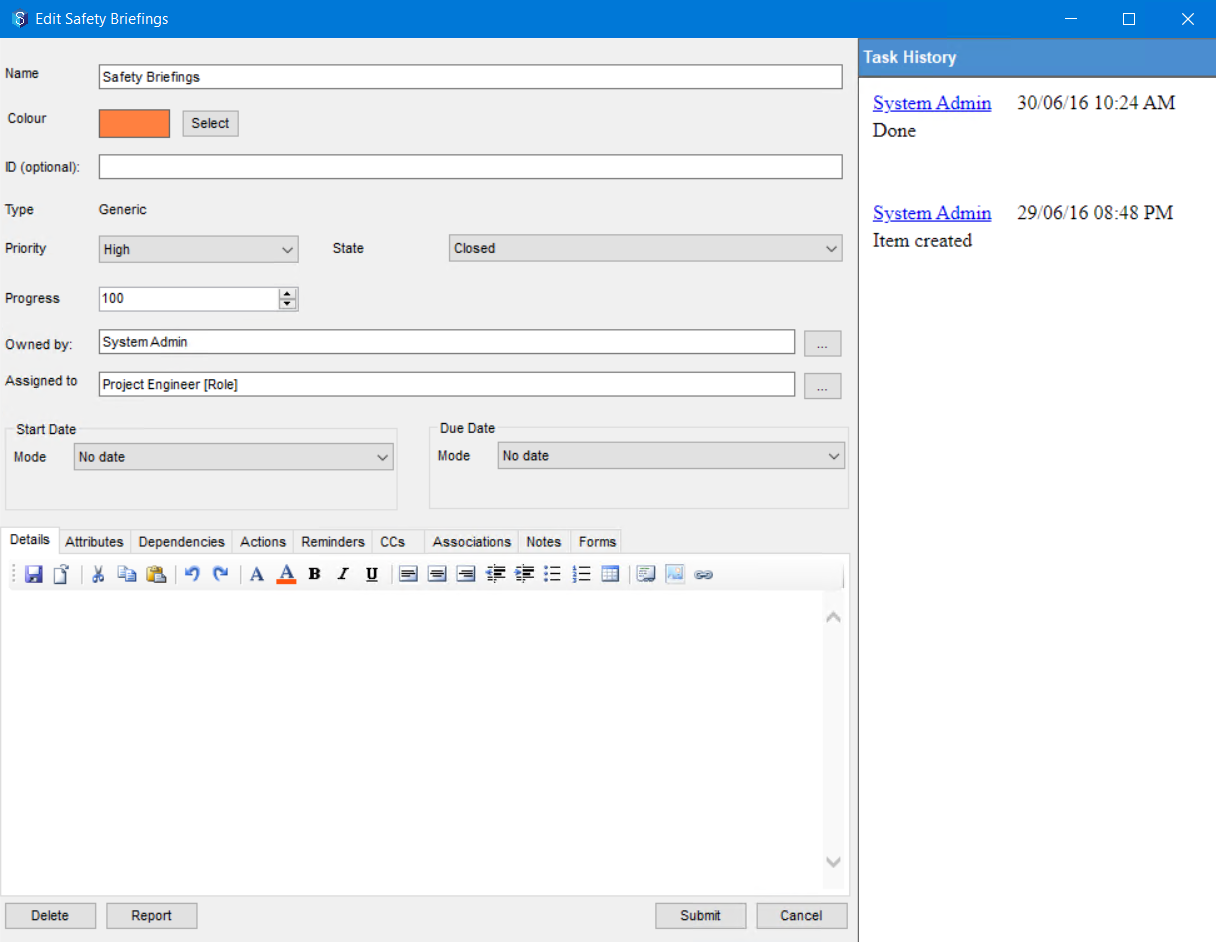
Make the necessary edits to the task.
Click the Submit
 button.
The Describe your Change dialog is displayed.If your 12d Synergy Administrator has configured the change descriptions for changing tasks, then the Describe your change prompt is displayed when you edit a task.
The options displayed in the Describe your Change dialog box can be configured by your 12d Synergy Administrator in the 12d Synergy Administration application > System Rules tab > Change Descriptions tab.
Select the reason that best describes the change you are making.
The task is updated and is displayed in the Task list. A record that the task has been edited is added to the Task History.
1.5. How to Create a Dependency for a Task
You can create a dependant task for a task (say, a primary task). When the dependant tasks is closed, it triggers an action in the primary task, say an action like updating the progress of the primary task. These triggers can be automatically set in the Actions tab. But creating the dependant tasks can be done by the procedure below.
While editing or creating a task (primary task), click the Dependencies tab in the Edit window.
Click the
 button.
The Select a Task window is displayed.
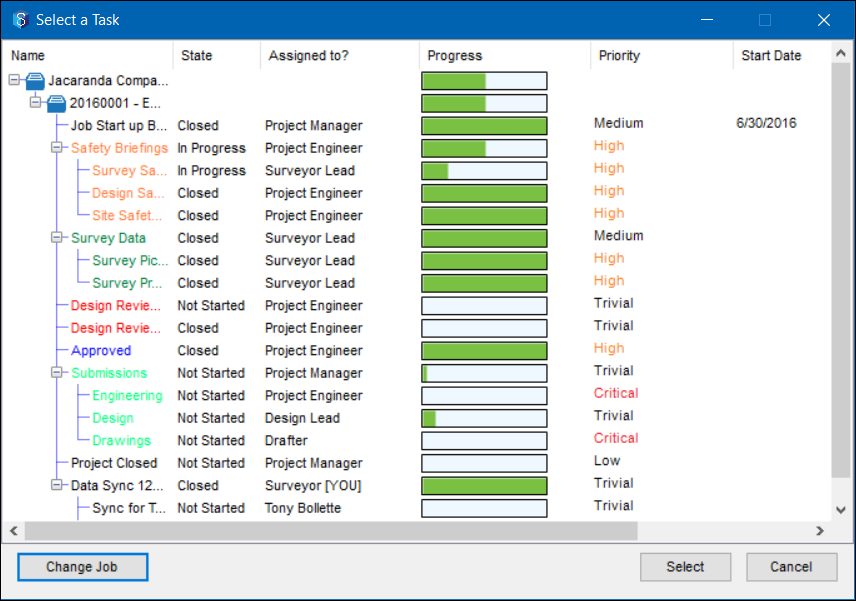
Select the task(s) that you want to this primary task to depend upon.
You can click the Change Job button to select a task from a different job as a dependant for the primary task.
Click the Select button.
The selected task is displayed in the Dependencies tab.You can delete a dependant task by selecting it from the Dependencies tab and clicking the
 button.
1.6. How to Create a Reminder for a Task
While editing or creating a task, click the Reminders tab in the Edit window.

Click the
 button.
The Create a Reminder window is displayed.
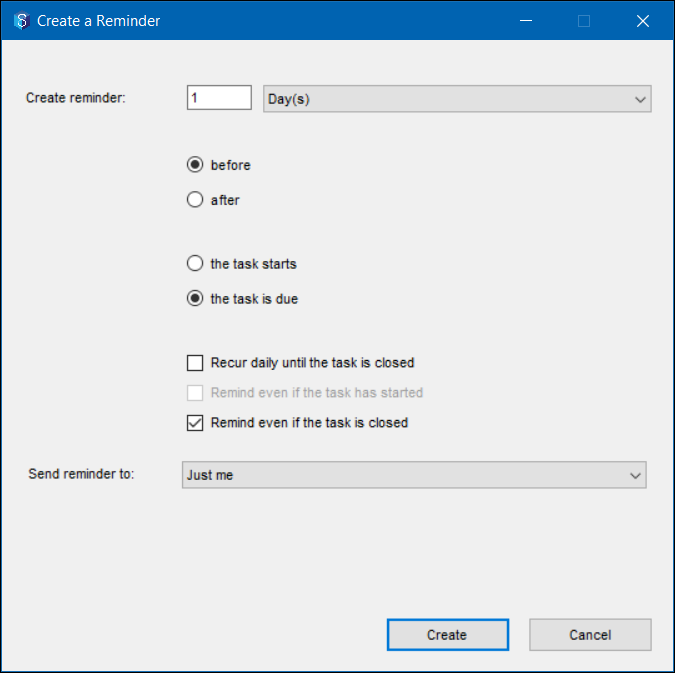
In the Create reminder box, select the time in days, weeks, months, or years.
Select either the before option or the after option.
Select the the task starts option or the the task is due option.
Select the frequency of the reminder by logically selecting one or more of the following check boxes.
Recur daily until the task is closed
Remind even if the task has started
Remind even if the task is closed
Select one of the following options from the Send reminder to list.
Just Me – send the reminder to yourself only
Owner and Assignee – send the reminder to the task owner and the person to whom the task is assigned
A specific user – send the reminder to a specific user
A user group – send the reminder to a group of similar users like engineers, surveyors, etc.
A project role – send the reminder to a specific role like a project manager, team lead, etc.
If the Task Reminders always sent setting is set to Yes in the 12d Administration application > System Settings tab > Tasks section, then an email is sent to the selected recipients even if the task is closed irrespective of its current status.
Click the Create button.
The reminder is displayed in the Reminders tab.
You can delete a reminder by selecting the reminder from the Reminders tab and clicking the  button.
1.7. How to Notify Others of Task Updates
While editing or creating a task, click the CCs tab in the Edit window.
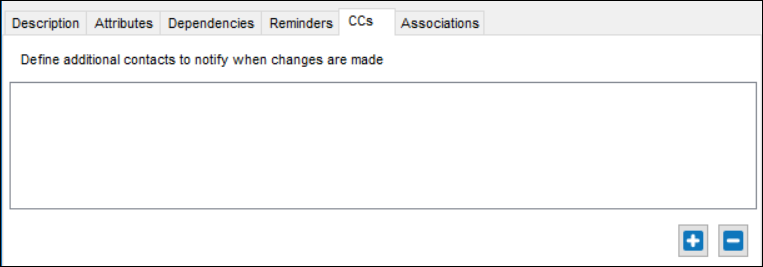
Click the
 button.
Select one of the following options.
Contact – to notify a specific contact
Role – to notify a specific role like project manager, surveyor, etc.
Group – to notify a group of similar users like engineers, surveyors, designers, etc.
The added CCs are displayed in the CCs tab of the selected task.
1.8. How to Add an Action to a Task
The Actions tab is only available when editing a task, after its creation.
When an action occurs, you can choose the consequential action that gets triggered by it. For example, on closing a task, you can choose to trigger an action like sending an email to the Task Assignee or changing the status of all the tasks depending on it. Thus, actions enable you to connect the tasks in the required sequential order. You can add an action to a task by following the procedure mentioned below.
While editing a task, click the Actions tab in the Edit <Task name> window.
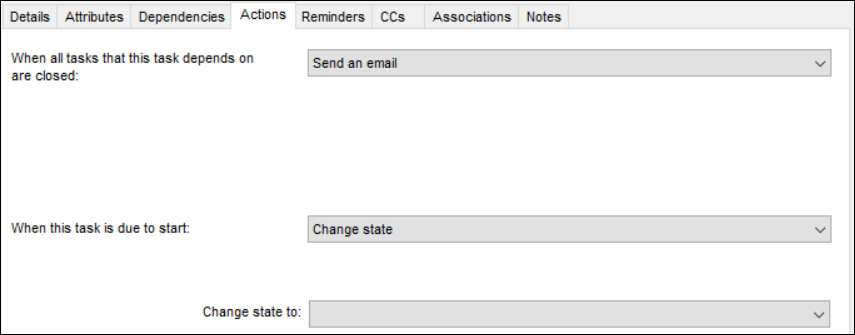
Select one of the following options from the When all tasks that this task depends on are closed list:
Do nothing – to take no action
Send an email – to send an email to the task Assignee that the dependant task is closed
Change the state – to select the state to which the task has to be updated from the Change State to list
Select one of the following options from the When this task is due to start list:
Do nothing – to take no action
Send an email – to send an email to the task Assignee that the task is going to start
Change the state – to select the state to which the task has to be updated from the Change State to list
If your 12d Synergy Administrator has configured the change descriptions for changing tasks, then the Describe your change prompt is displayed when you add an action to a task.
If the Notify Task owners of updates setting is set to Yes in the 12d Administration application > System Settings tab > Tasks section, then an email is sent to the task owner for every update made to the task. By default, it is set to Yes.
Click the Submit button.
1.9. How to Add a Note to a Task
You can mention any notes in this tab and also choose to send them to other contacts as well. Notes can also be attached to tasks, just like in files. It is a helpful way to communicate reminders and other ideas.
While editing a task, click the Notes tab in the Edit<Task name> window.
.png)
You can view the list of notes created in the box below the buttons in the Notes tab. If you select a note from this list, the details of the note are displayed in the Details tab in the box below. You can also view the contacts to whom the note is sent in the Notifications Sent tab in the below box.
Click the New
 button to add a new Note.
The Add a Note window is displayed.
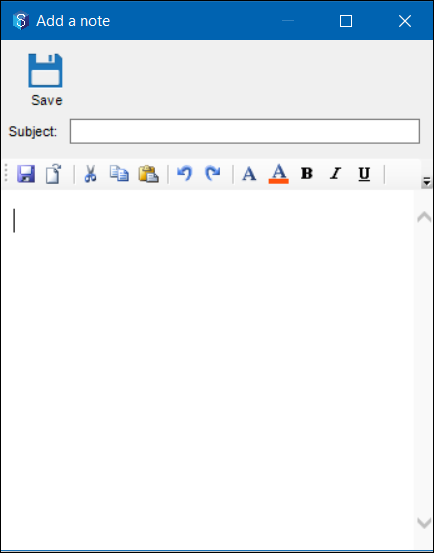
Enter the subject of the note in the Subject box and the content of the note in the Word editor.
Click the Save
 button.
The following prompt is displayed.
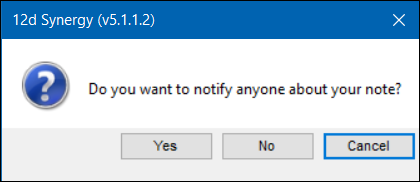
Do one of the following:
Click the Yes button to add contacts from the Select Users window.
The note is sent to the selected contacts. And you can view the sent contacts in Notifications Sent tab.Click the No button to just save the note in the Notes tab.
The note is added to the list of notes in the Notes tab.
Select a note and click the Reply
 button to reply to a note. You can also choose to send the response to any required contacts.
Select a note and click the Delete
 button to delete a note. If there are any responses to the selected note, they too will be deleted.
1.10. How to Add an Association to a Task
An association is an important part of tasks. It links the entities such as jobs, files or folders associated with the task to the task.
While editing or creating a task, click the Associations tab in the Edit<Task name> window.
.png)
You must have the Data Reader rights to view the associations added to a task.
Click the
 button.
The Add an association window is displayed.
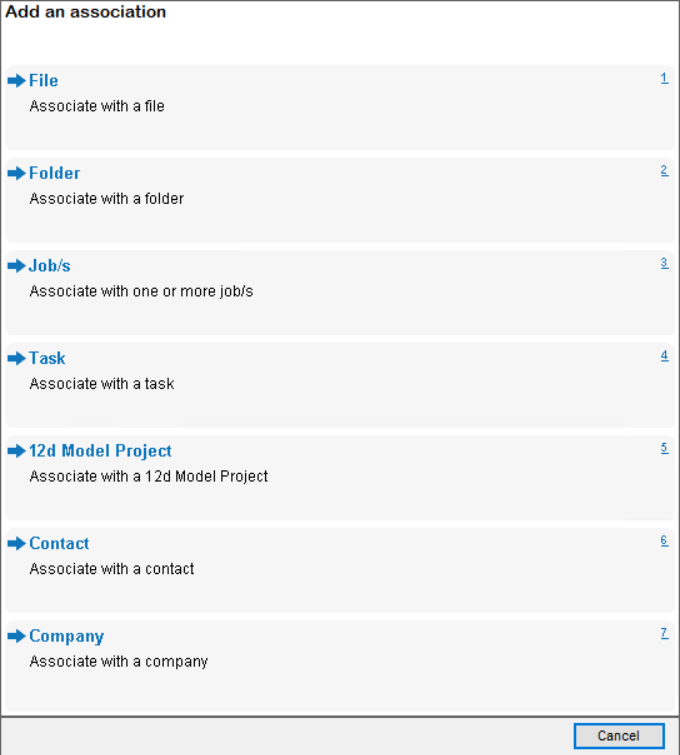
Select the entity that you want to associate the task with and select the entity accordingly.
If your 12d Synergy Administrator has configured the change descriptions for changing tasks, then the Describe your change prompt is displayed when you add an association to a task.
The selected entity is displayed in the Associations tab of the Edit window.
1.11. How to Attach a Form to a Task
While editing or creating a task, click the Forms tab in the Edit<Task name> window.
There are three tabs in the Forms tab.
New Form - If there are any forms attached to the task previously, they are displayed in this tab.
My Forms - If there are any forms submitted previously for this task, they are displayed in this task.
Attach Form - You can attach a new form to the task from this tab.
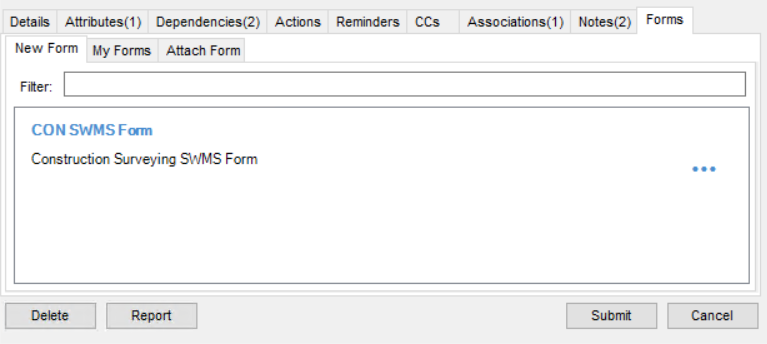
Select the Attach Form tab.
Click the
button. The Attach Forms window is displayed.
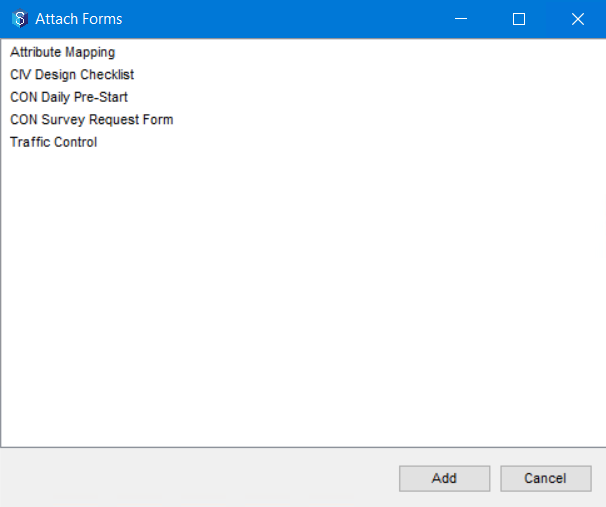
The list of forms added to the job that this task is part of is displayed.
Select the form you want to attach to the task and click the Add button. The form is attached and displayed in the Forms > Attach Form tab.
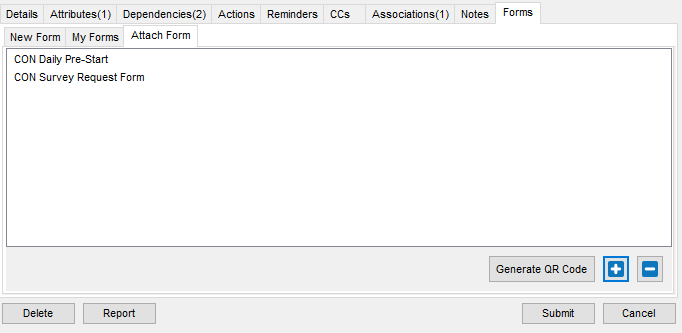
You can generate a form fill from this window using the Generate QR Code button.
Click the Submit button.
You are prompted to describe your change.Select the change description that meets your requirement.
The form is then attached to the task. When you access the task, the attached form(s) is/are displayed in the New Form tab.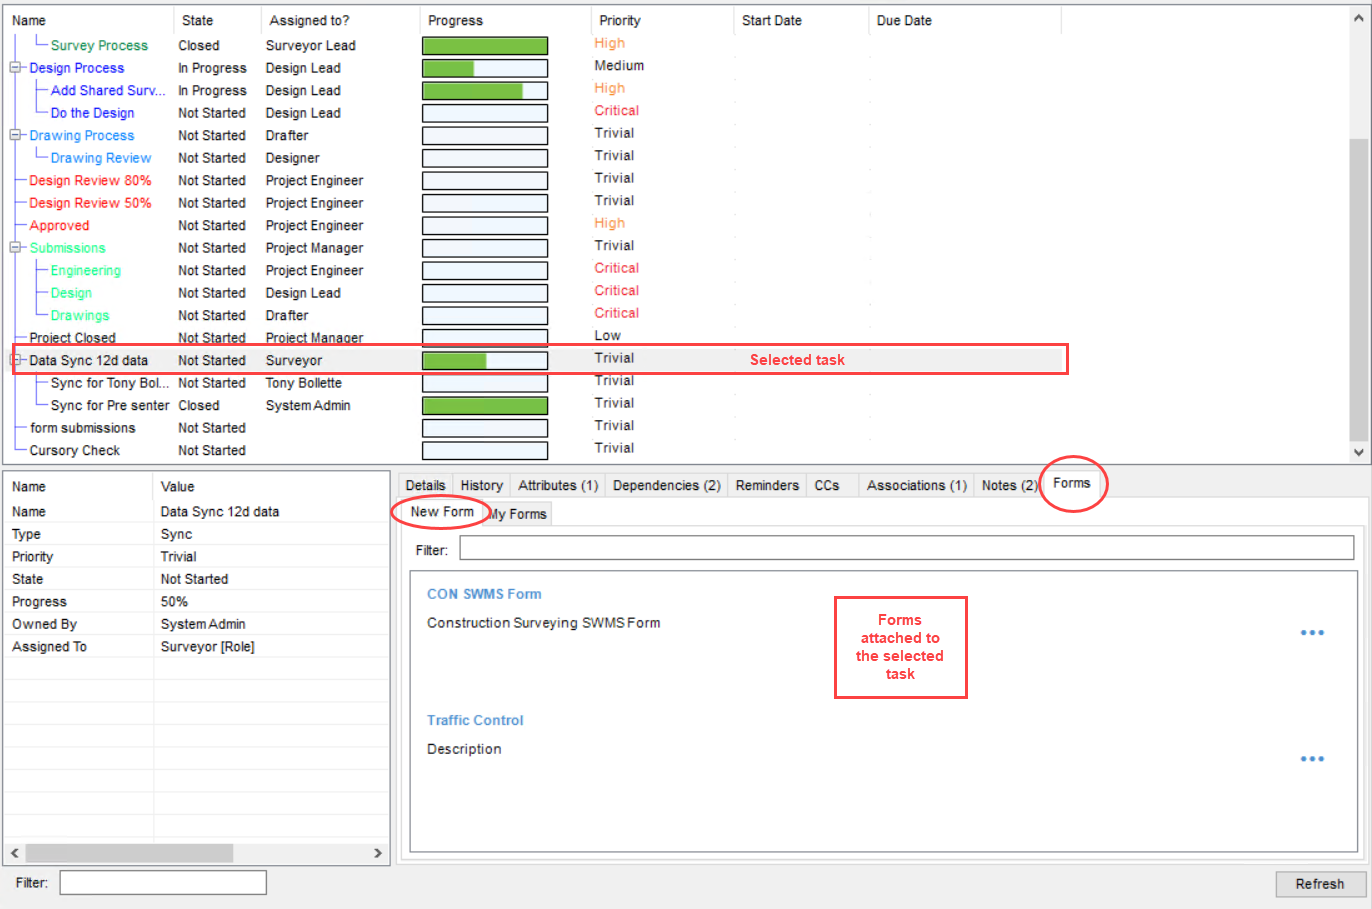
1.12. How to Mark a Task as Complete
While editing a task in the Edit window, select the Closed option (or any appropriate last status for a task) from the State list.
Your 12d Synergy Administrator can configure status options and their order from the 12d Synergy Administration application.
A prompt asking you if you want to update the progress to 100% is displayed.
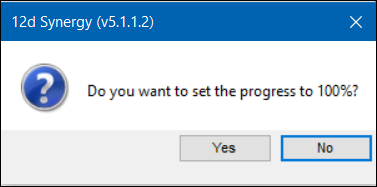
Click the Yes button.
The progress bar is updated to 100%.Click the Submit
 button.
The Describe your Change dialog is displayed.If your 12d Synergy Administrator has configured the change descriptions for changing tasks, then the Describe your change prompt is displayed when you close a task.
The options displayed in the Describe your Change dialog box can be configured by your 12d Synergy Administrator in the 12d Synergy Administration application > System Rules tab > Change Descriptions tab.
Select the reason that best describes the change you are making.
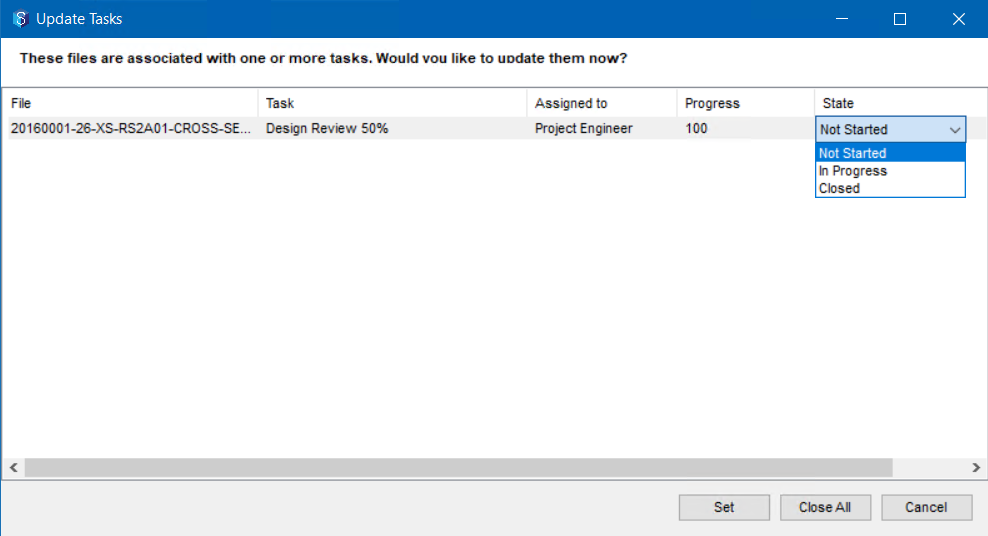
The task is updated and is displayed as a closed task in the Task List. A record that the task has been closed is added to the Task History.If you are checking in the file that is associated with a task, then an Update Tasks window is displayed. You can mark the task as complete (or closed) by updating the progress of the task to 100% in the Progress column or by selecting the Closed option from the State list.
1.13. How to Delete a Task
If the Only System Admins can delete tasks setting at 12d Synergy Administration application > System Settings tab is set to Yes, only then can your 12d Synergy Administrator delete tasks. If the setting is set to No, then any user, including the 12d Synergy Administrator, can perform this procedure.
Click the Task List tab in the job tree.
The Task list view is displayed.
Do one of the following:
Select the task you want to delete and click the Delete
 button in the ribbon.
While editing a task, click the Delete
 button.
A dialog box asking for confirmation is displayed.
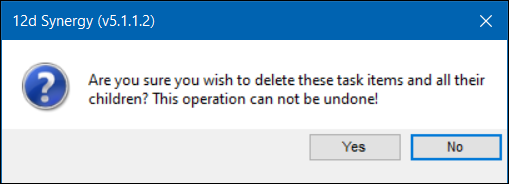
Click the Yes button.
The Describe your Change dialog is displayed.If your 12d Synergy Administrator has configured the change descriptions for changing tasks, then the Describe your change prompt is displayed when you delete a task.
The options displayed in the Describe your Change dialog box can be configured by your 12d Synergy Administrator in the 12d Synergy Administration application > System Rules tab > Change Descriptions tab.
Select the reason that best describes the change you are making.
The task is deleted and is removed from the Task List.
1.14. How to Create a Child Task
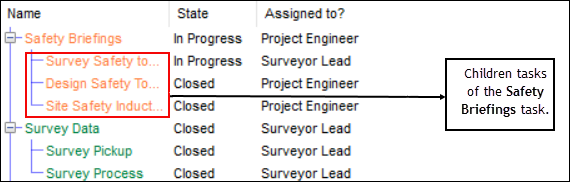
A task can have sub-tasks which are called child tasks. Any task having child tasks is called the parent task. The Start Date and Due Date of the child task can be relative to the dates of the parent task. You can automate the triggering of a parent task by setting up the relevant action on the child task.
Select the task in the Task list for which you want to create a child task.
You can create a child task for an existing child a task also.
Click the New Child
 button on the ribbon.
The Create Task window is displayed.

Create a task and this task will be displayed as a child task to the initial task selected.
1.15. How to Create a Task Report
Click the Task List tab in the job tree.
The Task list view is displayed.Do one of the following:
Right-click the required task and select the Report option.
While editing a task, click the Report button, select the required report from the Select a Report window and click the Select button.
The Enter Required Inputs window is displayed.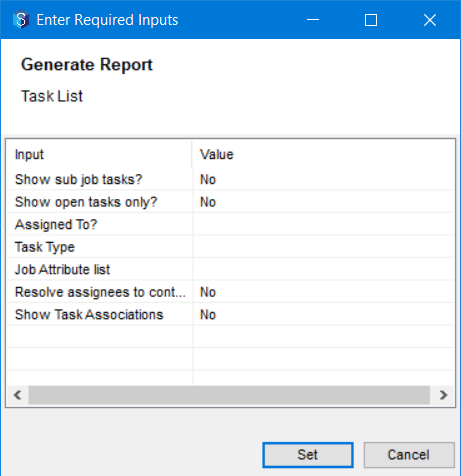
Select or enter the value of any of the attributes required.
Click the Set button.
The Save report to dialog box is displayed.
Select a location to save the report.
Enter a name for the report in the File name box.
Select a format for the report from the Save as type list.
Click the Save button.
The report is created and is displayed in the selected format. It is also saved in the specified location in the required format.