Admin Content
1.1. How to Create a User
In the 12d Synergy Administration application, select the Users tab > Create tab.
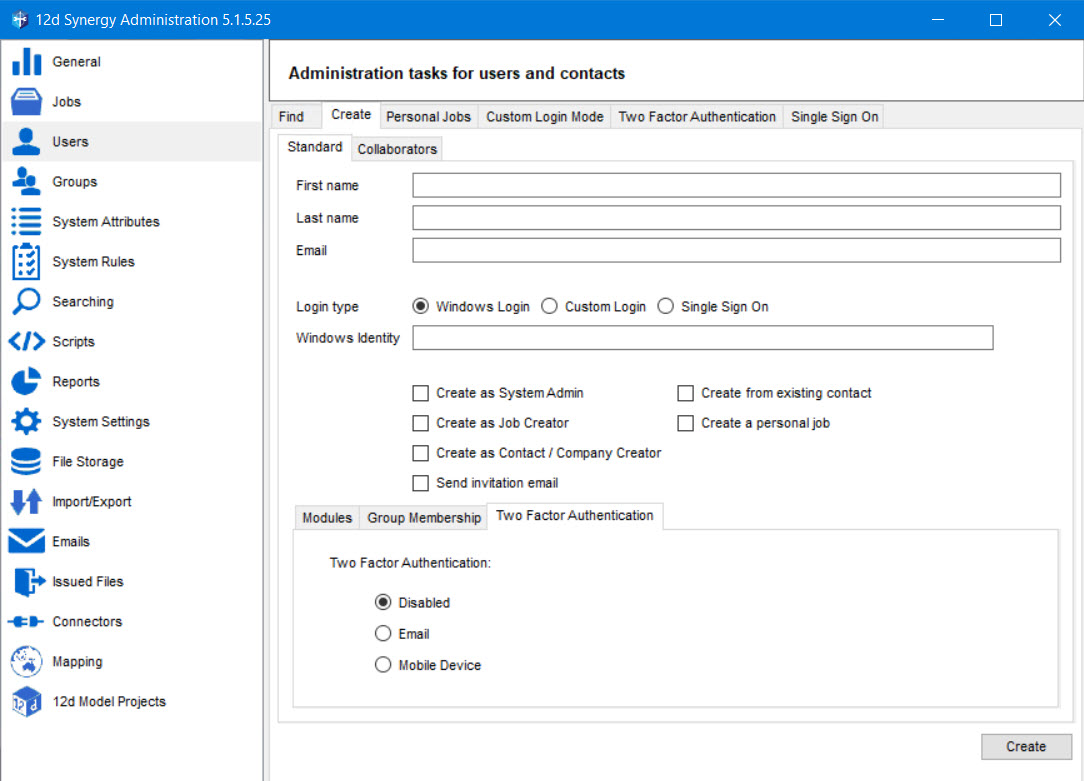
Note that the fields displayed in the above window change as per the authentication mode you select in the Login Type.
In the Standard tab, enter the following details:
First Name – First name of the user
Last Name – Last name of the user
E-mail – Email address of the user
Do one of the following:
To apply Windows authentication for the user, do the following:
Select the Windows Login option as the Login Type option.
Enter the user identification number used to access Windows in the Windows identity box.
To apply Custom authentication for the user, do the following in sequence:
Select the Custom Login option as the Login Type option.
Enter the custom login credentials in the Login box.
Enter the password in the Password box.
Re-enter the password in the Verify Password box.
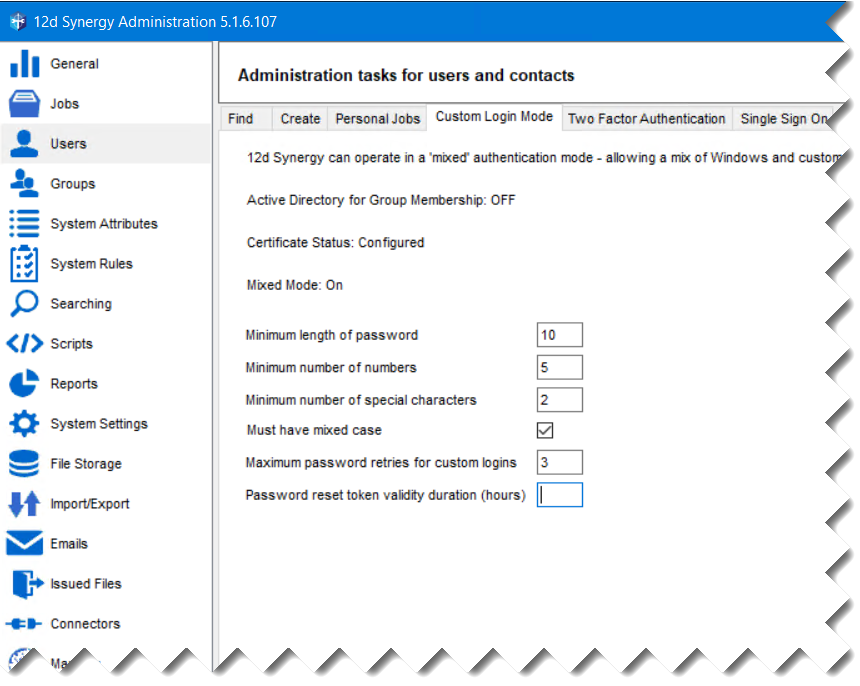
You can set the password rules for users who opt for custom authentication in the 12d Synergy Administration application > Users tab > Custom Login Mode tab. The password you enter in the Password box in the Users > Create tab must adhere to these defined rules.
You can also set the maximum number of incorrect login attempts for custom authentication users in the Maximum password retries for custom logins box.
To apply Single Sign On authentication for the user, do the following:
Select the Single Sign On option.
The Single Sign On option is enabled only after the Single Sign On feature is set up for your company.
Enter your single sign-on login email address in the SSO Identity box.
Select your SSO Provider from the SSO Provider list.
If you select the Single Sign On option, all the two-factor authentication details are disabled.
To create different types of users, do any of the following:
Select the Create as System Admin checkbox to mark this user as a 12d Synergy Administrator / System Administrator.
Select the Create as Job Creator checkbox to enable this user to create top-level and sub-level jobs.
Select the Create as Contact/Company Creator checkbox to enable this user to create contacts and companies, unlike regular users.
If you do not select any of these check boxes, you will create a regular user with standard permissions.
To upgrade a contact to a user, select the Create from existing contact check box.
The Find a User window is displayed.
Search for a user using any or none of the following parameters:
Quick find – Start typing any search string from the User’s first or last name, and the matching results appear in a list below. Select the required user and click the Use button.
First name – first name of the user
Last name – last name of the user
Email – email address of the user
Other attributes – to search for a user based on the user’s attributes. You can add attributes for the search using the
 button.
Click the Find button.
The list of users matching the given search parameters is displayed.Select the required user and click the Use button.
The details of the selected user are displayed in the Users tab > Create tab > Standard tab.Select the Create a personal job checkbox to create a personal job for the user being created.
If a location is set in the 12d Synergy Administration application > Users tab > Personal Jobs tab > Personal job parent box, then on selecting the Create a personal job checkbox, a personal job is created in the set location. Otherwise, it is created as a top-level job.
Select the Send invitation email check box to send an email to the address mentioned in the Email box, welcoming the user to 12d Synergy.
You can change the email template for the invitation mail using the 12d Synergy Administration application > Emails tab.
Select your local time zone from the Timezone list.
All operations processed on the 12d Synergy server will follow this time zone.In the Modules tab, select the checkboxes for all modules you want this user to enrol in.
In the Group Membership tab, you can view and modify the groups of which this user is a member.
If you are using Active Directory, you cannot edit the groups to which this user belongs.
If you are not using Active Directory, you can add/remove the user to/from a group.
In the Two-factor Authentication tab, select one of the following options:
Disabled – Disable two-factor authentication for this user.
Email – Enable two-factor authentication by sending the authentication code to this user via email.
Mobile device– Enable two-factor authentication by sending the OTP via an Authenticator application installed on their mobile device.
This tab is disabled for Single Sign On users.
Click the Create button.
A user is created based on all the selections made in this window.
1.2. How to Edit a User
In the 12d Synergy Administration application, select the Users tab > Find tab.
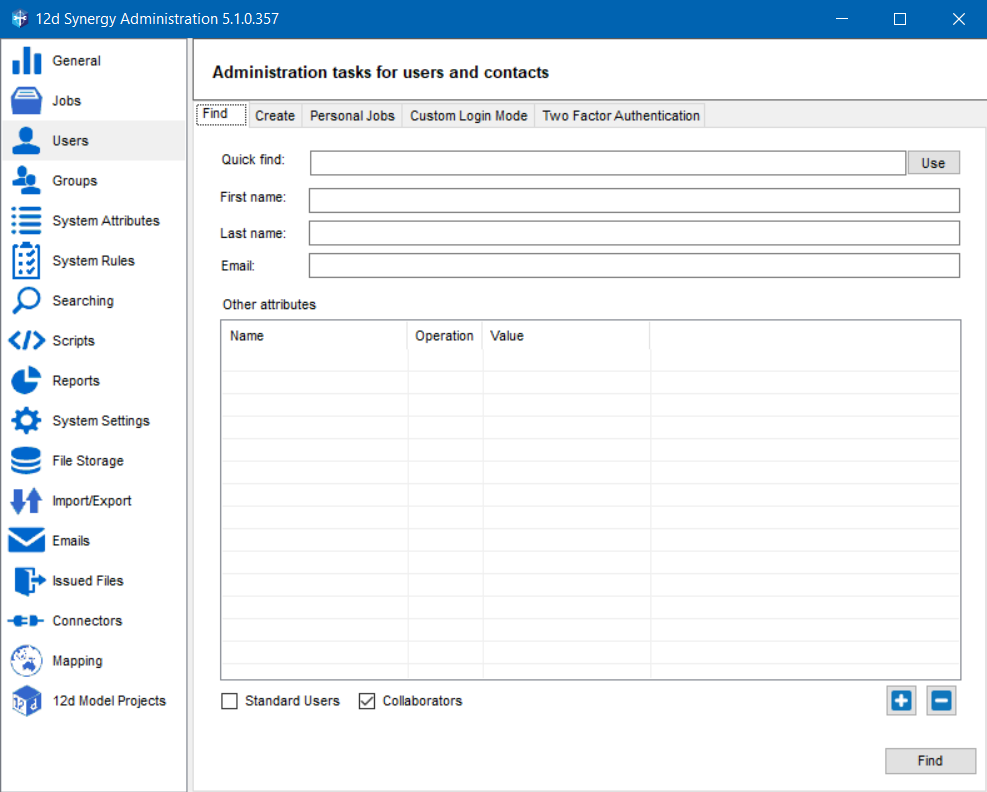
You can search for a user using any or none of the following parameters:
Quick find – Start typing any search string from the User’s first or last name, and the matching results appear in a list below. Select the required user and click the Use button.
First name – first name of the user
Last name – last name of the user
Email – email address of the user
Standard Users option – to search among standard 12d Synergy users only
Collaborators option – to search for a user among the Collaborators only
Both options – to search for a user among standard 12d Synergy users and Collaborators
Other attributes – to search for a user based on the user’s attributes. You can add attributes for the search using the
 button.
Click the Find button.
The list of users matching the given search parameters is displayed.Select the required user and click the Edit button.
The Edit a User window is displayed.
You can refer to the Creating a User procedure for understanding the details displayed in the Edit a User window.
You can temporarily block a user from accessing the 12d Synergy applications by locking their profile. Click the Lock button in the Edit a User window to lock the user. The Lock button is a toggle button. When a user is locked, it is displayed as the Unlock button. When a user is locked, their status is displayed as follows.

So, after locking a user, if you need to unlock the user, click the Unlock button in the Edit a User window.You, as a 12d Synergy Administrator, cannot lock yourself. However, another user with the rights of a System Administrator can lock your account.
If a user who has chosen custom authentication for logging into the 12d Synergy applications is locked, because of exceeding the maximum number of incorrect login attempts that you have set in the Users tab > Custom Login Mode tab, then you can unlock the user here in the Edit a User window.
The Edit a User window has the following tabs, which are not displayed in the 12d Synergy Administration > Users > Create tab.
Attributes tab – You can view the attributes that were created to define the selected user and change their values, if necessary.
Log tab – You can view the selected user’s activity for a set period.
Check outs tab – You can view the files checked out by this user and their location.
Reports tab – You can generate user-specific reports from this tab. For more details, please read Generating Reports.
There are some reports, such as the Job Usage report, which can be triggered from different entities to get different variations of the same report. You (a Job Administrator or a 12d Synergy Administrator) can generate a Job Usage report to understand how many users are using a job while editing a job or from the Reports tab of a job in the 12d Synergy Client application. If you want to know how many jobs a user is accessing, you have to trigger that report while editing a user. You can also generate a report to see which users are accessing which jobs for a set period from the Reports tab in the 12d Synergy Administration application. Thus, the Job Usage report has three variations.
Make the necessary edits in this window and click the Save button.
The user’s profile is edited and saved.
1.3. How to Delete a User
In the 12d Synergy Administration application, select the Users tab > Find tab.
Search for the required user and click the Find button.
The list of users matching the given search parameters is displayed.Select the required user and click the Edit button.
The Edit a User window is displayed.Click the Delete
 button.
The following message is displayed.
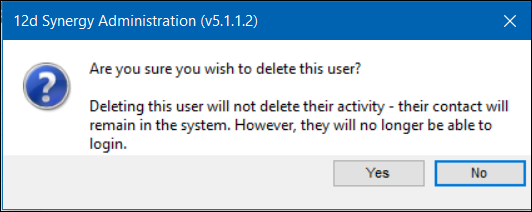
Click the Yes button.
The user is deleted, but the contact is saved in the system to trace the actions performed by the contact.