In 12d Synergy, there are two types of reports - Standard reports and Custom reports.
Standards reports are shipped out of the box with 12d Synergy. They provide basic information about entities such as Folders, Files, and Jobs, and features such as Tasks, Issues, Notifications, etc. They are delivered as a .csv or .html file.
Custom reports are those you script and build into the 12d Synergy applications.
While a 12d Synergy Administrator can generate all reports, an end user (without administrative rights) can generate only some. A list of these reports is mentioned here.
You can generate a report instantly or schedule it for a set date and time or frequency.
1.1. How to Generate a Standard Report
You can generate a standard report from both the 12d Synergy Client application and the 12d Synergy Administration application.
1.1.1. From the Reporting Menu in the 12d Synergy Client Application
Client Content
In the Reporting menu option, click the Generate a Report option.
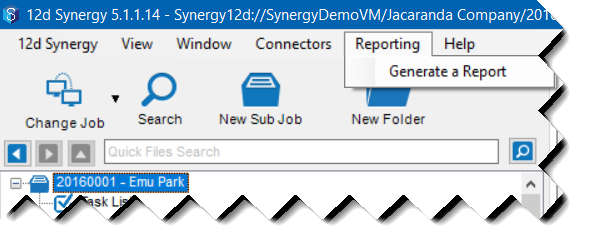
The Select a Report window is displayed.
All the reports that you can generate based on your access rights are displayed.

Select the required report and click the Select button.
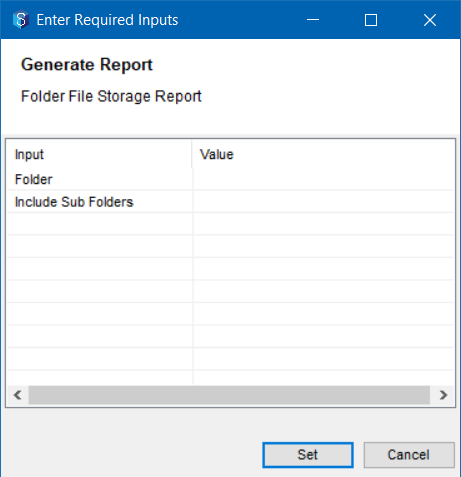
The Enter Required Inputs window is displayed.
1.1.2. Entity Specific Reports from the 12d Synergy Client application
Client Content
You can create reports specific to a job, 12d Model project and folder using the following procedure.
Select any folder or job in the tree structure and select the Reports tab from the right panel.
All applicable reports to the selected entity (job or folder) are displayed.

Select the required entity report from the Name panel on the left of the Reports tab.
The required inputs are displayed to the right of the Name panel in the Report Inputs panel.
You can also create task-specific reports.
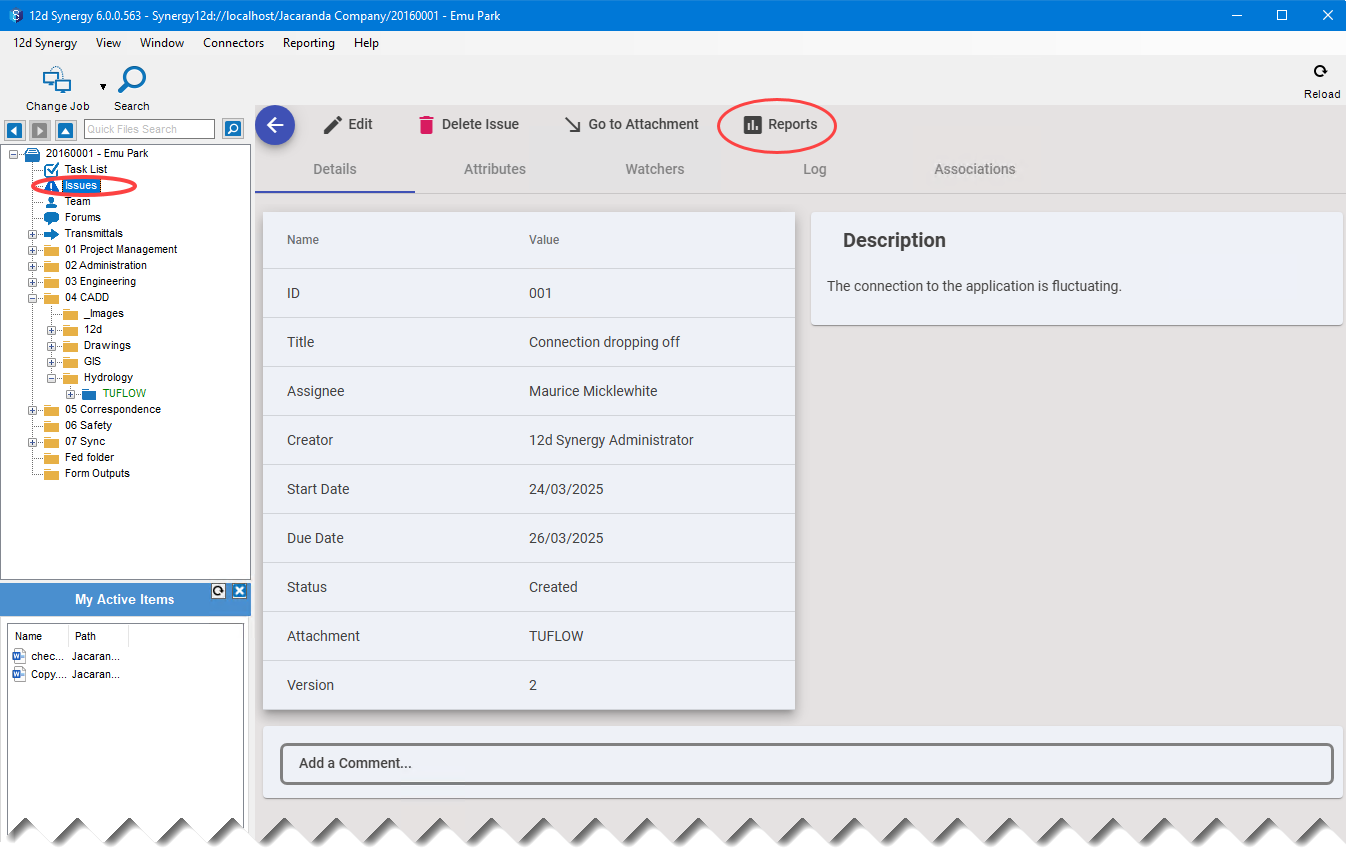
You can create issue-specific reports from the Reports tab when you view an issue from the Issues link in the job tree structure.
You can create file-specific reports by selecting the file, right-clicking it and selecting the Properties option. In the File Details window that is displayed, select the Reports tab. All the file-specific reports that can be generated are displayed in this window.
.png)
1.1.1.3. Generate a Report
For every input mentioned in the Input column, double-click the corresponding cell in the Value column to select or enter a value for the selected input.
Click the Generate or Set button, whichever is available in the window.
The Save report to dialog box is displayed.

Browse the location where you want to save the report.
Enter a name for the report in the File name box.
From the Save as type select one of the following file types for the report you are generating.
.csv – a comma-separated value file
.html – a web page
Click the Save button.
The report is generated in the required format and is saved in the selected location.
1.1.2. Using the 12d Synergy Administration Application
Admin Content
Select the Reports tab > Generate a Report tab.
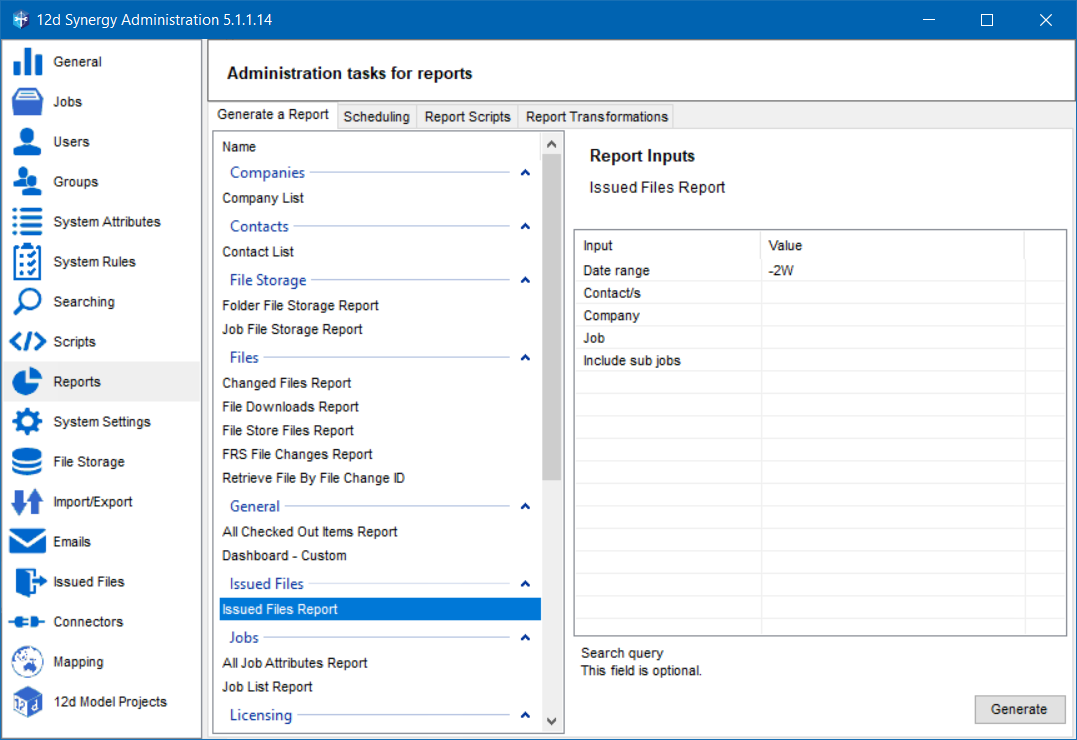
Select the required report from the Name panel.
The required inputs are displayed in the Report Inputs panel.For every input mentioned in the Input column, double-click the corresponding cell in the Value column to select or enter a value for the selected input.
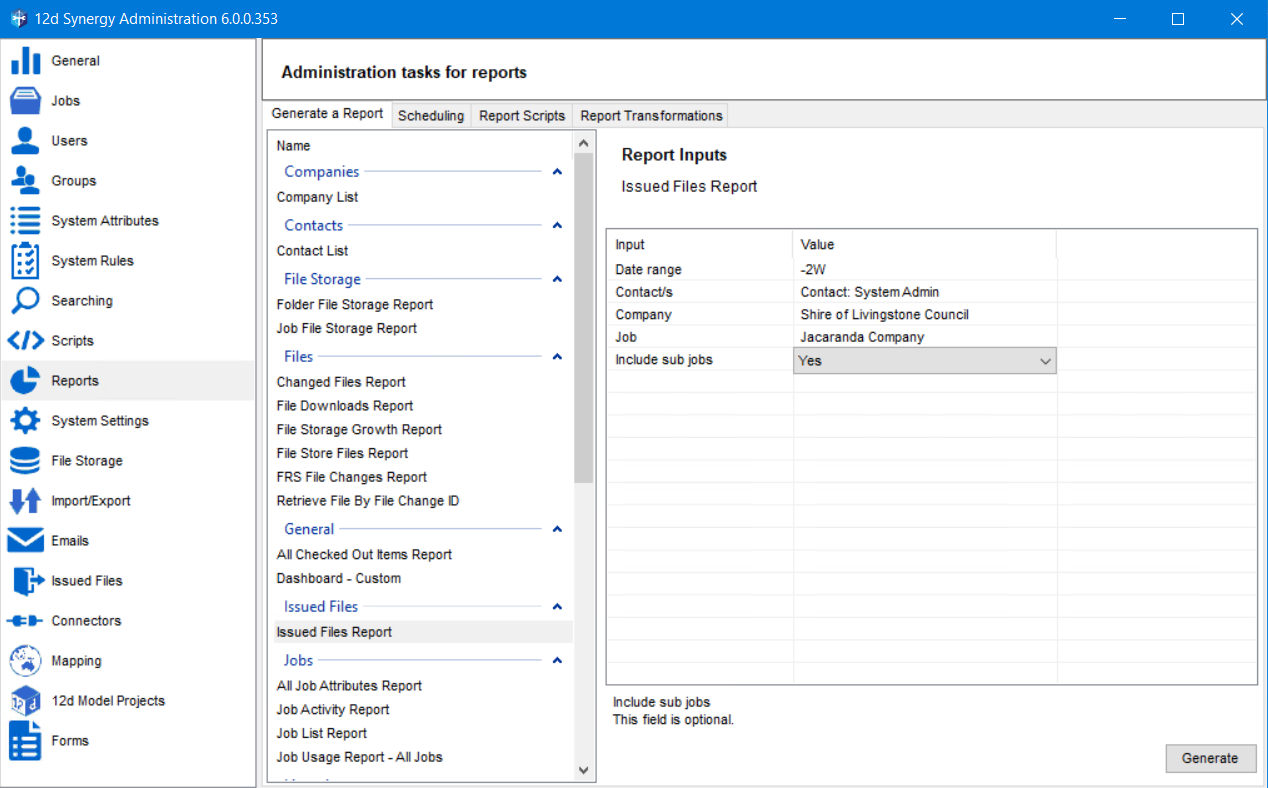
Click the Generate button.
The Save report to dialog box is displayed.
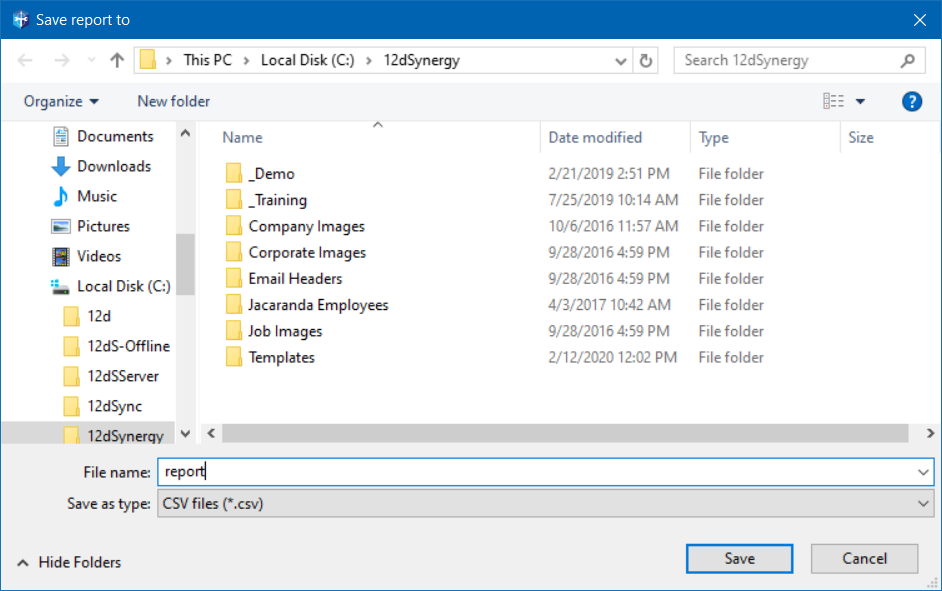
Browse the location where you want to save the report.
Enter a name for the report in the File name box.
From the Save as type select one of the following file types for the report you are generating.
.csv – a comma-separated value file
.html – a web page
Click the Save button.
The report is generated in the required format and is saved in the selected location.
1.2. How to Schedule a Standard Report
1.2.1. Using the 12d Synergy Client Application
Client Content
Right-click any selected job or folder, select the Edit or Edit folder option, respectively.
The Edit a Job or Edit a Folder window is displayed accordingly.Click the Reports tab.
Click the Report Schedules tab.
Click the
 button.
A New Report Schedule entry is added in the Name panel and is displayed in the Report Schedule Name box.Click the Select Report button.
The Select a Report window is displayed.
All the reports related to the selected entity (job or folder) are displayed.Select the report you want to generate and click the Select button.
The name of the selected report is displayed in the Report box of the Schedule Information tab.
1.2.2. Using the 12d Synergy Administration Application
Admin Content
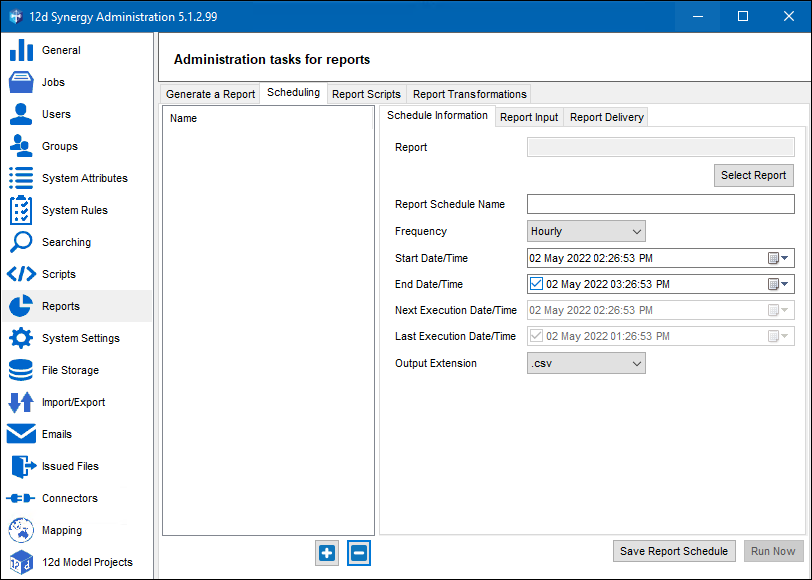
Select the Reports tab > Scheduling tab.
Click the
 button.
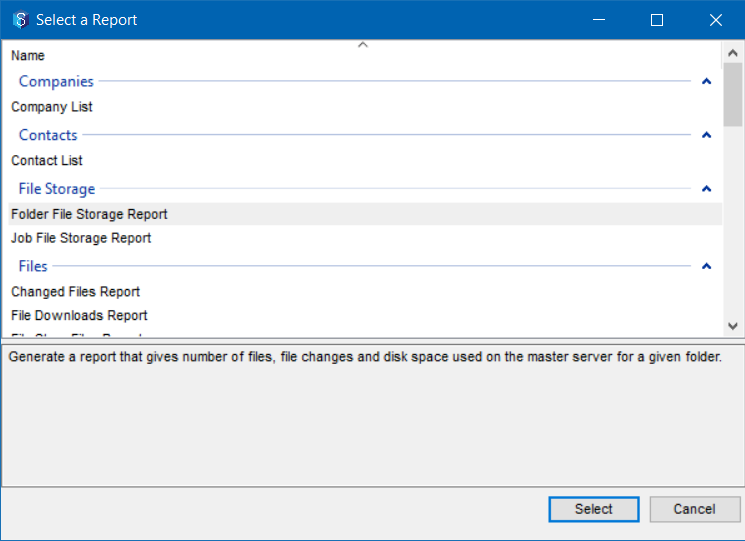
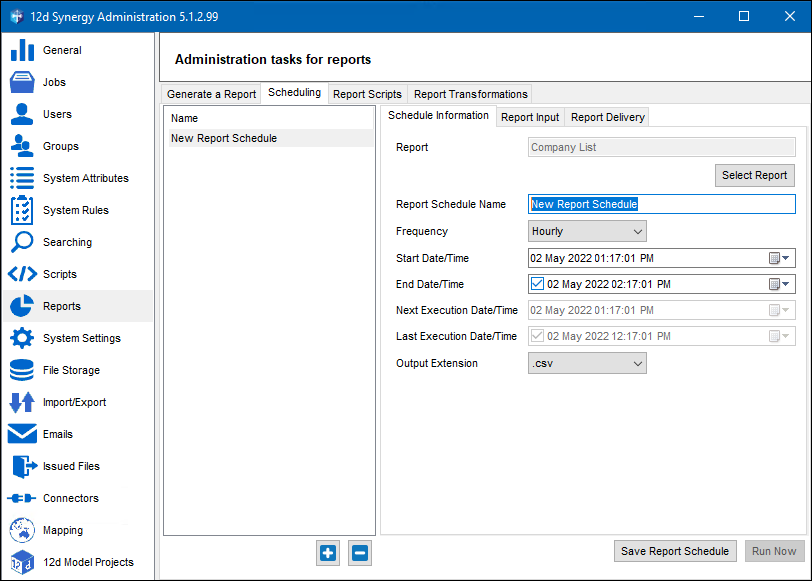
A New Report Schedule entry is added in the Name panel and is displayed in the Report Schedule Name box.In the Schedule Information tab, click the Select Report button.
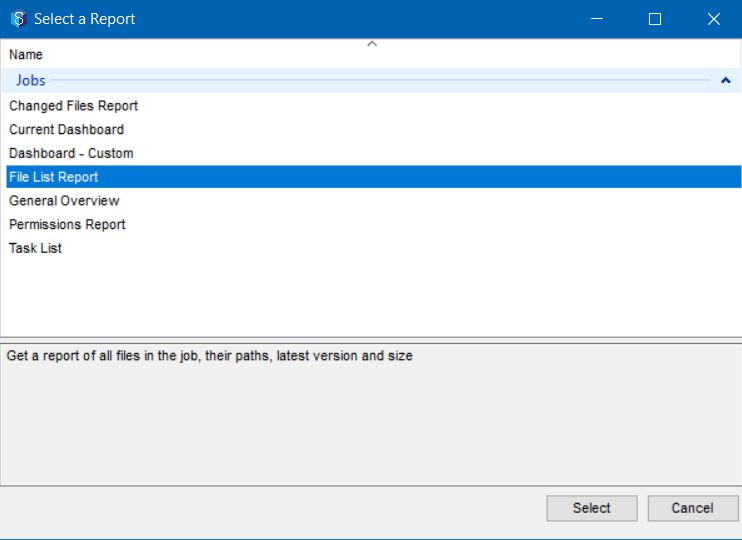
The Select a Report window is displayed.
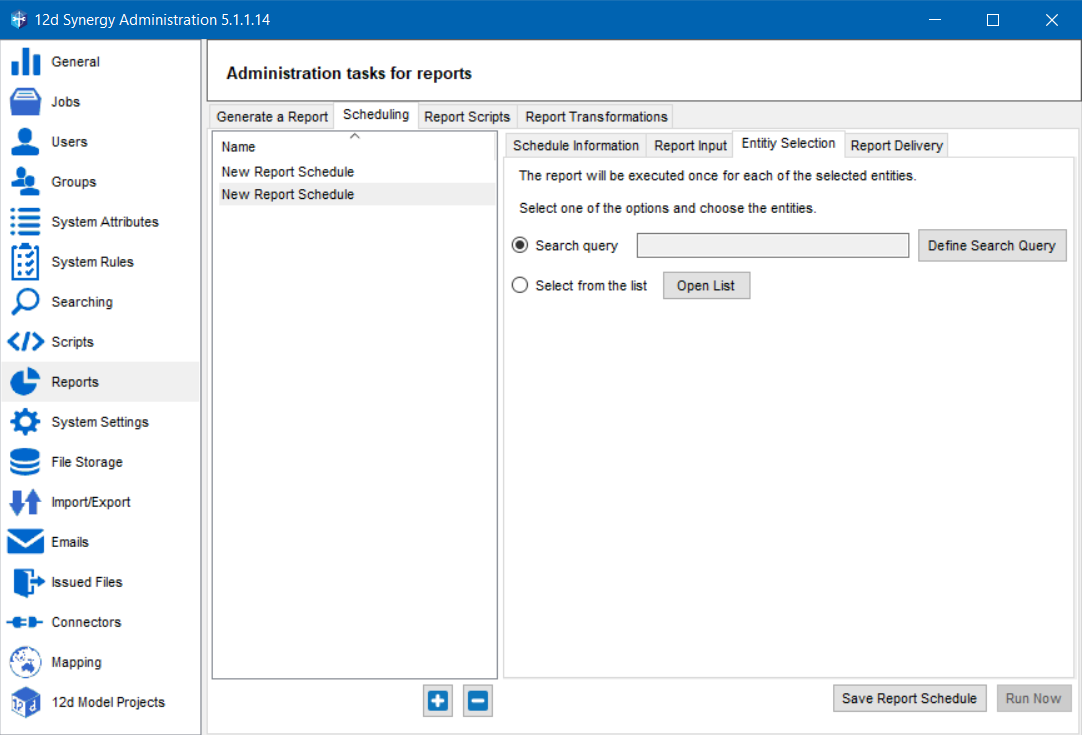
For entity reports where there is a need to select one or more entities such as a job, folder, or a file, an Entity Selection tab is displayed. You can select entities based on one of the options displayed.
Select the required report and click the Select button.
The selected report is displayed in the Report box of the Schedule Information tab.
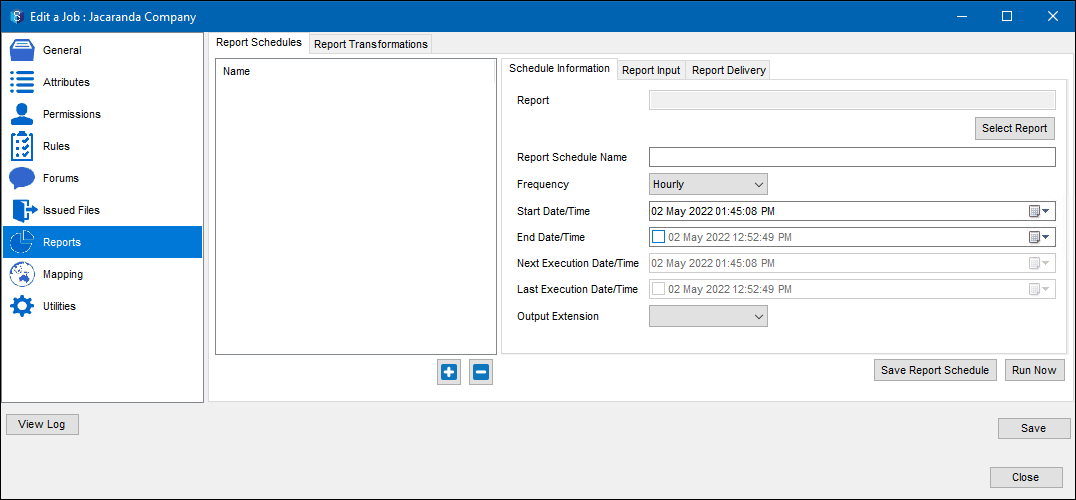
1.2.3. Create a Schedule
In the Schedule Information tab, enter a name for the report schedule you are creating in the Report Schedule Name box.
Select the required frequency for generating the report from the Frequency list.
Select the date and time range from the Start Date/Time and End Date/Time lists for the selected report.
The Next Execution Date/Time and Last Execution Date/Time display the execution dates and times calculated by the server.Select the file format of the report to be created from the Output Extension list.
Click the Report Input tab.
For every input mentioned in the Input column, double-click the corresponding cell in the Value column to select or enter a value for the selected input.
Click the Report Delivery tab.
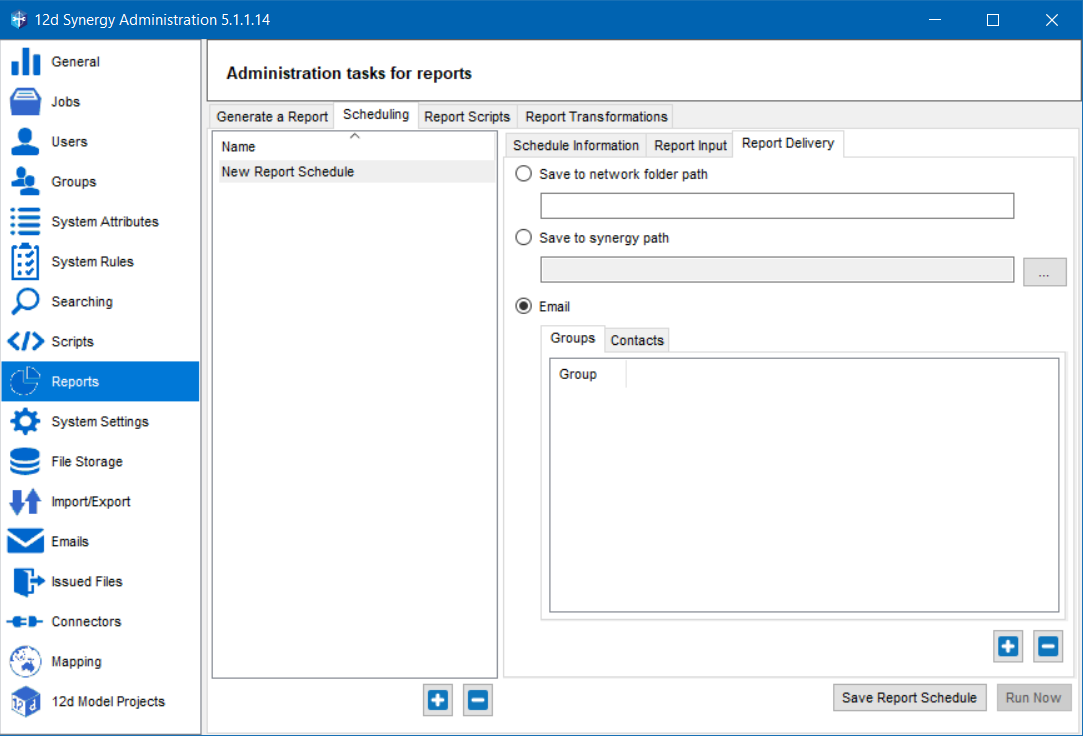
Do one of the following to set the report delivery:
Select the Save to network folder path option to save the report to the location you will be entering in the box below.
Select the Save to Synergy path option to save the report to the 12d Synergy location you will browse using the ellipsis
 button below.
Select the Email option and click the
 button to add groups of users in the Groups tab and individual users in the Contacts tab.
Click the Save Report Schedule button.
The report is generated based on the date, time, and frequency set and is delivered in the selected format.You can click the Run Now button and test if the report is being generated.
1.3. Custom Reports
You can create custom reports via the scripting engine built into the 12d Synergy applications. You can write a program and specify the inputs to the report, using full API access. For more information on the API, please see the 12d Synergy API Reference guide.
1.3.1. How to Upload a Custom Report
Admin Content
In the 12d Synergy Administration application, select the Reports tab > Report Scripts tab.
Click the Add button.
The Add a Report Library window is displayed.
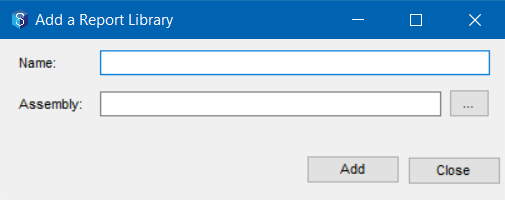
Enter the name of the custom report in the Name box.
Click the ellipsis
 button and add the .dll file of the custom report you have developed.
Click the Add button.
The custom report is displayed in the left panel of the Report Scripts tab.
It is also added in the 12d Synergy Client application > Reporting menu > Generate a Report option > Select a Report window. You can generate the custom report like any other standard report from there.