Admin Content
You can send out customized emails from 12d Synergy to notify users about important information or changes. While details such as the company logo, header, and footer of an email are generally the same, details such as the sender’s name, date, receiver’s name, etc., will keep varying. All these attributes of an email are called variables, and they can be used to build a customisable email template.
You can create email templates that match different events and customise them with the required variables and text. When the event occurs and if the user has requested to be notified of the changes, then these templates are sent out as emails to the required stakeholders.
While each event can be notified to users via email, you also have the option to send a summarised email of events that occur within a set interval. This summarised email is called an Email Digest. You can configure which events and their details are included in an Email Digest. If you do not opt into Email Digests, or no digest template is defined for that email type, then the emails are sent to users as individual emails using the template defined for each email.
1.1. How to Set Up Outgoing Email
You (as an Administrator) can set up the email server to send outgoing emails.
In the 12d Synergy Administration application, select the Emails tab > Email Server tab.
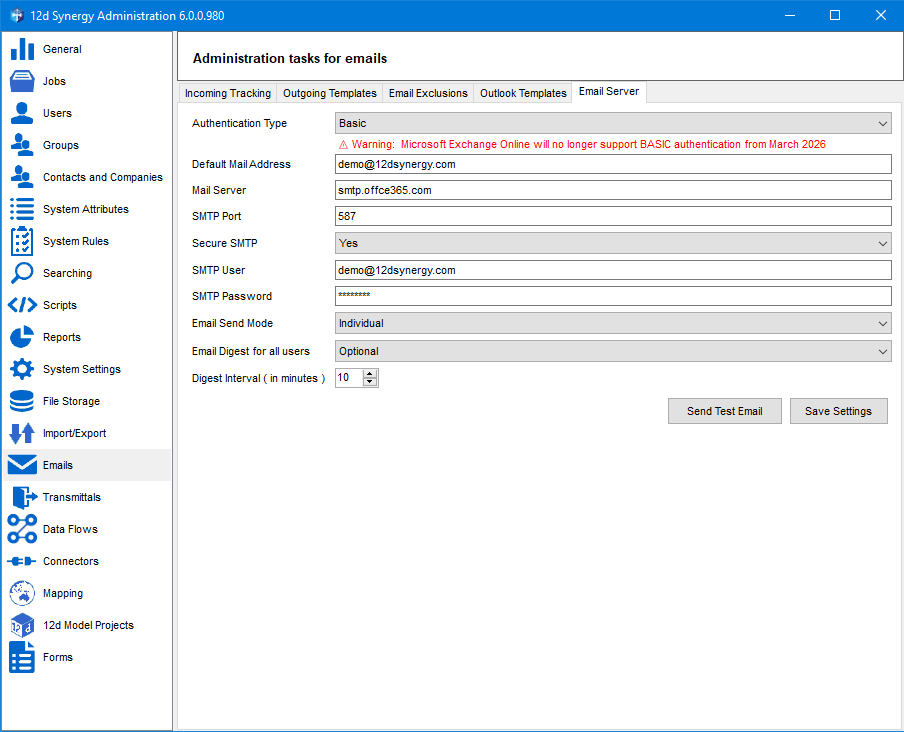
From the Authentication Type list, select one of the following authentication types:
No email server — If you select this option, no further server configuration details are displayed. Hence, no email notifications will be sent.
Basic — The standard SMTP settings have to be configured.
Exchange Online with Entra ID — This is the new authentication against Microsoft’s servers that 12d Synergy now supports.
This option is available in 12d Synergy version 5.1.7.753 or later.
Enter the email address from which outgoing emails will be sent in the Default Mail Address box.
Enter the address of the server used to send emails in the Mail Server box.
If your SMTP server uses a non-standard SMTP port, then enter the port number in the SMTP Port box.
If your SMTP server requires authentication to send emails, then enter the email address to be used for authentication in the SMTP User box.
If you select the Exchange Online with Entra ID option, then SMTP authentication must be enabled for your tenant and for the user who is to send the email. You can find out more information about how to enable SMTP Authentication here: https://learn.microsoft.com/en-us/exchange/clients-and-mobile-in-exchange-online/authenticated-client-smtp-submission
Based on the selected authentication type, enter the values for the following details displayed.
Authentication Type
Details specific to the selected Authentication Type
Description Value
No email server
No details are displayed
NA
Basic
Secure SMTP
Used if your SMTP Server uses a secure SMTP port
Default value: No
SMTP Password
Used if your SMTP server requires authentication to send emails
Exchange Online with Entra ID
Entra ID: Tenant ID
Enter the Tenant ID and Client ID you received when registering the Entra ID app.
Entra ID: Client ID
In March 2026, Microsoft will begin deprecating support for basic SMTP authentication with Client Submission when communicating with Exchange Online / Office 365. This change from Microsoft will affect our on-premises customers who use Exchange Online / Office 365 for email. This does not affect cloud customers or customers who use their own self-hosted exchange server.
To continue to send email notifications with an on-premises server, you will need to do one of the following:
Upgrade to a version of 12d Synergy that supports modern authentication (Exchange Online with Entra ID mode explained below) against Microsoft’s servers. This is available in 12d Synergy version 5.1.7.753 and beyond.
Use another service that supports SMTP, such as SendGrid or Azure Communication Services.
If the 12d Synergy Server is unable to log in to send emails via Microsoft Exchange with an Entra ID login, we will endeavour to email you from our external alert service. Your Administrative Contact, configured in the 12d Synergy Administration application > System Settings > General tab > Administrative Contact setting, will receive emails from notifications@12dsynergycloud.com. Please ensure you add this email address to your email whitelists. Additionally, your server needs to be able to talk to our API at https://alerts.12dsynergy.com to be able to inform us of any problems.
Select whether you want to send individual emails to all users or a single group email to all users from the Email Send Mode list. By default, the Individual option is selected.
In the Email Digest for all users list, you can choose to summarise emails and send them as email digests instead of individual update emails.
If you select the Always Digest option, then all users will receive email digests.
If you select the Optional option, then a user can turn on the email digests feature by selecting the Change Job
 icon button in the 12d Synergy Client application > Servers button in 12d Synergy prompt > Request Email Digests where available check box in the Edit Servers window.
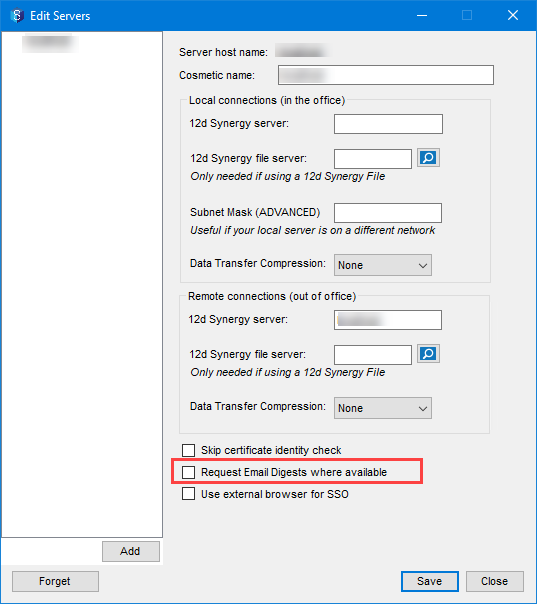
This option is only applicable when you select the Individual option from the Email Send Mode list.
This Email Digest feature is only available in 12d Synergy version 5.1.7 or later.
You can select the time interval for sending email digests from the Digest Interval (in minutes) list. After every set number of minutes, all individual emails are collated and sent as one email digest to all the users if you have selected the Always Digest option from the Email Digest for all users list, and to the users who have opted for email digests by selecting the Request Email Digests where available check box (as described in the previous step of this procedure). By default, this interval is set to ten minutes.
Click the Save Settings button.
If you have selected the Exchange Online with Entra ID option from the Authentication Type list, then an additional button named Authenticate with Entra ID is displayed.
.png)
Click this button and enter the credentials used to log in to your email application in the prompt that follows.
Authentication is performed, and the following message is displayed if successful.
Perform the actions mentioned in the note below to send a test email.You can send a test email to verify the email connection. This can be done when you select Basic or Exchange Online with Entra ID authentication types from the Authentication type list.
Click the Send Test Email button, and the following prompt is displayed.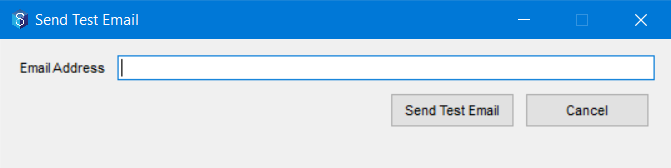
Enter a recipient’s email address in the Email Address box and click the Send Test Email button. If all the settings are correct, the recipient will receive the test email.
1.2. How to Use an Outgoing Template
In the 12d Synergy Administration application, select the Emails tab > Outgoing Templates tab.
Select the predefined template that suits the event for which you want to create an email template.
The template is displayed in the right panel.

You can choose to use the existing template or make changes to it.Do one of the following:
To use the existing template, click the Save button.
To edit the template, do the following:
Click the Edit Body button.
The Email Template Editor is displayed.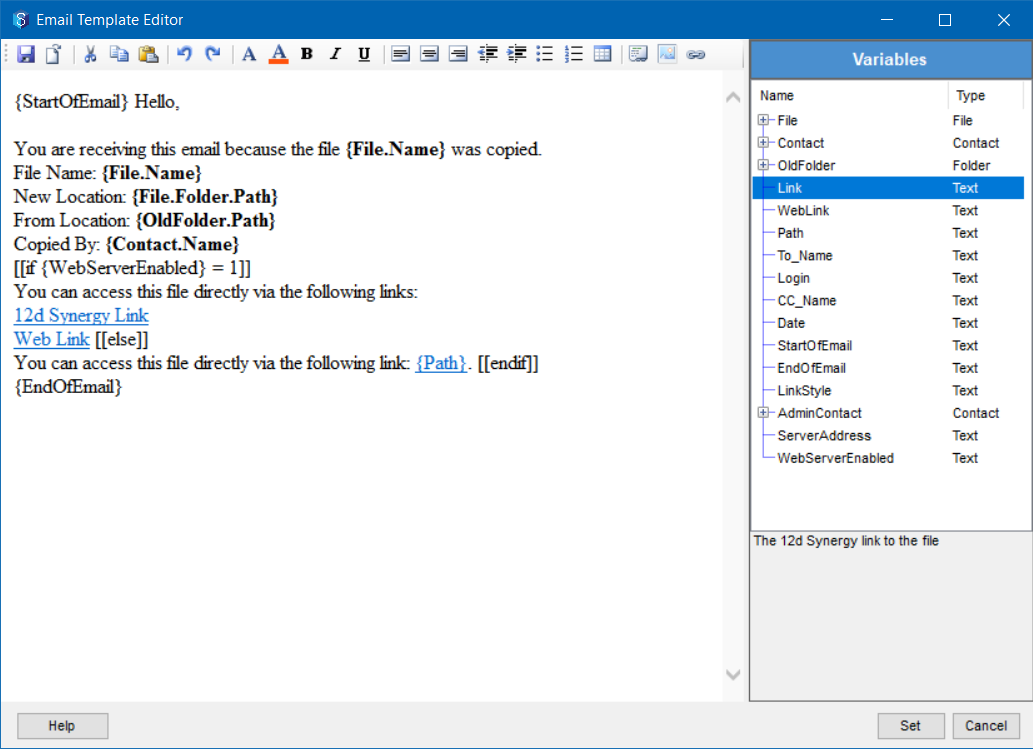
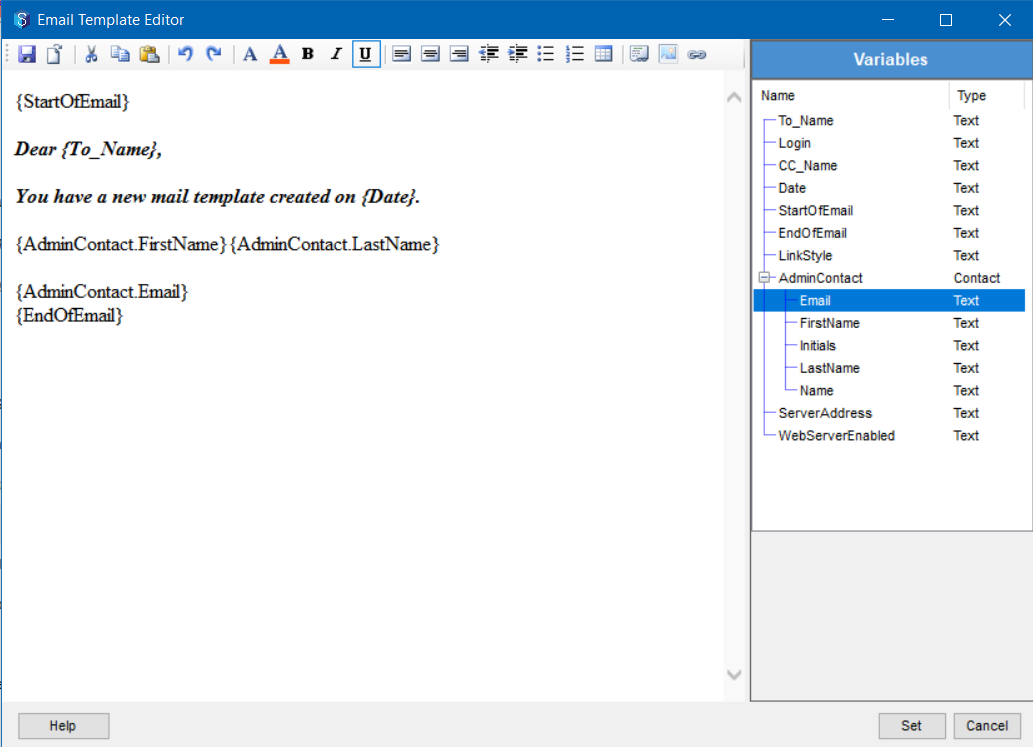
Make the necessary changes to the template in the editor. You can add more variables to the template. Place the cursor where you want to enter the variable, then click the required variable in the Variables panel on the right.
The description of the variable you select in the Variables panel is displayed below it.
When you create a 12d Synergy Link using the Link variable, MS Outlook no longer supports the synergy12d:// links. To make these links work now, set the 12d Synergy Admin > System Settings tab > Use HTTP based links instead of synergy12d links setting to Yes.
Click the Set button.
The updated template is displayed in the Outgoing Templates tab.Click the Save button.
The template is now ready for use. It is triggered whenever the event for which it has been created occurs. If you have set up this event to be a part of the email digest, then the template digest is a part of the email digest when this event is triggered. It is now ready for use in any custom scripts or workflows.
1.3. How to Create a Customised Outgoing Template
In the 12d Synergy Administration application, select the Emails tab > Outgoing Templates tab.
Click the
 button.
The Email Template Editor is displayed.
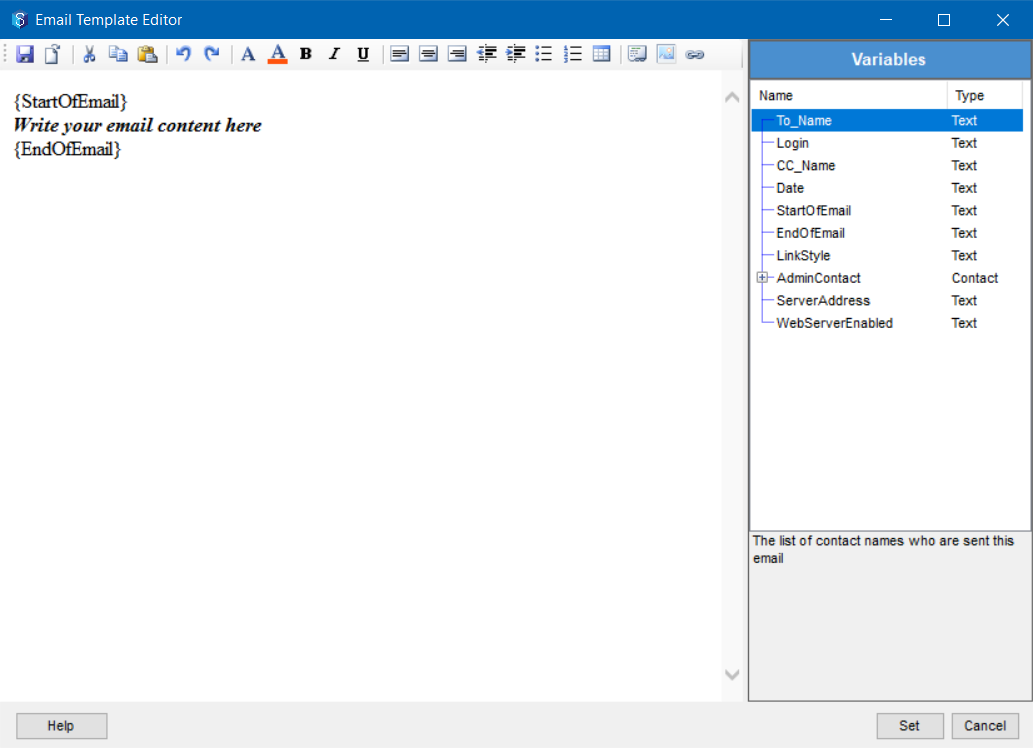
You can add customised text to the email in the space where it says Write your email content here.
You can add more variables in your content by placing the cursor where you want to add the variable and clicking the required variable from the Variables panel.
The description of the variable you select in the Variables panel is displayed below it.
If you have set up the Email Digest feature for your users, and you wish to include the selected event (or template) in the email digest, then do the following:
Click the Edit Digest button.
The Email Template Editor is displayed.

Click the Insert Variable button.
The Pick a Variable window is displayed.

Double-click the required variable or select it and click the Select button.
The selected variable is displayed in the Email Template Editor window.Repeat step c to add more variables to the Email Template Editor window. The content of this editor will be the content of your Email Digest if the selected event occurs.

Click the Set button.
The created variable expression is displayed against the Template Digest field for the selected event in the Outgoing Templates tab.

Click the Set button.
The new template is displayed as a New template under Custom in the tree structure in the Outgoing Templates tab.Select the New template under Custom in the tree structure.

Do the following in the right panel:
Enter a new name for the template in the Template name box.
Enter the subject for the email template in the Template subject box.
Click the Save button.
The template is now ready for use. It is triggered whenever the event for which it has been created occurs. It is now ready for use in any custom scripts or workflows.
1.4. Logic in Templates
Email templates also allow some conditional logic to help customize the output of emails. This is especially useful for Task emails, when you may wish to display different information to the task assignee, rather than the CC’s.
All logic commands are placed in [[ ]]
1.5. If Statements
You can choose to print something to the email template based on conditions, using If and Else If statements
For example,
[[if $AssignedToName = $To_Name]]
You are the assignee!
[[else]]
You are not the assignee!
[[endif]]
If statements can also use Boolean Logic
[[if $AssignedTo = “Design Engineer” OR $AssignedTo = “Surveyor”]]
This is assigned to a designer or surveyor
[[elseif $AssignedTo != “Project Manager”]]
This is not assigned to the project manager, the design engineer, or the surveyor.
[[endif]]
Note: If statements can also be nested.
1.6. Link Statements
Rather than using HTML, you can simply specify links using the [[link]] command. This takes the syntax:
[[link link=”the url here” name=”the name to display here]]