A job is the highest-level structure in 12d Synergy. It is an item of work that contains folders, files, tasks, forums, 12d Model Projects and potentially other jobs.
1.1. How to Create New Jobs
You can create a top-level job and a sub job in the 12d Synergy Web and Mobile Apps.
On the 12d Synergy Web or Mobile App home page, do one of the following:
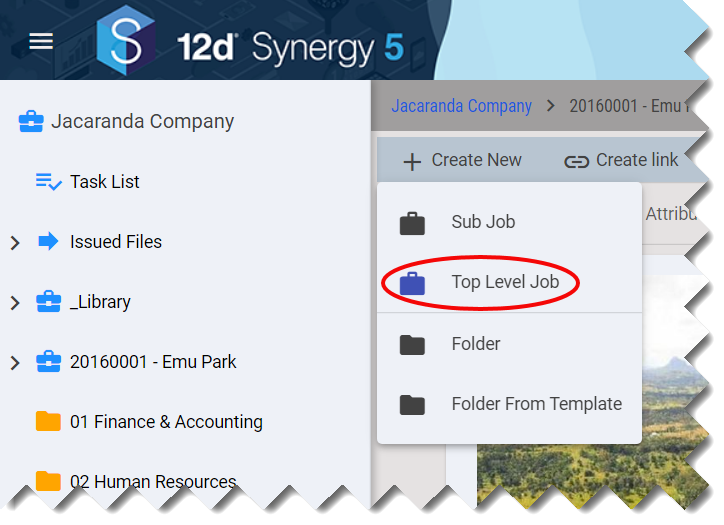
To create a new top-level job, click the Create New
 icon and select the Top Level Job option.
Depending on the size of the browser or if you are using the 12d Synergy Mobile App, this option is displayed either as a selection option below the 12d Synergy ribbon or as a Create New option in the
 menu at the bottom-right of the page.
The Create new Top Level Job dialog box is displayed.

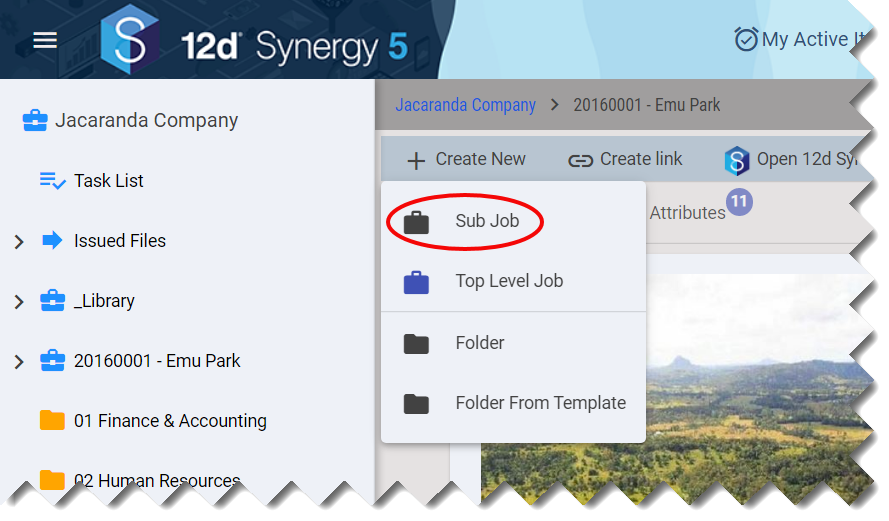
To create a new sub level job, click the Create New
 icon and select the Sub Job option.
Depending on the size of the browser or if you are using the 12d Synergy Mobile App, this option is displayed either as a selection option below the 12d Synergy ribbon or as a Create New option in the
 menu at the bottom-right of the page.
The Create new Sub Job dialog box is displayed.

There are four steps to create a job. Only the first step is a mandatory one.
Step 1 – Enter the Job name and any required attributes (MANDATORY)
A table displaying the configured job attributes, if any, is displayed in this step.
Enter the job name in the Name field.
If any configured job attributes are displayed, enter/select their value.
For more details on configuring job attributes, please refer to the Attributes page in the 12d Synergy Guide.
Click the Next button.
The Next button is enabled only when the details in this section are correctly filled.
Step 2 – Define an optional description (OPTIONAL)
In the Word editor, enter the description of the new job.
Click the Next button.
Step 3 – Define any job categories (OPTIONAL)
If your 12d Synergy Administrator has created Job Categories, then you can apply those categories to define the new job.Select the checkboxes against the Job Categories displayed in this step.
If you are looking for a specific Job Category, you can enter its name in the Filter field. If the entered job category exists, it is displayed in the table below the Filter field. You can then select the checkbox displayed against it to define the new job.
Click the Next button.
Step 4 – Define an optional cover image (OPTIONAL)Click the Upload Image
 icon to select a cover image for the job.
Click the Create
 button.
A new job is created with the defined attributes and is displayed accordingly.
1.2. How to Create a Link to the Job
You can create a link to a job by following this procedure.
You can access any instance or entity copied from the 12d Synergy Client application using the Open 12d Synergy link  button.
1.3. How to Search for a Job
You can search for a job with the following parameters:
Quick Search string
Name of the job
Custom and defined attributes of the job
Location ranges on the map
1.3.1. To search for a Job in the Attributes tab
On the 12d Synergy ribbon, click the Job Search
 button.
Depending on the size of the browser or if you are using the 12d Synergy Mobile App, this option is displayed either on the 12d Synergy ribbon or under the
 top-left menu.
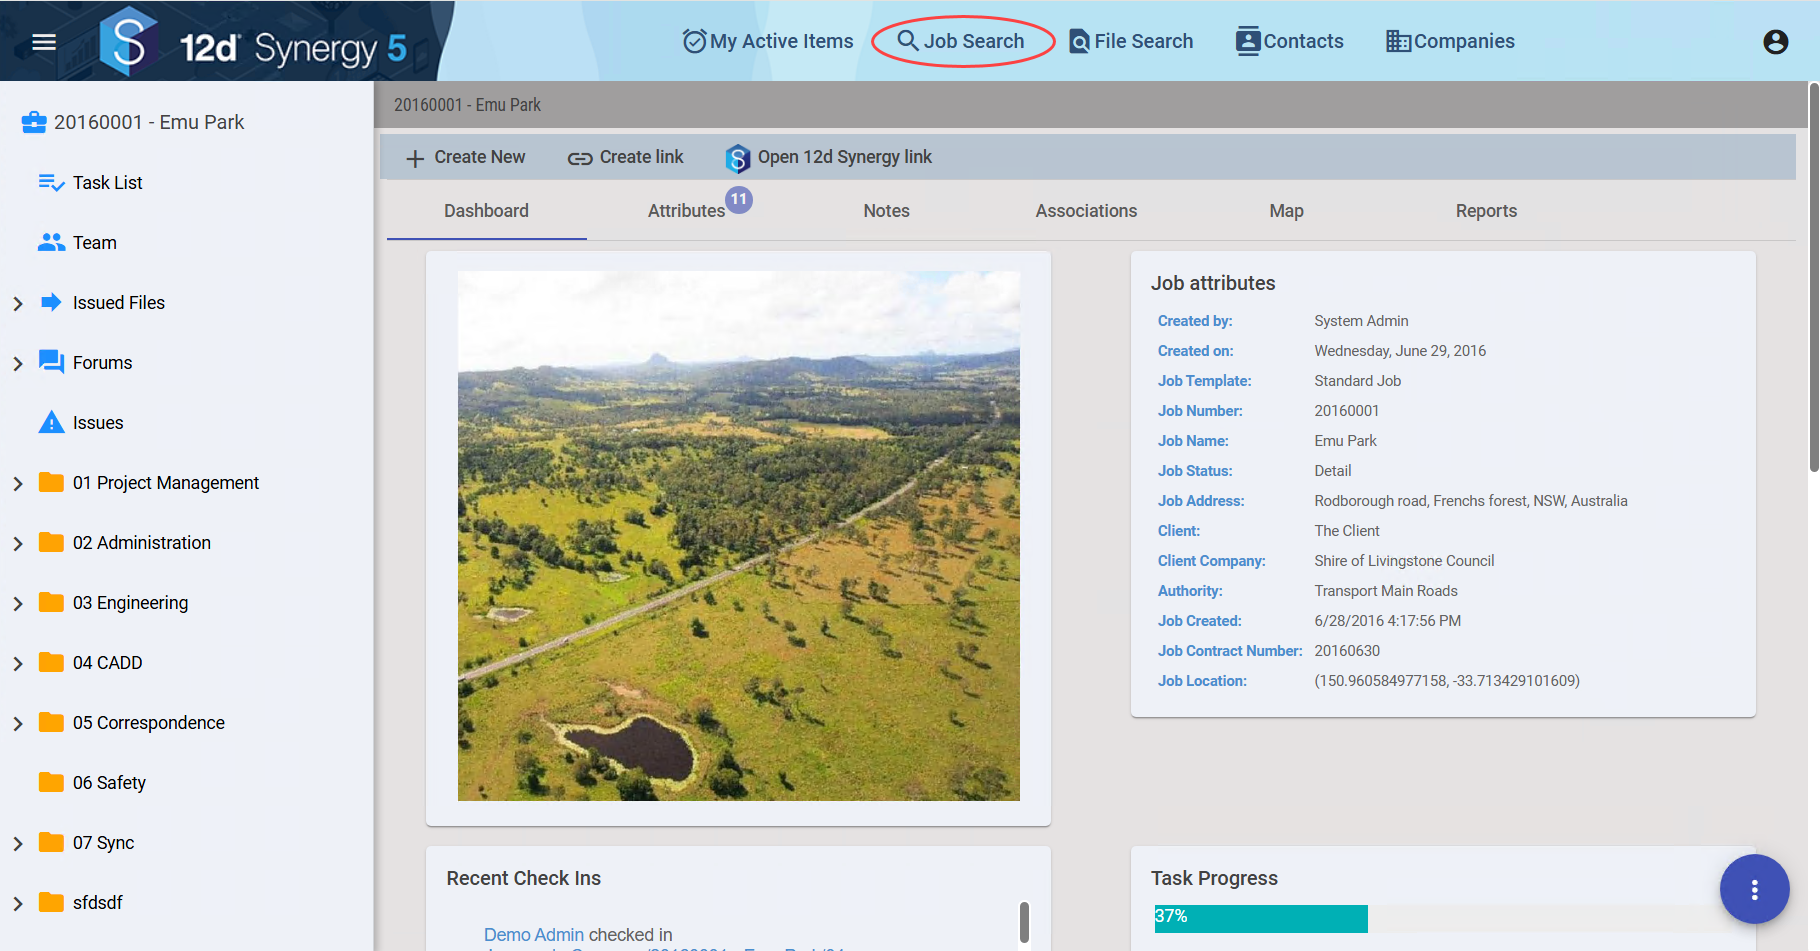
The Job Search form with the Attributes and Map tabs is displayed below.

In the Attributes tab, do any of the following:
To search based on any information in the required job, enter the search string from the required job in the Quick Search field.
To search based on the name of the required job, enter the name of the required job in the Name field.
By default, Restrict to top level?, Restrict to my jobs and Category attributes are displayed in the table in the Other attributes form. To search based on more configured attributes of the required job, do the following:
Click the Add Attributes
 button to configure the search based on relevant attributes.
The Attribute Search form is displayed. You can search based on Defined attributes or Custom attributes.In the Defined attributes and Custom attributes tabs, select the checkboxes against the required attributes.
Click the Select button.
The selected attributes are displayed in the table below the Add attributes button.Configure the search parameters for the selected attributes.
Click the Search Jobs button.
The search results are displayed in the Job Search > Results > List tab and the location of the displayed results is displayed in the Job Search > Results > Map tab.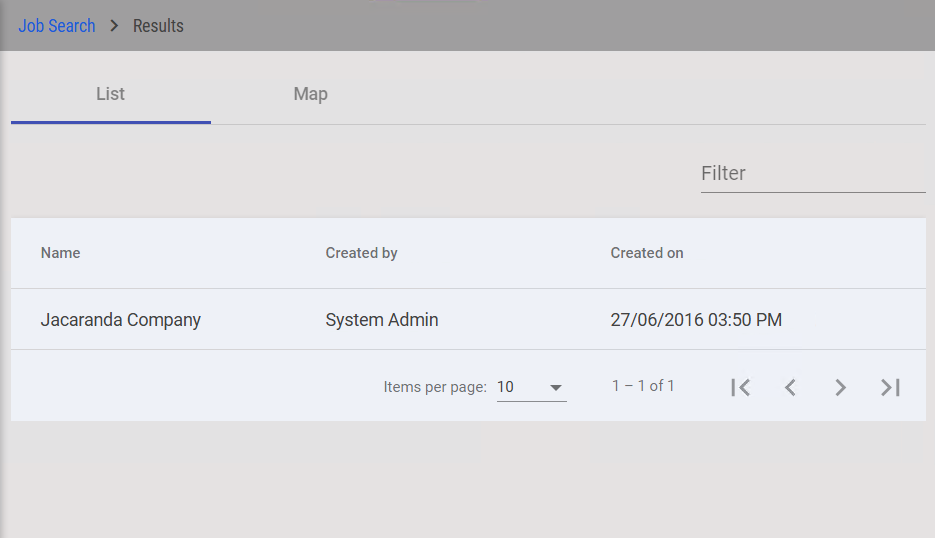
Click the required job.
The dashboard of the required job is displayed in the Dashboard tab.If you want to work in another top-level job, you will have to search for it and then select it from the displayed results.
1.3.2. To search for a Job in the Map tab
On the 12d Synergy ribbon, click the Job Search
 button.
Depending on the size of the browser or if you are using the 12d Synergy Mobile App, this option is displayed either on the 12d Synergy ribbon or under the
 top-left menu.
.png)
The Job Search form with the Attributes and Map tabs is displayed below.
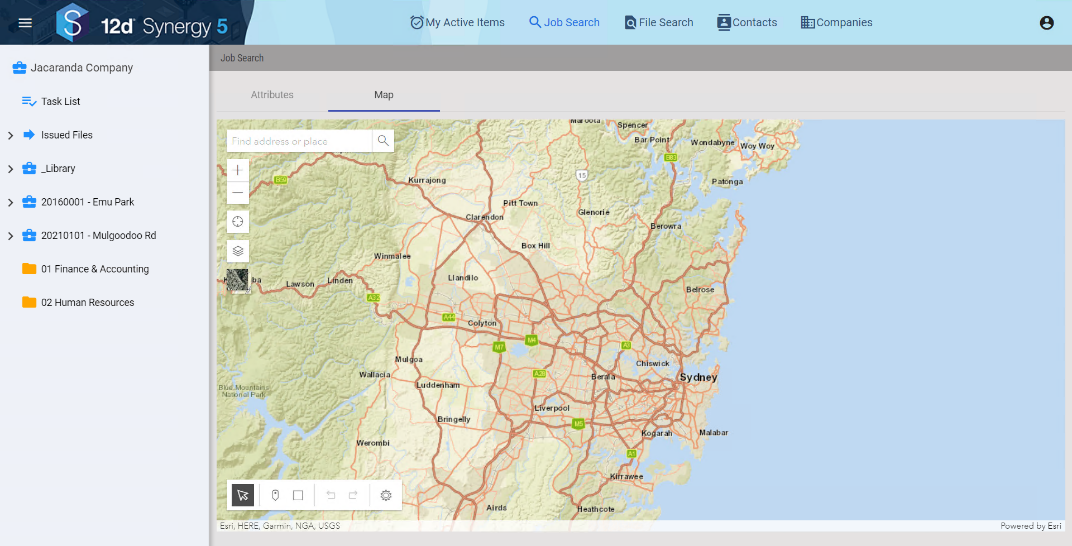
Click the Map tab.
Enter the approximate location or address in the Search
 box.
box.Click in the Search box to view and select the Use current location option.
Click the
 icon.
icon.
The Enter a range window is displayed.
Enter the search radius range in the Range box and select the unit of measurement for the range from the Unit list.
Click the Set button.
The map zooms in on the location of the search result and pinpoints the jobs in the search area. A pop-up with the list of search results is displayed.

Click the required job from the list of displayed jobs.
The details of the selected job, with the option of selecting the job, are displayed as a pop-up window.
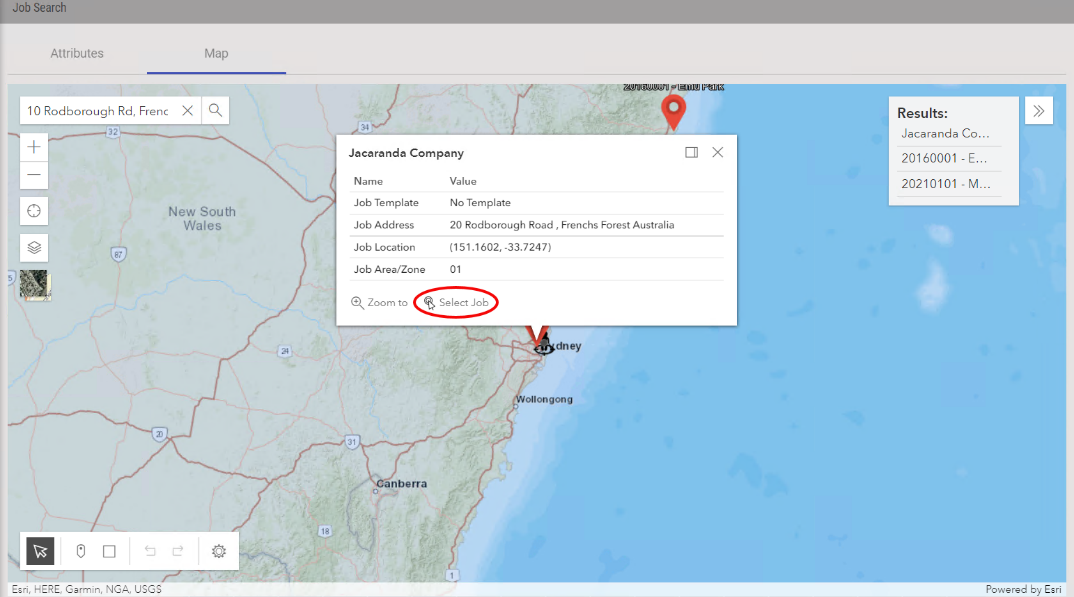
Click the Select Job link to open the job.
The dashboard of the required job is displayed.You can alternatively search in the following ways.
a location point using the Draw a Point
 icon in the bottom left corner of the map.
a rectangular area using the Draw a rectangle
 icon.
icon.
You can use the Dock
 icon on any pop-up window to lock the display of the pop-up window on the map.
Click the Undock
 icon to minimise the pop-up window on the map.
You can click the
 and
and  icons on the left corner of the map to zoom in and zoom out, respectively.
You can click the
 icon on the left corner of the map to pinpoint your current location on the map.
You can click the Expand Layers
 icon in the left corner of the map to display the list of job layers added by your 12d Synergy Administrator. If no job layers are added, then the added system layers, if any, are displayed.
You can click either the satellite view or the general map icons in the Toggle base map
 icons to toggle between these views of the map.