Admin Content
Attributes are pieces of user-defined metadata to help describe your data. They can be applied to most entities within 12d Synergy, including Jobs, Folders, Files, 12d Model Projects, Contacts, and Tasks.
Attributes help us in understanding and defining the entity better and can be used for searching specific entities. They can also be used by some external processes and for writing scripts or workflows.
There are two types of attributes.
System-defined attributes – Some attributes can be defined at a system level as well as at an entity level. If you set up a system attribute at an entity level (say at the file level), then all entities of that type (that is, all files) must define that attribute. The following system attributes can be set in the System Attributes tab of the 12d Synergy Administration application.
Job Attributes
12d Model Project Attributes
File Attributes – with optional extensions
Note that adding attributes to any of these will always attach them to existing jobs, files or 12d Model Projects. In these cases, attributes must be given a default value or set to optional.
User-defined attributes – These are defined at run time by the user. Revision number and version number are good examples of such attributes. These attributes are predefined by the 12d Synergy Administrator.
All the attributes are displayed in the 12d Synergy Administration application > System Attributes > All Attributes tab. 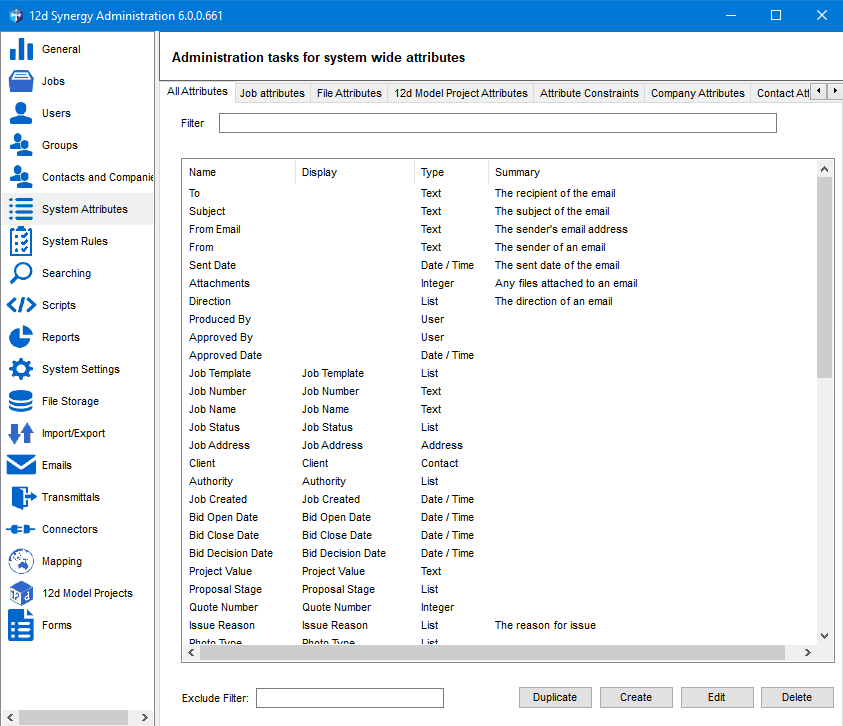
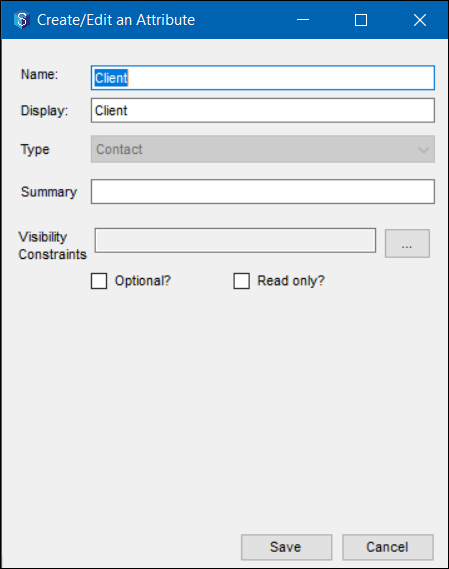
1.1. Attribute Structure
The following details help you define an attribute:
Name – to uniquely identify the attribute
Display Name – how the user will see the attribute in the system
Type – the type of values that the attribute holds.
An optional summary of the attribute
Visibility Constraints if it is a list attribute
Whether or not it is an optional attribute (Optional attributes are displayed in italic font.)
Whether or not it is a read-only attribute
1.2. Attribute Type
The type of attributes and the values that they can hold are mentioned below.
An attribute value can have special characters, but when it is included in a job naming rule or a file naming rule, only ., -, _ and <space> are permitted.
Attribute Type | Values/Format | Examples |
|---|---|---|
Text | A-Z, a-z, 0-9 and all special characters | Street12@3.drain4, Granville.sewageplan1403 |
Integer | Positive and negative whole numbers, including zero | -980, 980, 0 |
Real | Positive and negative decimal numbers, including zero | -9.8, 9.8, 0 |
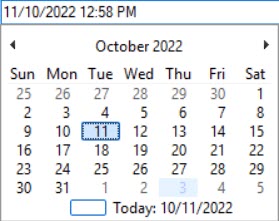
Date / Time | While selecting a value, the date/time format set on your system is displayed. For instance, dd/mm/yyyy hh:mm AM/PM is the format set for most Australians, where hh:mm is the time based on a 12 hour system. Similarly, after saving the value of the attribute also, the value is displayed in the date/time format set on your system. | 25/02/2001 12:45 PM 15/12/2010 9:25 AM
|
Contact | Click the corresponding value cell and then click the Search | The contact's name is saved as the value for this type of attribute. |
User | Click the corresponding value cell and then click the Search icon displayed in the value column of the User type attribute to select a contact from the Find a Contact window. Either a job team member or a job contact can be selected as a value for this type of attribute. | The user's (contact's) name is saved as the value for this type of attribute. |
List | The value for this type of attribute is one of the options that are defined at the time of its creation. For instance, say we have created an attribute called Project Type with the list options Marketing, Surveying, Support, Construction, and Drawing. One of these values can be selected as a value for the Project Type attribute. You can also set constraints on the List type attribute options. For example, you can set a constraint on the display of the Marketing list option in the above example. | The option selected from the list of options that are defined when the attribute is created. |
Coordinate | The value of this type of attribute is the latitude and longitude coordinates of a place either selected from the map or entered manually. You can also specify the address of the place, and the latitude and longitude coordinates are accordingly calculated and displayed. | When a point is selected from the map, its value is something like this - (150.022844426615, -33.7006056905089). It can also be an entered values such as (201, 35.5). On entering an address, say 20, Rodborough Rd, Frenchs Forest NSW 2086, the value is (151.248834017314, -33.7547539378306). |
Yes/No | Yes or No | Yes No |
Address | The value of this attribute is an address of a location which includes the street address, suburb, state, postcode and country. You can click the value cell of this type of attribute and enter the approximate address in the Edit an Address window, view it on the map and select a more accurate location from the map. If you mention a wrong address, “This address is invalid.” message is displayed. | 20 Rodborough Rd, Frenchs Forest, NSW, 2086, Australia. |
Company | Click the corresponding value cell and then click the Search | 12d Synergy Pty Ltd. 12d Solutions Pty Ltd. |
 icon displayed in the value cell of the Contact type attribute to select a contact from the Find a Contact window. Either a job team member or a job contact can be selected as a value for this type of attribute.
 icon displayed in the value column of the Company type attribute to select a company from the 12d Synergy Companies window.
1.3. How to Apply Attributes
1.3.1. Job Attributes
Attributes can be applied to jobs to describe additional information about the job. They can be applied to an individual job or across all jobs at the system level.
They can be referenced in emails, reports, Word documents, and in 12d Model projects.
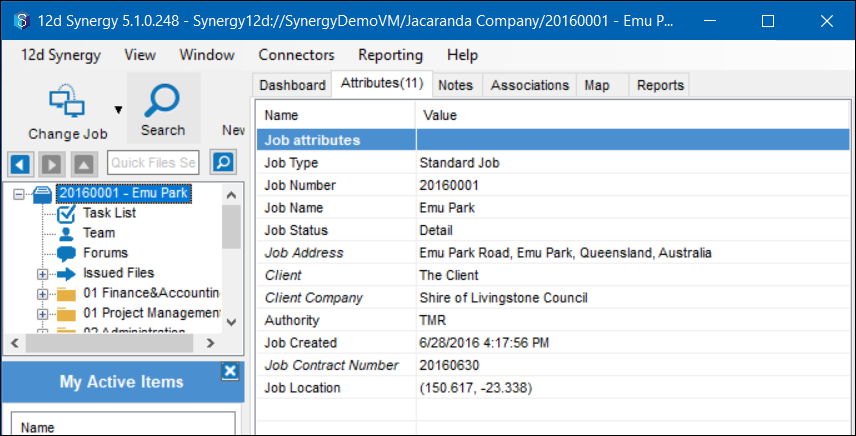
You can view the attributes that apply to a job by selecting it and clicking the Attributes tab in the top-right panel of the 12d Synergy Client application.
1.3.1.1. How to Apply Job Attributes
You can apply job attributes at an individual level or the system level.
Do one of the following:
To apply an attribute at the individual job level, do the following:
In the 12d Synergy Client application, select the required job from the tree structure.
Right-click the job and select the Edit option.
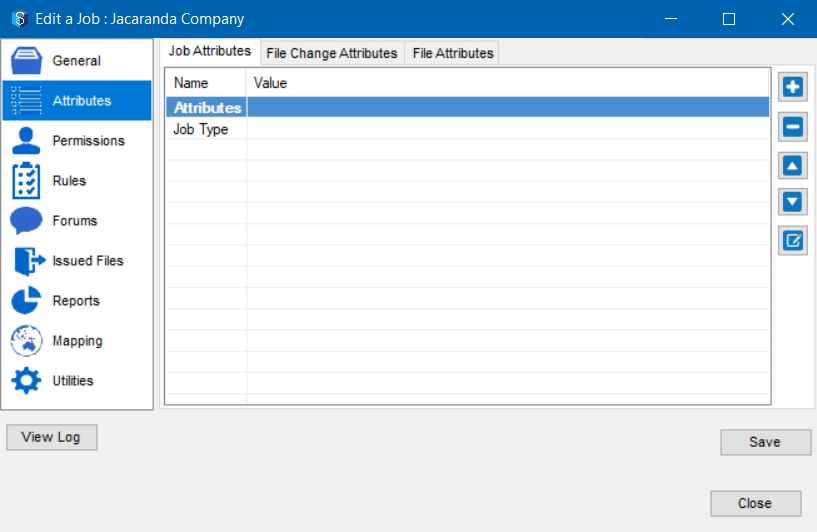
The Edit a job window is displayed.Click the Attributes tab from the left panel.
Click the Job Attributes tab in the right panel.
All the existing job attributes that apply to the selected job are displayed in this tab.
To apply an attribute to all the jobs at the system level, do the following:
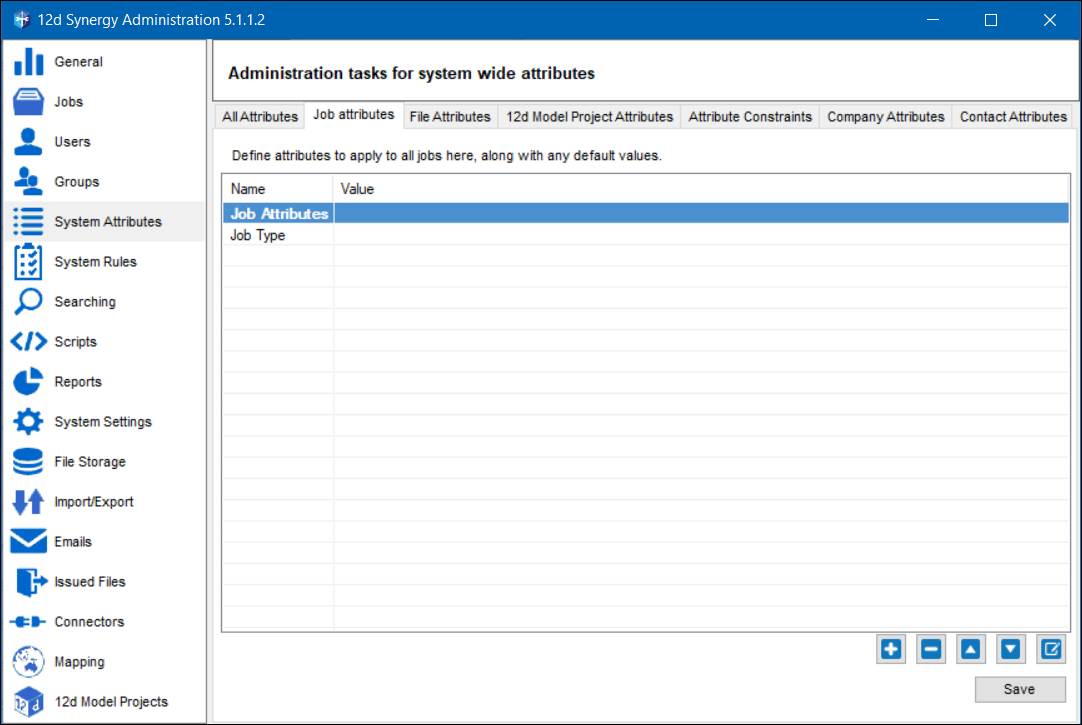
In the 12d Synergy Administration application, click the System Attributes tab from the left panel.
Click the Job Attributes tab in the right panel.
All the existing job attributes that apply to all the jobs in the system are displayed in this tab.
1.3.2. Folder Attributes
Attributes can be defined for folders to define them in more detail. Such attributes are called Folder attributes. When applied to a folder, these attributes impact the subfolder too, if the Inherit file and change attributes from parent checkbox is selected while creating the subfolder.
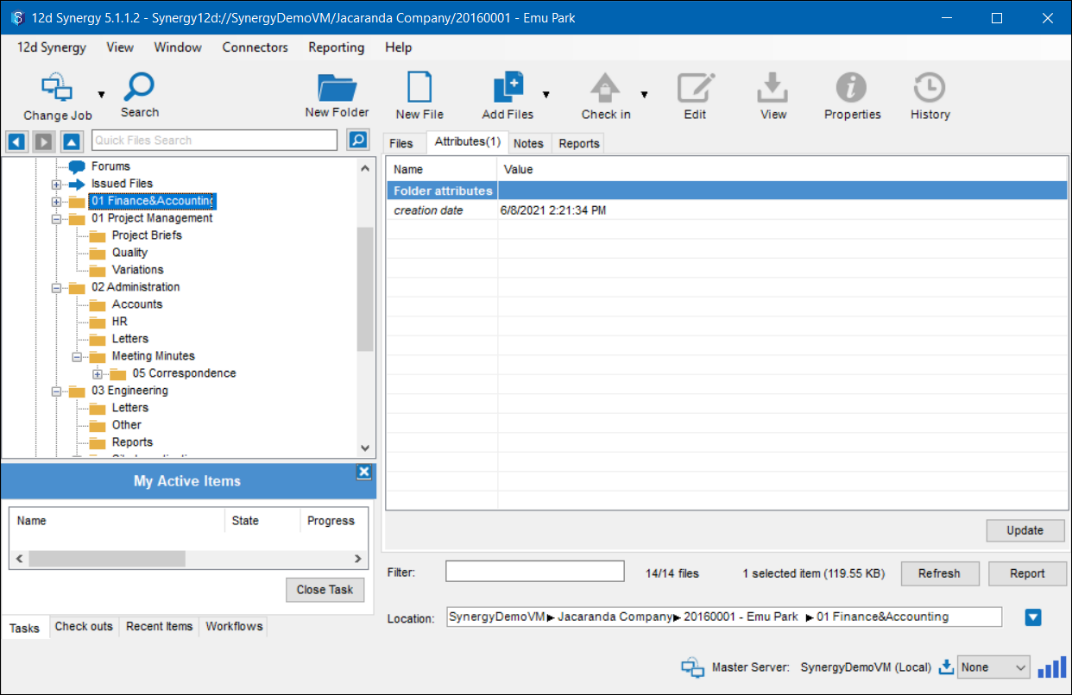
You can view these attributes by selecting a folder and clicking the Attributes tab in the top right panel of the 12d Synergy Client application.
1.3.2.1. How to Apply Folder Attributes
You can apply folder attributes at an individual folder level.
To apply an attribute at the individual folder level, do the following:
In the 12d Synergy Client application, select the required folder from the tree structure.
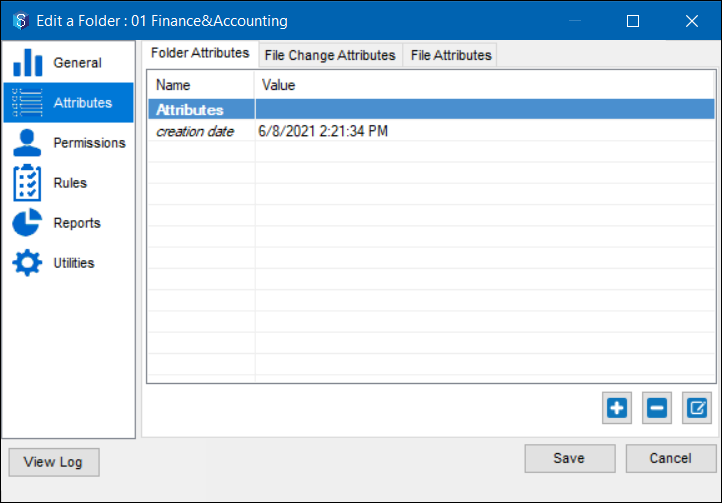
Right-click the folder and select the Edit folder option.
The Edit a Folder window is displayed.Click the Attributes tab from the left panel.
Click the Folder Attributes tab in the right panel.
All the existing folder attributes that apply to the selected folder are displayed in this tab.
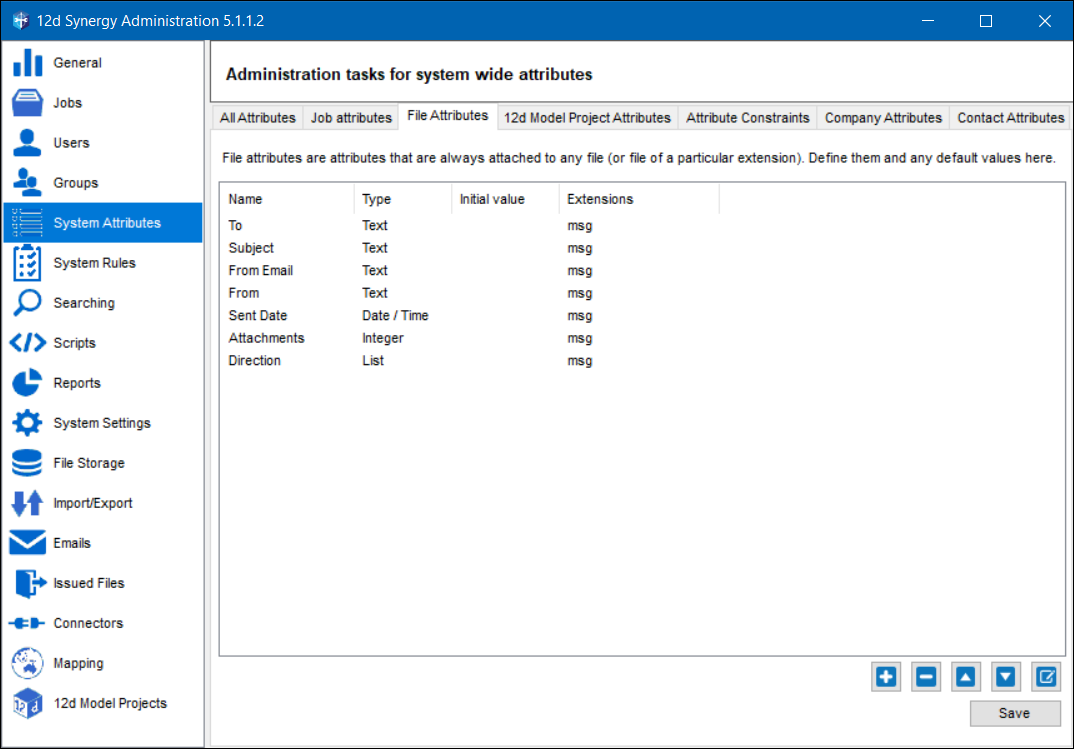
1.3.3. File Attributes
Attributes can be defined at the folder level to apply to all the new files being created in that folder. These are called file attributes. They can also be applied to an individual file or across all files of a specific type, at the system level.
You can view these attributes by selecting a file in a folder view and clicking the Attributes tab in the bottom right panel of the 12d Synergy Client application.
.bmp)
1.3.3.1. How to Apply File Attributes
You can apply file attributes at the file level, folder level, and system level.
Do one of the following:
To apply an attribute at the folder level, do the following:
In the 12d Synergy Client application, select the required folder from the tree structure.
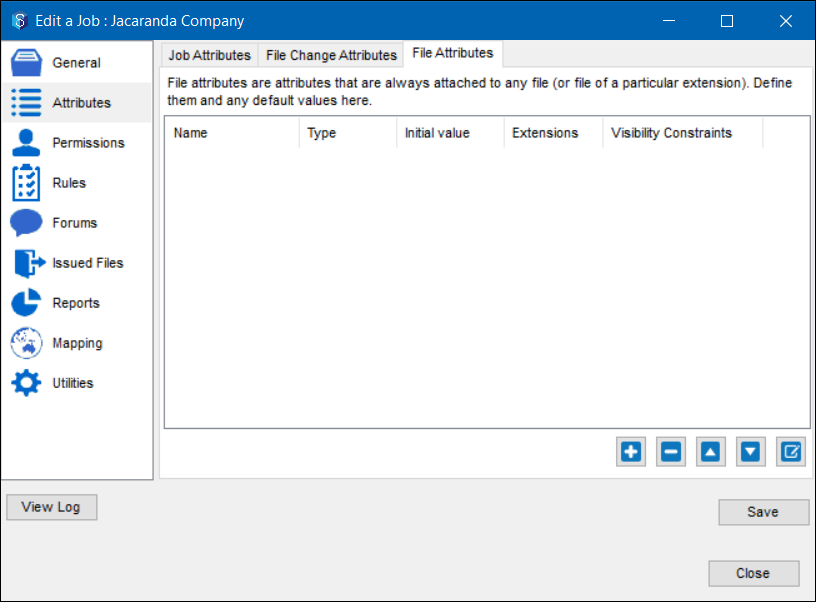
Right-click the folder and select the Edit option.
The Edit a job window is displayed.Click the Attributes tab from the left panel.
Click the File Attributes tab in the right panel.
All the existing file attributes that apply to the selected folder are displayed in this tab.
To apply an attribute to all the selected type of files at the system level, do the following:
In the 12d Synergy Administration application, click the System Attributes tab from the left panel.
Click the File Attributes tab in the right panel.
All the existing file attributes that apply to all the folders in the system are displayed in this tab.
To apply an attribute at the file level, do the following:
In the 12d Synergy Client application, select the required folder from the tree structure.
All the files in the folder are displayed in the top-right panel.Select the individual file for which you want to create and apply a file attribute.
The Attributes tab in the bottom-right panel displays all the attributes applied to the selected file.Do one of the following to check out the file:
Click the Check Out
 button.
Click the Check Out
 button in the ribbon.
Right-click the file and select the Check Out option.
The Attributes tab is enabled and the buttons to add and delete
  attributes are displayed.
.bmp)
Click the
 button.
The Find an Attribute window is displayed. All the existing attributes in the system are displayed in this window.
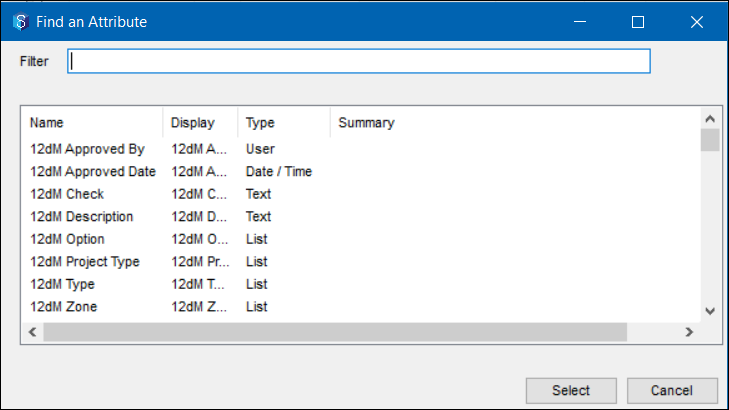
Select the required attribute and click the Select button.
The selected attribute gets displayed in the Attributes tab in the bottom-right panel.Click the corresponding Value column of the selected attribute and enter/select its value.
The attribute value is added.Click the Check in
 button in the bottom-right panel.
The newly added attribute is applied to the file and is saved.While creating a file attribute, if you select the Prompt at every change check box in the Create/Edit an Attribute window, it means that every time you check in a file, the system will prompt you whether you want to change the existing value of that attribute.
If a file does not yet have a file attribute attached, it will be prompted for and attached at check-in time.
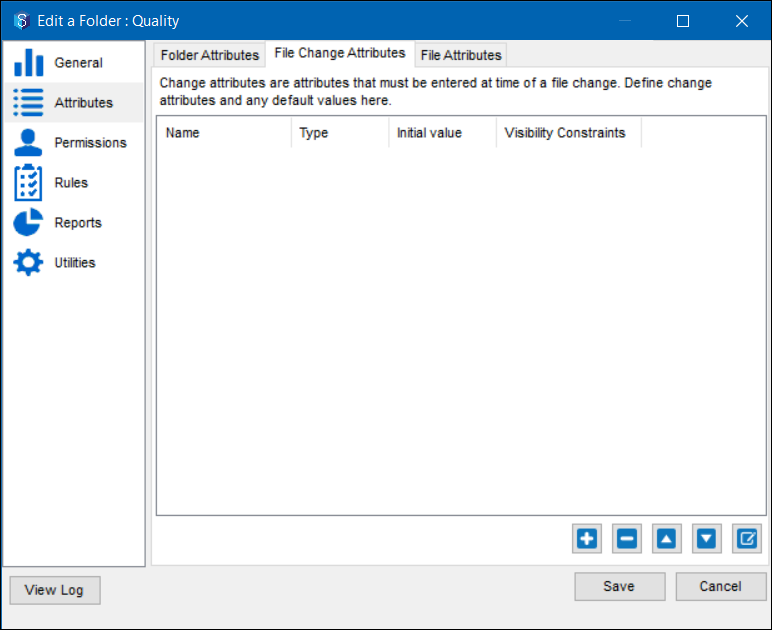
1.3.4. File Change Attributes
File Change attributes are additional change descriptions for files. Each time a file is checked in after a change/update, you are prompted to fill out attributes that help explain the change that was made to the file. You can view the values of the file change attribute by selecting the file and clicking the .png) icon button on the quick access toolbar in the 12d Synergy Client application.
icon button on the quick access toolbar in the 12d Synergy Client application.
1.3.4.1. How to Apply File Change Attributes
You can apply file change attributes at the folder level.
To apply an attribute at the folder level, do the following:
In the 12d Synergy Client application, select the required folder from the tree structure.
Right-click the folder and select the Edit option.
The Edit a job window is displayed.Click the Attributes tab from the left panel.
Click the File Change Attributes tab in the right panel.
All the existing file change attributes that apply to the selected folder are displayed in this tab.
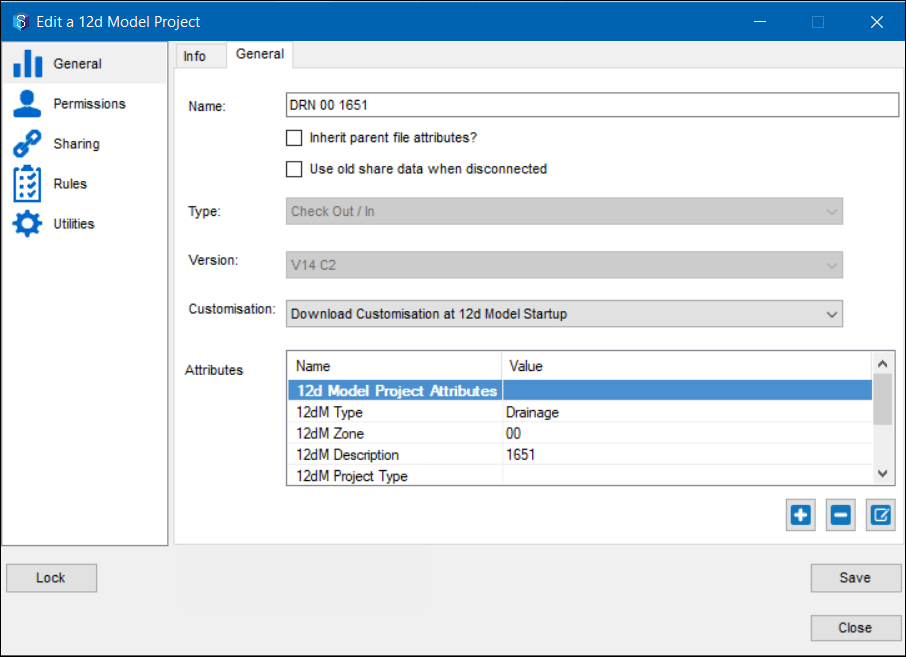
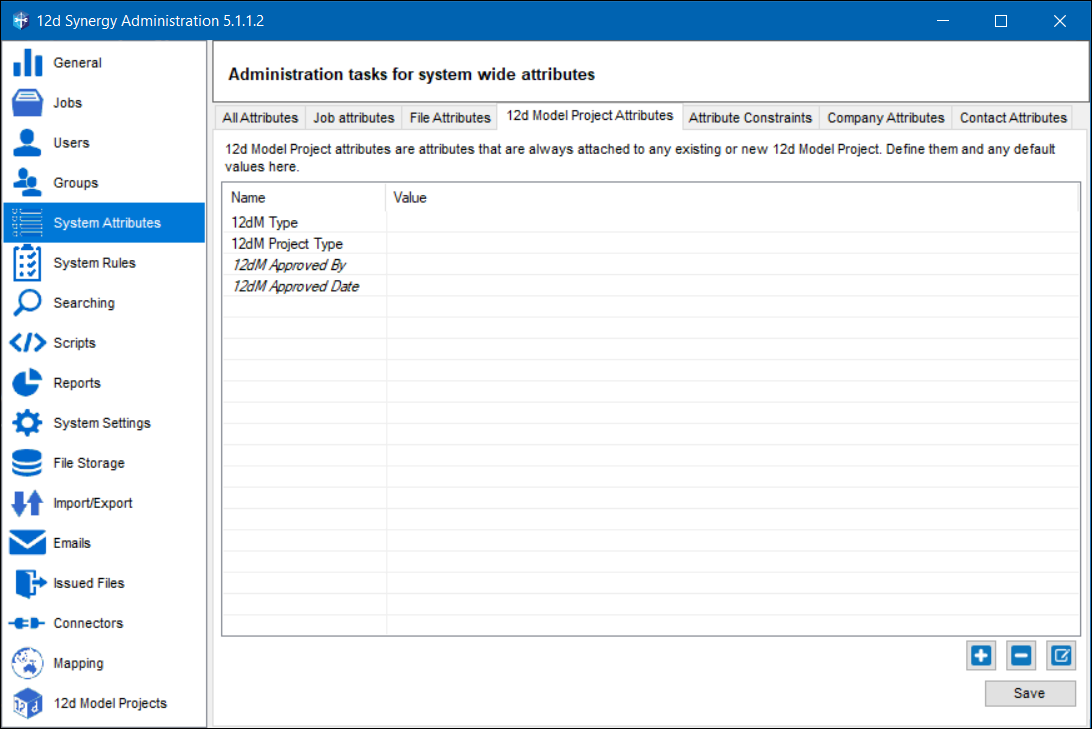
1.3.5. 12d Model Project Attributes
Attributes that are defined to describe the 12d Model project are called 12d Model Project Attributes. These attributes can be applied to an individual 12d Model project or across all 12d Model projects, at the system level.
1.3.5.1. How to Apply 12d Model Project Attributes
You can apply attributes at an individual 12d Model project level or the system level.
Do one of the following:
To apply an attribute to an individual 12d Model project level, do the following:
In the 12d Synergy Client application, select the required 12d Model project from the tree structure.
Right-click the 12d Model project and select the Edit 12d Model project option.
The Edit a 12d Model project window is displayed.Click the General tab from the left panel.
Click the General tab in the right panel.

All the existing 12d Model project attributes that apply to the selected 12d Model project are displayed in the Attributes box.
To apply an attribute to all the 12d Model projects at the system level, do the following:
In the 12d Synergy Administration application, click the System Attributes tab from the left panel.
Click the 12d Model Projects Attributes tab in the right panel.

All 12d Model project attributes that apply to all 12d Model projects in the system are displayed in this tab.
1.3.5.2. How to Edit 12d Model Project Attributes
You can edit 12d Model Project attributes at an individual 12d Model project level or the system level.
Do one of the following:
To edit the attribute at an individual 12d Model project level, do the following:
In the 12d Synergy Client application, select the required 12d Model project from the tree structure.
Right-click the 12d Model project and select the Edit 12d Model project option.
The Edit a 12d Model project window is displayed.Click the General tab from the left panel.
Click the General tab in the right panel.
All the existing 12d Model project attributes that apply to the selected 12d Model project are displayed in the Attributes box.
To edit the attribute at the system level, do the following:
In the 12d Synergy Administration application, click the System Attributes tab from the left panel.
Click the 12d Model Projects Attributes tab in the right panel.
All 12d Model project attributes that apply to all 12d Model projects in the system are displayed in this tab.
Select the attribute you want to edit and click the
 button.
The Create/Edit an attribute window is displayed.Make the necessary edits and click the Save button in the Create/Edit an attribute window.
The edited attributes are displayed in the 12d Model Projects Attributes tab.
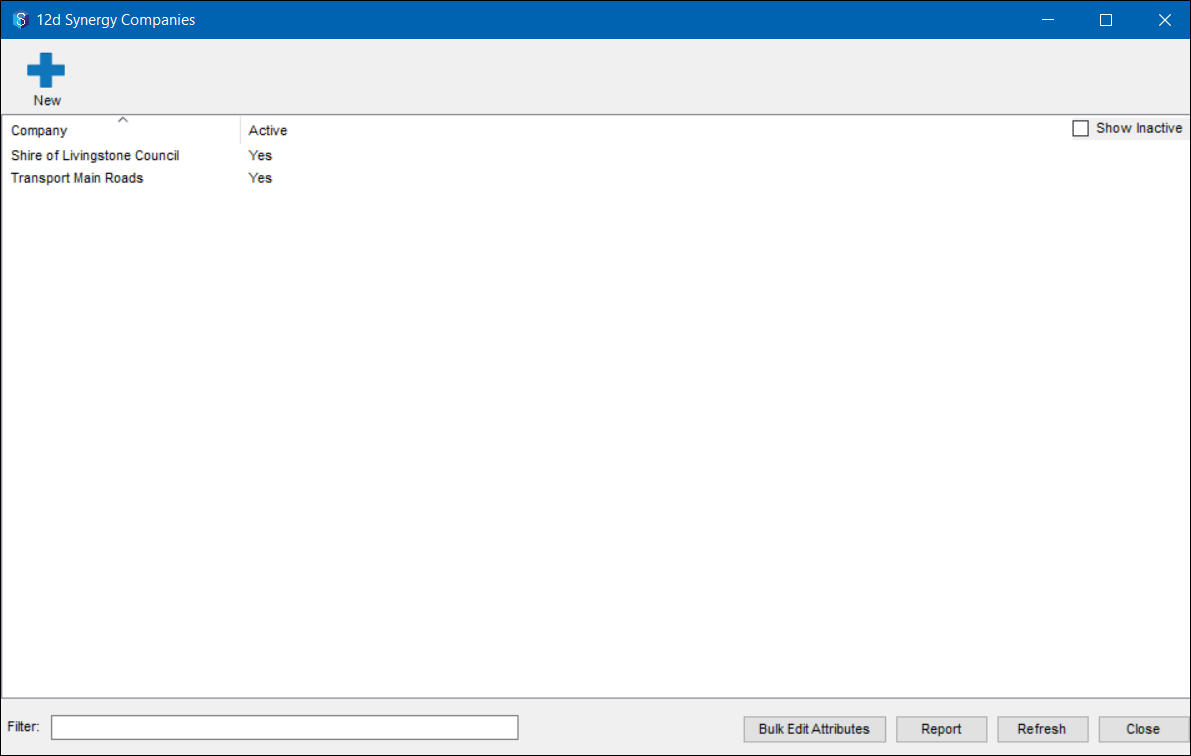
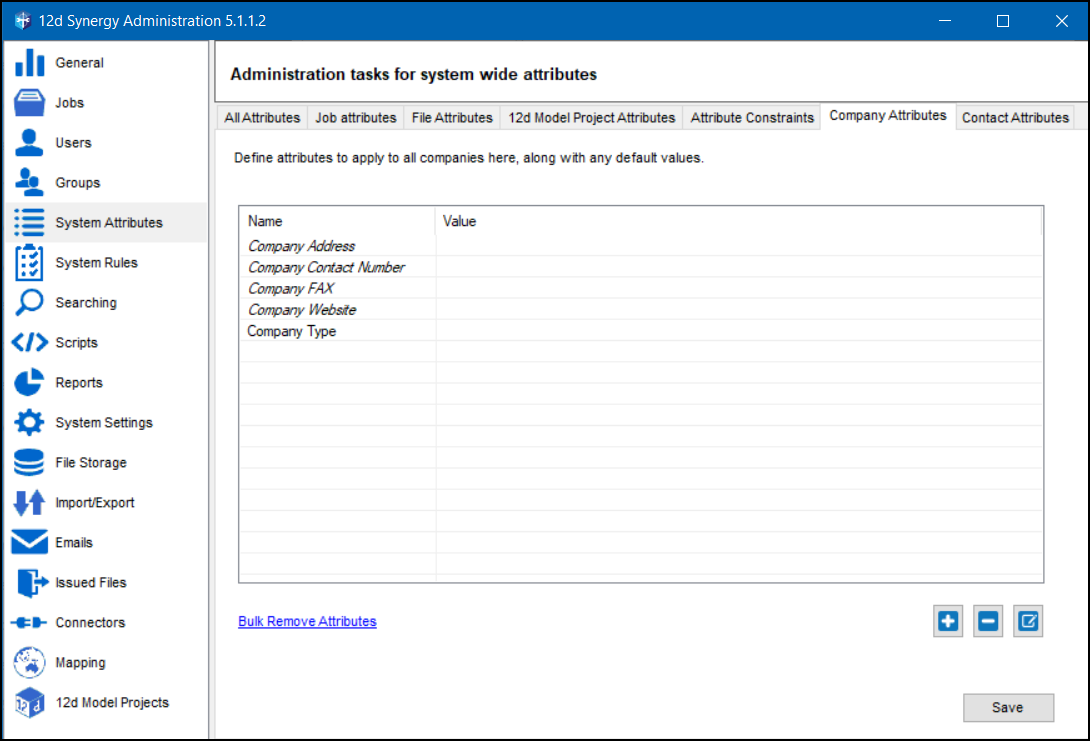
1.3.6. Company Attributes
System-level attributes that define companies in more detail are called company attributes. You can view these attributes in the 12d Synergy Client application > Windows menu option > Companies tab > 12d Synergy Companies window > General tab.
1.3.6.1. How to Apply Company Attributes
To apply a company attribute at the system level, do the following:
In the 12d Synergy Administration application, click the System Attributes tab from the left panel.
Click the Company Attributes tab in the right panel.
All the existing Company attributes that apply to the system are displayed in this tab.
1.3.6.2. How to Edit Company Attributes
You can edit the company attributes at the individual or system level.
Do one of the following:
To edit the company attributes at the system level, do the following:
In the 12d Synergy Client application, click the System Attributes tab from the left panel.
Click the Company Attributes tab in the right panel.

Select the attribute you want to edit and click the
 button.
The Create/Edit an attribute window is displayed.Make the necessary edits and click the Save button in the Create/Edit an attribute window.
The edited company attribute is displayed in the Company Attributes tab.
To edit the company attributes at the individual attribute level, do the following:
In the 12d Synergy Client application, in the Windows menu option, click Companies.
All the companies added to the system are displayed in the 12d Synergy Companies window.Select the company whose attributes you want to edit.
The attributes are displayed in the General tab below.
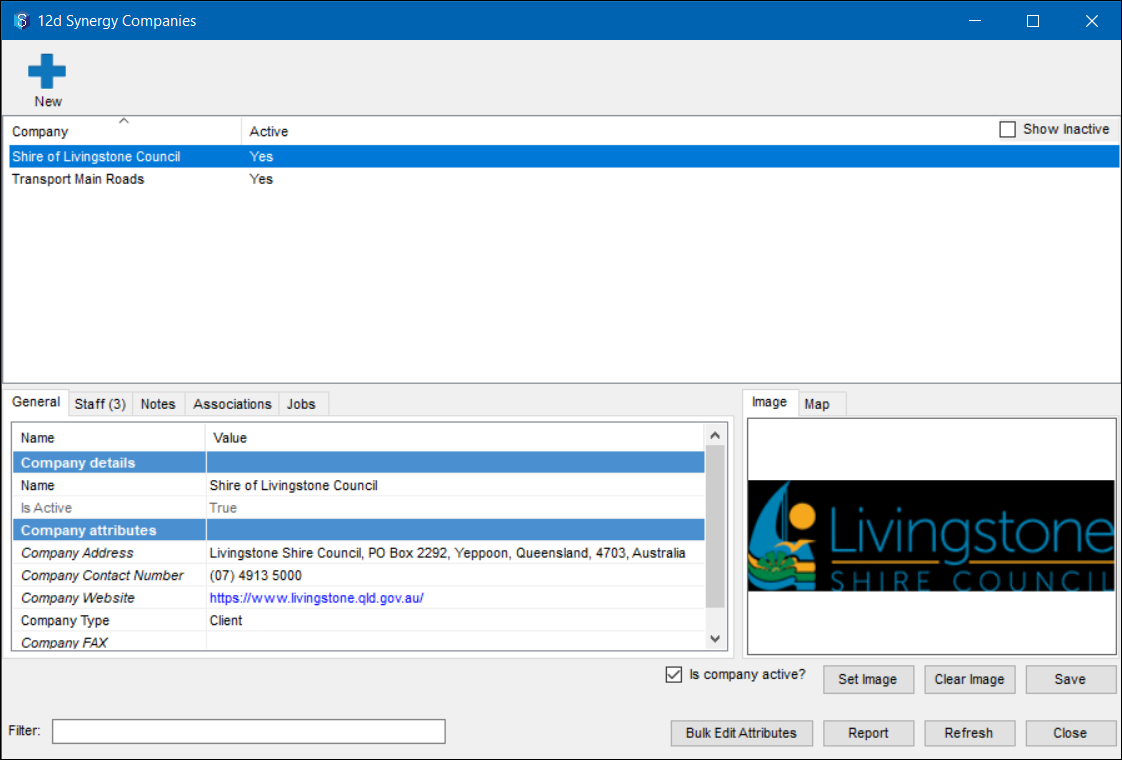
Click the corresponding cell in the Value column and edit it.
Click the Save button.
The company attribute is updated.
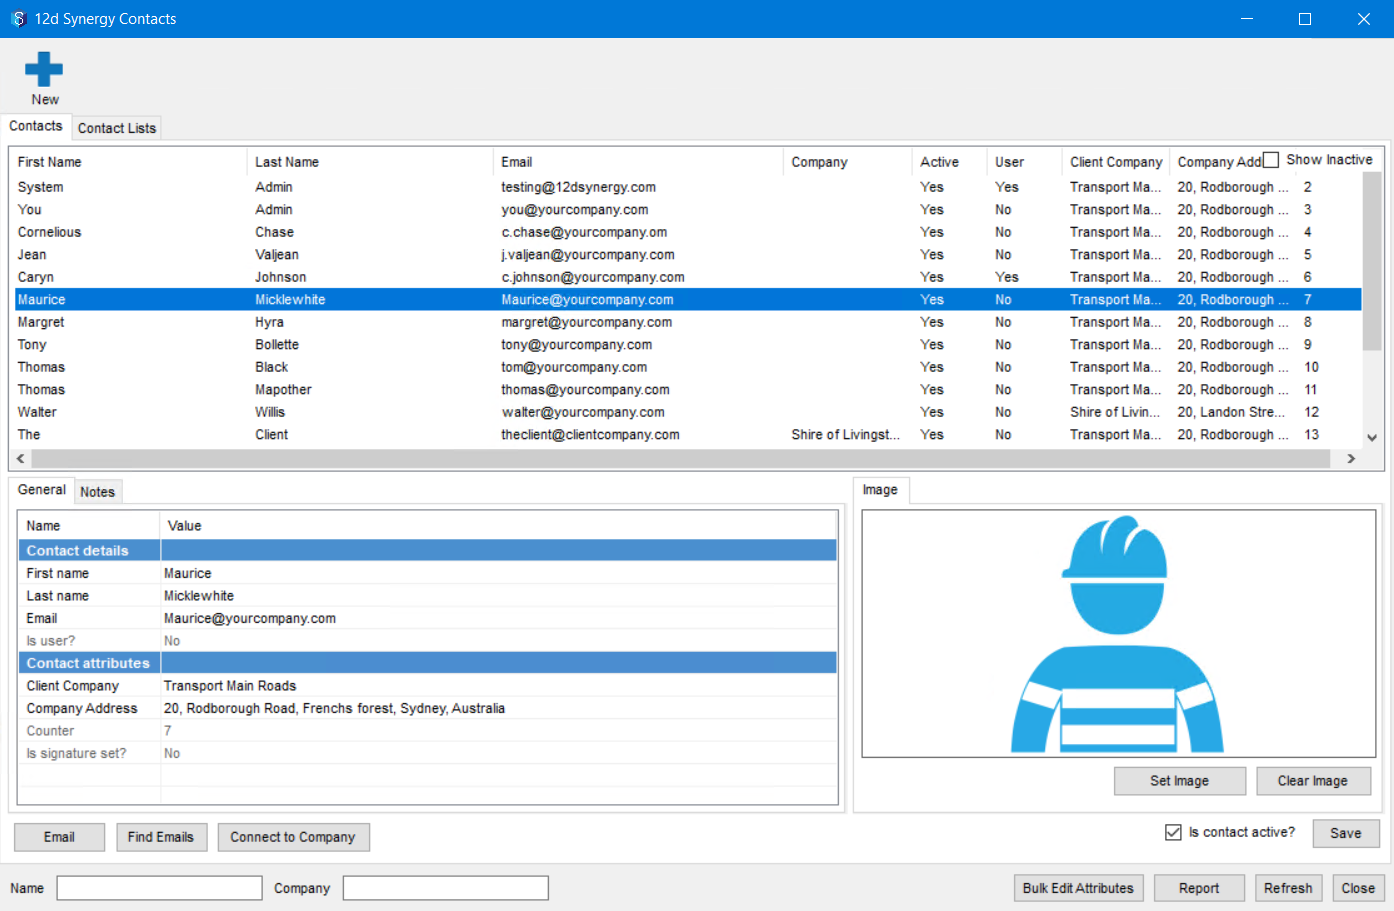
1.3.7. Contact Attributes
Attributes that are created to define contacts at the system level are called Contact attributes. You can select a contact in the 12d Synergy Client application > Windows menu option > Contacts tab > 12 Synergy Contacts window and view these attributes in the General tab.
1.3.7.1. How to Apply Contact Attributes
To apply a contact attribute at the system level, do the following:
In the 12d Synergy Administration application, click the System Attributes tab from the left panel.
Click the Contact Attributes tab in the right panel.
All the existing Contact attributes that apply to the system are displayed in this tab.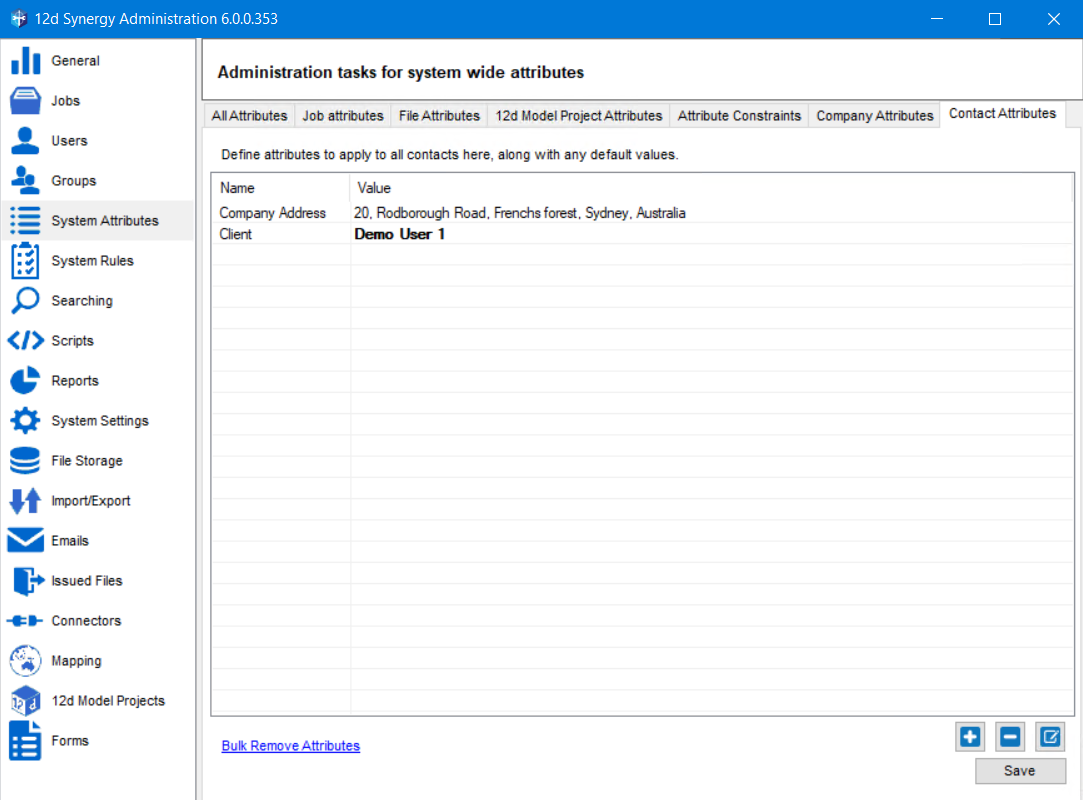
1.3.7.2. How to Edit Contact Attributes
You can edit the contact attributes at an individual or system level.
Do one of the following:
To edit the contact attributes at the system level, do the following:
In the 12d Synergy Administration application, click the System Attributes tab from the left panel.
Click the Contact Attributes tab in the right panel.

Select the attribute you want to edit and click the
 button.
The Create/Edit an attribute window is displayed.
Make the necessary edits and click the Save button in the Create/Edit an attribute window.
The edited contact attribute is displayed in the Contact Attributes tab.
To edit the company attributes at the individual attribute level, do the following:
In the 12d Synergy Client application, in the Windows menu option, click Contacts.
All the contacts added to the system are displayed in the 12d Synergy Contacts window.Select the contact whose attributes you want to edit.
The attributes are displayed in the General tab below.
To edit the value of a contact attribute, click the corresponding cell in the Value column and edit it.
Click the Save button.
The contact attribute is updated.
1.4. How to Create / Add an Attribute
In the 12d Synergy Administration application > System Attributes tab, select any of the different attribute tabs, and click the Create button (displayed only in the All Attributes tab) or the
 button, whichever is displayed.
Do one of the following:
To create a new attribute and add it to the selected entity, do the following:
Click the New attribute option.
The Create/Edit an attribute window is displayed.
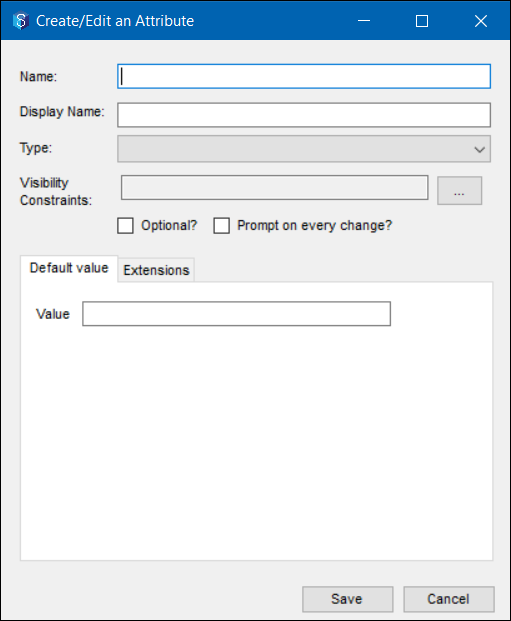
Based on the type of attribute you are creating, the details in the Create/Edit an attribute window will vary.
It is a good practice to prefix the entity for which you are creating an attribute with the name of the attribute. For example, in the attribute Job Client, Job is the entity for which you are creating an attribute called Client.
Click the Display box.
The name of the attribute is automatically displayed in the Display box. Edit the display name, if needed.Select the type of value that the attribute should hold from the Type list.
Enter a description for the attribute in the Summary box, if needed.
Select the Optional check box if you want the attribute to be optional.
Such attributes are displayed in an italic font.Select the Read-only? checkbox to disable the user from selecting a value for the attribute.
Click the Save button.
The attribute is created and is displayed with the list of other attributes that apply to the entity.
To add an existing job attribute, do the following:
Click the Existing attribute option.
The Find An Attribute window is displayed.

Browse or filter the attributes, then select the required attribute.
Click the Select button.
The selected attribute gets added to the list of other attributes that apply to the entity.
Click the Save button.
You can also duplicate an existing attribute and update it as needed. Select the attribute you want to duplicate, and click the Duplicate
button.
.png)
1.5. Attribute/Visibility Constraints
Attribute constraints are rules defined to control the display of attributes or their values. For example, if an attribute Country takes the value Australia, then the attribute States should display the states of Australia as a list to choose from.
Or only if an attribute Review Status takes the value Reviewed, then the attribute Review Result must be displayed with the review result.
You can also have constraints on the options displayed for a List type attribute. For example, if the States list attribute has all the states as its list options, then you can have a constraint on the display of, say, Victoria, which is one of the list options.
1.5.1. Attributes with Extensions
Some file attributes and file change attributes allow the use of extensions to constrain them to particular file types. For example, the system is installed with File Attributes for emails.
These are set up to be limited to the extension MSG. However, you may wish to apply extensions to files of all but a certain type, in which case the
extension should be preceded by the ‘!’ character. Example: !MSG would apply to all files BUT MSG files.
In this way, you can build up dependent attributes.
1.5.2. How to Define Attribute Constraints?
Constraints are defined as logical expressions using Boolean operators, functions, and variables based on attribute values. For example, to make the attribute Review Result only appear when the Review Status attribute is Reviewed, you might set this constraint as follows:
$ReviewStatus = "Reviewed"
Constraints can also be defined using functions such as Exists and HasValue.
Ultimately, an attribute constraint should resolve as True if it should be displayed and False if it should be hidden.
1.5.3. How to Attach Constraints to Attributes
In most cases, attributes are defined at the attachment point. This means you can reuse the same attribute in different ways on jobs, folders, or files.
However, if you wish to define the values in a List attribute, the constraints must be defined globally.
1.5.4. How to Attach Constraints to List Attribute Options
You can define or update the constraints to a list type attribute options while creating or editing an attribute from the System Attributes tab in the 12d Synergy Administration application.
In the Create / Edit an Attribute window displayed while editing a List type attribute, select the list options for which you want add constraints and click the Set List Item Constraints button to add constraints in the Attribute Constraint Editor window. If there any previously added constraints on the selected options, they will be overwritten by the new constraints.
Note that you can also define or update the constraints of a list type attribute while editing a job/folder/sub-job from both, the 12d Synergy Client and Administration applications.
1.5.5. Components of a Constraint
1.5.5.1. Attributes
While not strictly necessary, an attribute constraint should be used to compare against other attributes. For example, only show attribute A when Attribute B is equal to some value. Note that attributes in a constraint don't need to come from the same entity - if you are constraining attribute visibility for a File, you can query against attribute values on the Job or Folder. Likewise, sub-jobs can query against the attributes on the parent job.
1.5.5.2. Comparison Operators
Currently, attribute constraints only support direct matches using the “=” operator.
1.5.5.3. Boolean Operations
You can use the Boolean Operations AND and OR. This allows you to make conditions with multiple comparisons against one or more attributes.
For example:
$Status = "Reviewed" OR $Status = "Completed"
This means when the value of Status is Reviewed or Completed.
Alternatively, you can use brackets to perform more complex constraint queries.
For example:
$Type = "Quote" and ($Status = "Pending" OR $Status = "In Progress")
This means, display when the value of Type is quote and the value of Status is either Pending or In Progress.
1.5.5.4. Functions
Functions can also be used to help evaluate if an attribute or value should be displayed. The following functions are available.
Exists
Description: Determines if an attribute exists on this entity
Usage: Exists($Attribute)
HasValue
Description: Determines if an attribute exists and has a value
Usage: HasValue($Attribute)