v6 feature
While transitioning between states in a workflow, you can capture data from a form fill. This data, in the form of an output file, can also be added as an associated file to the entity on which the workflow is being run. Let us see how to capture data as a form fill when working with workflow transitions.
1.1. How to Add Form Fills as a Data Capture for Workflow Transitions
Admin Content
When defining the transitions in a workflow, you can choose to add a data capture to the transition from the Data Captures tab.
.png)
Click the
.png "plus(8).png") button.
button.
The following prompt is displayed..png)
Select the Form Fill option.
The following details are displayed in the Data Capture tab.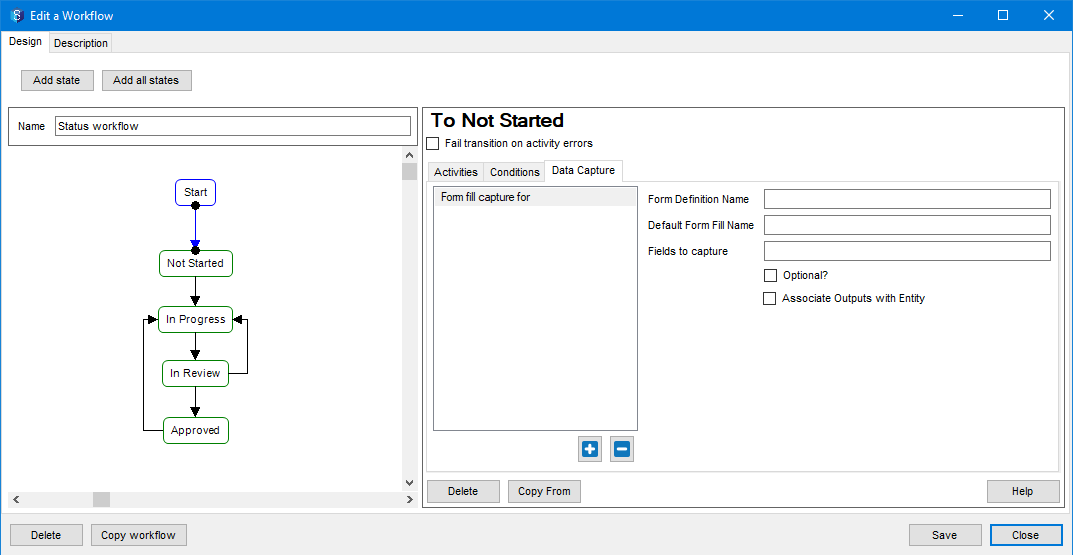
Enter the following details:
Name of the form in the Form Definition Name box. This name should be the same as the one you entered while defining the form in the 12d Synergy Administration application > Form Definitions > Name box.
A name for the form fill in the Default Form Fill Name box. When a form is filled in this context, the form fill is displayed with this name in the Forms tab > My Forms or Job Forms tab at the job level.
The fields from the form fill that you want to capture as variables in the Fields to capture box.
Each field must be separated by a comma.
There should be no space between the comma and the next field name.
The fields are referred to by their question name, which is set while defining the form.
If you want the form fill to be an optional data capture, select the Optional box.
If you want to associate the output file of the form fill with the entity on which the workflow is running, then select the Associate Outputs with Entity check box.
Click the Save button.
The data capture is defined and saved.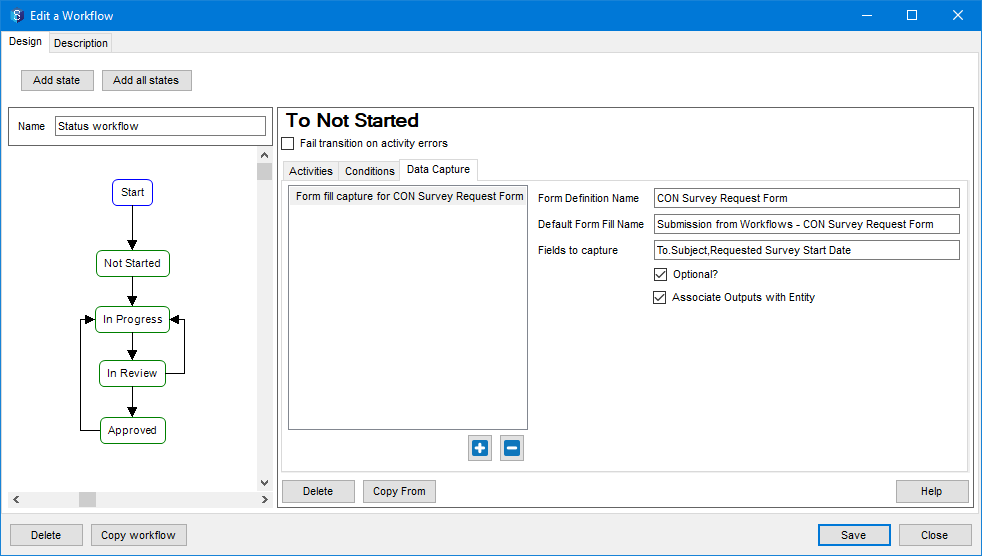
1.2. When the Form Fill Data Capture is in Use
When a transition occurs in a workflow that contains a form fill data capture, then the following windows are displayed in the order mentioned below.
Step 1) Update the attribute to the next state (of the workflow) and click the Set button. 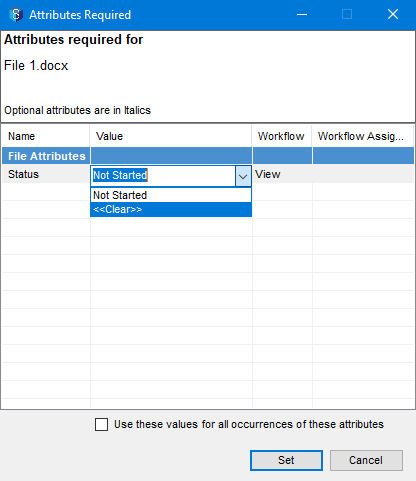
Step 2) Click the form fill you need to capture in the Required Data for Workflow window.
The form to fill out is displayed..png)
Step 3) Fill out the form and submit it. Then click the Set button on the Required Data for Workflow (shown above) window.
If you have selected the Optional check box while defining the data capture for the workflow, you can skip the form fill by clicking the Set button, without filling out the form.
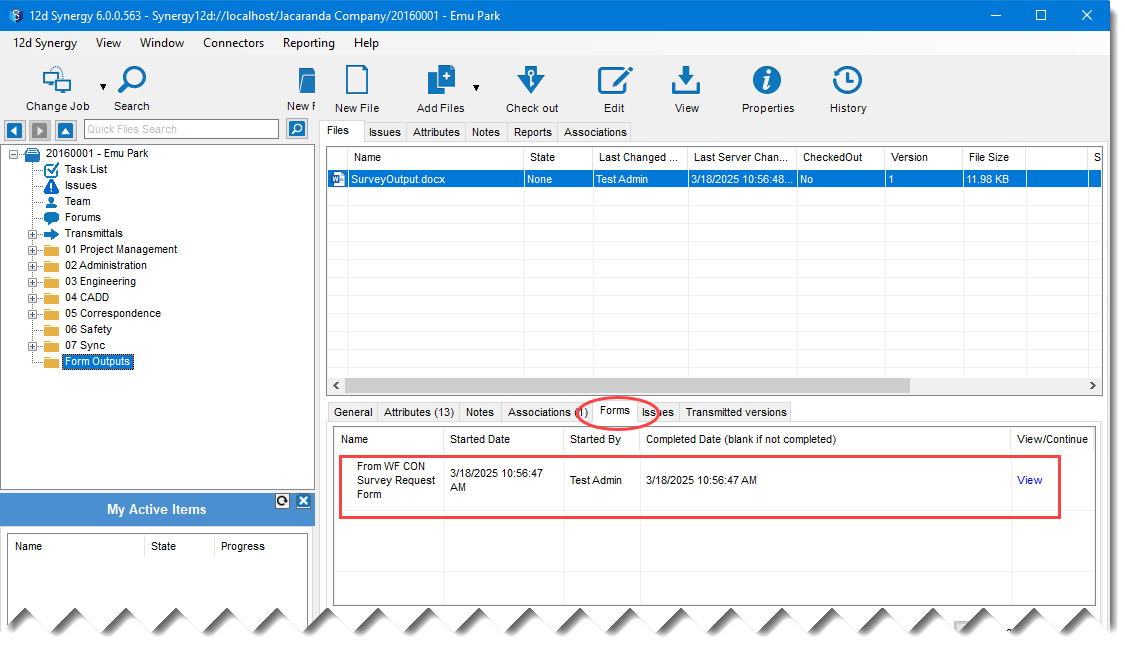
Step 4) An entry for the form fill(s) is made in the My Forms or Job Forms tab at the job level. .png)
Step 5) Select the added entity in 12d Synergy Client application. In the Attributes tab of the entity, the state to which the workflow has transitioned is displayed. In the example below, it is “Not Started”. .png)
Click the View link displayed against the attribute in the Workflow column.
The following window is displayed.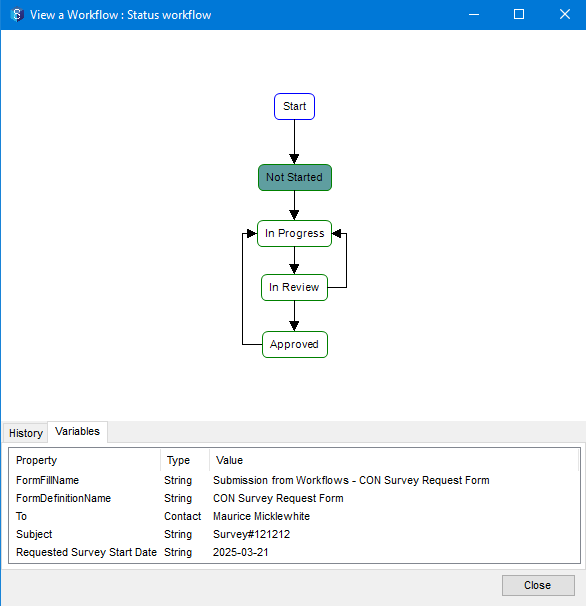
The Variables tab in the above image displays the fields you listed in the Fields to capture box while defining the data capture.
Step 6) If the Associate Outputs with Entity checkbox is selected while defining the data capture (point 6 in procedure 1.1.), then the entity is associated with the output file. You can see this when you select the entity in the 12d Synergy Client application.
The output file associated with the selected entity is displayed in the Associations tab as shown in the image below. 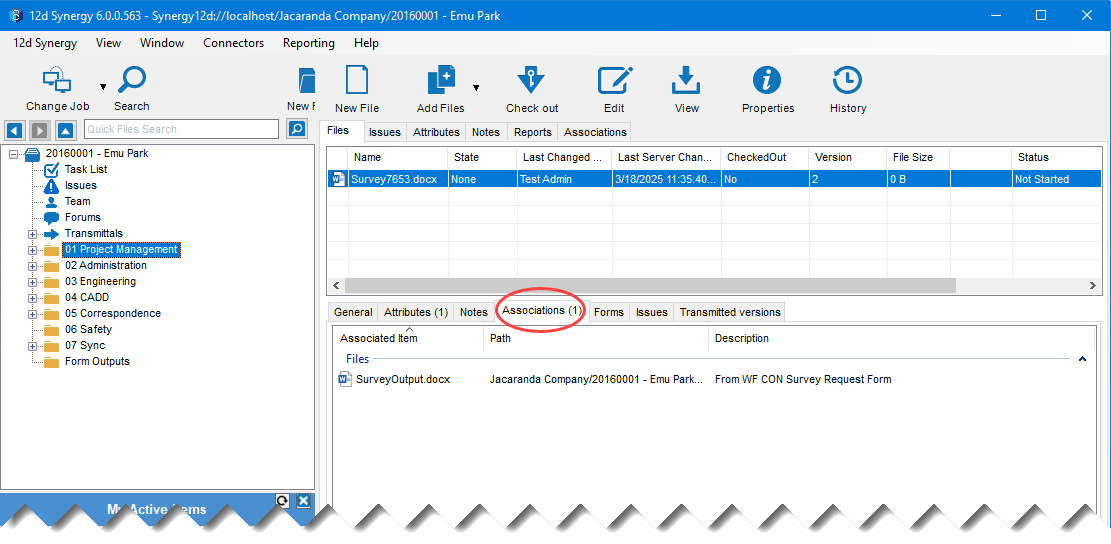
Similarly, if you select the output file, it is associated with the entity file. This is displayed in the Associations tab when you select the output file as shown below. .png)
Step 7) An entry for the form fill is made in the Forms tab when you select the output file.