Admin Content
When a job is created, you can create a team that defines the people involved in the job. Each role in the team can be assigned permissions to access data and work on the job. In this topic, you will learn how to set up a team with different roles, create and edit roles, assign contacts to roles, and assign different permissions to these roles. These roles can be used to assign tasks and utilise workflows.
The 12d Synergy Administrator can perform all the actions listed in this topic.
Apart from creating a team, the following users can also perform the other actions listed in this topic:
Any user for whom the Can Manage Teams permission is set
1.1. How to Set up a Team
In the 12d Synergy Client application, right-click the job for which you want to create a team.
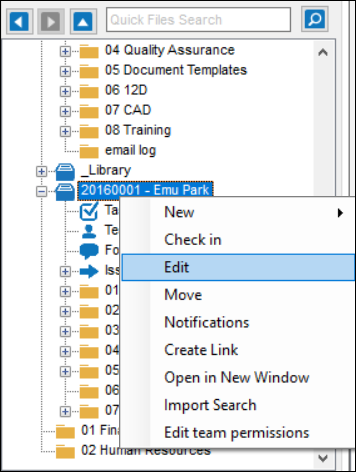
If you have the Can Manage Teams checkbox selected, then you can set up the team using the Edit team permissions option that is displayed in the right-click options for a job.
Click the Edit option.
The Edit a Job <job name>window is displayed..png)
Select the Permissions tab from the left panel.
Select the Job Roles tab from the right panel.
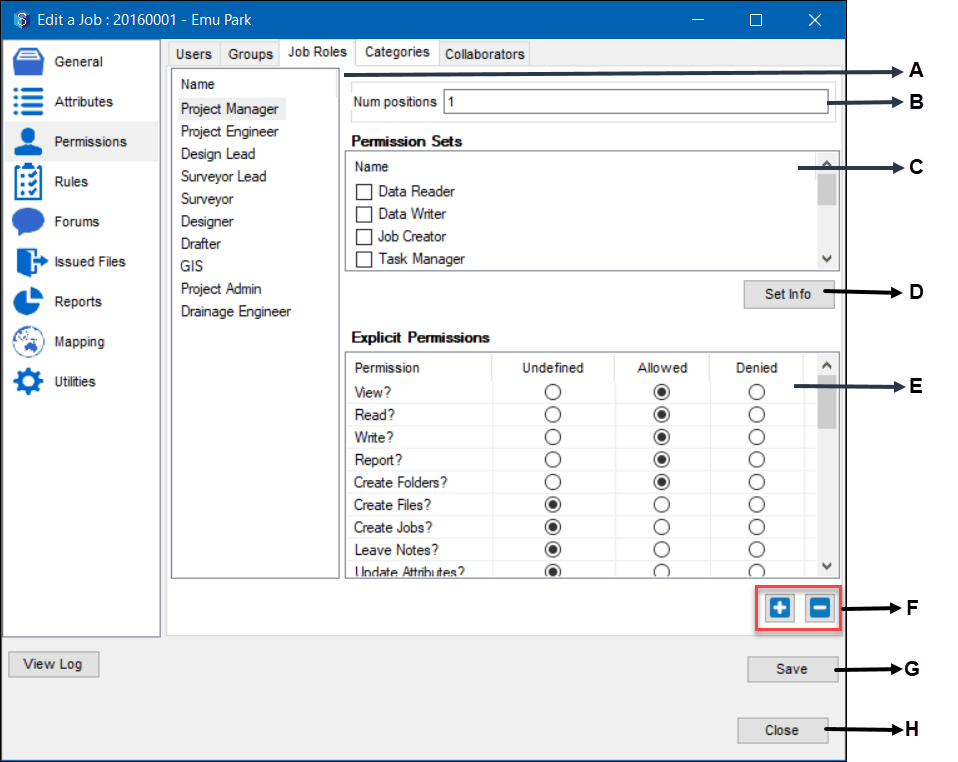
Alphabet | Component | Description |
|---|---|---|
A | Name of the Roles created | Displays the list of the roles applicable for the selected job |
B | Number of positions | Enables you to set the number of positions for the selected role in panel A |
C | Permission Sets | Displays the permission sets. A permission set is a group of related explicit permissions under one single name. For example, the Data Writer permission can include explicit permissions such as viewing, writing, leaving notes, creating folders, and creating files. You can define a permission set by clicking the D button. |
D | Set info button | Enables you to define permission sets by selecting the related and applicable explicit permissions in the Permission Set Info window. |
E | Explicit permissions | Displays the list of explicit permissions that can be applied to the roles |
F | Add and remove a role | Enables you to add a new or existing role to the job, and remove a selected role in panel A. |
G | Save button | Saves the changes made to the job roles and permissions |
H | Close button | Closes the window |
You can do any of the following in this window:
Click the Save button.
1.1.1. How to Create and Define a New Role for a Job
You must be a 12d Synergy Administrator to create a new role.
In the Edit a Job > Permissions > Job Roles tab, click the
 button.
The Add role prompt is displayed.

Click the New option.
The Define a Role window is displayed.
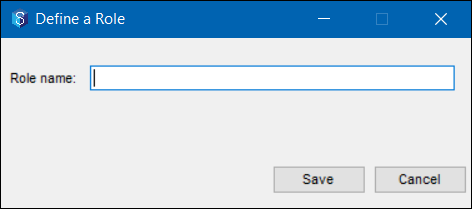
Enter the name of the role to be created in the Role name box.
Click the Save button.
The role is created and is added to the Name panel (A).Select the newly created role from the Name panel (A).
In the Permission Sets panel and/or Explicit Permissions panel, select all the relevant permissions that apply to the new role.
You must be a 12d Synergy Administrator to create a new role.
For more details about permissions, see Permissions.
Click the Save button.
1.1.2. How to Apply an Existing Role for a Job
In the Edit a Job > Permissions > Job Roles tab, click the
 button.
The Add role prompt is displayed.
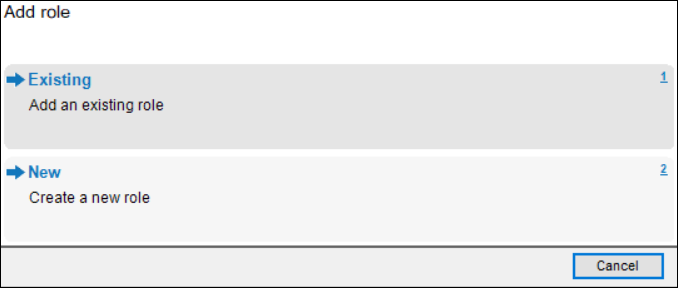
Click the Existing option.
The Select a Role window is displayed.
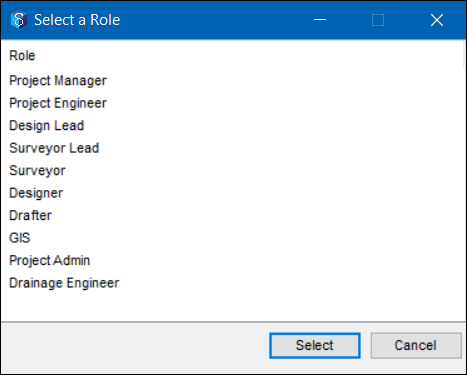
Do one of the following:
Select the required role.
Press the Ctrl key and select multiple roles.
Click the Select button.
The role(s) is/are added to the Name panel (A).
1.1.3. How to Set the Number of Positions of a Role for a Job
In the Edit a Job > Permissions > Job Roles tab, select the required role from the Name panel (A).
Enter the number of positions of the selected role in the Num Positions box.
1.1.4. How to Remove a Role for a Job
In the Edit a Job > Permissions > Job Roles tab, select the required role from the Name panel (A).
Click the
 button.
The selected role from the Name panel is removed from the list.
1.1.5. How to Edit an Existing Role for a Job
In the Edit a Job > Permissions > Job Roles tab, select the required role from the Name panel (A).
In the Permission Sets panel and/or Explicit Permissions panel, select all the relevant permissions that apply to the new role.
For more details about permissions, see Permissions.
Click the Save button.
The selected role will now have the newly selected permissions.
1.1.6. How to Assign a Contact to a Role
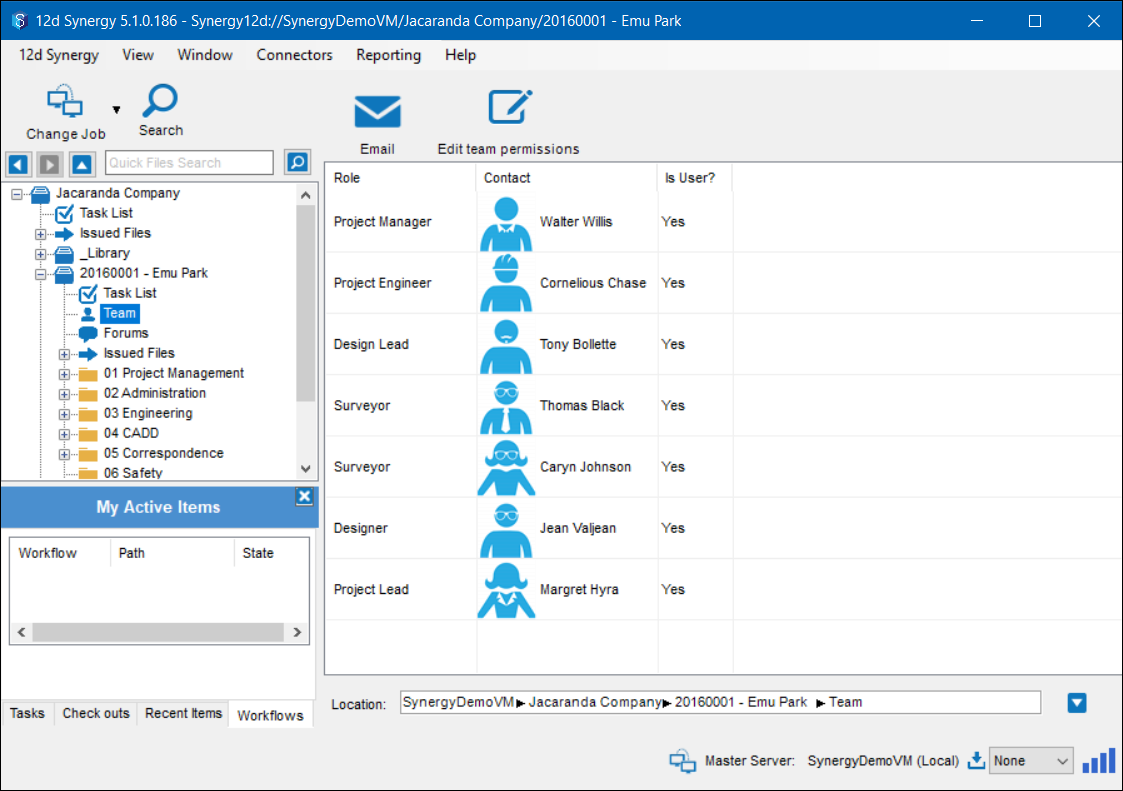
In the 12d Synergy Client application, click the Team link in the tree structure of the job for which you want to assign contacts to the team roles.
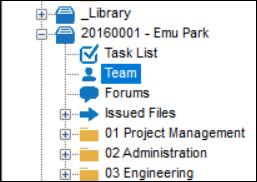
The team is listed on the right panel of the window..png)
In the Contact column, click in the cell next to the role you want to assign. A blank cell in the Contact column indicates that the corresponding role has not yet been assigned to anyone. You can either click a blank cell to assign a contact or click an already assigned contact to reassign the role to another contact.
The Find a Contact window is displayed.
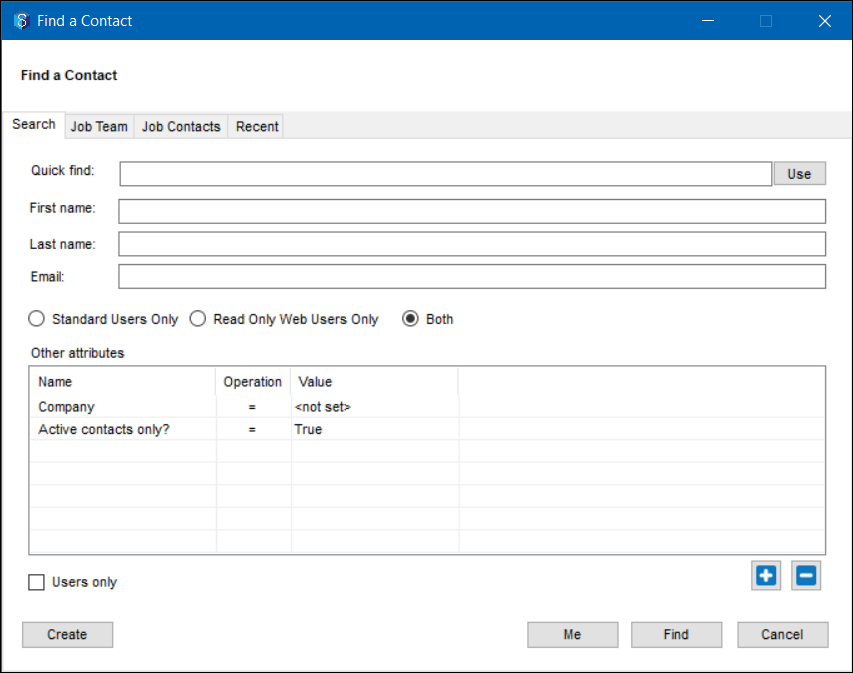
You can search for a contact with any of the following options:
Quick Find and Use button
First name
Last Name
Email address
Other Attributes
Newly added attributes by clicking the
 icon button
 Job Team tab
Job Contacts tab
Recent tab
Options for selecting the type of users
You can create a new user by clicking the Create button and assigning them to the selected role.
You can also assign the role to yourself by clicking the Me button.
Click the Find button.
The Search Results are displayed.Select the required contact and click the Select button.
The selected contact is displayed in the cell against the role selected in step 2 of this procedure..png)