Attributes of title blocks can be updated in the following ways.
1.1. Excel Register Method
The Excel Register method is a one-way update of attributes from the Excel Register to the CAD drawings.
This method is not compatible with the other methods detailed later in this article and must be used exclusively.
- Ensure that all the drawings related to an Excel Register are placed in one folder.
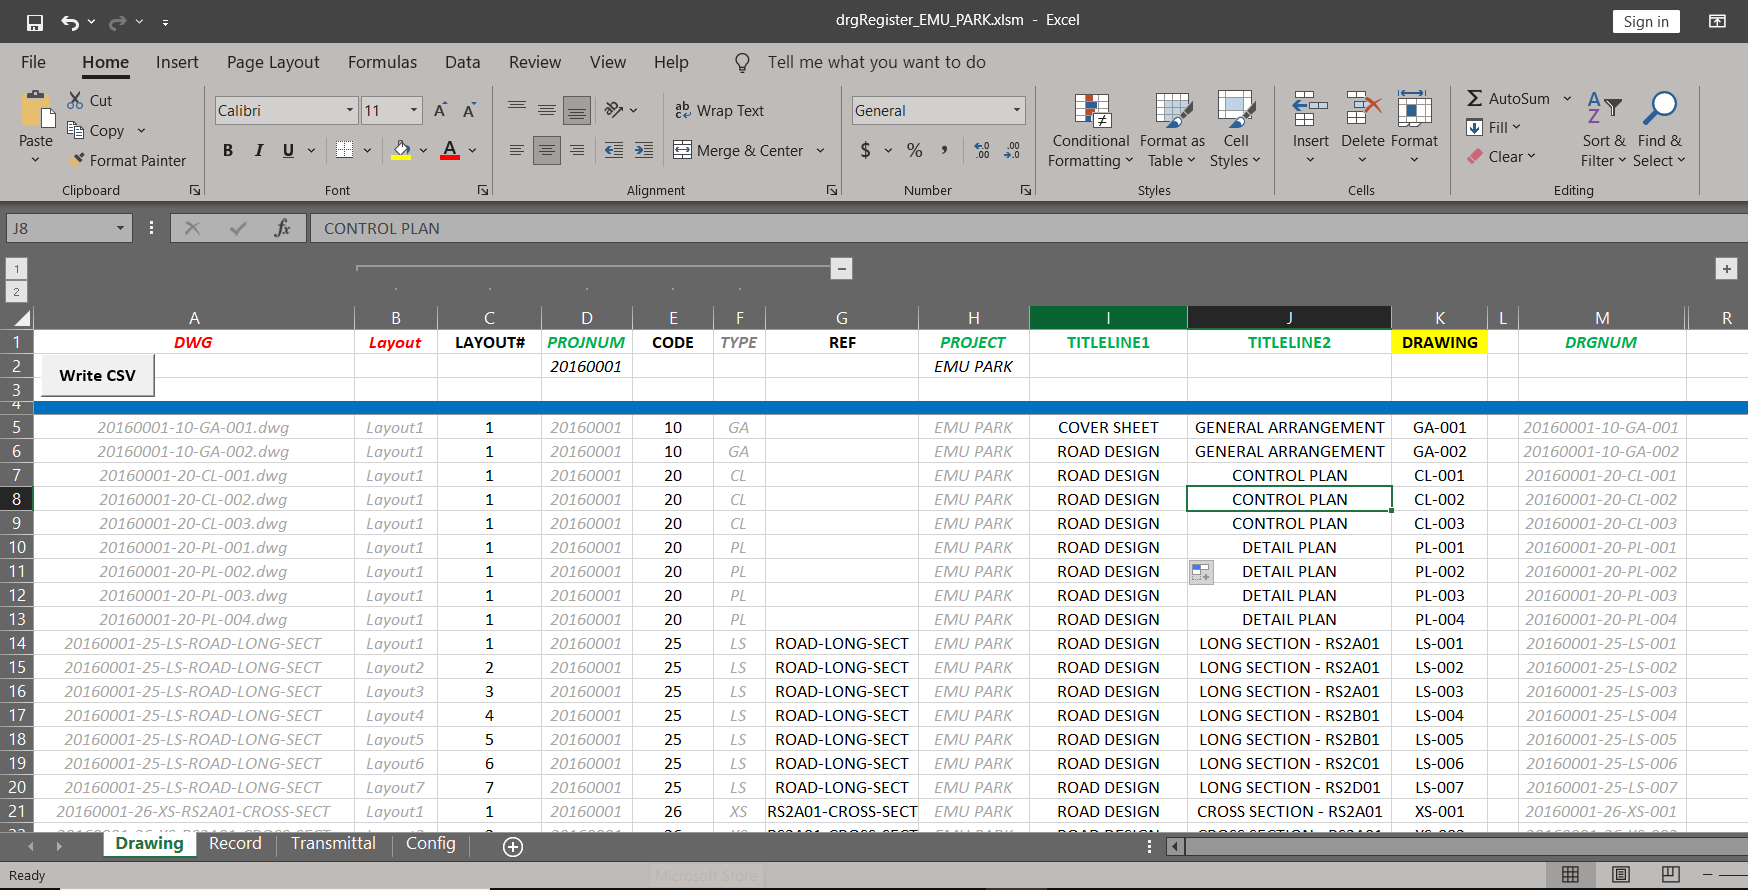
- Many companies utilise an Excel Register to update their title blocks outside the 12d Synergy environment. 12d Synergy also allows you to use the Excel Register method, but the Excel Register must have the following structure:
- The 1st column is reserved for the names of the CAD drawing files
- The 2nd column is reserved for the layout names
- From the 3rd column onwards, attributes can be entered. A sample Excel Register file, drgRegister_DEMO_EMU_PARK.xlsx, can be downloaded here.
- Browse the job tree and check out the Excel Register which holds the attribute details of the CAD drawings that you want to update.
- Update the attributes in the attribute columns, as required.
- Save the Excel Register and check it into the server.
- Do one of the following procedures:
1.1.1. To update the title block attributes from the Excel Register
- Right-click the Excel Register file in the 12d Synergy Client application and select the Other > Update CAD Attributes option.
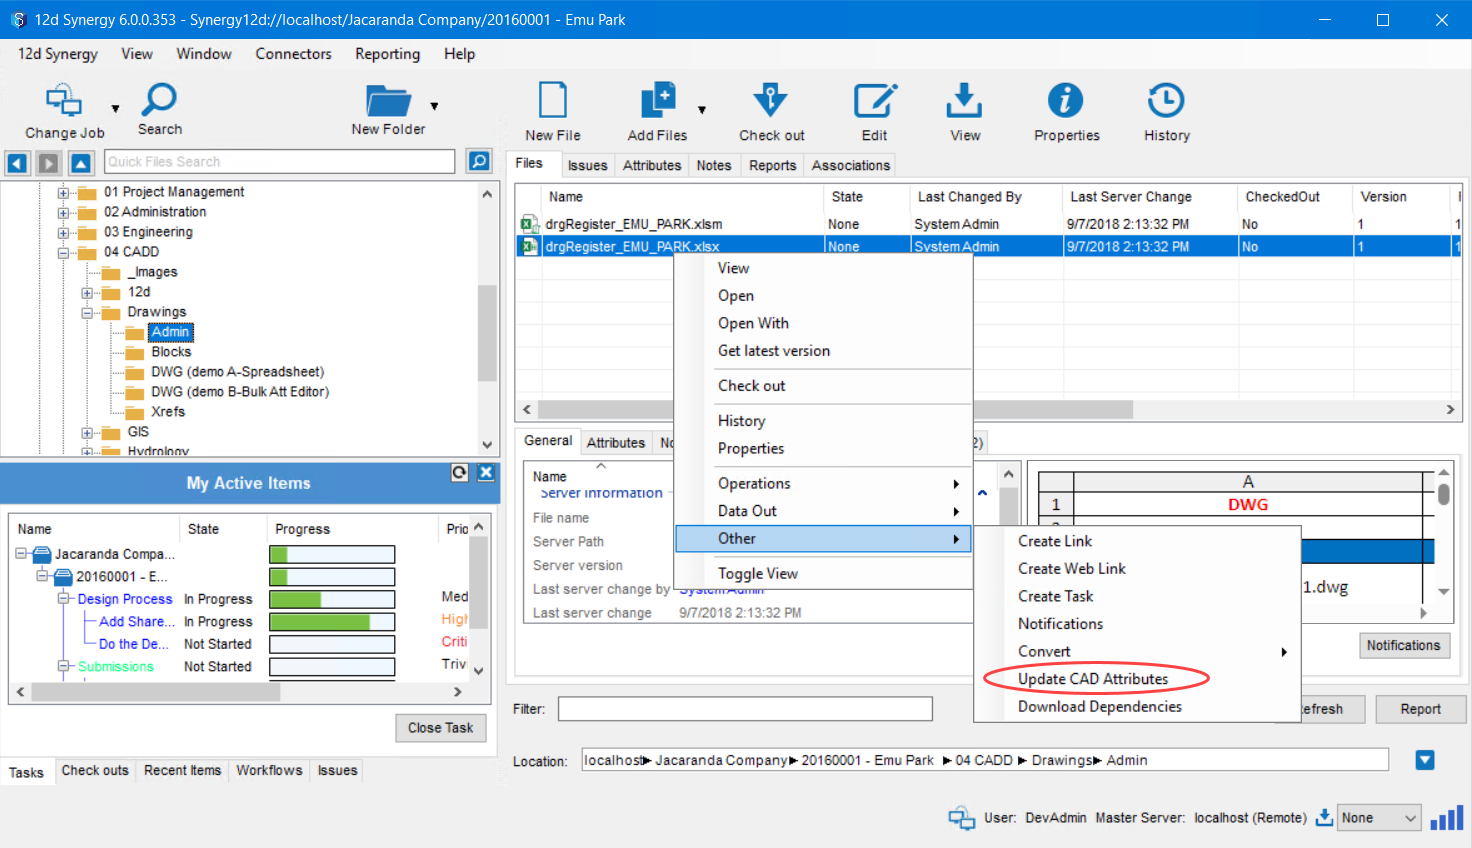
The following prompt is displayed.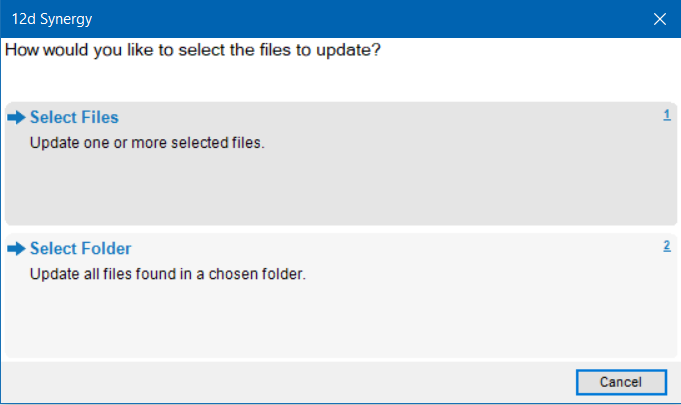
- Do one of the following:
- Pick the Select files option to individually select the files whose attributes have to be updated in the Excel Register.
The Browse for a file window is displayed and files can be selected. - Pick the Select Folder option to select a folder that contains the files whose attributes have to be updated in the Excel Register.
The Select a folder window is displayed and the folder can be selected.12d Synergy processes the entire folder and updates the attributes only when the matching changed files are encountered.
- Pick the Select files option to individually select the files whose attributes have to be updated in the Excel Register.
- Once the files or folder have been selected from the respective window, click the Select button to process the update.
1.1.2. To update the title block attributes from the CAD Application
- Check out the drawing whose attributes have been changed in the Excel Register.
- On the 12d Synergy plugin, click the Update from Register
 icon.
icon.
The following prompt is displayed.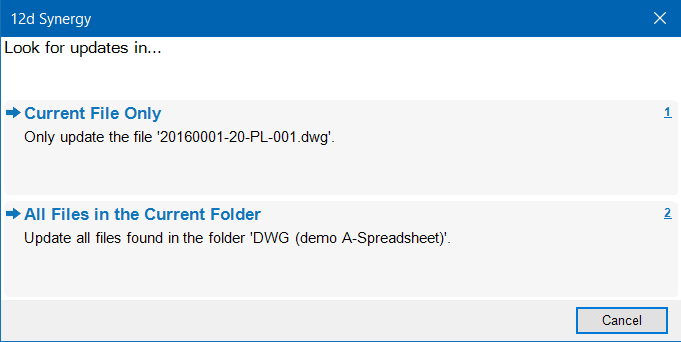
- Do one of the following:
- Select the Current File Only option to update the attributes of the opened CAD drawing with the updated contents of the Excel Register.
- Select the All Files in the Current Folder option to update the attributes of all the CAD drawings in the folder with the updated contents of the Excel Register.
The following prompt is displayed.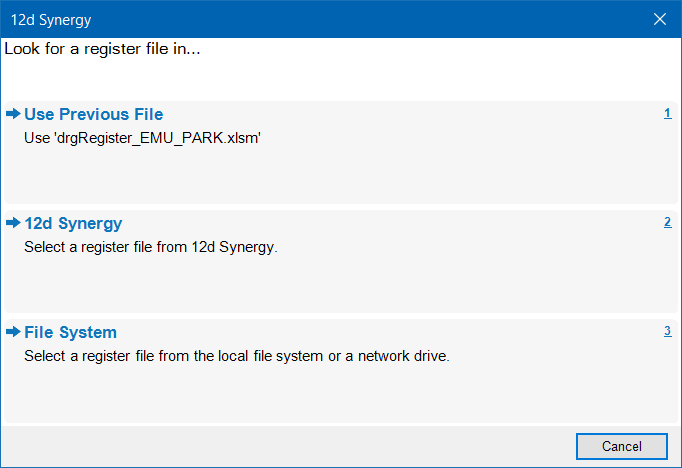
- Do one of the following:
- Select the Use Previous File option to use the last updated Excel Register in the 12d Synergy Clientapplication.This option is available only if you have used the Excel Register method before for updating title blocks.
- Select the 12d Synergy option to select an Excel Register from the 12d Synergy Client application.
The Browse for a file window is displayed for you to browse and select the required file. - Select the File System option to select an Excel Register from the local system or a network drive.
The Open browser is displayed for you to browse and select the required file.
- Select the Use Previous File option to use the last updated Excel Register in the 12d Synergy Clientapplication.
- Click the Select button.
12d Synergy processes the update as per your selection and the CAD file/s is/are updated.If you are trying to complete the update using an MS Excel file in 12d Synergy where a newer version exists on your workspace, then the following prompt is displayed.
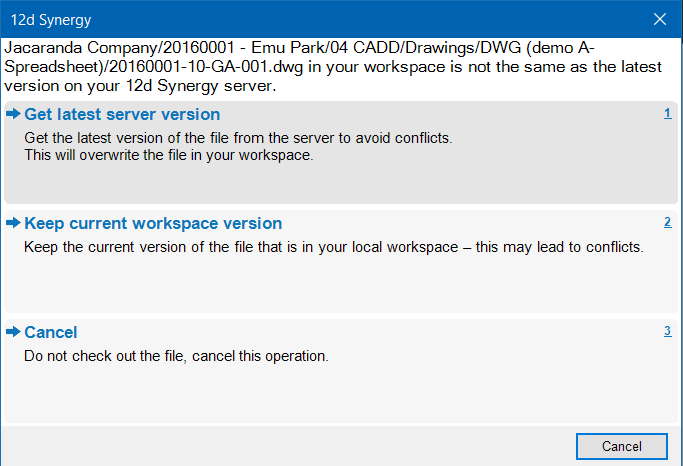
If you have made changes to the file, then the updated file is in your workstation. Click the Cancel button and check-in the Excel Register before you complete the action again.If others have made updates and the version on your workspace is not needed, then select the Get latest server version option to use the Server version of the Excel Register.
- Enter the reason and check-in the updated CAD file/s.
1.2. Layout Editor Method
Using the 12d Synergy Client application, you can import layouts and their attributes from the CAD files. You can then edit the attribute values either in the 12d Synergy Client application or in the CAD files. When you choose to do the latter, you can push the updated values back to the 12d Synergy Client application so that they get updated there also.
1.2.1. Importing Layouts from a Drawing File
- In the 12d Synergy Client application, open the folder that holds all the CAD files.
- Select all the applicable files, right-click and select the CAD > Import Layouts option.
12d Synergy will now interrogate the drawing files and import the layouts into its system for management.- You can select all the files by placing the cursor in the Files tab of a folder and pressing the keys Ctrl + A.
- It is the same when you select a file and press Ctrl + A to select all the files.
1.2.2. Updating the Attributes from the 12d Synergy Application
- In the 12d Synergy Client application, select the CAD files whose attributes you want to update and click the Check Out
.png) icon in the quick access toolbar.
icon in the quick access toolbar. - With the checked-out file selected, click the Layouts tab of that file.
.bmp)
- Select the attribute cell you want to edit from the layout table and double-click to edit it.
.bmp)
- Enter the new value in the cell.
The change is then made to the drawing in the Server. - Open the drawing to confirm if your changes have taken effect.
1.2.3. Updating the 12d Synergy application with the Updated Attributes in the CAD file
You can perform this procedure when working with the Layout and Bulk File Attribute methods.
- Open and check out the CAD drawing file whose attributes you want to update.
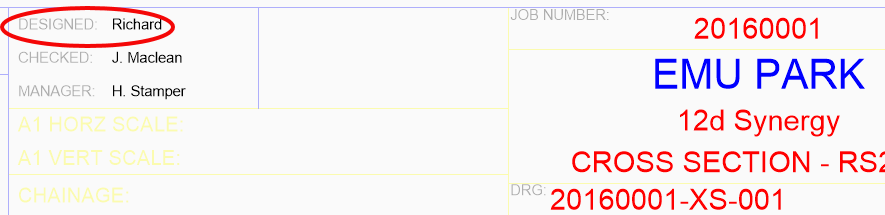
- In the CAD application, make the necessary changes to the attribute you want to update.
The example below is the Attribute Editor in BricsCAD where you can update the attribute value.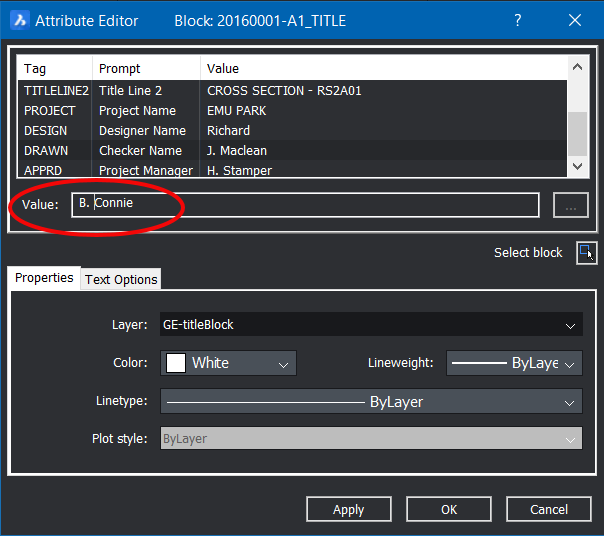
- Update the attribute to the required value in the Value box.
- Click the Apply button (or any similar button) to apply the changes to the attribute.
The attribute value is updated and is displayed in the CAD drawing too.
- Click the Push Block Attributes icon
 button from the 12d Synergy plugin.
 - Close the CAD file and check it into the 12d Synergy server.
The updated attributes are saved in the 12d Synergy Client application. - Open the 12d Synergy Client application and select the Layouts tab of the updated file.
The updated attribute values are displayed here..png)
1.3. Bulk File Attribute Editor Method
The Bulk File Attribute Editor method is similar to the Layout Editor method but includes the ability to edit multiple CAD drawing files at one go.
- Ensure that the layouts are imported in the 12d Synergy Client application.
- In the 12d Synergy Client application, select the files you want to update, right-click and select the Operations > Bulk File Attribute Editor option.
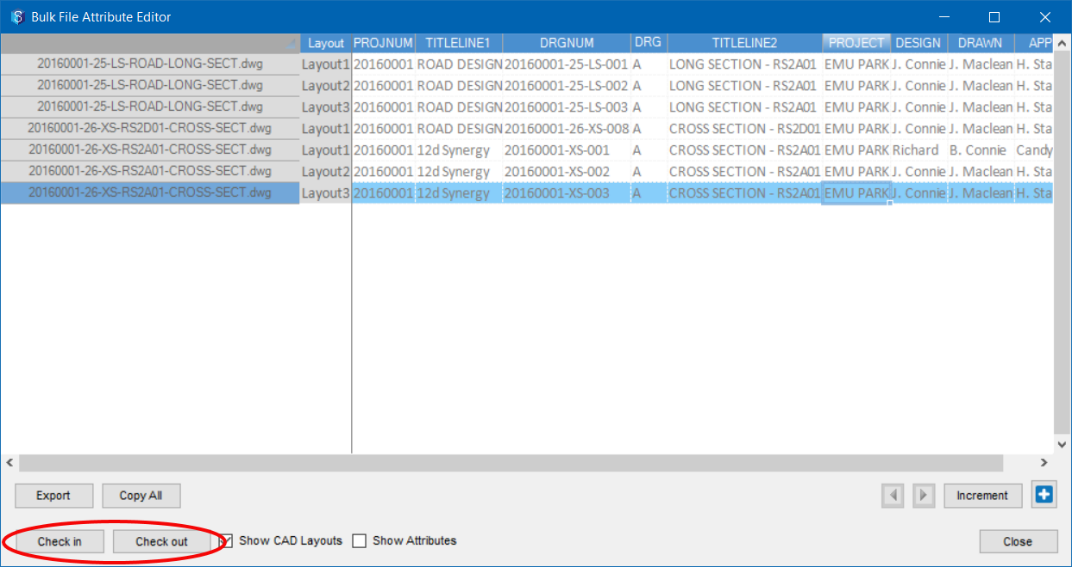
The Bulk File Attribute Editor windowis displayed.- You can select all the files by placing the cursor in the Files tab of a folder and pressing the keys Ctrl + A.
- It is the same when you select a file and press Ctrl + A to select all the files.
- To view all the CAD attributes of all layouts, select the Show CAD Layouts checkbox.

All the attributes are displayed column-wise in the Bulk File Attribute Editor window. - Select all the rows in this window by placing the cursor on one row and press Ctrl + A keys and check the file out by clicking the Check out button.
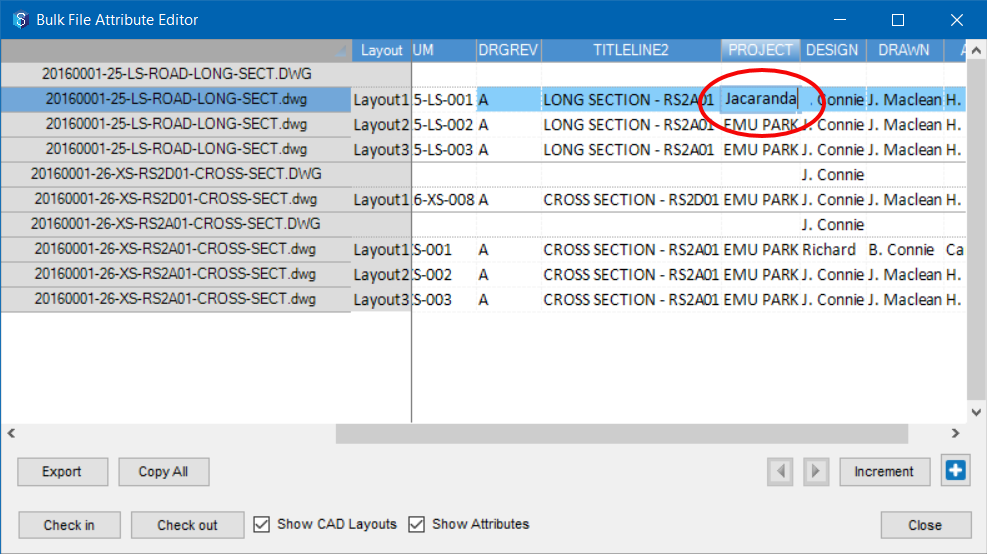
- Select the attribute cell you want to update.
- Do any of the following:
- Single-click on the attribute cell to make it editable and enter the new value for that attribute.
- Like in MS Excel, you can drag an updated cell value to the rows below it.
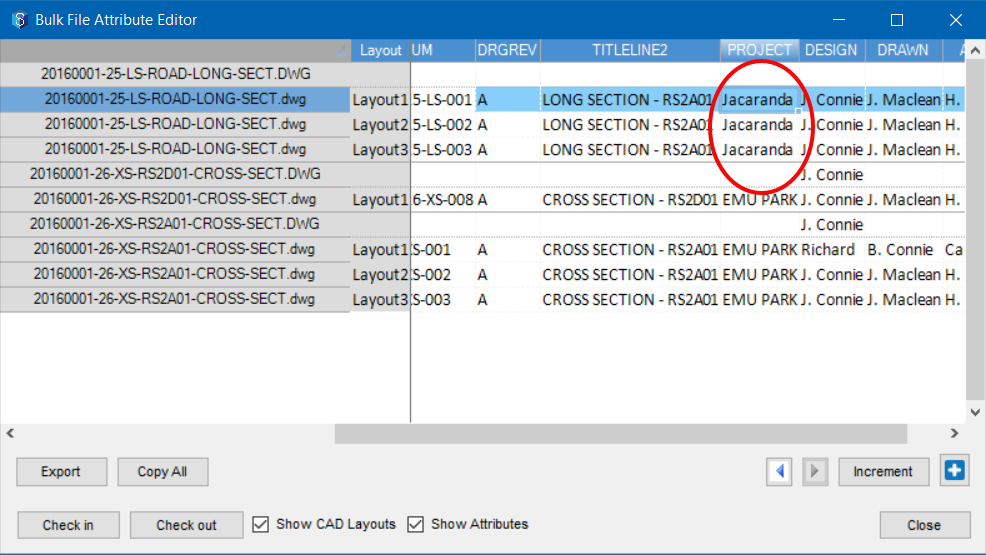
- If there are attributes which contain a numerical or alphabetical value that can be incremented by one or to the next alphabet respectively, select the cell and click the Incrementbutton.
You can also create a new attribute or add an existing attribute to these CAD files by clicking the
 icon.
icon.
- Single-click on the attribute cell to make it editable and enter the new value for that attribute.
- Do one of the following:
- Click the Check in button to check-in the files.
- Click the Close button.
The attribute updates are made and saved.