1.1. How to Import CAD Drawings
You can add drawing files from your system or drive into the 12d Synergy Client application just like you add any other file. You also have the option to either move a drawing file or copy a drawing file when adding it.
- Please be aware that DWGs can be a memory intensive format.
- 12d Synergy recommends that you keep your DWGs in smaller, manageable sizes and use Xrefs where possible.
- Larger DWGs may have performance impacts when being checked in or checked out. 12d Synergy recommends that you keep their size to under 50 megabytes where possible.
1.2. How to Import CAD Drawings with Xrefs Attached
When you are importing drawing with Xrefs, it is recommended that you import the entire folder of drawings and Xrefs together.
- Select the folder on your system or storage drive that has the drawings with their Xrefs that you want to import into 12d Synergy.
- Open an instance of the 12d Synergy Client application.
- Drag and drop the folder into the job or folder under which you want to save the imported files.
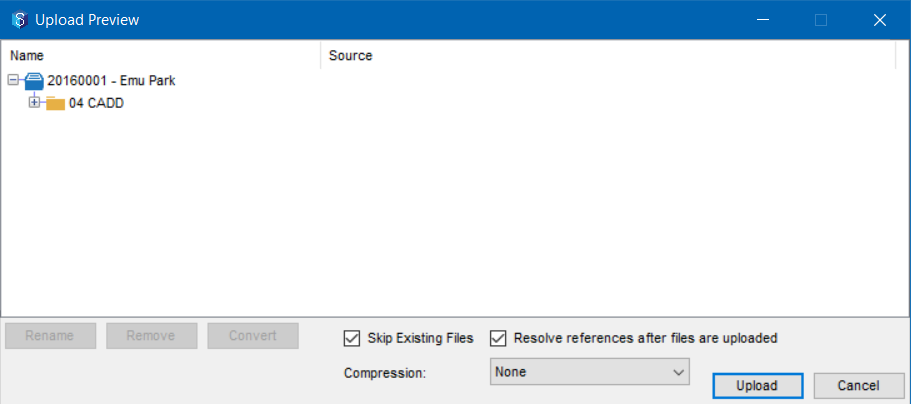
The Upload Preview window is displayed.
- Select the Resolve references after files are uploaded check box to correct the pathing of the Xrefs as they are being uploaded.
- Click the Upload button.
The drawings with the attached Xrefs are uploaded.
If you add the drawing files independently without their Xrefs, then you will need to re-path the Xrefs using the Window > Find references option.
- Select the Window > Find References option in the 12d Synergy Client application.
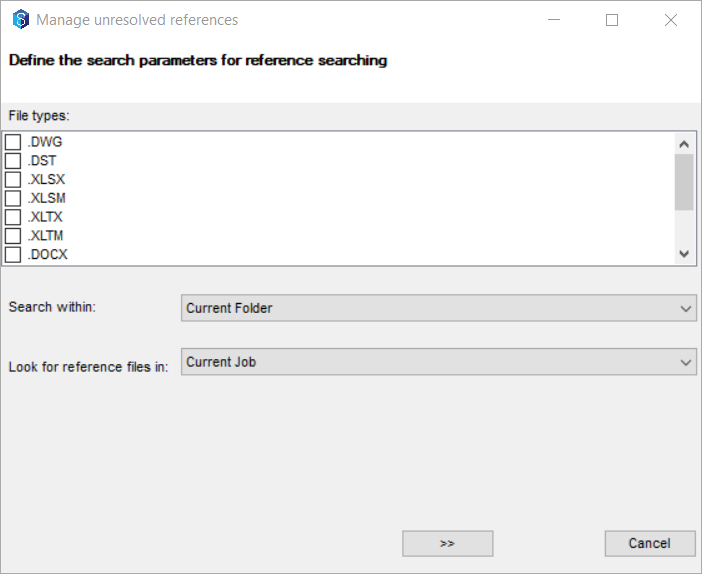
The Manage unresolved references window is displayed.
- Select the checkboxes against the required file types from the File types: box.
- Select the applicable options from the Search within and Look for reference files in lists.
- Click the
 button.
All the Xrefs of the selected file types will be found and re-pathed.
1.3. How to Create a Drawing file
You can create a CAD drawing file in one of the following two ways:
1.3.1. From a Drawing template
- Access the folder in which you want to create a new file.
- From the quick access toolbar in the 12d Synergy Client application, click the New File
 icon.
icon.
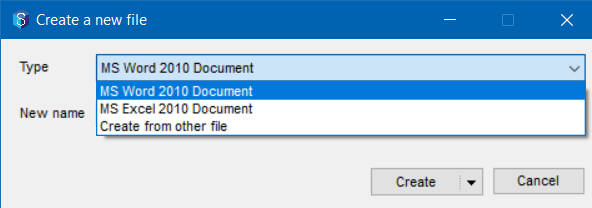
The create a new file window is displayed.
- Select the Create from other file option from the Type list.
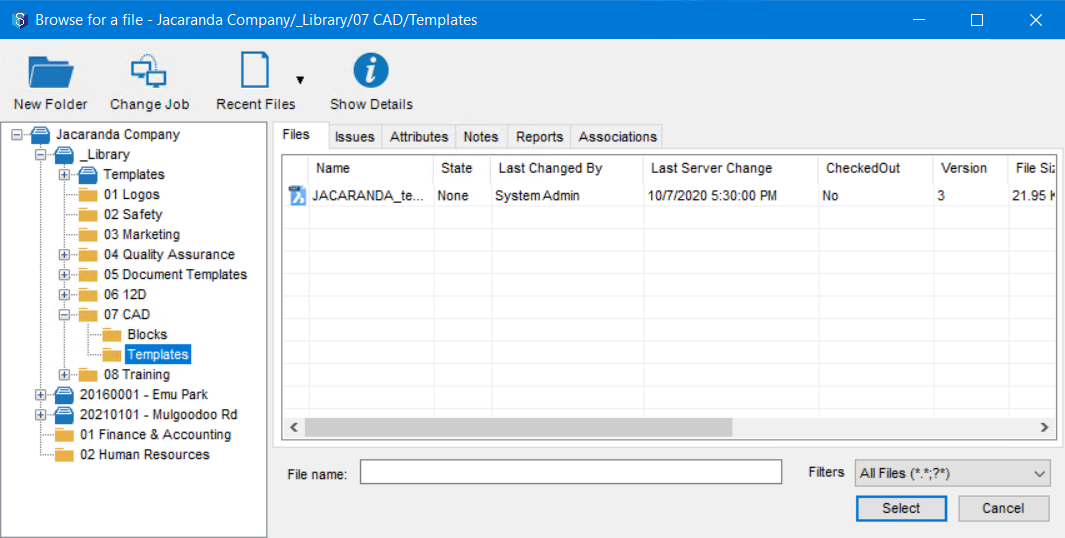
The Browse for a file window is displayed.
Navigate and browse to the job and folder that holds your CAD templates and select the required drawing template file(.dwt). - Click the Select button.
A drawing file (.dwg) is created from the template file(.dwt) and is displayed in the folder you selected in Step 1.
1.3.2. Creating a Drawing from an Existing file
- Open any drawing file (.dwg) file using your CAD application.
This can only be a file saved on your network/local drive.
- On the 12d Synergy plugin, click the Save As option and create a copy of that file in the required location.
You can then check out and update the new file as required.The Save As icon will differ from application to application. For instance, it is for BricsCAD.
Alternatively, you can copy an existing file from within the 12d Synergy Client application and use it.
- Select any drawing file in the 12d Synergy Client application.
- Right-click the file and select the Operations > Copy option.
The Select a folder window is displayed. - Select the folder where you want to save the new drawing file.
You can change jobs using the Change job button if you want to select a folder from a different job.
- Click the Open button.
The file is copied to the selected location. You can then update the new file as required.