Admin Content
The Import and Export functionality is a useful tool for exporting and storing data on a secondary device, and importing it back into your 12d Synergy system whenever needed.
This is mainly used when you need to export data or a configuration from a 12d Synergy instance and merge it into another.
Note that this functionality is different from migration. Migration is often used when an entire server needs to be moved, while Import and Export functions can be used to merge data, as a one-off operation.
1.1. Contents of a Package
The import and export package includes the following by default.
Job structure
Relevant job and folder rules, metadata data and configuration
Teams
Attributes
Naming Rules
Folder Layouts
Dashboard configuration
Issue Types
Associations
Notes
Permissions
Forms
Tasks
Issues
Relevant file information
Content (and all versions if required)
Attributes
Change records (who changed it, and when)
Permissions
12d Model projects and relevant metadata
Attributes
Default rules
Details such as groups, contacts, and attributes tagged with the packaged data are automatically included in the package. You do not have to explicitly track or include these details separately.
The data package also includes historical data and is generally very large. The import/export process may take a few hours. It is suggested to perform the import/export process outside office hours to avoid affecting work.
1.2. How to Export a Data Package
In the 12d Synergy Administration application, select the Import/Export tab > Export tab.
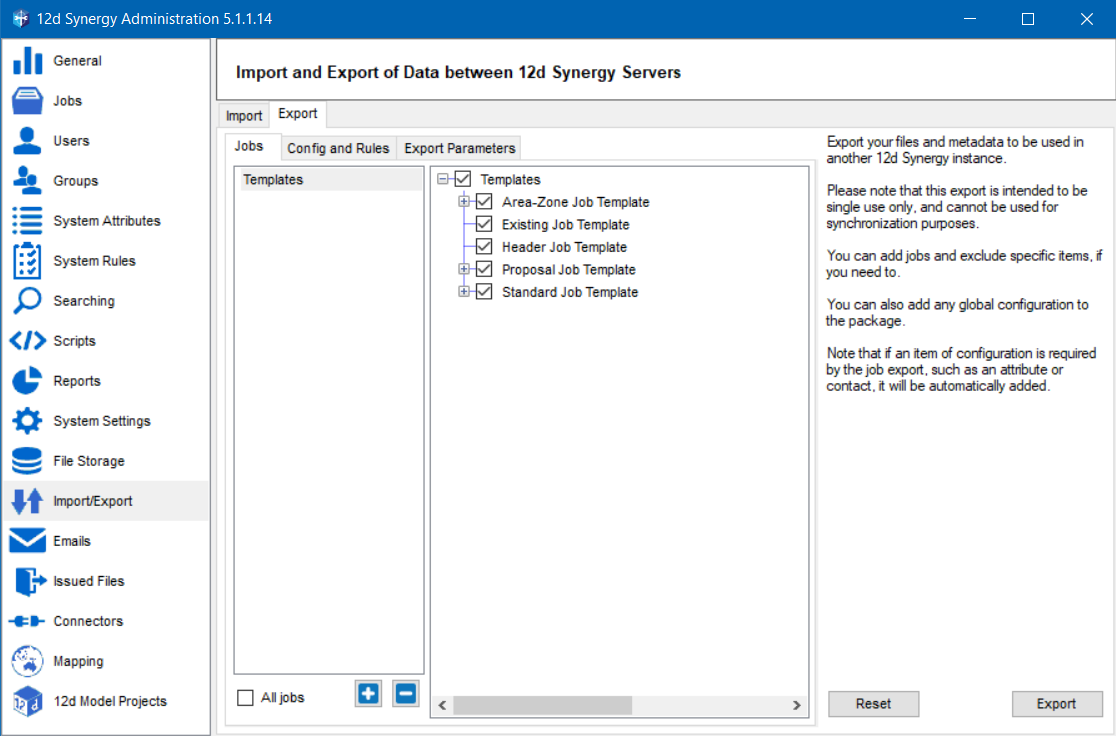
In the Jobs tab, click the
 button to add the job that you want to export.
The Find a job window is displayed.Search, browse and select the required job.
The selected job is displayed in the left panel of the Jobs tab. The right panel displays the contents of the selected job.Select the All jobs checkbox to export all the jobs in your 12d Synergy Server.
If you want to omit any specific contents of the selected job, you can clear the checkboxes corresponding to those contents in the right panel.
Click the Config and Rules tab.
The available configurations and rules are displayed in a tree structure, with a checkbox next to each item.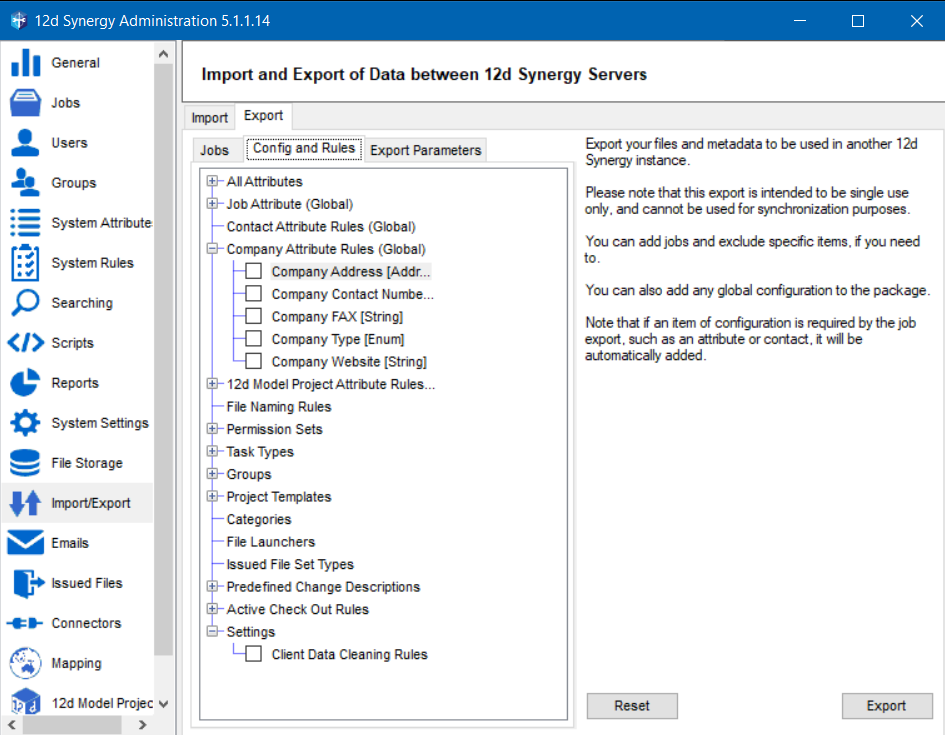
Select all the checkboxes against the items you want to include in the export package.
If the job(s) you are exporting need any specific configuration items, such as attributes or rules, they are automatically included in the export package.
Select the Export Parameters tab.
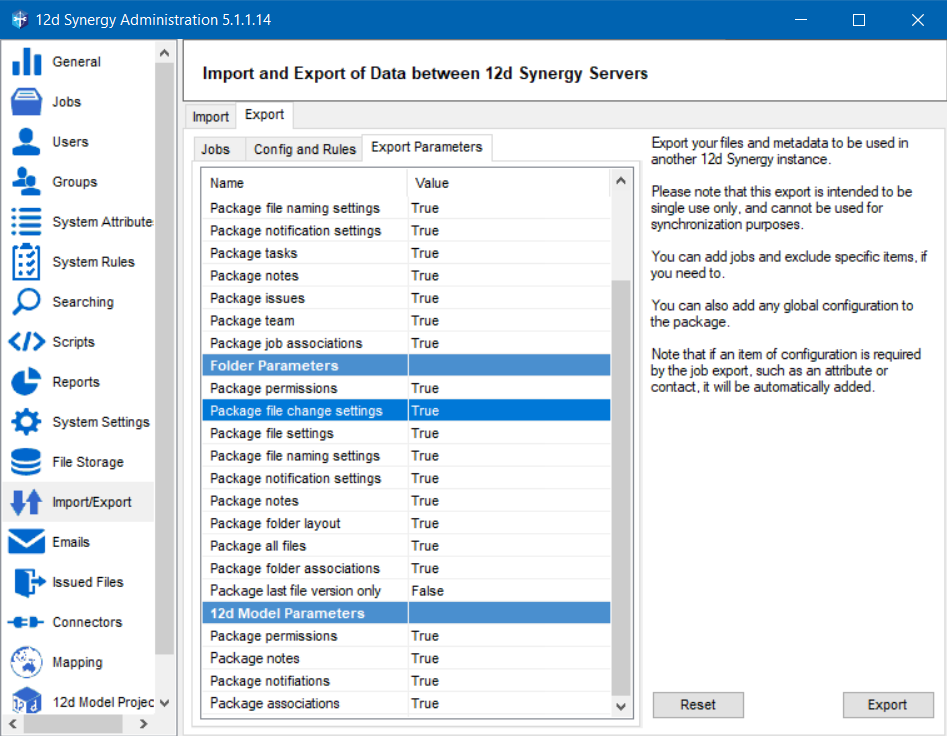
By default, all the listed parameters in this tab are included in the export package.If you want to exclude any specific parameter in the export package, select the False option from the corresponding cell in the Value column.
If an error occurs while exporting the data package, the process may fail. However, if you want the export process to continue running, ignoring the files causing the errors, then you can add a custom setting SkipMissingFilesInPackage and set its value to 1 in the 12d Synergy Administration application > System Settings tab > Custom Settings tab.
Click the Export button.
The following prompt is displayed.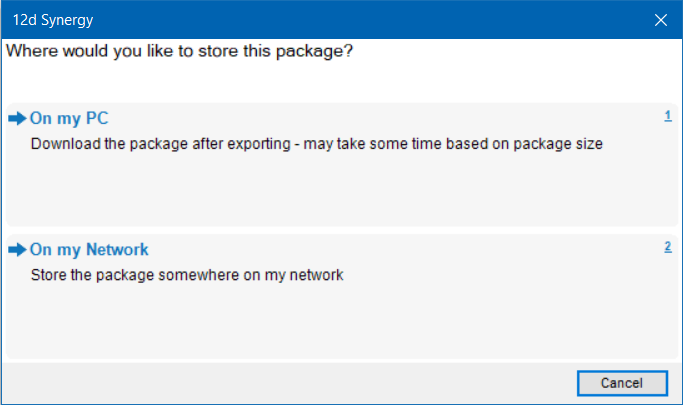
Do one of the following:
To store the data package on your personal computer, do the following:
Select the On my PC option.
The Save a package where? prompt is displayed.
Browse and select the location where you want to save the package from the tree structure.
Ensure that you have sufficient space on your PC to accommodate the package and its zip file.
Enter a file name for the package you are exporting in the File name box.
Click the Save button.
To store the data package on your network, do the following:
Select the On my Network option.
The Export package window is displayed.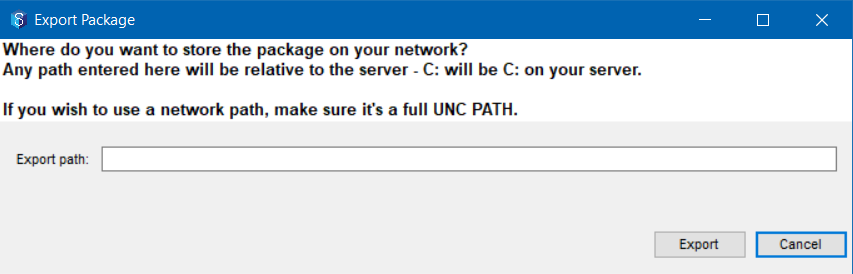
Enter the path to the network drive location where you want to store the package, along with the name of the data package, in the Export path: box.
You must include the data package name in the path. For instance, entering just D:\Export\ will NOT work. Instead, enter D:\Export\<data package name>.12dSPackage, for the data package named <data package name>.12dSPackage to be exported to D:\Export\ location.
Ensure that the 12d Synergy Server has access to the path you have mentioned here.
Click the Export button.
Based on the package size and your connection speed, the package is exported to the specified location.
1.3. How to Import a Data Package
To import a data package, there must be data previously exported from the Export tool.
In the 12d Synergy Administration application, select the Import/Export tab > Import tab.
In the Available Packages panel, all the previously added data packages are displayed. The panel on the right displays the contents of the package selected in the Available Packages panel. You can also view who created the package and when in this tab.
Before a package is imported, it has to be added to the system so that it can be properly referenced and validated.
Click the
button to select the package you want to add.
The Give the package a name window is displayed.Enter an appropriate name for the package in the Name box.
Click the Set button.
The following prompt is displayed.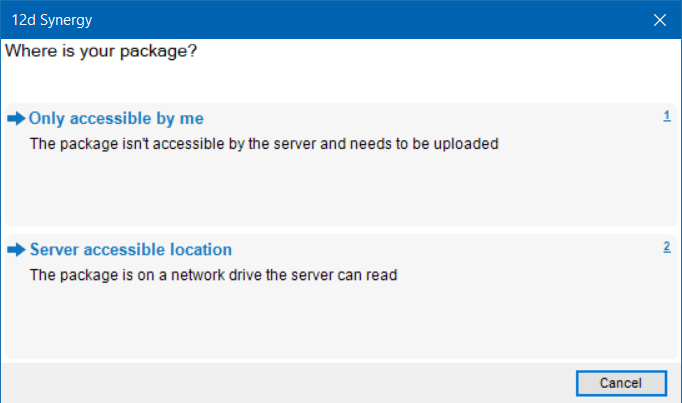
Do one of the following:
Select the Only accessible by me option to select a package from the local folder where it is saved and click the Open button.

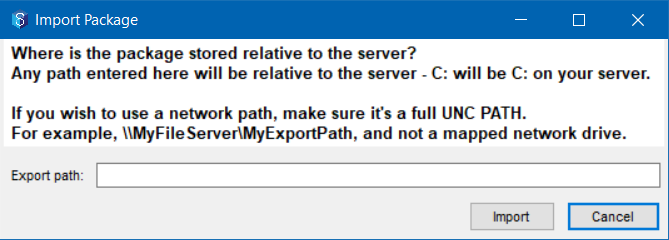
Select the Server accessible location to select a package from the network drive folder, mention the full path of the package to be imported in the Export path box and click the Import button.
The package is created and added to the Available Packages panel in the Import tab.A copy of all the added packages is stored in the General storage folder, the location of which is mentioned at the 12d Synergy Administration application > System Settings tab > General tab > Value column of the General Storage setting. After a successful import, you can choose to delete these packages from this folder, as they consume space (this is dependent on the size of the package you are importing).
Select the package you want to import from the Available Packages panel.
Click the Import button.
A confirmation prompt is displayed.Click the Yes button.
The following prompt is displayed.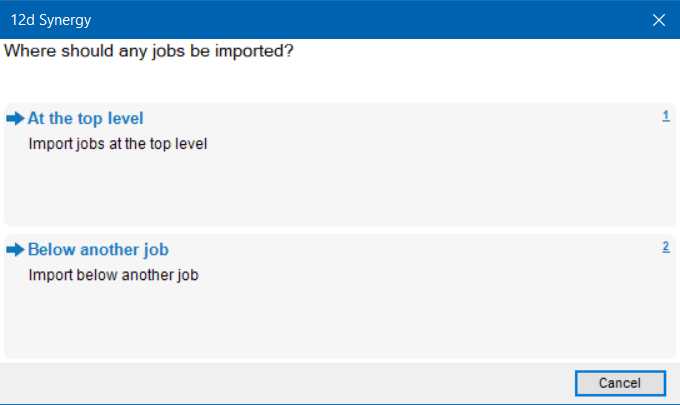
Do one of the following:
Select the At the top level option to import the packaged content at the top level.
Select the Below another job option to import the packaged content as a sub-job, find and select a job under which you want to import it, and click the Select button.
The package is imported accordingly, and a message is displayed once the import is successful. You can open the imported package (job) using the 12d Synergy Client application by finding the imported job.You cannot import a job more than once. You must either purge it before reimporting it or import it at a different location.
When you package linked files, the source of the link must be included in the package. Otherwise, the file will be packaged as an independent file and not as a linked one.