12d Synergy stores its files in a ‘File Store’. When 12d Synergy is installed, a default File Store is configured. All initial jobs created are bound to this File Store.
However, you can create multiple File Stores. Say for instance you might want to store different jobs at different locations or physical drives. In this case, you can create multiple File Stores and bind different jobs with different File Stores using user-defined rules.
1.1. File Stores
1.1.1. Delta Store
This is the default store type for 12d Synergy. Selecting this type of file saves only the changes between consequent files and occasionally full versions of the file to cut down on time to reconstruct files when prior versions as requested. The disk space used for this type of file store is lesser than that used by a full store.
1.1.2. Full Store
This store type simply stores a copy of every file. Hence it occupies a lot of disk space. However, it is the fastest to use.
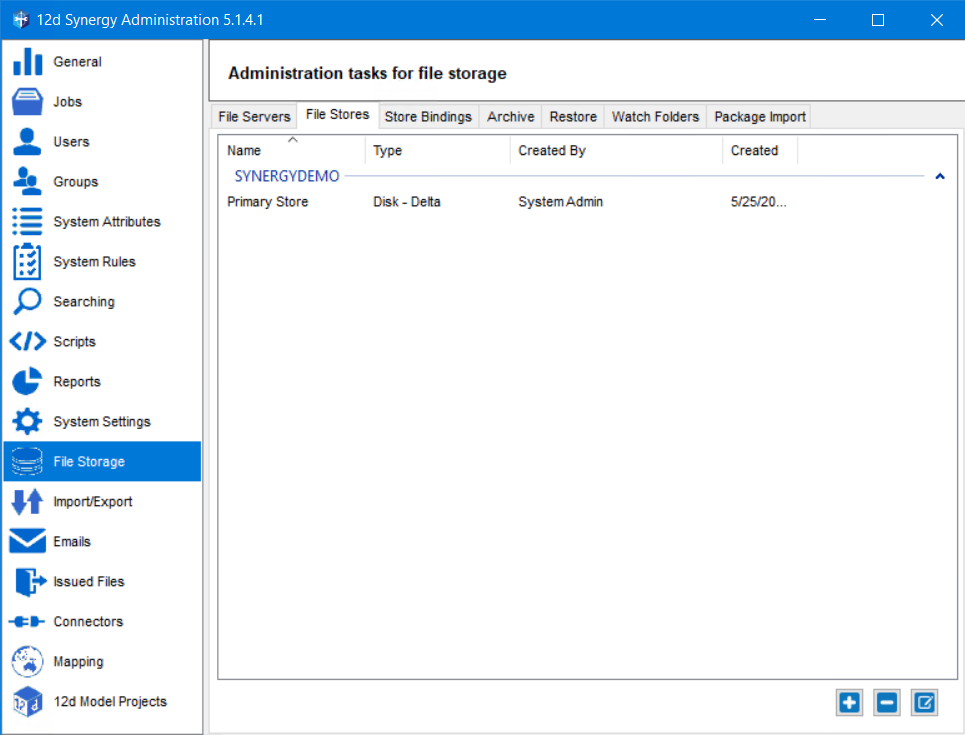
1.1.3. How to Create a File Store
- In the 12d Synergy Administration application, select File Storage tab > File Stores tab.
- Click the
 button to add a file store.
The Add a File Store window is displayed.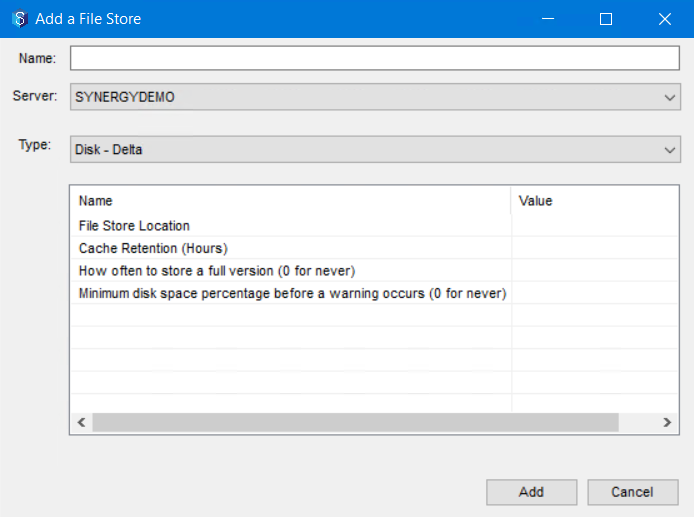
- Enter a name for the file store in the Name: box.
- Select the server on which the data that you want to store in the file store is located from the Server: list.
There is usually only one server in the Server list unless you have a File Replication Server (FRS) set up in your system.
- Do one of the following:
- To create a Delta File Store, select the Disk - Delta option from the Type: list and enter the following details in the table below.
- File Store Location - the location on your drive of the file store where the files will be saved.
- Cache Retention (Hours) – the time, in hours, for which a retrieved historical file is stored in your cache.
- How often to store full version (0 for never) – The frequency of saving the full version of a file. This setting will help to cut down on the file reassembly time when a file version is requested.
- Minimum disk space percentage before a warning occurs (0 for never) – The percentage of used disk space that when reached, should trigger a warning to the users.
- To create a Full File Store, select the Disk – Full option from the Type: list and enter the following details in the table below.
- File Store Location - the location on your drive of the file store where the files will be saved.
- Minimum disk space percentage before a warning occurs (0 for never) – The percentage of used disk space that when reached, should trigger a warning to the users.
- To create a Delta File Store, select the Disk - Delta option from the Type: list and enter the following details in the table below.
- Click the Add button.
The File Store is created and displayed in the File Stores tab.
1.2. File Store Bindings
File Store bindings are a set of rules that you create to define which files or folders should be stored in which file store. When a file or folder is stored in a specific File Store, all changes to that file or folder are also stored in the same File Store.
1.2.1. How to Create a File Store Binding and its Rules
- In the 12d Synergy Administration application, select the File Storage tab > Store Bindings tab.
The created binding rules, if any, are displayed in this tab.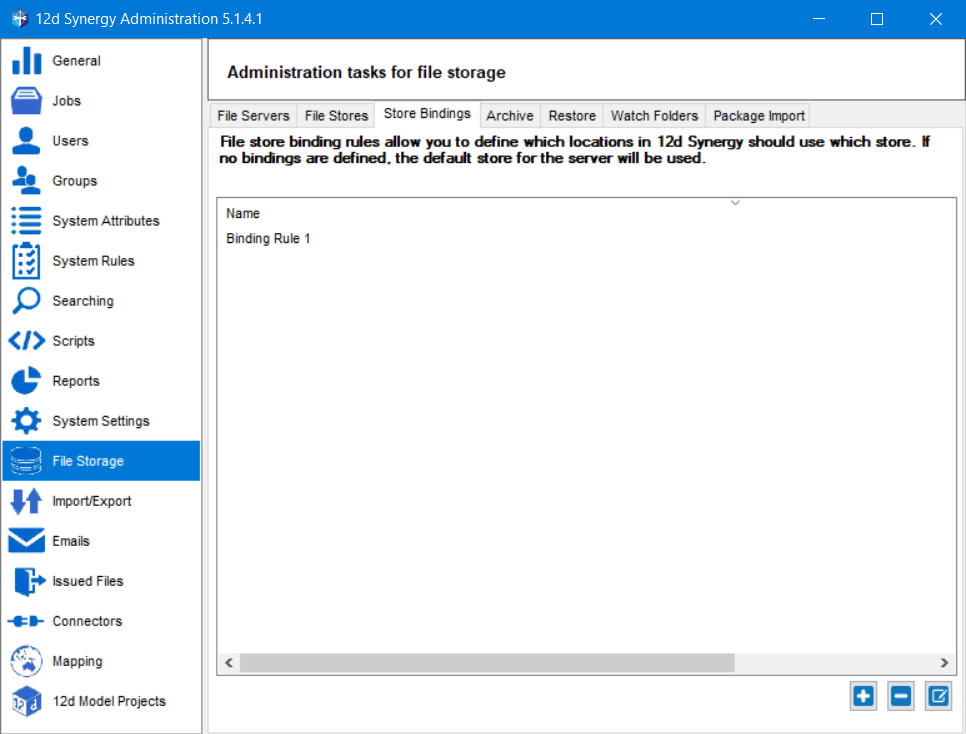
- Click the
 button to add a file store.
The Store Binding Rules window is displayed.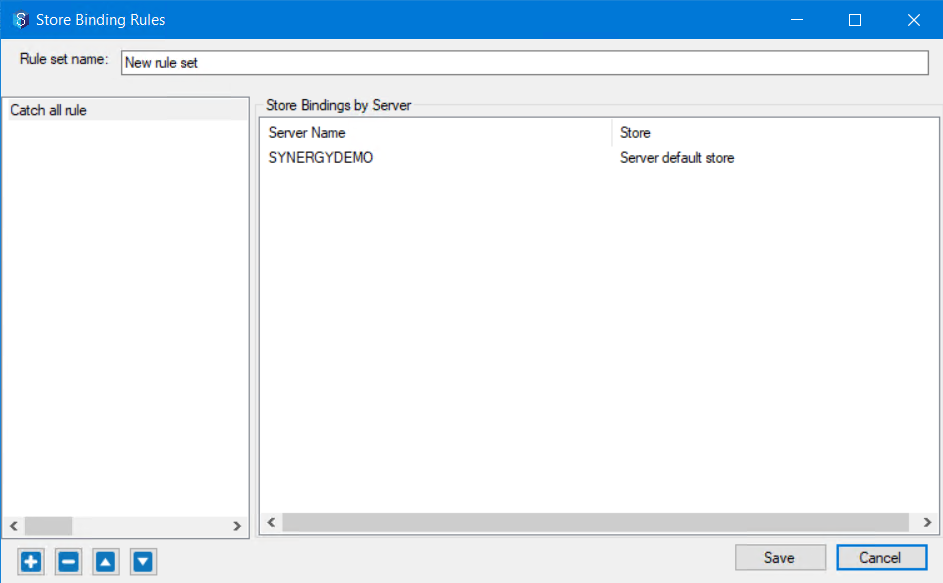
- Enter the name for the store binding rule in the Rule set name: This binding rule will be a collection of rules that you will create in the left panel of this window.The Catch all rule rule is a default rule of any binding rule and it is applied when no other file name or folder name pattern rules are matched.
- To add rules to the store binding rule you are creating, click the
 button under the left panel to add a rule.
The following prompt is displayed.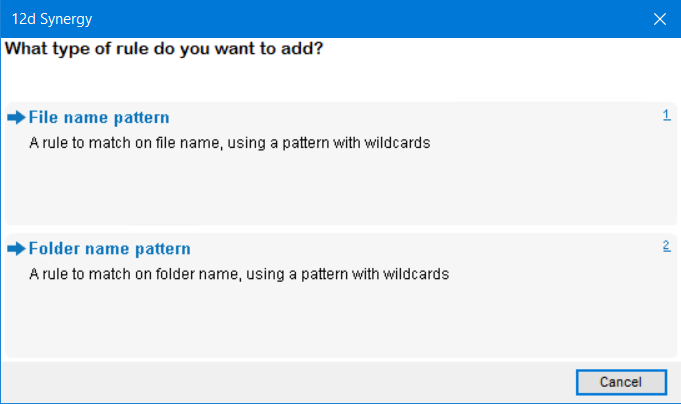
- Do one of the following:
- If you want to create a rule for files of a specific type, select the File name pattern option.
- If you want to create a rule for folders, select the Folder name pattern option.
The right-upper panel is added to the Store Binding Rules window. You can define your rule for files or a folder here.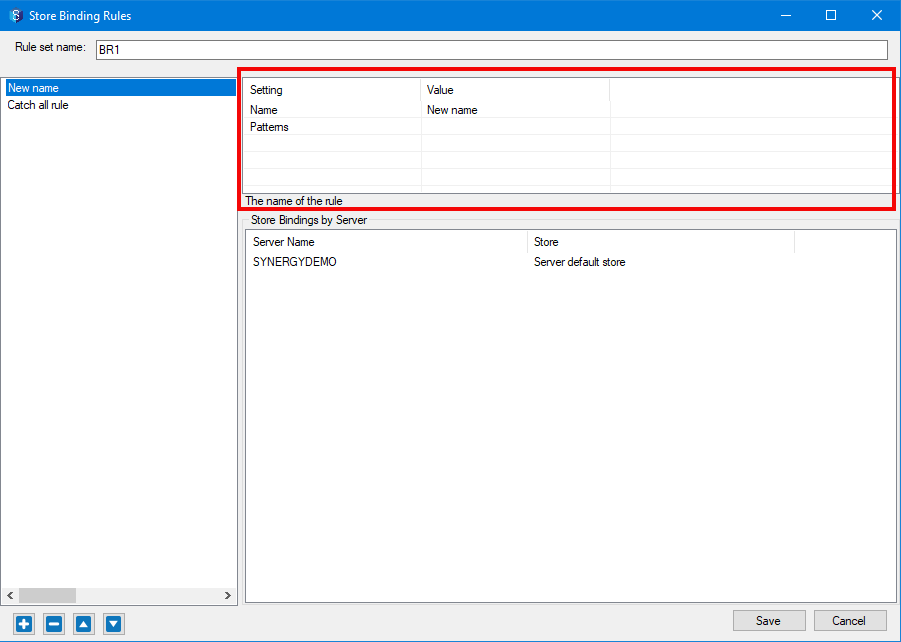
- Double-click the Value cell in the Name row and enter the name for the rule you are creating in the cell.
- Double-click the Value cell in the Patterns row and enter one of the following:
- If you have selected the File name pattern option while creating this rule, enter the extensions of the file types for which this rule is applicable. You can enter multiple file extensions by separating them with a semicolon.
For instance, to apply the rule for all MS Word documents, you have to enter *.doc; *.docx in the Value column of the Patterns row. You can also apply the rule to a specific file by entering its name and extension. - If you have selected the Folder name pattern option while creating this rule, enter the folder names or folder names with wildcards for which this rule is applicable. You can enter multiple folder names or folder names with wildcards by separating them with a semicolon.
For instance, to apply the rule for all folders that have names starting with CCTV and the folder named RAIL, then you have to enter CCTV*; RAIL in the Value column of the Patterns row. Then all the folders that have names starting with CCTV (like CCTV1, CCTV_New, etc.)and the folder named RAIL are considered for this rule.The description of what needs to be entered in a cell is displayed below the upper-right panel.
- If you have selected the File name pattern option while creating this rule, enter the extensions of the file types for which this rule is applicable. You can enter multiple file extensions by separating them with a semicolon.
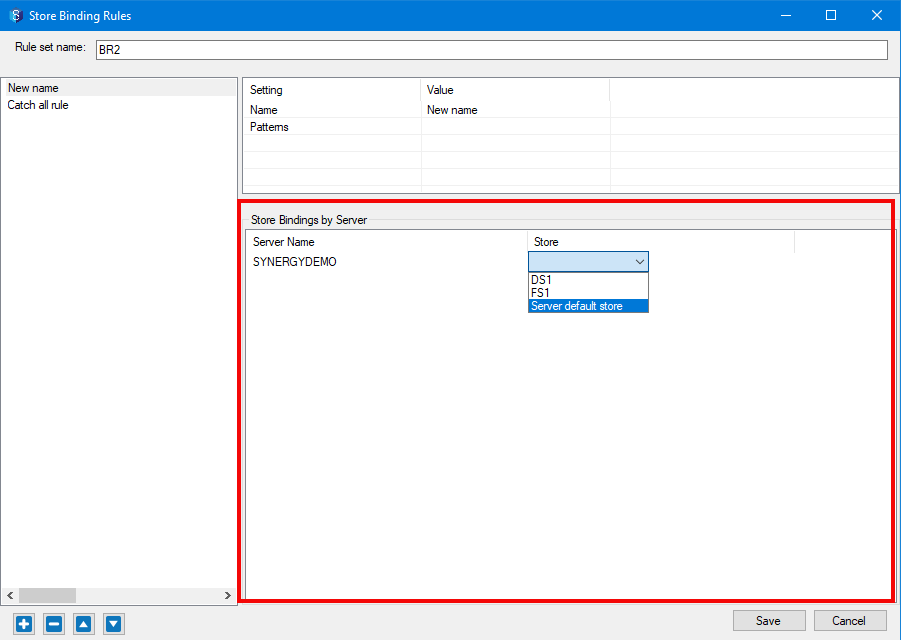
- In the Store Binding by Servers section, to bind the rule you are creating with a File Store on a server, select the required File Store from the list of options displayed in the Store column of the required server. All the File Stores created in the File Storage tab > File Stores tab are displayed as options for a server here.
The Catch all rule is applied to all the files and folders that do not meet the newly created rules of a Store Binding rule.
- Click the Save button.
The rule is created and is added to the list of rules in the left panel of the Store Binding Rules window. These rules are a part of the newly created Store Binding Rule that you created in Step 2 of this procedure.