Client Content
In some versions of MS Excel, particularly when scaling has been used across multiple monitors, some windows may not render correctly. In this instance, these applications may need to be switched to Optimize for Compatibility mode in MS Excel > File > Options > General tab. It is recommended to do so to ensure that the 12d Synergy plug-in options are correctly displayed.
12d Synergy offers a plugin to interface with Microsoft Excel easily.
1.1. The 12d Synergy Plugin for Microsoft Excel
.png)
User Interface Element | Menu Option | Description |
|---|---|---|
| Open | Opens a file browser to open a required file from the 12d Synergy Client application. |
| Imports/Uploads a Microsoft Excel file into 12d Synergy | |
| Imports/Uploads a Microsoft Excel file into 12d Synergy with a new name of your choice | |
| Updates the local version of the file to the latest version of the file from the Server. | |
| Inserts attributes from 12d Synergy to be used in the file. | |
| Inserts placeholders for attributes in form templates
| |
| Refresh Attributes | Updates the attributes when changes are made |
| Locks the file for editing so that other users cannot edit it at the same time. It is locked until you check the file back in. This option is available only when the file is opened without being initially checked out. | |
| Saves the MS Excel worksheet as a PDF and stores it at a location of your choice in the 12d Synergy application. | |
| Change Version | Allows you to select the version number of the 12d Synergy Client application to load the Excel worksheet in the subsequent startup. Note that this feature comes in handy when you have more than one version of the 12d Synergy Client application installed on your system. |
| Add | Links data from one workbook to another by using this icon. When you link data between two workbooks, if you update the linked data in one sheet, the data in the other worksheet automatically gets updated. Note that both worksheets must be a part of the 12d Synergy system. This is an advanced function of MS Excel. 12d Synergy has only provided an easy interface to use this function in Excel Worksheets that are stored in the 12d Synergy Server. |
| Edit | Edits the data links that were previously created using the Add |
.png)


.png)


 icon.
icon.1.2. How to Check-out a File using the 12d Synergy Plugin
When you open a worksheet in View only (read-only) mode, you can still check out the worksheet using the 12d Synergy plugin for MS Excel.
In the 12d Synergy plugin, click the
 icon.
icon.This icon is enabled only when a worksheet is opened in the View only (Read-only) mode.
The following prompt is displayed.
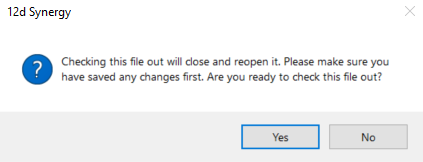
Click the Yes button to confirm the checkout.
The worksheet is checked out and is now editable.
1.3. How to Upload Files into the Server
Uploading a file will check in the worksheet and make it a read-only file. You have two options to upload a file.
In the 12d Synergy plugin, do one of the following:
To upload/import the worksheet into the 12d Synergy application, do the following:
Click the Upload
 icon.
icon.
The following prompt is displayed.

Select the required option and upload the file.
To upload/import the worksheet into the 12d Synergy application with a different file name, do the following:
Click the Upload As
 icon.
icon.
The Name File for Upload window is displayed.
.png)
Enter the new file name in the Upload As box.
Click the Accept button.
The Select a folder window is displayed.
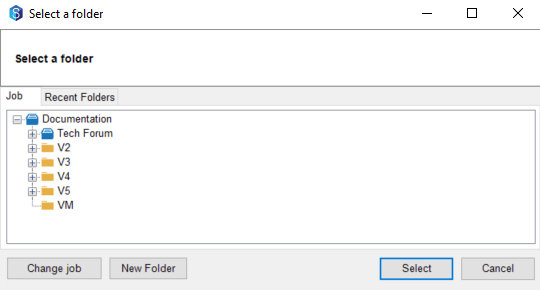
Select the location where you want to upload/import the newly named file.
Click the Select button.
The following prompt is displayed.
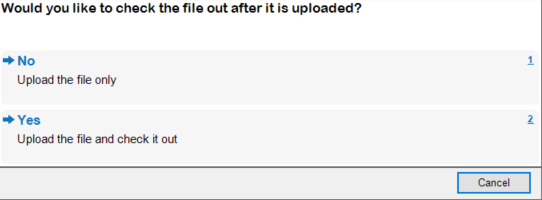
Select the required option and upload the file.
1.4. How to Get the Latest Version of the file
When you work on a worksheet, save it, and check it into the 12d Synergy Client application, the version number of the file is updated. When you checkout the file, work on it, and save it, the version number on the 12d Synergy Client application is NOT updated as it is still not checked in.
When you do a Get latest version for any worksheet, the last checked-in version of the worksheet is updated to your local workspace and is opened for use.
Note that if you have checked out a file, made some changes to it, saved it, and closed it but did not check it into the 12d Synergy Client application, then on doing a Get Latest Version, the changes that you have made to the worksheet are lost as they have not been checked in to the 12d Synergy Client application.
You can perform a Get Latest Version function in one of the following ways:
Right-click the worksheet and select the Get latest version option.
In the opened worksheet, access the 12d Synergy menu option and click the
 icon.
icon.
The locally saved version of the worksheet is overwritten by the last saved version checked into the 12d Synergy Client application.
1.5. How to Insert Attributes in a File
Excel worksheets that have plugins can have embedded attributes. When you update the source of these attributes, such as a Job attribute, the worksheet is automatically checked out, the attribute value is updated, and it is checked back into the 12d Synergy Client application. Thus, the version number of the file is increased, and the worksheet is up to date.
To insert an attribute, do the following:
Open the Excel worksheet and place the cursor at the cell where you want to insert an attribute.
Click the
 icon from the 12d Synergy plugin.
The Select Attribute window is displayed.

Select the required attribute and click the Select button.
The value of the selected attribute is inserted in the worksheet at the cursor.You can use the Refresh Attributes
 icon button to update the values of the attributes in the worksheet when they are updated in the 12d applications.
If you select the Insert as a dynamic placeholder check box in the Select Attribute window, the attribute name is added to the worksheet within square brackets. The square brackets symbolise a placeholder for the attribute mentioned in between them, the value of which can be updated only once.
1.6. How to Insert Forms Placeholders
You can use this icon button while creating form templates. Please refer to the linked procedure to learn how to format your form output using placeholders.
This icon is displayed only when the Excel sheet you are accessing is checked out from the 12d Synergy Client application.
1.7. How to Create a PDF of the MS Excel Worksheet
12d Synergy enables you to directly create a PDF of the MS Excel worksheet you are working on and save it at a location of your choice in the 12d Synergy Client application.
Click the Save As PDF
 icon button on the 12d Synergy plugin.
The Select a Folder window is displayed.Select the location where you want to save the created PDF.
Click the Select button.
The Enter the new name for the file prompt is displayed.Enter a name for the PDF to be created and click the OK button.
The Describe this Change prompt is displayed.
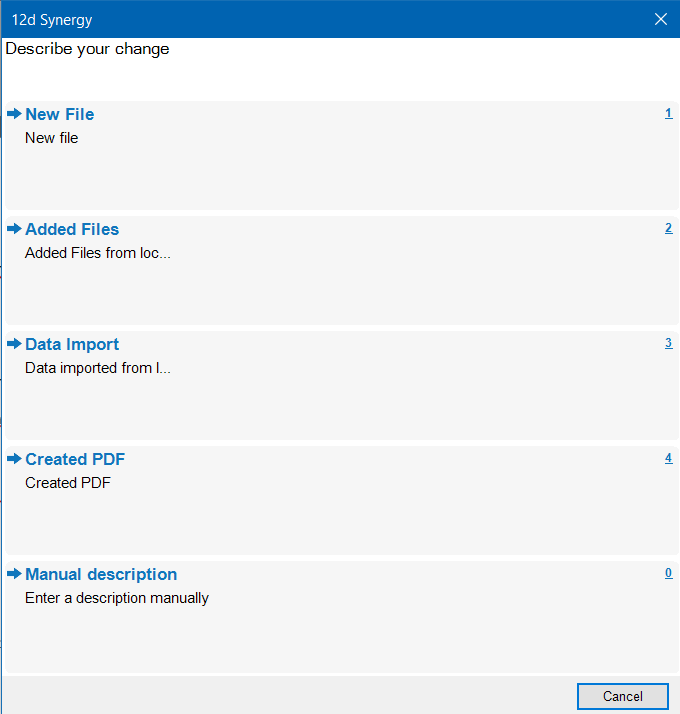
Select the Created PDF option.
If any attributes are to be filled for the PDF, you will be prompted to enter their values at this stage.
The PDF is created and is saved in the selected location.
To see the original file from which a PDF has been generated, select the PDF, and view the Associations tab. It will display the MS Excel worksheet from which the PDF was generated.