Admin Content 5.1.4 (on request) or later
Single Sign On allows a third-party provider, such as Azure Active Directory (now called Microsoft Entra ID), to authenticate your users and control who can log in to 12d Synergy. When you use Single Sign On authentication, your passwords are never sent to 12d Synergy and can be reused across multiple applications with a single source of truth.
Currently, 12d Synergy only supports Azure AD (now called Microsoft Entra ID) as a third-party provider.
When you choose to log in to the 12d Synergy applications with Single Sign On authentication, you need to do the following in the 12d Synergy Administration application:
When using SSO, the third-party provider is responsible for two-factor authentication. 12d Synergy's two-factor authentication will no longer apply.
1.1. How to Configure Azure AD (now called Microsoft Entra ID)
Log in to your Azure portal and navigate to the Azure Active Directory.
Select App registrations from the left panel and click the New registration link.
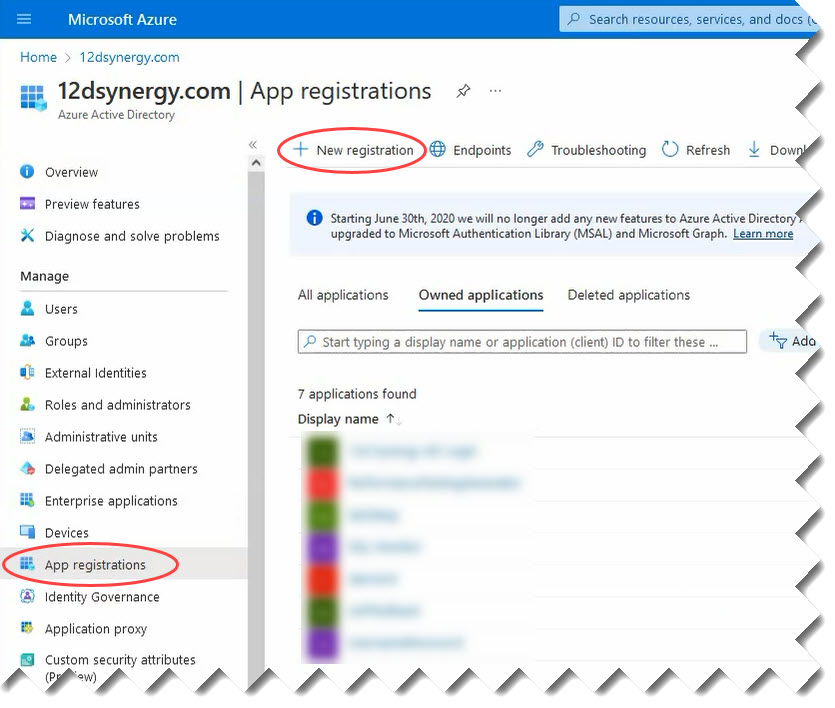
The Register an application screen is displayed.
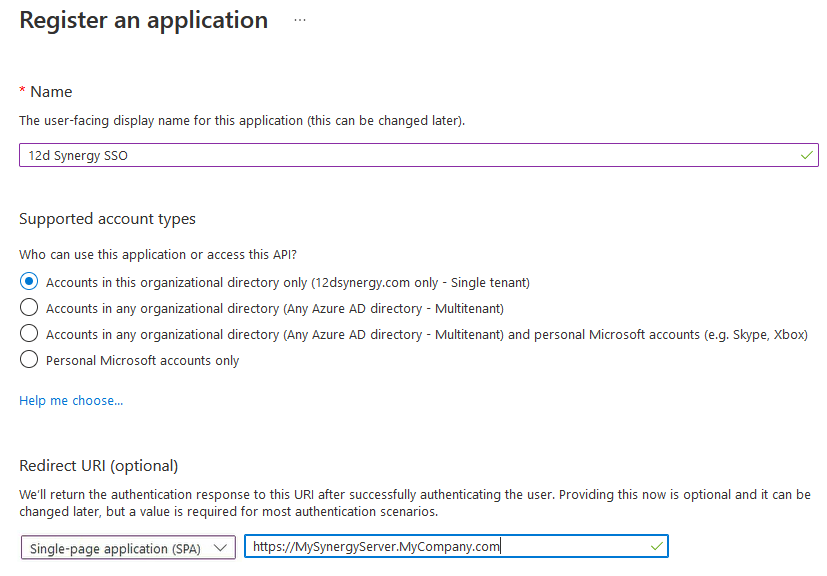
Enter a name for your application in the Name box.
Select the best-suited option for your application from the options displayed under the Supported account types section.
From the first box under Redirect URI (optional) section, select the Single-page application (SPA) option.
Enter your company's web address in the second box.
Click the Register button displayed towards the bottom of the page.
The following page is displayed.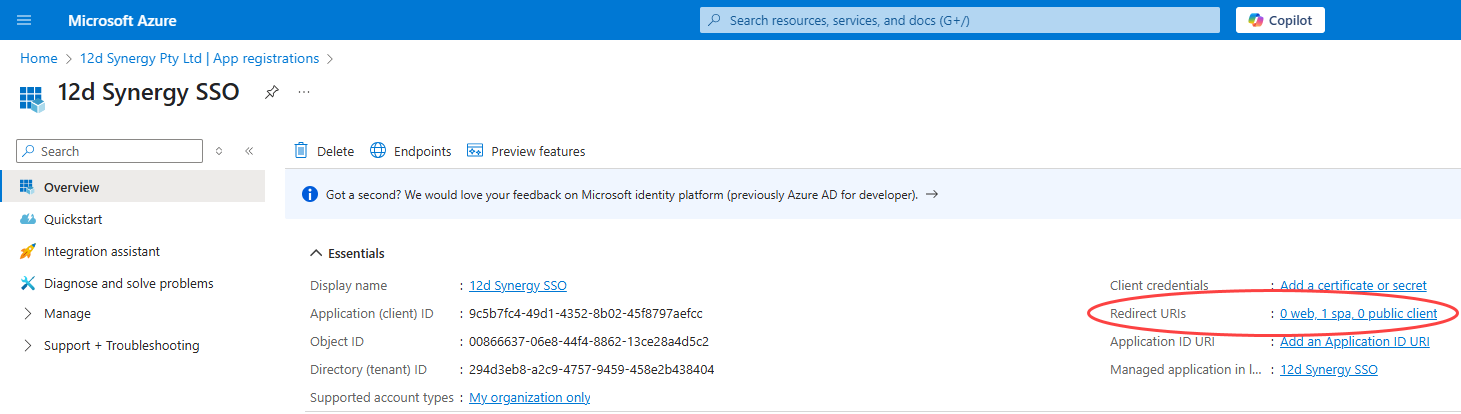
Click the link displayed against the Redirected URIs field.
The following page is displayed.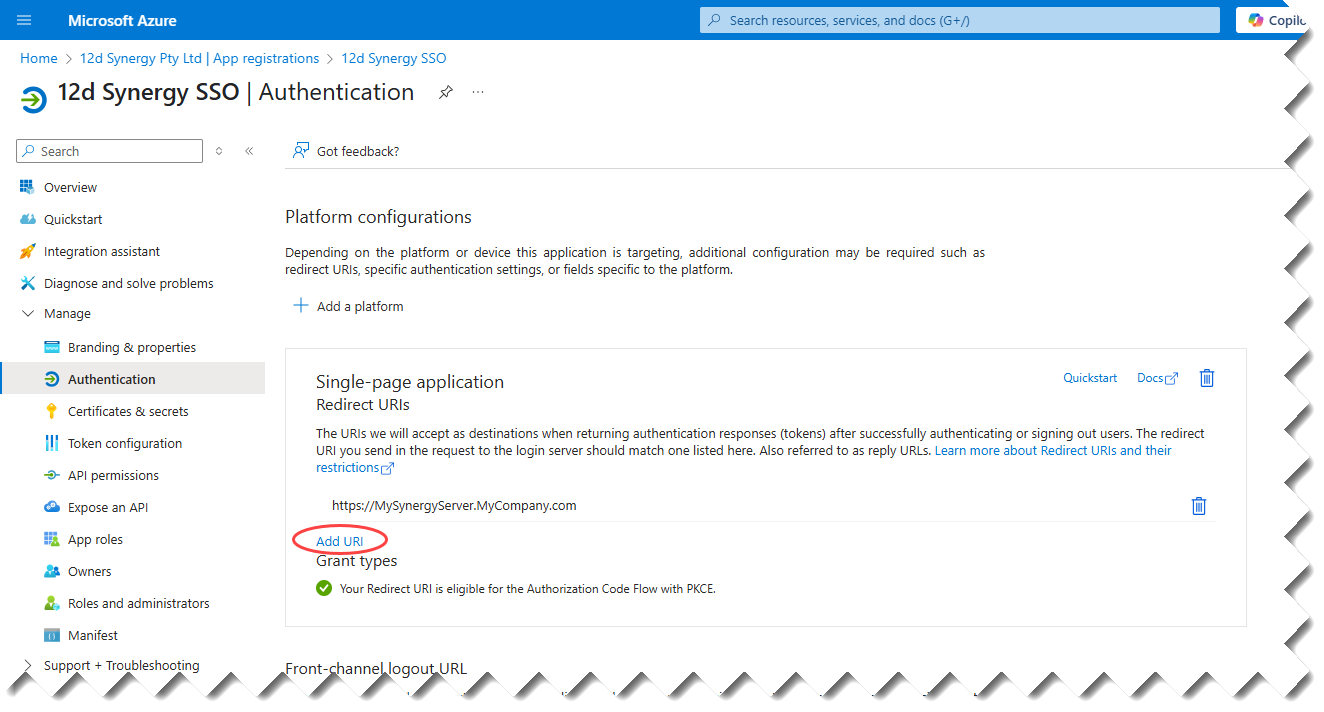
If instead of the above page, the following ‘Authentication (Preview)’ page is displayed, then click the ‘To switch to the old experience, please click here.’ content highlighted in the image below.
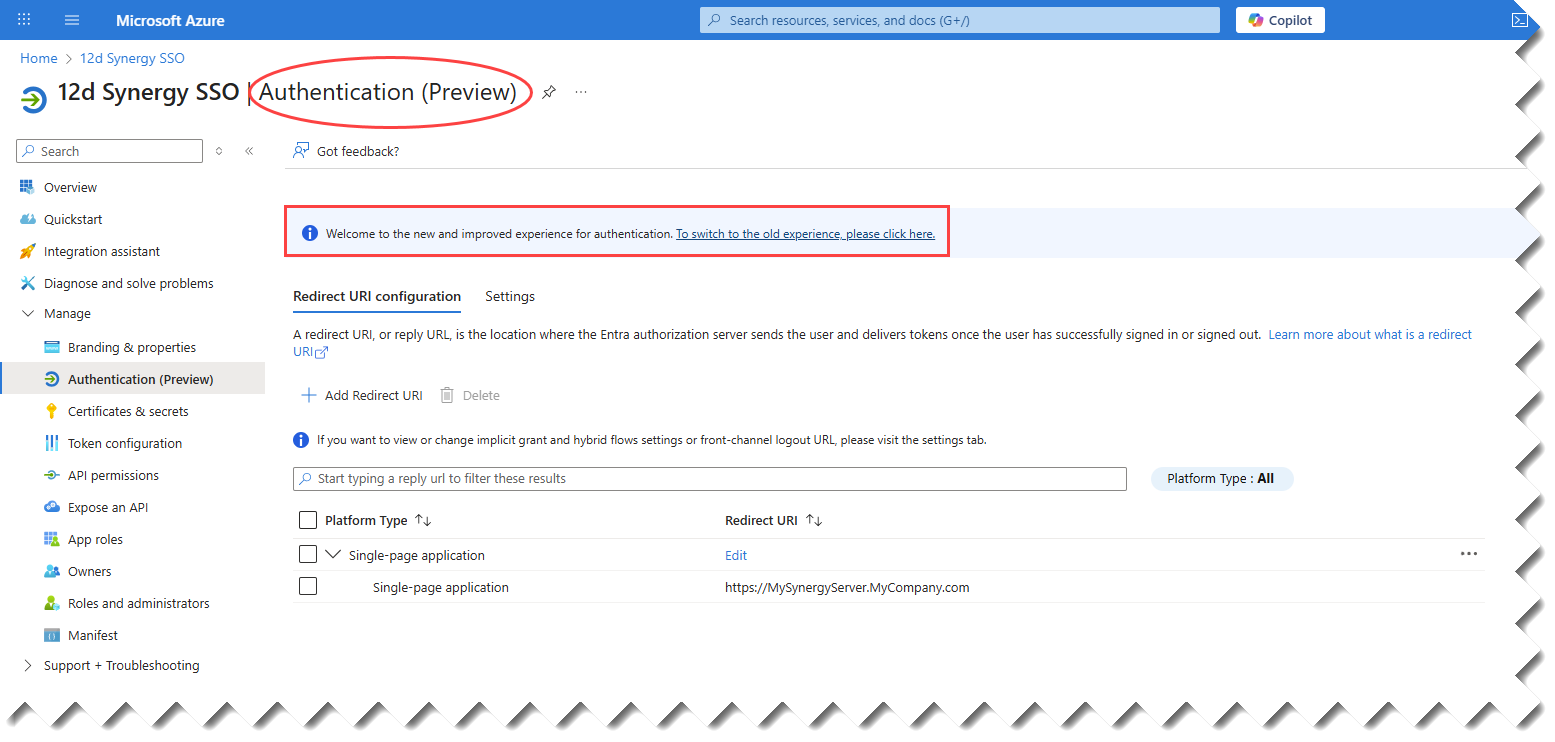
You can then continue with the procedure mentioned below.Click the Add URI link, as shown in the image above.
In the page that follows, in the Single-page application, Redirect URIs section, enter https://MySynergyserver.MyCompany.Com/auth-callback in the provided box as shown below.
.png)
Click the Save button.
The following page is displayed.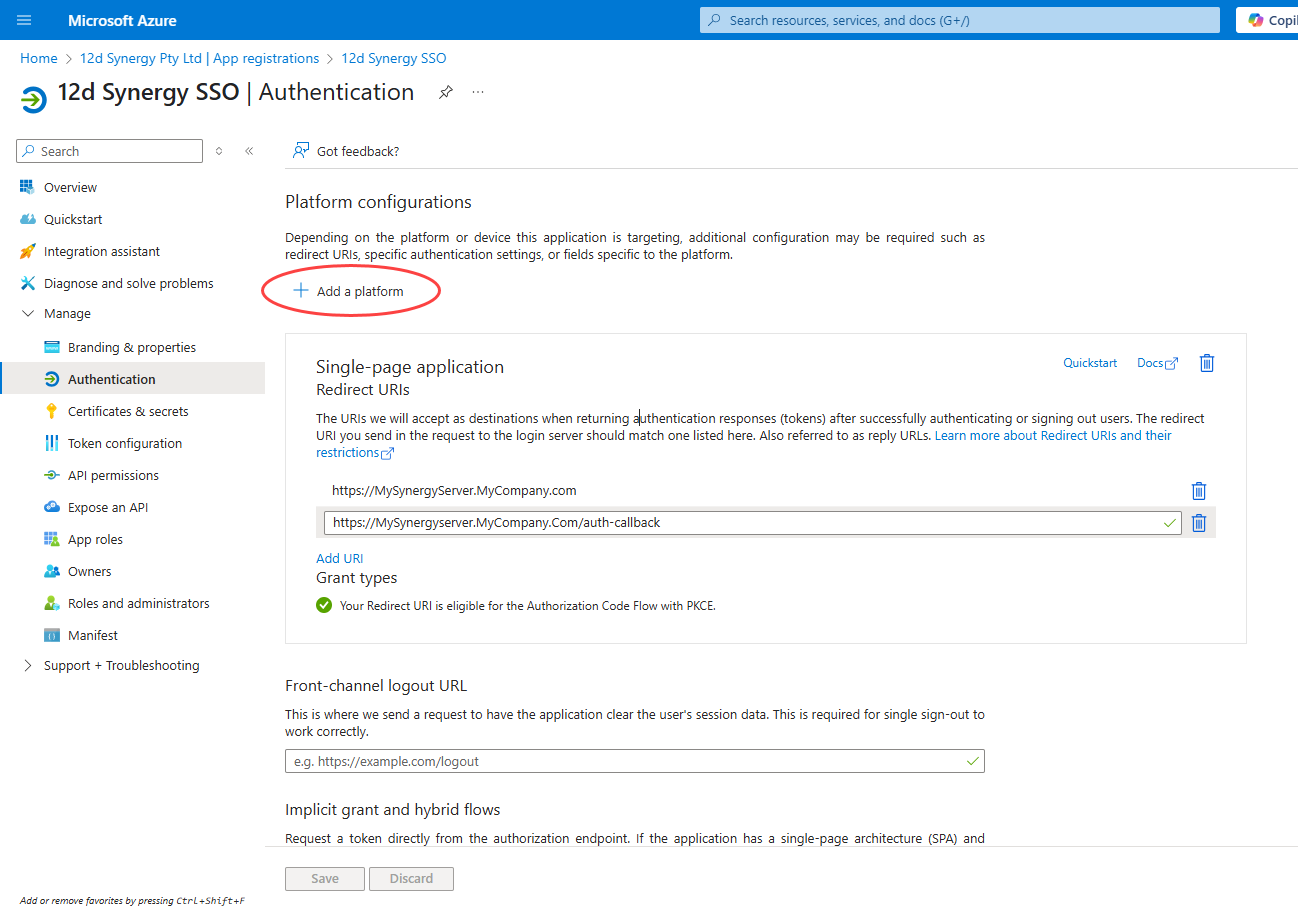
Click the Add a platform link, as shown in the image above.
The following panel is displayed on the right side of the page.
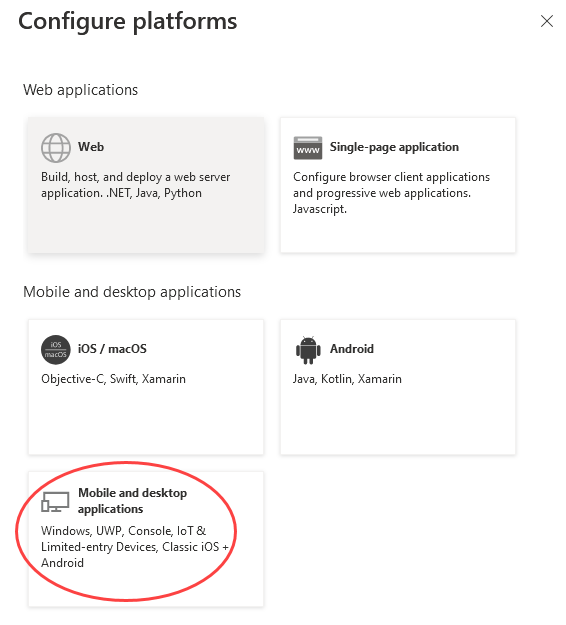
Click the Mobile and desktop applications box.
The following panel is displayed.
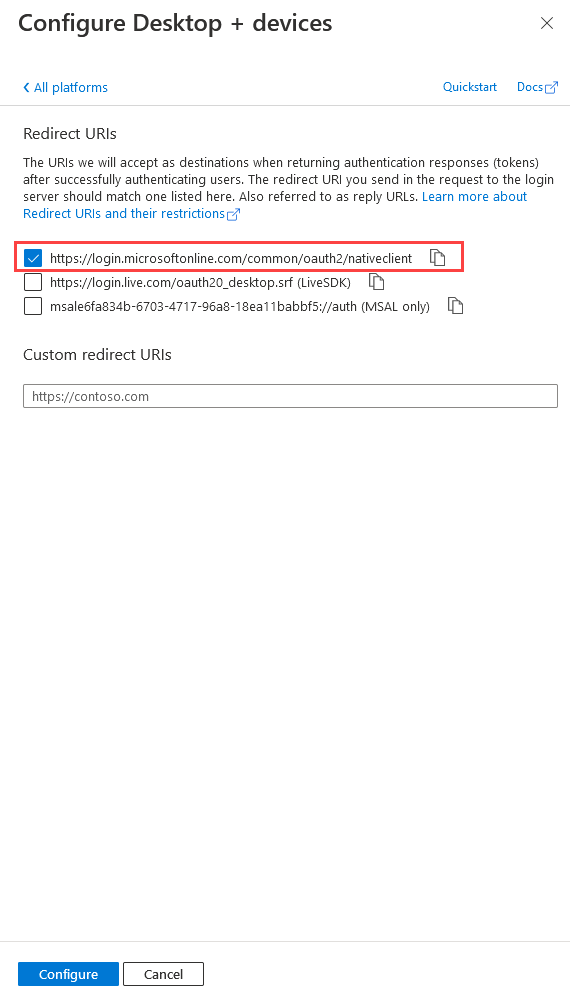
Select the checkbox that mentions nativeclient in its address. In the example above it is the first check box.
Enter "http://localhost" in the Custom redirect URIs box.
This is required for users who need to use an external browser for SSO. This applies only to users using 12d Synergy v5.1.6 or later.
Click the Configure button.
The following page is again displayed.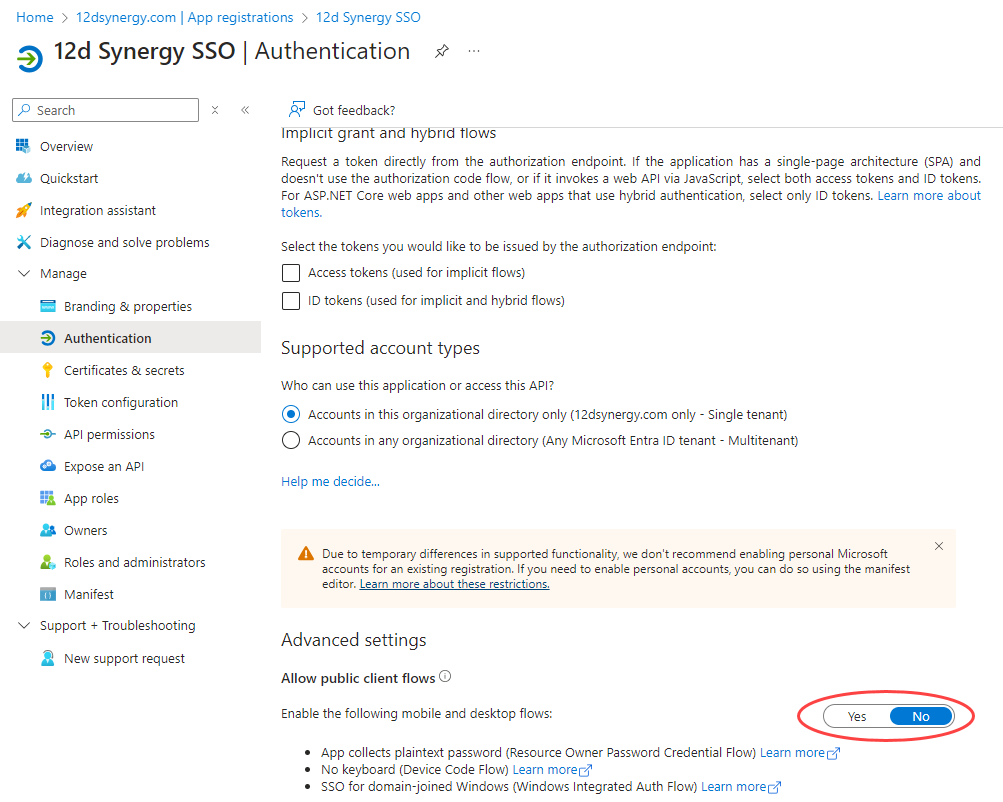
Scroll down on the resulting page and click No in the toggle button displayed against the Enable the following mobile and desktop flows: field.
Click the Save button.
SSO for the mobile and web applications is now set.
The following page is displayed.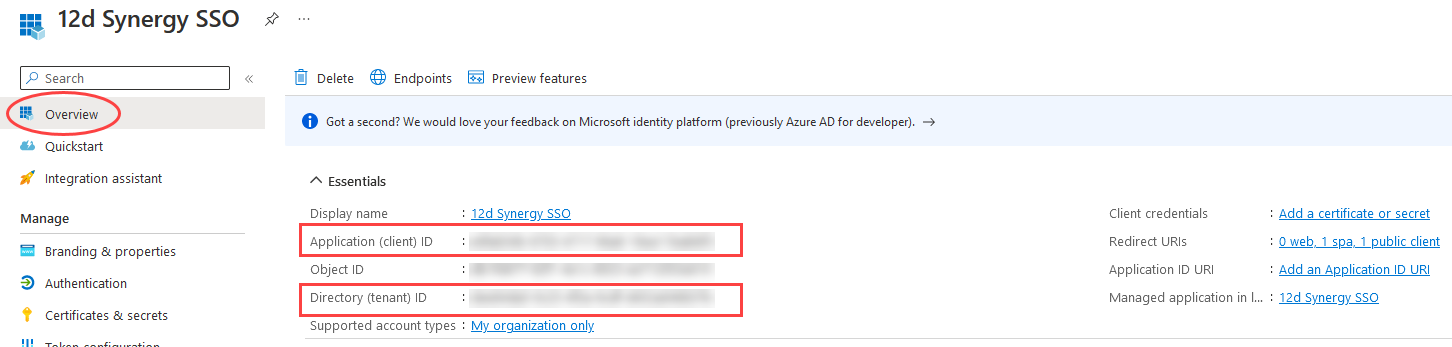
Click the Overview link in the left panel.
The Application (client) ID and Directory (tenant) ID are displayed in this page. Use these details to configure SSO in the 12d Synergy Administration application.
1.2. How to Configure SSO in 12d Synergy
In the 12d Synergy Administration application, select the Users > Single Sign On > Azure AD > Basic Configuration tab.
Click the
 button.
The Create Azure AD Config window is displayed.
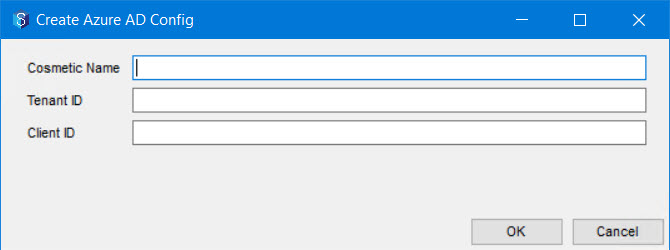
Enter a name for your Azure AD (now called Microsoft Entra ID) connection in the Cosmetic Name box.
Enter the Tenant ID and Client ID provided by your 12d Synergy Administrator (from the above procedure) in the Tenant ID and Client ID boxes, respectively.
Click the OK button.
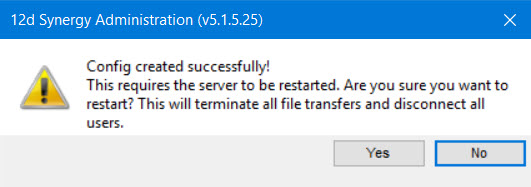
Your Azure AD (now called Microsoft Entra ID) configuration is completed successfully. You have to restart your 12d Synergy Server as suggested in the confirmation message.If any file transfers are in progress while restarting the server, they are stopped. Also, all users connected to the 12d Synergy Server are disconnected. Hence, be cautious while restarting the server.
To restart the server, click the Yes button.
The following message is displayed.

Click the Ok button.
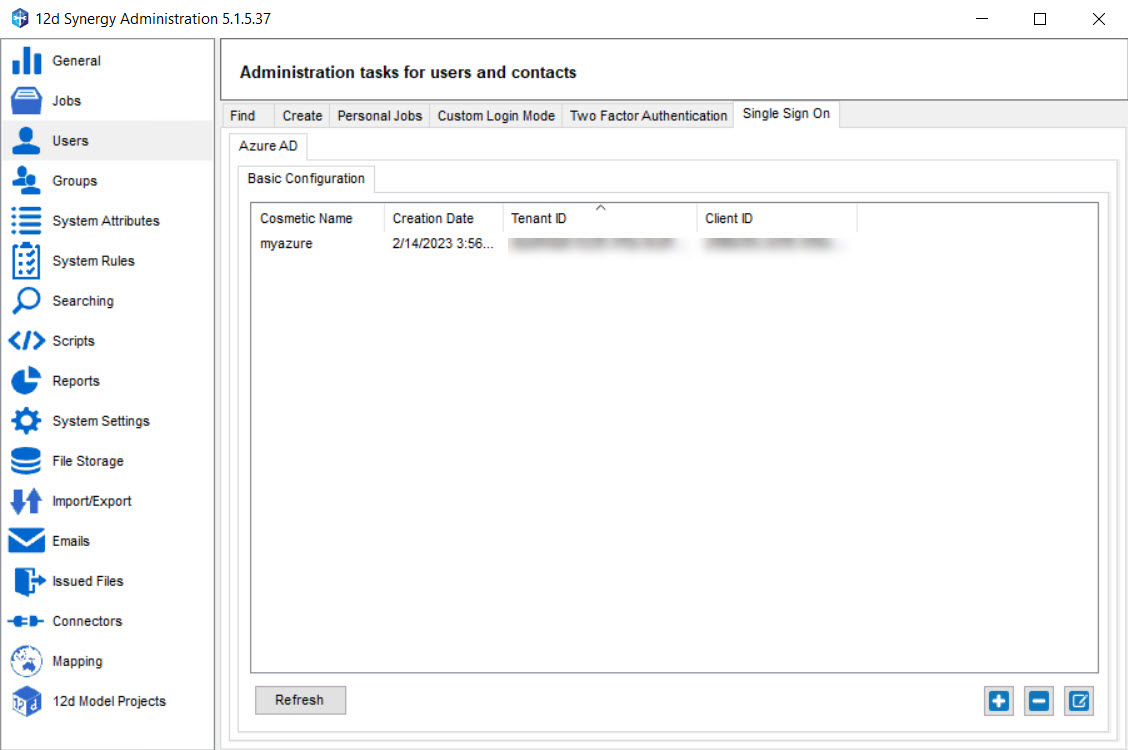
Your Azure AD (now called Microsoft Entra ID) is configured in 12d Synergy and is displayed in the Users > Single Sign On > Azure AD > Basic Configuration tab.12d Synergy does NOT support Azure AD (now called Microsoft Entra ID) groups for Permission Management.
1.3. How to Create an SSO User
You can create a user with Single Sign On authentication just the way you create a Windows or Custom authentication user.
While creating a user in the 12d Synergy Administration application > Users tab > Create tab > Standard tab, do the following: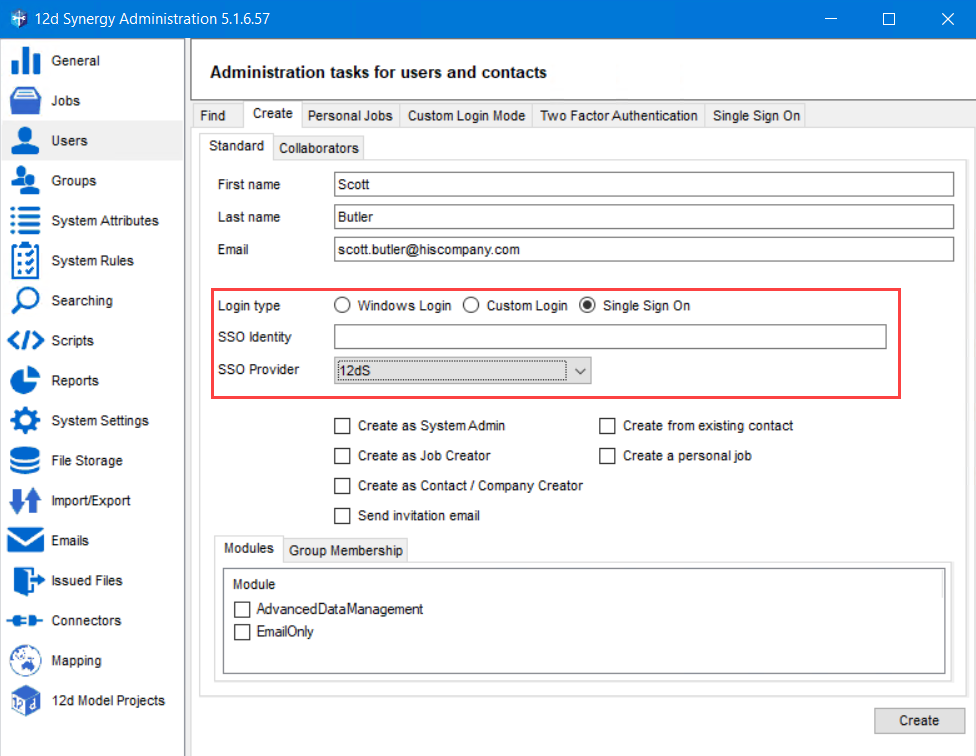
Select the Single Sign On option.
Enter your single-sign-on login email address in the SSO Identity box.
Select your SSO Provider from the SSO Provider list.
Enter the remaining details and click the Create button.
If you are unaware of any of these details, please check with your 12d Synergy Administrator.
For the complete procedure on creating a user, please refer to Creating a User.
1.4. How to Convert to an SSO User
When converting users for the first time, ensure to test the conversion process on a non-admin user account.
While editing a user in the 12d Synergy Administration application > Users tab > finding a user from the Find tab > Edit a User window, do the following:
Select the Single Sign On option.
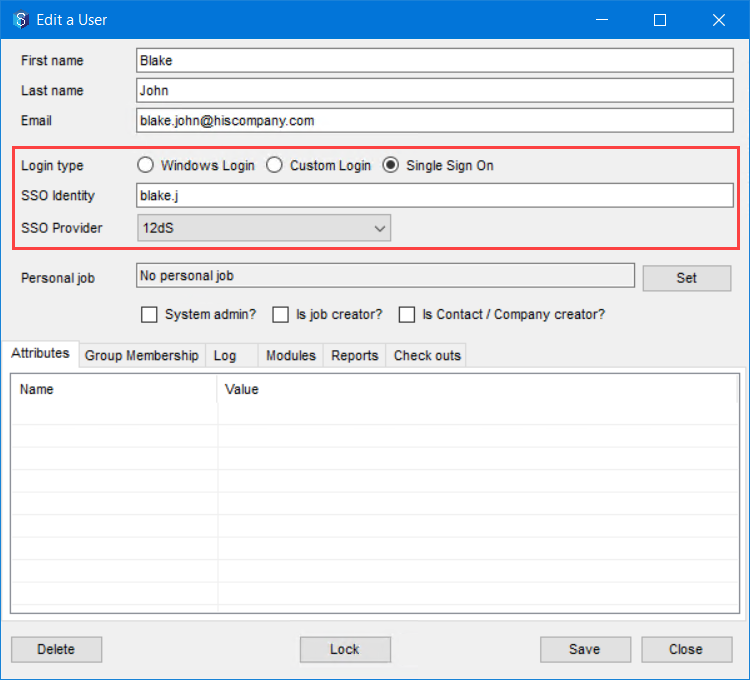
Clear the displayed details in the SSO identity box (if any) and enter the single-sign-on login email address.
Select the required SSO Provider from the SSO Provider list.
Make any other edits if needed, then click the Save button.
If you are unaware of any of these details, please check with your 12d Synergy Administrator.
For the complete procedure for editing a user, please refer to Editing a User.