If you are on this page looking for the erstwhile Issuing feature, please note that it is now renamed to Transmittals.
v6 feature
Issues can be of different types. These types allow you to categorize and define information about issues that might be raised under different contexts. They allow you to define the following details for any new issue ticket:
Statuses of the Issue
Attributes
Issue Naming Schemes
Colour coding
Entity tagged to the Issue
Workflows
By default, 12d Synergy comes with one issue type called the generic issue. You can create issue types that suit your requirements.
You cannot delete an issue type that has been used for creating issues in the 12d Synergy Client application.
A generic issue type has the following predefined states of progress. They are as follows:
Not Started
In Progress
In Review
Done
You can, however, create more states to suit your requirements.
You also have the option to create a copy of an existing issue type and reuse it as a base for a new issue type. To do this, select the issue type to be copied and click the Copy button in the 12d Synergy Administration application > System Rules tab > Issue Types tab.
1.1. How to Create an Issue Type
Admin Content
In the 12d Synergy Administration application, select the System Rules tab > Issue Types tab.
Click the
 button.
The Create Issue Type window is displayed.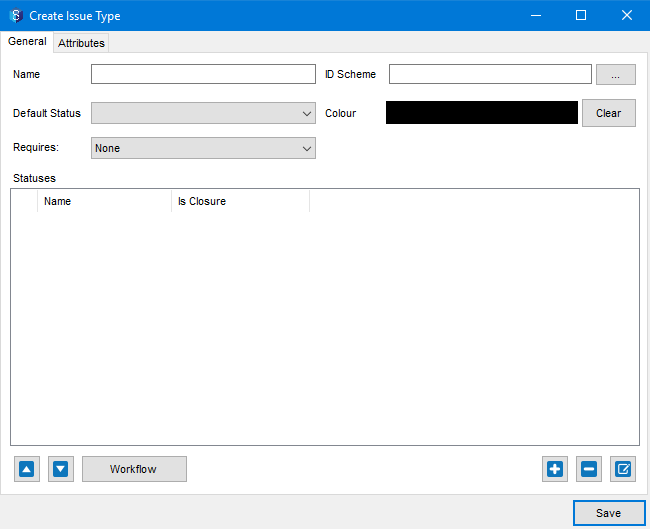
In the General tab, enter the following details:
Name the issue type
Define a unique naming rule for the issue tickets of this issue type by clicking the ellipsis
.png) button displayed against the ID Scheme box.
button displayed against the ID Scheme box.
An Issue Type ID Scheme Builder is displayed.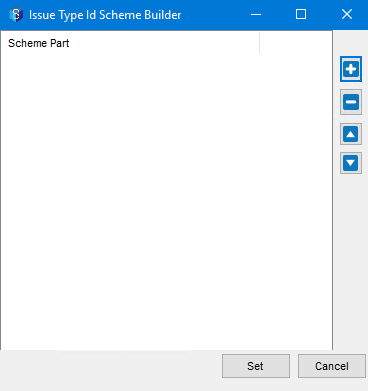
The process of creating an ID Scheme is similar to creating a file naming rule. Steps 7 to 11 in this procedure detail how to add components to the naming rule. The same steps apply to building components of an ID Scheme for an issue type. The same procedure is mentioned below for easy reference.Steps to Create an ID Scheme for an Issue Type
Click the
 button.
The Add File Naming Rule Part prompt is displayed.
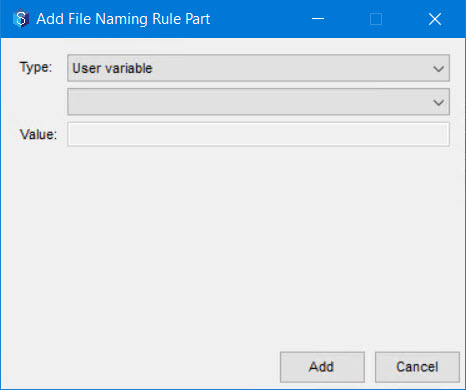
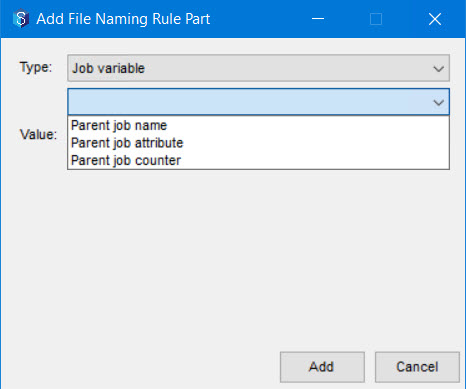
From the Type list, select the required type of component that you want to include in the ID Scheme.

If the component selected in step 2 of this procedure has a subtype, then those subtypes are displayed in the list below the Type list. Select the required subtype component that you want to include in the ID Scheme.
Refer to the Naming Rule Parts section for more details about the naming components.
Based on your selections in steps 2 and 3 of this procedure, one of the following happens in the Value box.
The value (syntax) of the naming rule part is calculated and displayed.

If user input is required for the type and/or sub-type that you have selected, then enter the required value in the Value box.
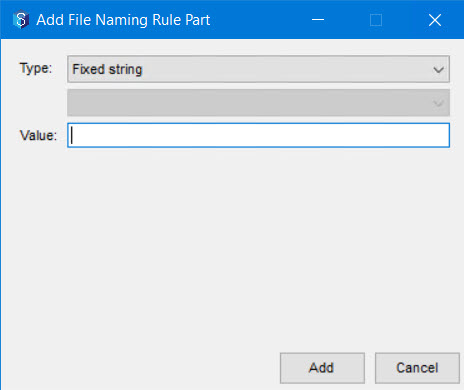
Click the Add button.
The naming rule part is displayed in the Issue Type ID Scheme Builder prompt.
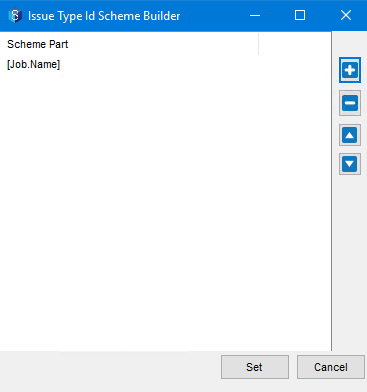
Repeat steps 1 to 5 in the Issue Type ID Scheme Builder window to add more components to the naming scheme to complete it as per your requirement.
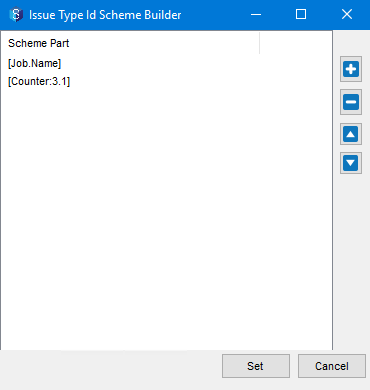
Click the Set button.
The created scheme is displayed in the ID Scheme box in the Create Issue Type window..png)
Click in the Colour box to select the colour in which you want all issues of this issue type to be displayed.
An issue type can be created for an entity type, such as a file, a 12d Model project, or a Managed folder. You can select the required entity from the Requires: list.
It is not necessary to attach an entity to the issue type.
In the Statuses panel, click the
button to add a state (status) for the issue type. 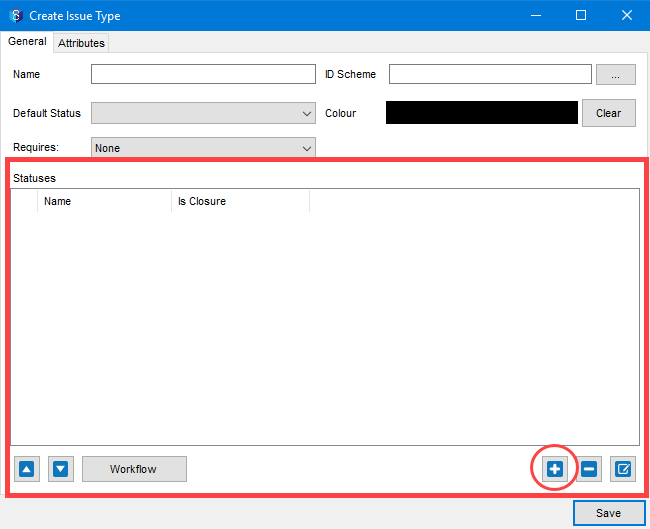
The New Status window is displayed..png)
You can also add attributes to the status in the Attributes tab in the above window. These attributes need to be entered when issue tickets of this issue type progress to this status.If the status you are creating is the last status of an issue ticket of this issue type, then select the Closure Status check box in the New Status window > General tab. For instance, Issue resolved can be the last status of an issue ticket.
You can add as many statuses as you want to define for an issue type. All the states you add are displayed in the Statuses panel.
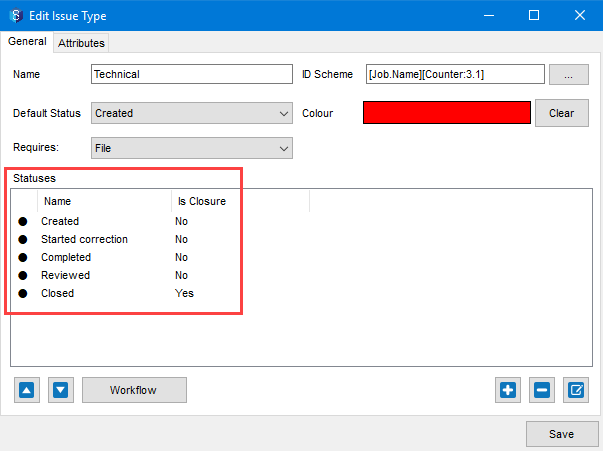
Now, select the default status of an issue ticket of this issue type from the Default Status list (in the Edit Issue Type window).
This step is mentioned here because you need to first add some statuses (step e above) before selecting a default one.
If you want to build a workflow for this issue type, click the Workflow button.
Select the Attributes tab to add a new attribute or an existing attribute to the new issue type.
Click the Save button.
The new issue type is created and is displayed in the Issue Types tab.