If you are on this page looking for the erstwhile Issuing feature, please note that it is now renamed to Transmittals.
V6 feature
You can now raise issue tickets (problems) against jobs, files, 12d model projects and managed folders, and track them to closure. These issues are categorised under customised issue types created by your 12d Synergy Administrator. Each issue type has different stages defined towards its resolution. As the issue progresses through these stages, the status of the issue has to be updated.
You can create issue tickets in a job in two ways.
If you are a 12d Synergy Administrator, by default, you have permission to create an issue ticket.
However, if you are a user, you will need the following explicit permissions to create issue tickets.

1.1. How to Create an Issue from the Issues Link in the Job Tree
The Issues link in the job tree is displayed only if web access is provided. Web access is provided by selecting the Allow 12d Synergy Web app in the 12d Synergy Administration application > System Settings > Web Access tab.
In the 12d Synergy Client application, click the Issues link in the job tree.
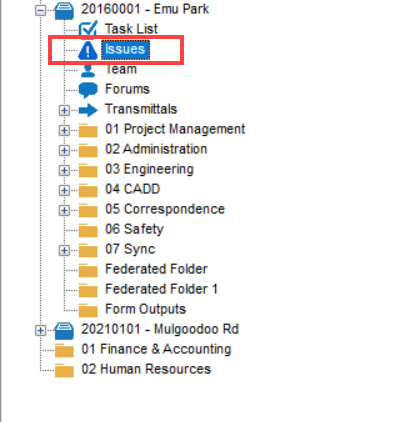
The list of created issue tickets is displayed.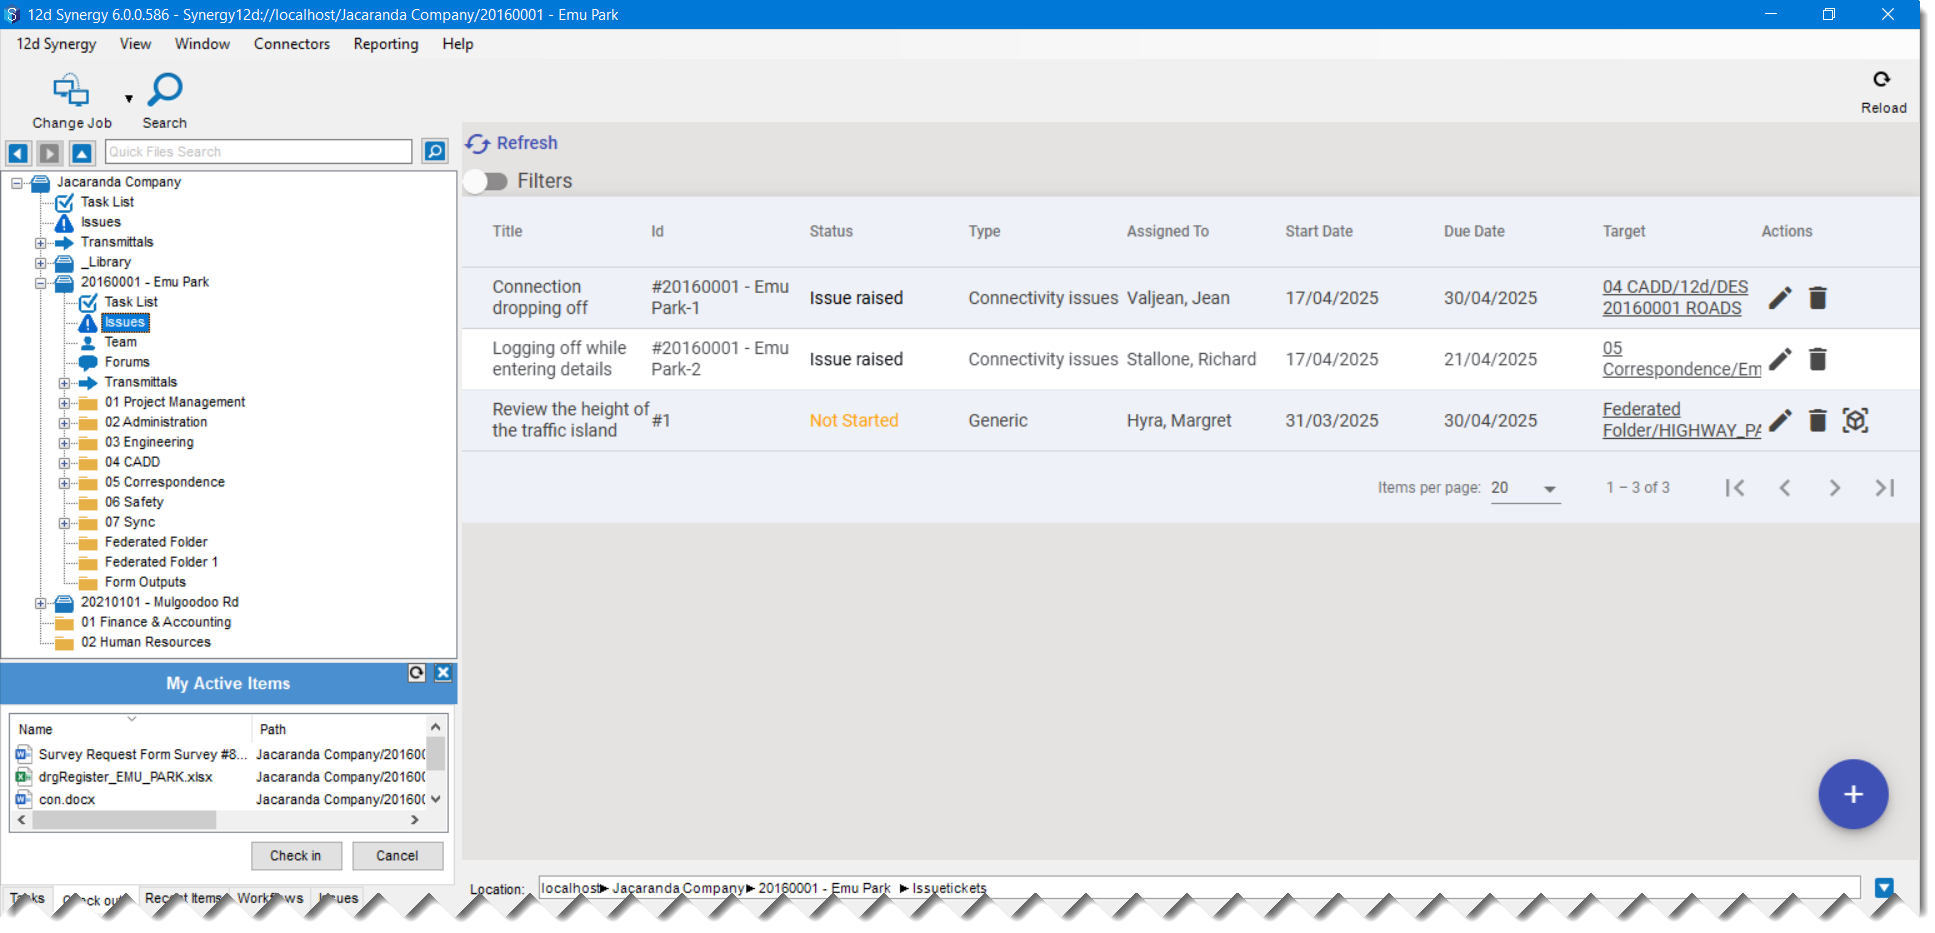
You can filter the results using the Filters
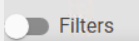 toggle button.
The following filters are displayed.
Click the Add
.png) button at the bottom-right corner.
button at the bottom-right corner.The New Issue ticket is displayed.
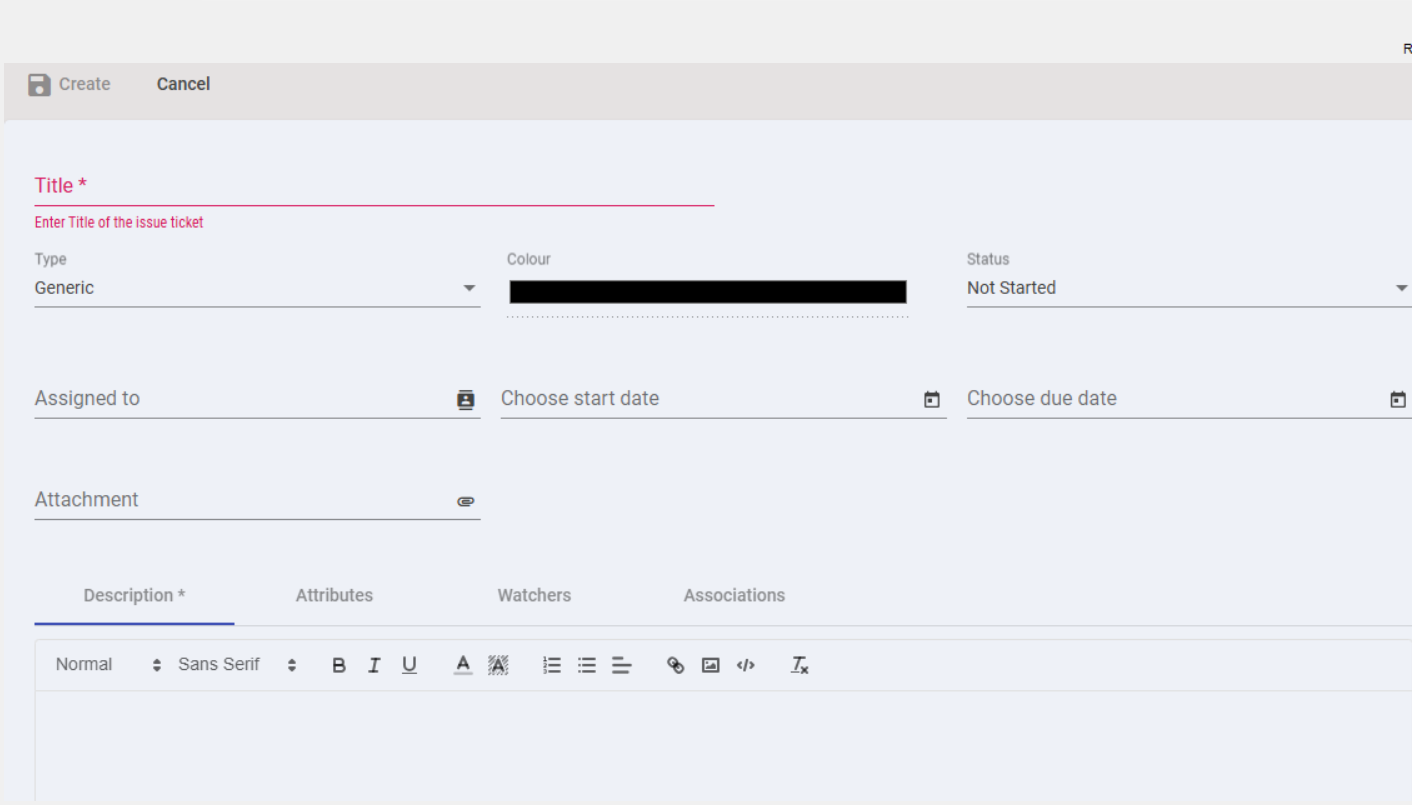
Enter a name for the issue in the Title field.
Select the type of issue you are creating from the Type list. The issue types created by your 12d Synergy Administrator are displayed in this list.
Click the colour bar on the Colour field to select the font colour of the new issue.
If your 12d Synergy Administrator has selected a default colour for an issue type, then that colour is displayed in the Colour box when you create an issue ticket of that issue type.
Select the current status of the issue from the Status list.
Click the
.png) icon against the Assigned To field to select and assign the issue to a contact.
icon against the Assigned To field to select and assign the issue to a contact.
Once the issue is created, an email is sent to this Assignee notifying him/her of the assignment. If the assigned person is the same as the user creating the issue, then no explicit email is sent.Select the date from when the issue has been occurring from the Choose start date list.
Select the date by which the issue has to be resolved from the Choose due date list.
You can attach a file, a 12d Model project, or a Managed folder to the issue you are creating. Click the
 icon and select the required entity from the list displayed.
When you attach any of the above-displayed entities to the issue, the issue ticket gets linked to that entity also. So, when you view that entity, the issue ticket that it is attached to is displayed in the Issues tab, as shown below. Here, a 12d Model Project has been attached to an issue ticket.
Enter a mandatory description of the issue in the Description tab.
If the issue ticket you are creating is of an issue type for which attributes have been added in its definition, then those attributes are displayed in the Attributes tab of the issue ticket creation form.
If you want to notify other contacts of any issue ticket updates via email, you can add those contacts as watchers in the Watchers tab. Click the Add
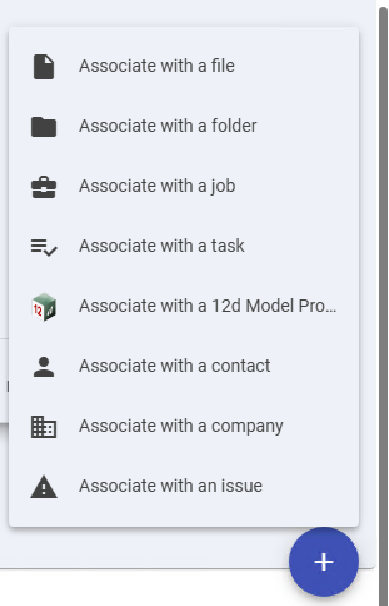
button in the Watchers tab and select the required contacts.If you want to associate an entity to this issue ticket, click the Add
button in the Associations tab and select the required entity from the displayed list. 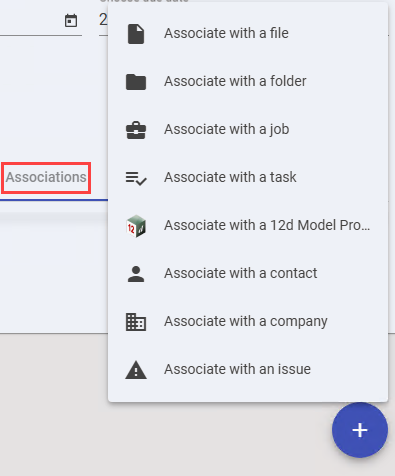
Follow the steps to associate that entity with the issue ticket. The entity associated is then displayed in the Associations tab..png)
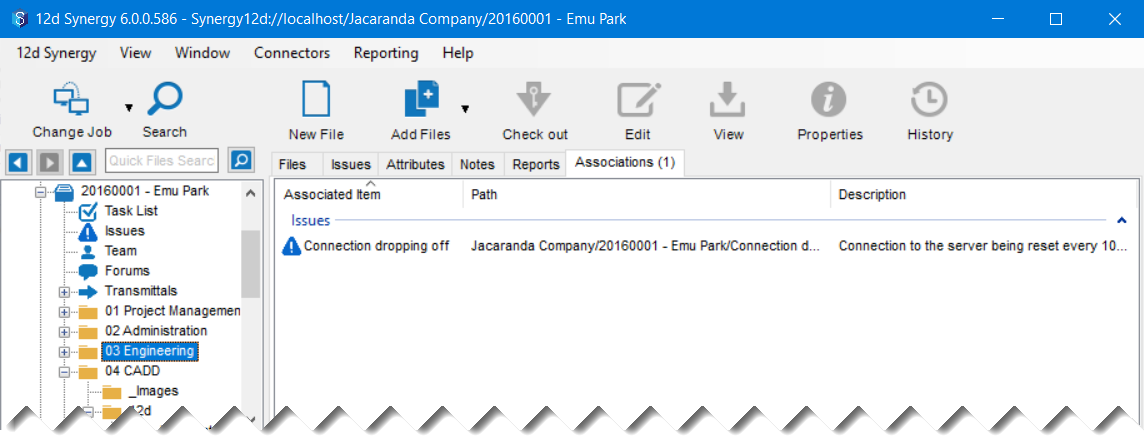
When you associate any of the above-displayed entities with the issue, the issue ticket gets associated with that entity, too. So, when you view that entity, the issue ticket it is associated with is displayed in the Associations tab, as shown below. Here, a folder has been associated with an issue ticket.
Click the Create
 link at the end of the ticket.
The issue ticket is created and displayed in the Issues link in the job tree.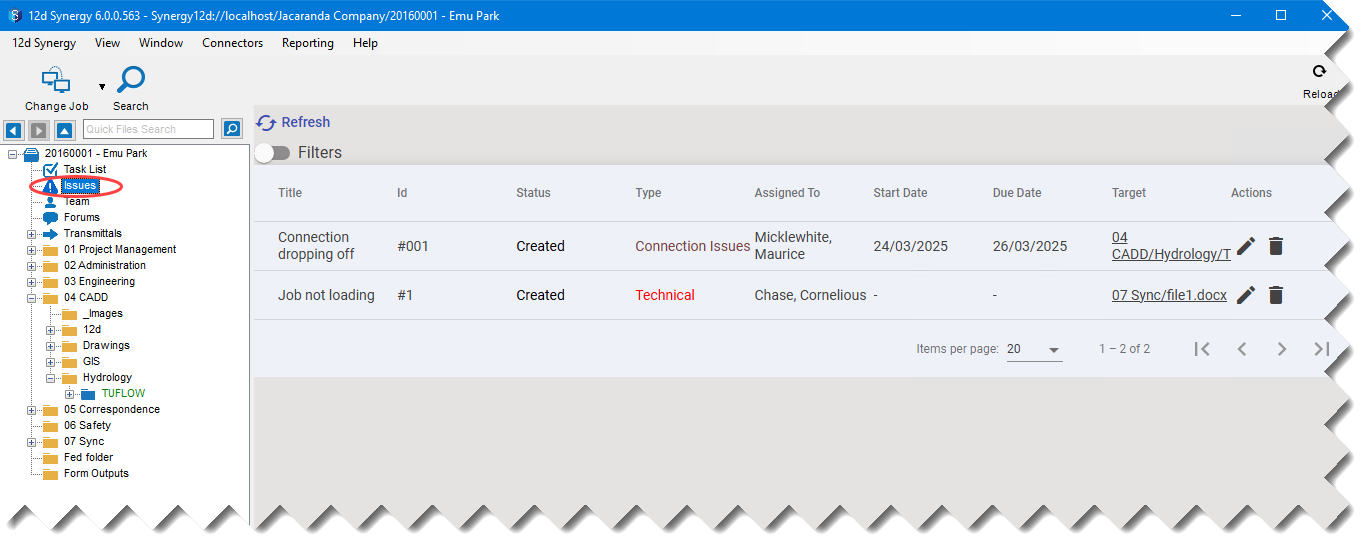
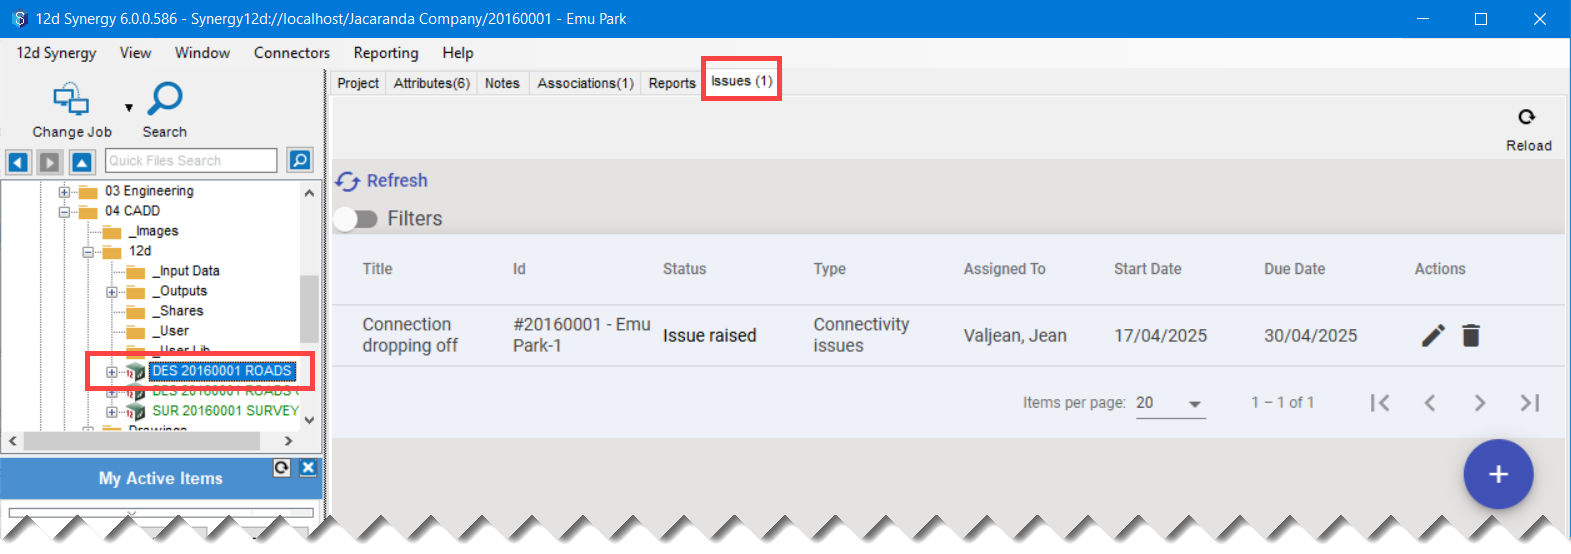
If you click an issue ticket from the list, its details are displayed as shown below.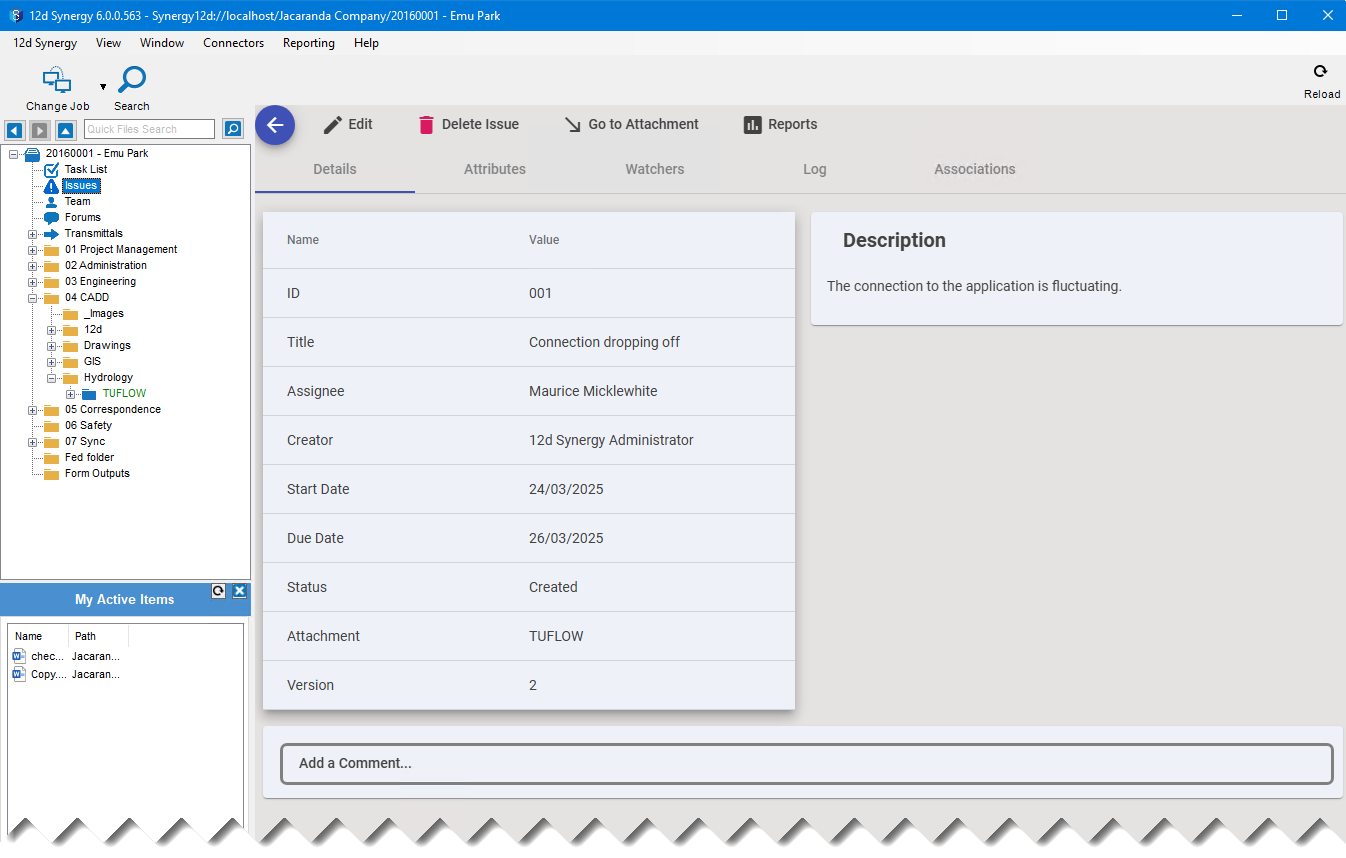
You can add your comments in the Add a comment box about the issue in the above window. You can also tag other users with @<username> to notify them via email about the comment being made. Any user who can view issue tickets can add comments on an issue.
You can also generate issue-related reports by clicking the link.
link.Click the Go to Attachment
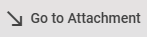 link in the above image, to view the attached entity. You will see that the issue is displayed in the Issues tab of that entity.
For example, if you attach a 12d Model project to the issue and view it, you will see that the issue is displayed in the Issues tab.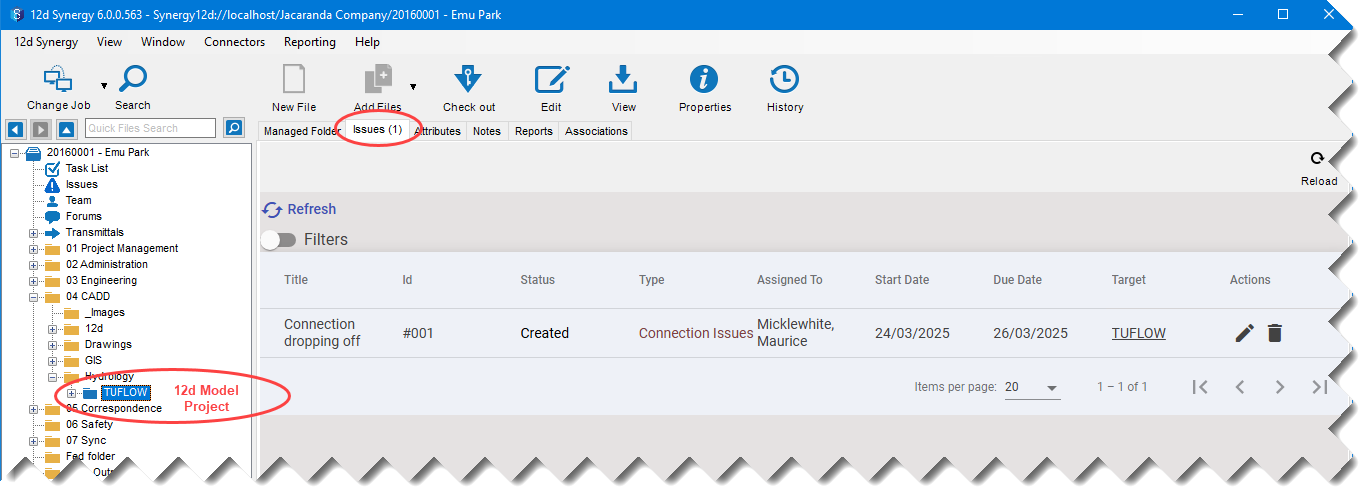
If you have the necessary permissions to create an issue, you can create issues on a managed folder, a file or a 12d Model folder in their corresponding Issues tab.
1.2. How to Create an Issue from the Model (BIM) Viewer
In the 12d Synergy Client application, visualise the IFC file or IFCzip file, or a federated folder on which the issue has to be raised.
Place the mouse cursor on any point on the file and zoom in using your mouse scroll wheel.
Click the Create an Issue
 icon from the ribbon of the Model Viewer window.
Click the cursor on the point where there is an issue in the .ifc model.
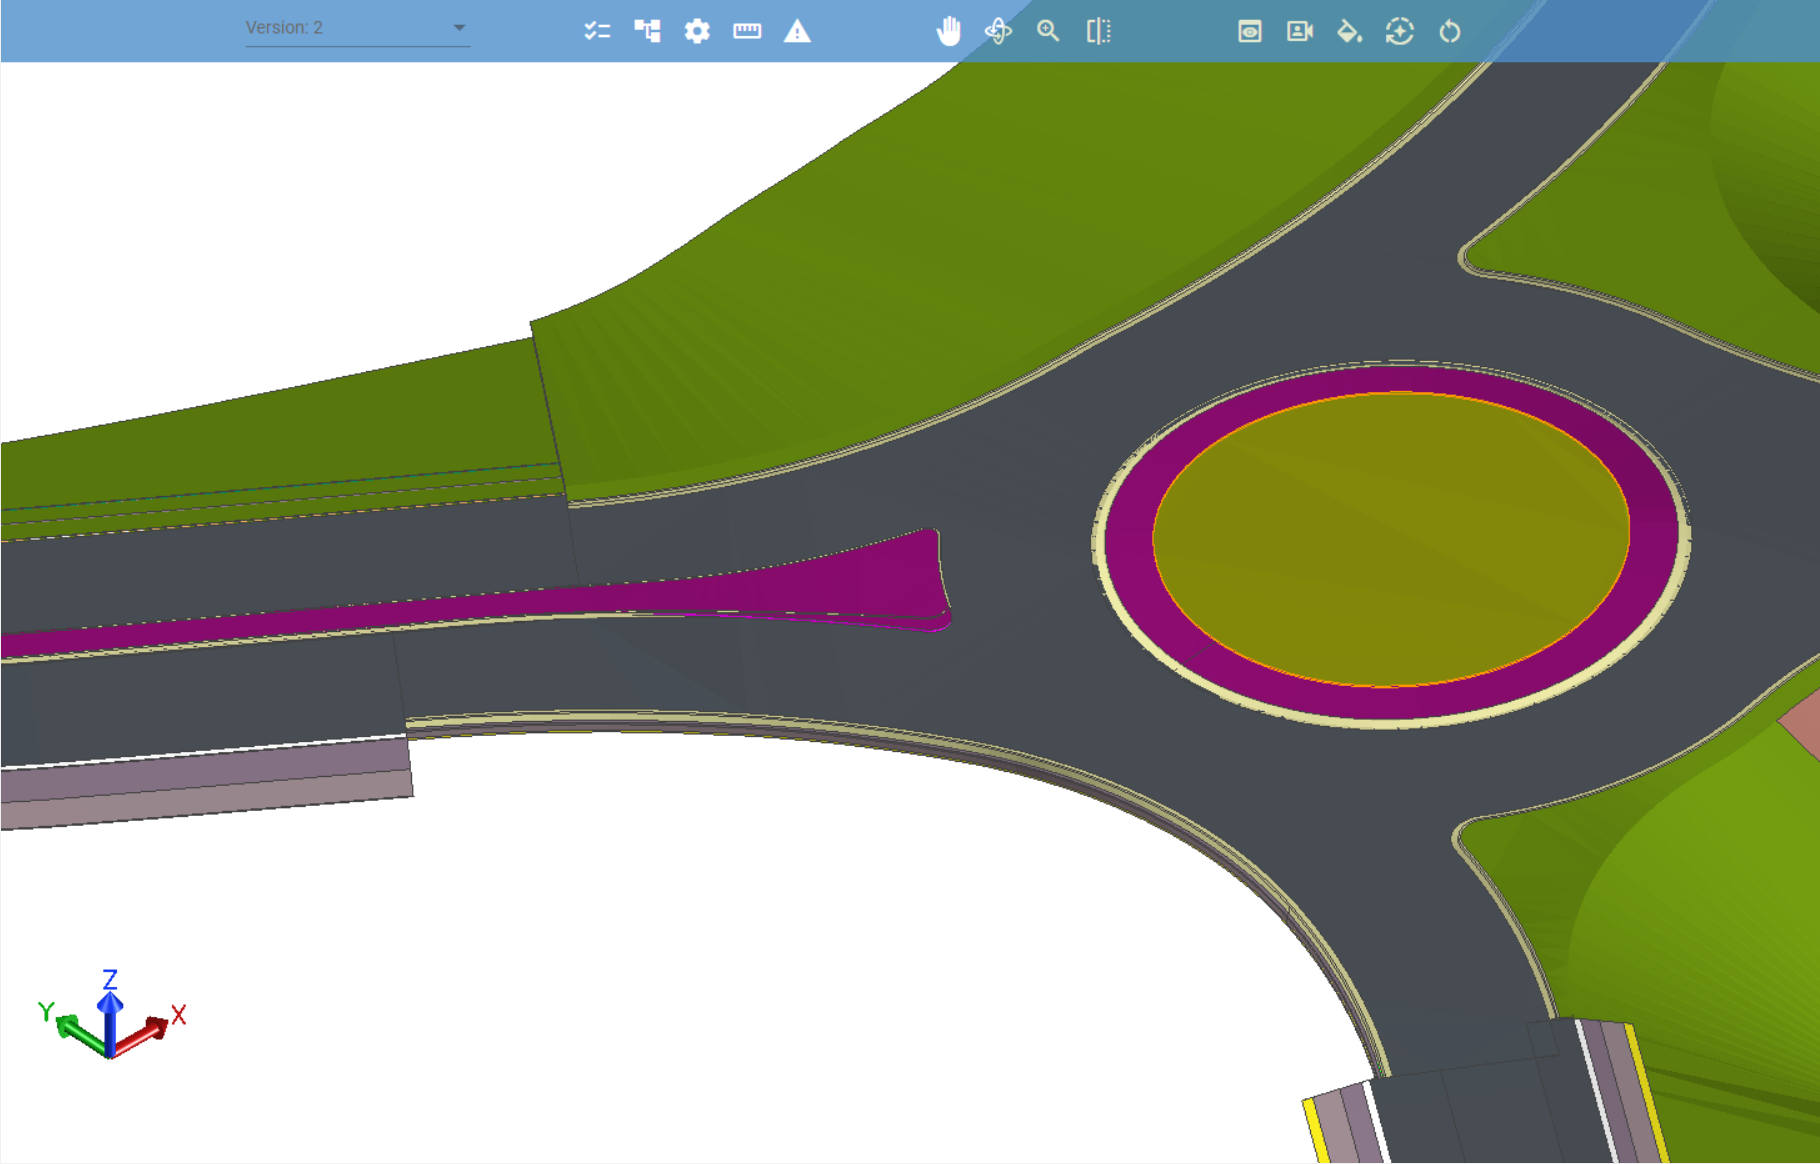
Let’s create an issue saying “Review the height of the traffic island”. So, click the cursor on the traffic island as shown in the image below..png)
A blue coloured dot is displayed at the point of issue, and a Create Issue prompt is displayed for you to fill out the details of the issue, as shown in the image above. You will also see that a snapshot of the view with the point of issue is taken automatically and displayed in the Preview section of the Create Issue prompt.Enter a relevant title for the issue in the Title field.
Select the issue type from the Type list. By default, the Generic issue type that is shipped with the 12d Synergy application is displayed.
By default, the Status of the issue is selected as Not Started (the first status of the issue type). However, you can change it, if needed.
Click the
 icon against the Assigned to field to assign the issue to a contact.
Once the issue is created, an email is sent to this Assignee notifying him/her of the assignment. If the assigned person is the same as the user creating the issue, then no explicit email is sent.Click the calendar icon
 displayed against the Choose start date and Choose due date to select start and due dates, respectively.
 There are four tabs displayed below the Preview of the issue.

Description — Enter a brief description of the issue in this tab. It is mandatory to give a description.
Attributes — If any attributes are created for the selected issue type, they are displayed in this tab.
Watchers — You can add a list of contacts who should be notified of any issue updates. Even if a comment is added to the issue, all contacts added as watchers will be notified.
Associations — You can associate this issue with another entity in the system, folder, job, task, 12d Model project, contact, company and/or another issue.
Click the Create
.png) link.
link.
An issue is created, and its details are displayed in the View Issue prompt. The issue is also displayed in the Issues link of the job.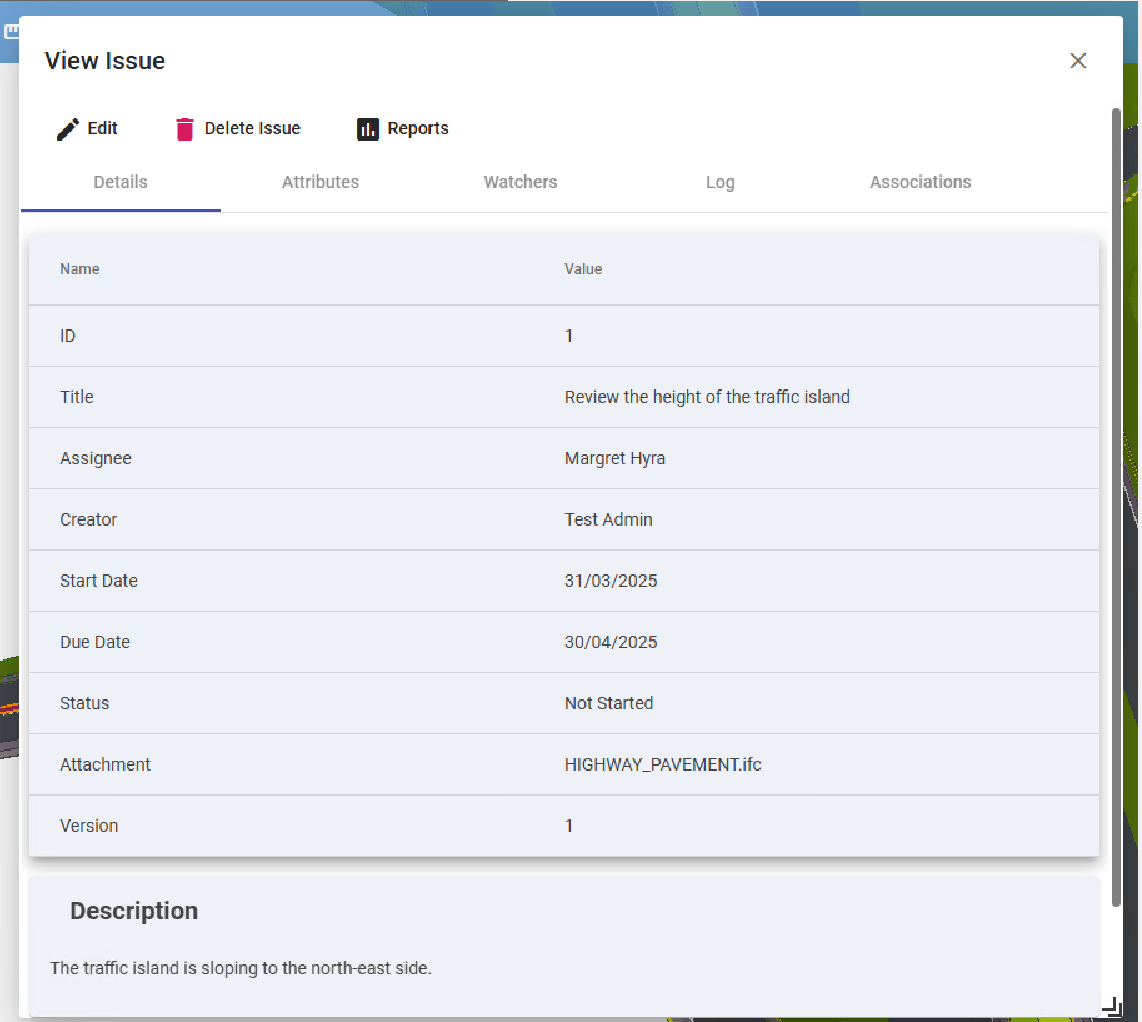
The Log tab is a new tab in the View Issue form. It displays all the details of the updates made to an issue in chronological order.
You can click the Edit.png) icon to edit or update the details of the issue.
icon to edit or update the details of the issue.
You can click the Delete Issue icon to delete the issue.
You can click the Reports icon to generate issues related reports.
1.3. How to Edit an Issue
If you are a 12d Synergy Administrator, by default, you have permissions to edit an issue ticket.
However, if you are a user, you will need explicit permissions to view and edit issue tickets.
If these permissions are not given to you, the Edit icon and button are disabled.
In the 12d Synergy Client application, click the Issues link in the job tree.
The list of created issues is displayed to the right..png)
Do one of the following:
Click the edit
.png) icon displayed in the Actions column of the issue ticket you want to edit.
icon displayed in the Actions column of the issue ticket you want to edit. Click the issue ticket you want to edit and click the Edit
.png) link on the page that is displayed.
link on the page that is displayed.
The details of the issue ticket are displayed.
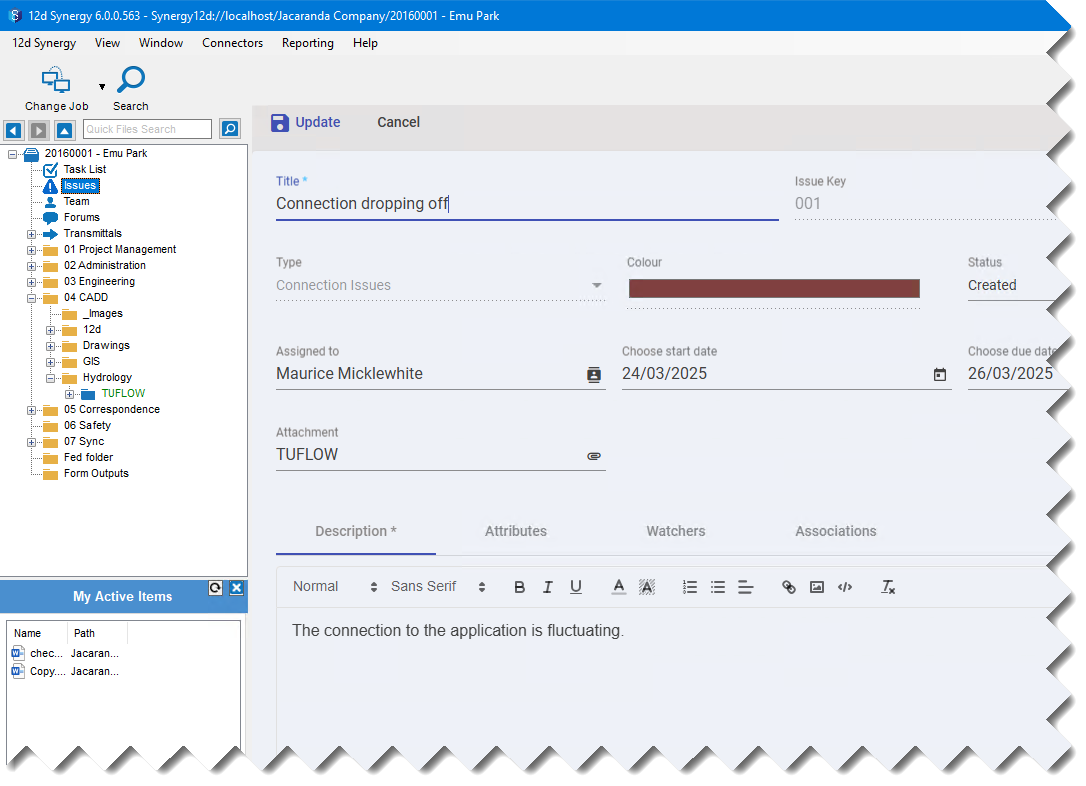
Edit the issue ticket as required and click the Update
 link.
link.
The issue ticket is updated, and its details are displayed.