Admin Content v6 feature
1.Logic tab
This tab enables you to add some rules and logic to the elements in the form. There are three types of logic that you can work with. They are as follows:
Skip Logic — Based on the answer to a question in the form, the form filler is directed to some specific question in a different section or page. The use of this logic allows the form filler to skip some questions in between. As an example, let’s say, if traffic control required at the construction site is NO, then this type of logic can be used to skip the questions about temporary traffic management. In this case, Temporary traffic management includes details like the revised speed limit, use of traffic control signboards or other LCD equipment, diversion routes, etc. So, if traffic control is not required, these details are not necessary. However, if traffic control is required and set to YES, then the traffic management questions will remain and have to be entered by the form filler.
Display Logic — Instead of displaying all questions at once, display logic filters content based on your answer to a specific question. Thus, showing you information relevant to your answer. As an example, let’s say, if Revisions made to the plan is YES, only then display questions that require details about the revisions. So if the revisions made to the plan is NO, then all questions related to the revision details are omitted.
Branching Logic — Based on the answer you select from multiple options to a question, you are accordingly directed to a conditional path corresponding to your answer. This logic displays questions that are relevant to the form filler only. This ensures easier readability and understanding of the form and also quicker completion rates. You can use a combination of both the above-mentioned logics - Skip logic and Display logic.
1.1. How to Add a New Rule
While defining the logic and flow in your form, click the Logic tab.
Click the Add New Rule button displayed in the centre of the page.
The condition builder is displayed..png)
Refer to the table below and build a rule accordingly. A sample of a built rule is displayed below.
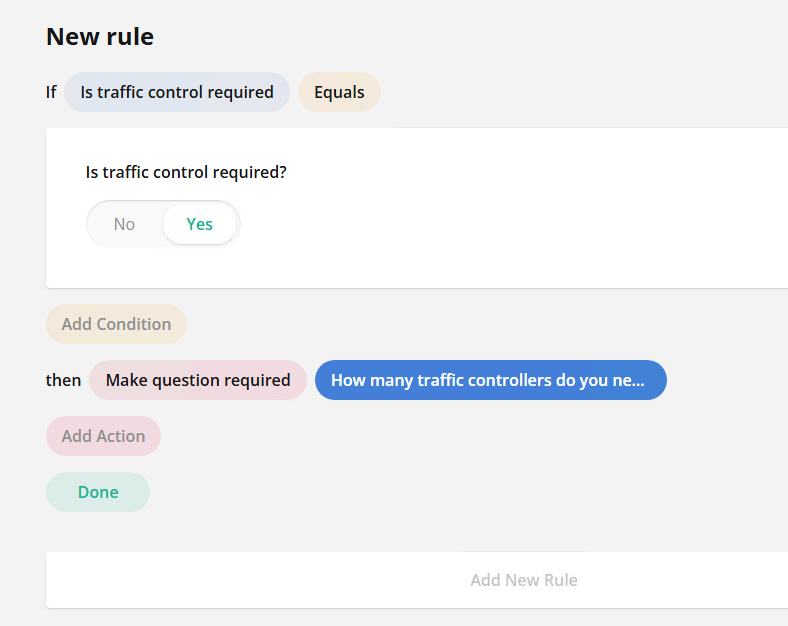
After creating the rule, click the Done button.
The rule is created and is displayed as shown below.
Repeat steps 2 to 4, as required.
Components of a rule | Choice list displayed | Example |
|---|---|---|
Select | All the questions added to the form are displayed by their question names.
|
|
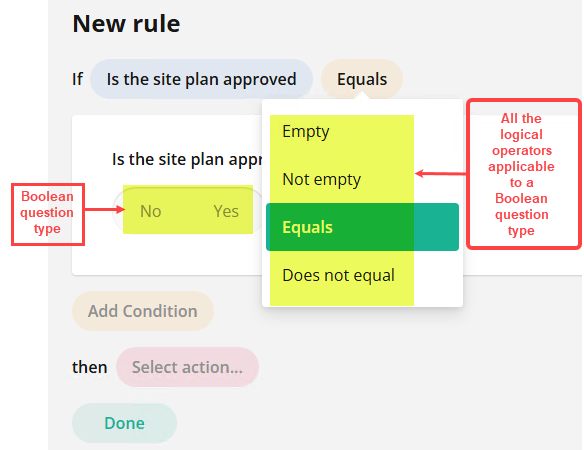
Equals | Based on the question you select from the Select list, all applicable mathematical, logical and/or comparison operators are displayed. |
|
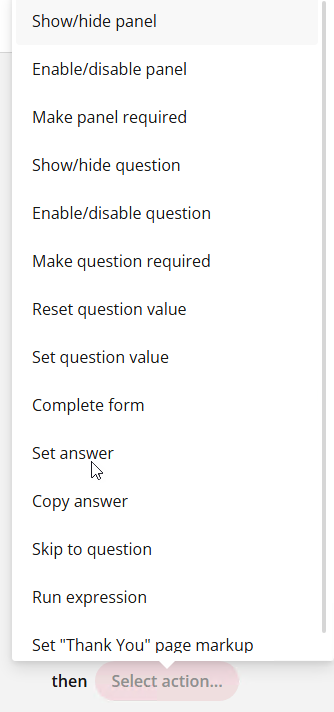
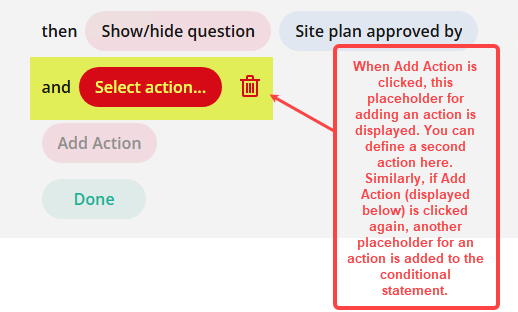
Select Action | The list of actions that can be performed based on the type of question selected is displayed. In the example of a Boolean question type, all the actions that can be utilised are listed. If you select the Show/hide question action, then based on whether the question is shown or hidden originally while defining the form, the opposite happens when the defined condition is met. For instance, if a rating scale question is selected, then the actions related to the select rating action such as “If the rating given is equal to 5, then skip to the end of the form.” |
|
Add Action | If you want to add multiple actions to occur when a condition is met, then this button is used. |
|
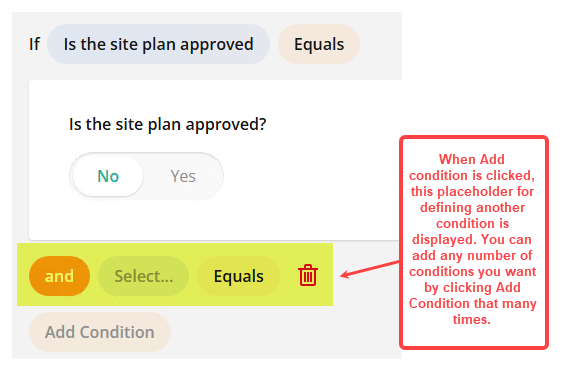
Add Condition | If you want to add another condition in the conditional statement that you are defining, then this button is used. |
|
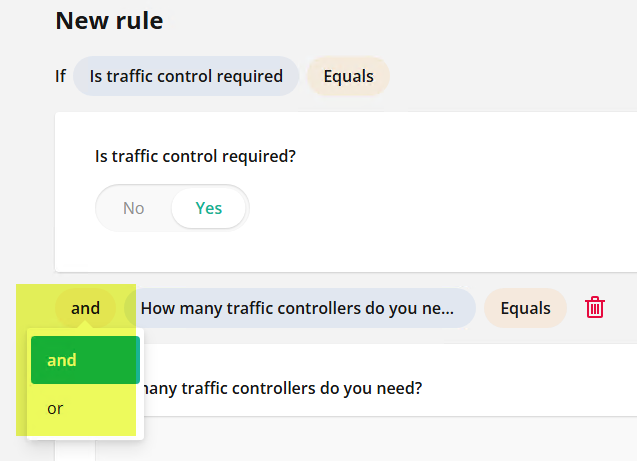
And | When you have multiple conditions in a rule, you can choose whether you want all the conditions to be met or just some. |
|
.png)
You can also manually enter the conditions and logic in the form. Click
on the top-right corner of the window.
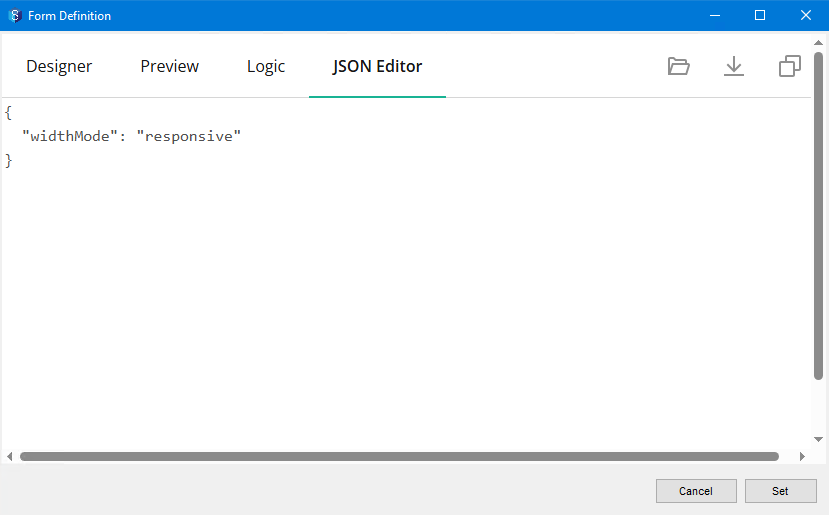
2.JSON Editor tab
If you want to define the form by coding the required design and logic, you can use the JSON Editor. You can alternatively upload an existing JSON file using the Import  icon.
icon.