The Transmittals feature in 12d Synergy is an in-built secure data transmission tool. Documents or files to be transmitted are grouped into file sets/transmittal sets. These sets can then be transmitted to one or more individuals who are added as 12d Synergy contacts. During the process, a transmittal cover sheet (a simple record of files transmitted) can be automatically populated from a built-in template, if desired. The Transmittals feature captures a snapshot of the files as they were at the time of transmission, ensuring files can be recalled if needed.
There are various options for transmitting file sets. A brief description of each is mentioned below:
Via Email (Server) – This option transmits the file set via an automated email from the Server. The recipient’s email size limit is a limitation in this method. While this method tracks the details of the file set sent, there is no proof that the recipients have received and accessed the files.
Via Publishing – This option transmits the file set via a secure web link that can be password-protected. It then sends an automated template email with the web link to the recipients. This option can track both transmission and receipt details. However, ensure that your 12d Synergy Administrator has enabled the prerequisites for publishing on your account.
Manually – This option zips the file set and saves it in the local Downloads folder for manual submission. A record is maintained that a file set has been transmitted manually.
Internally – This option saves the file set to a selected location in a 12d Synergy job and shares an automated link to 12d Synergy users via email. The files can be accessed via the 12d Synergy Web App, the 12d Synergy Mobile App, or the 12d Synergy Client application. A record is maintained that a file set has been transmitted internally.
1.1. How to Transmit Files
1.1.1. Create a file set
1.1.1.1. Via the Transmittals tab in the Job Tree
The Transmittals tab in the job tree displays the transmitted file sets categorised under the type sets created by your 12d Synergy Administrator.
Click the Transmittals tab of the required job in the job tree.
The Transmittal Set Types view is displayed..png)
By default, the Transmittal Set Types created by your 12d Synergy Administrator are displayed.Click the required Transmittal Set Type.
The file sets created under that transmittal set type are displayed.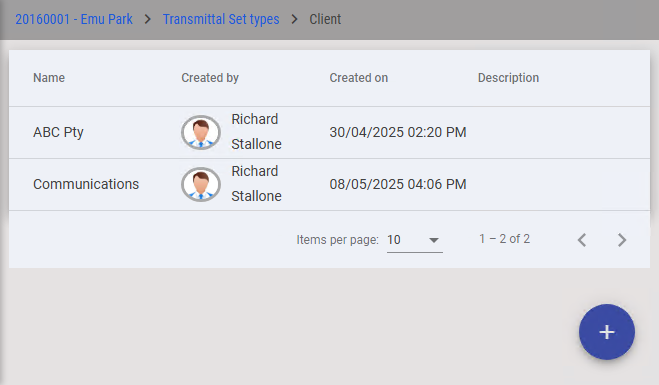
Click the Create Transmittal Set
 button at the bottom-right corner of the form.
The Create a File Set dialog box is displayed.
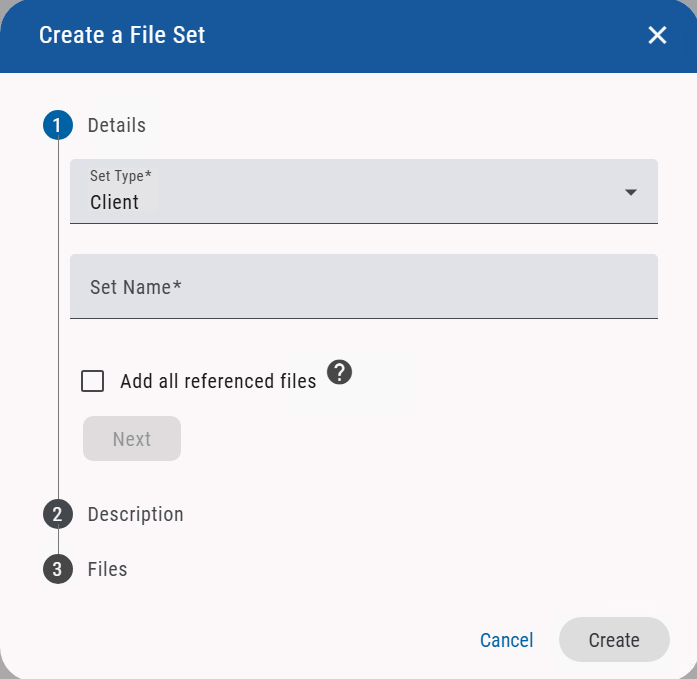
Select the required File Set Type from the Set Type list.
Enter a name for the File Set you are creating in the Set Name field.
Select the Add all referenced files check box if you want to add all relevant references for the files being transmitted. The relevant references are determined at transmit time.
Click the Next button.
Enter a description for the file set you are creating in the text editor.
Click the Next button.
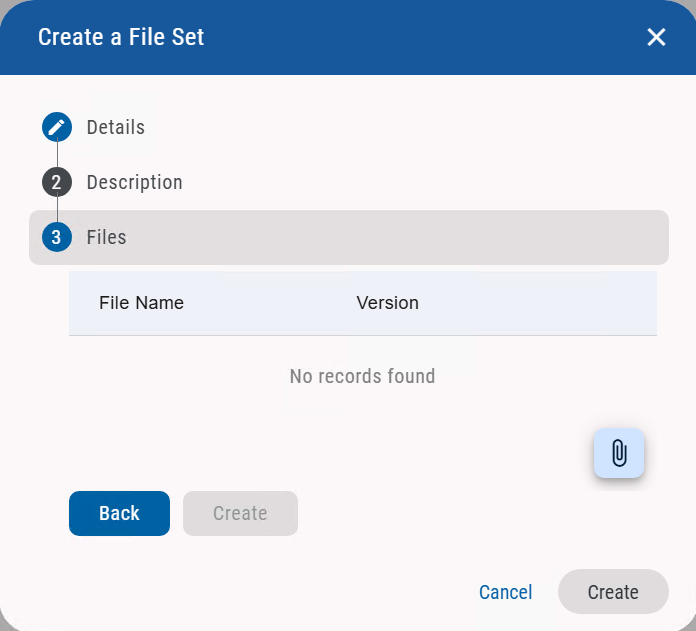
Click the Add file(s)
 button.
The Select File(s) dialog box is displayed.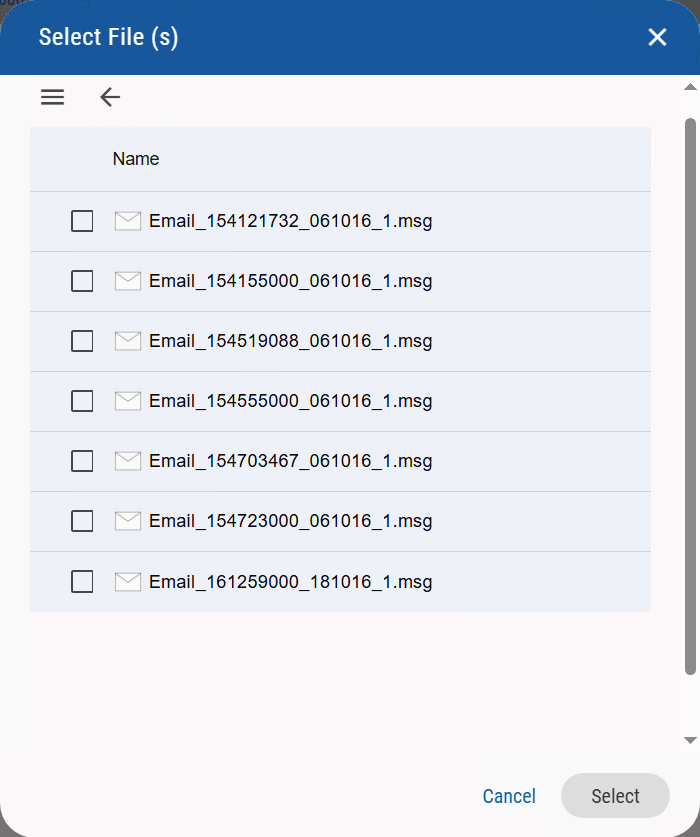
Browse through the jobs or folders to view and select the required files.
Click the Select
 button.
The selected files are displayed in the Files section of the Create a File Set dialog box.Click the Create
 button.
A file set is created.Click the file set you created to view its contents.
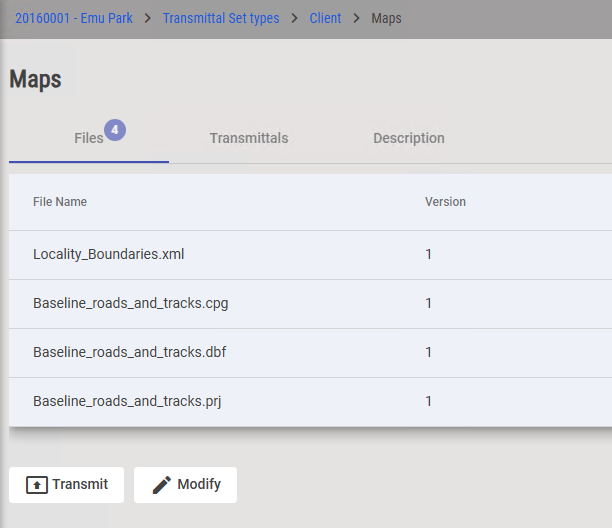
Click the Transmit
 button.
The Transmit File Set dialog box is displayed.
1.1.1.2. Via Bulk Action button in Folder View
You can directly transmit files from a folder that contains the files to be transmitted.
Select the folder containing the multiple files you need to move, transmit, or copy.
The list of files in the selected folder is displayed in the Folder view.
Select the checkboxes against the files you want to transmit.
The Bulk action button is displayed.
Click the Bulk action
button.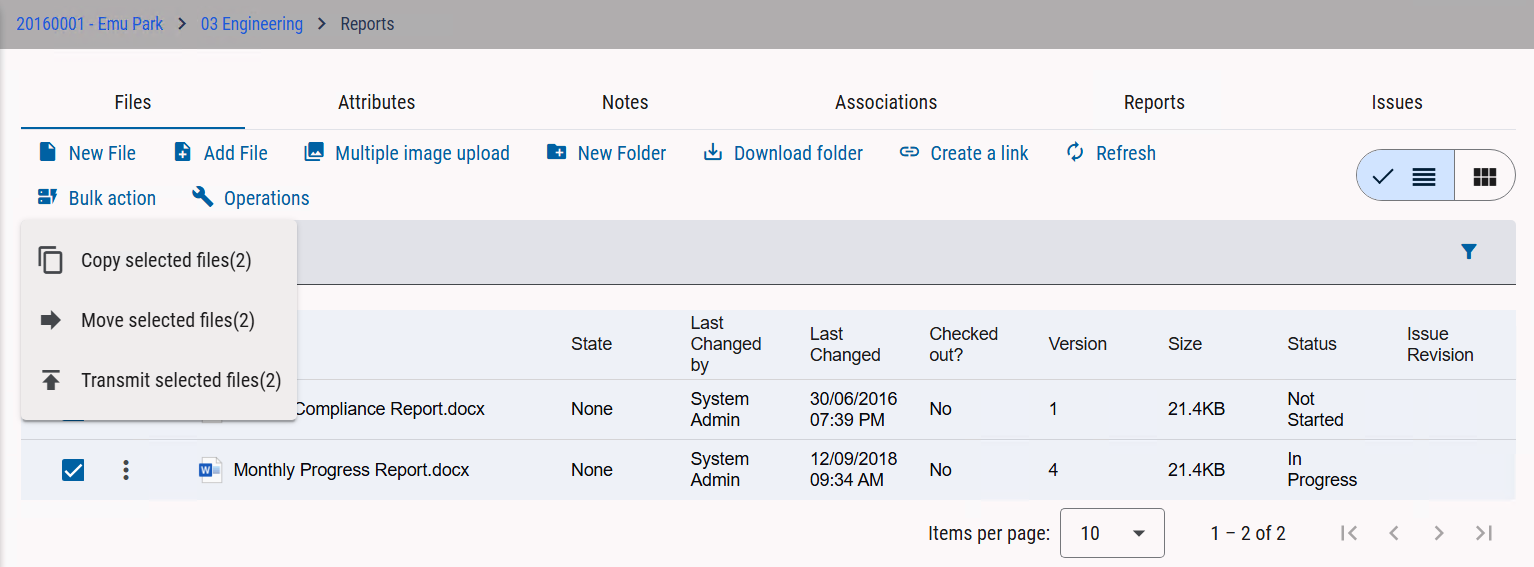
Depending on the size of the browser or if you are using the 12d Synergy Mobile App, this option is displayed either as a selection option below the 12d Synergy ribbon or as an option in the menu at the bottom-right of the page.
Select the Issue selected files option.
The 12d Synergy dialog box is displayed.
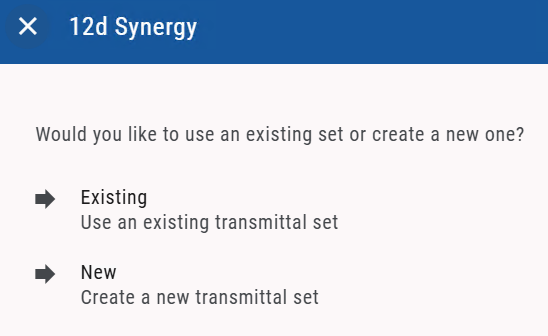
Do one of the following:
To add the selected files to an existing transmittal set, do the following:
Select the Existing option.
The Add to an existing transmittal set dialog box is displayed.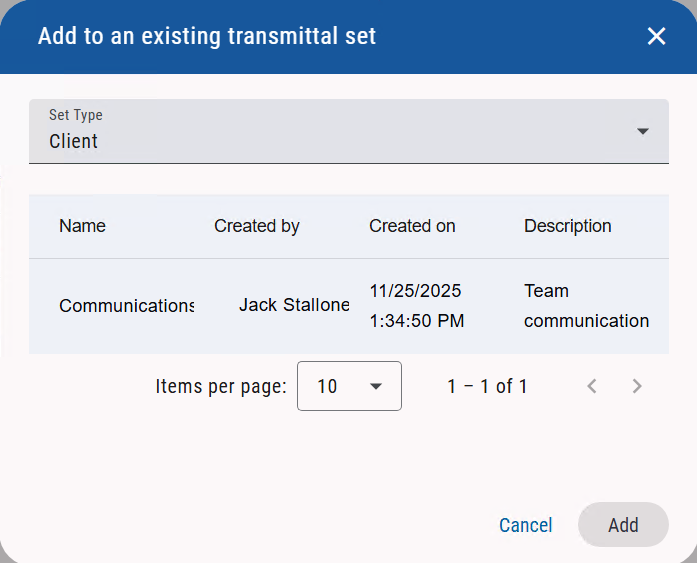
Select the required file set type from the Set Type list.
The file sets in the selected file set type are displayed below.Click the required file set from the list of file sets.
The Add button is enabled.Click the Add
 button.
The Transmit File Set dialog box is displayed.
To create a new transmittal set with the selected files, do the following:
Select the New option.
The Create a File set dialog box is displayed.Select the file set type under which you want to create a file set from the Set Type list.
Enter a name for the file set you are creating in the Set Name field.
Select the Add all referenced files check box to add all relevant references for the files being transmitted. The relevant references are determined at transmit time.
Click the Next button.
If you want to describe the files or file set, enter it in the text editor in the Description section.
Click the Next button.
The list of selected files is displayed in the Files section.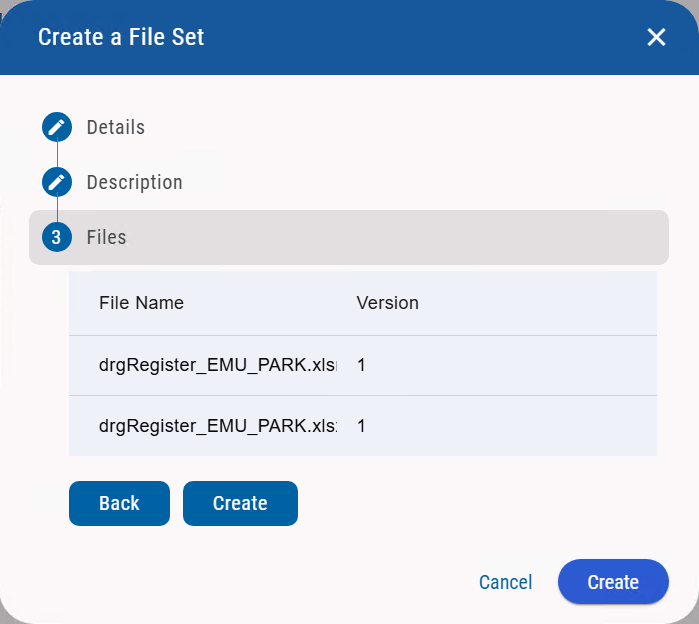
Click the Create button.
The Transmit File Set dialog box is displayed.
1.1.2. Transmit a File Set
In the Transmit File Set dialog box, under the 1 - Transmittal details section, do the following:
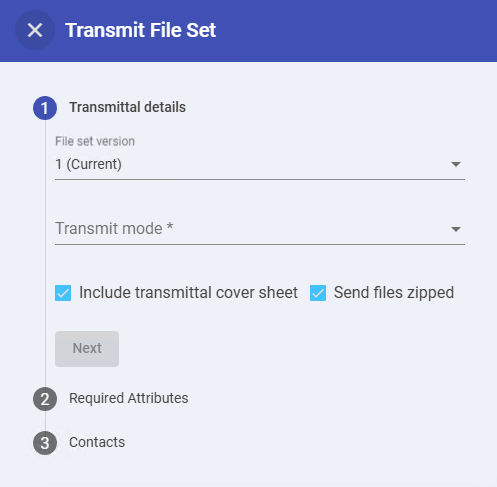
Select the version of the file set to be transmitted from the File Set Version list.
Current refers to the latest version of the selected file set.
Select one of the following transmit modes from the Transmit mode list to transmit the file set.
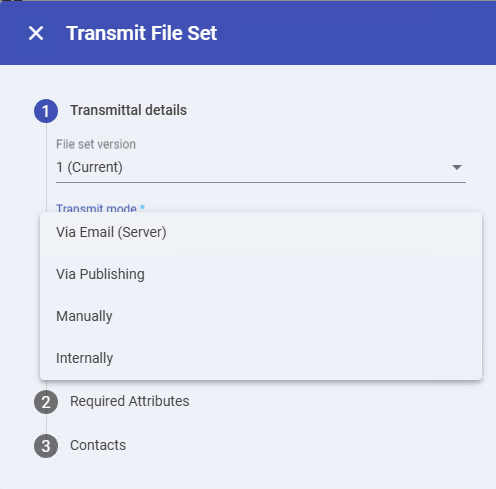
Via Email (Server) – This option emails the recipients directly from a server email address. You will not be able to change the email contents.
Via Publishing – This option publishes the files online, which are viewable in any web browser. However, ensure that your 12d Synergy Administrator has enabled the prerequisites for publishing on your account.
Manually – This option allows you to download the transmitted file set as a ZIP file to your system's default Downloads folder so you can access it later. However, a record is maintained that a file set has been transmitted manually.
Internally – This option will enable you to save the file set at a specific location in 12d Synergy Client and share the location with the selected 12d Synergy users via email.
Select the Include Transmittal cover sheet checkbox to include an overview of the files being transmitted as the cover sheet.
Select the Send Zipped Files check box to zip the files before transmitting them.
Click the Next button.
In the 2 –Required Attributes section, enter/select the required attribute values.
Click the Next button.
In the 3 – Contacts section, click the
 button to add the contacts to whom the files have to be transmitted.
Click the Next button.
Based on the mode selected for transmitting the file set, in 1 – Transmittal Details section, 4 - Email files section is accordingly displayed.Do one of the following:
If the transmit mode is Via Email Server, then do the following in the 4 – Email files section.
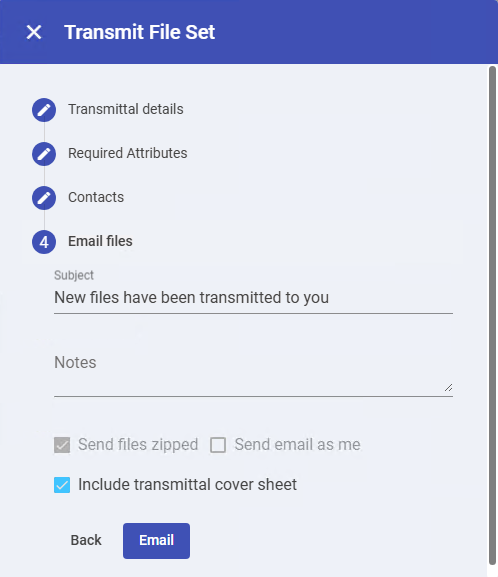
Enter the subject of the email in the Subject field.
Enter information, if any, in the Notes field.
Select the Send Zipped Files check box to zip the files before transmitting them.
If your 12d Synergy Administrator allows you to send transmitted files from different email addresses, then the Send email as me check box is enabled. You can select this check box to send the transmitted files via email from your email address.
Select the Include Transmittal cover sheet check box to include an overview of the files being transmitted as the cover sheet.
Click the Email button.
If the transmit mode is Via Publishing then do the following in 4 – Publish this file section.
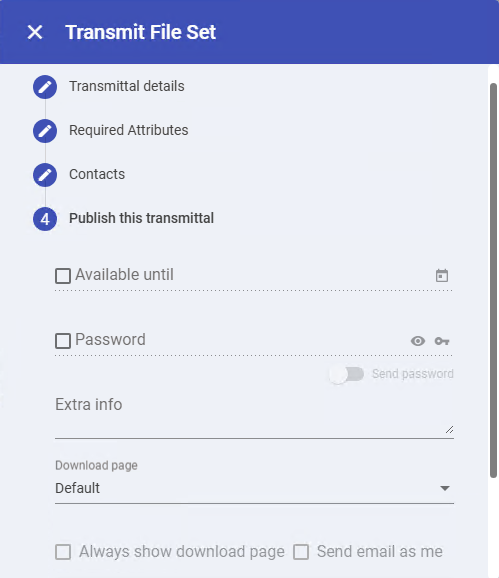
Select the Available Until checkbox and click the calendar icon
 to select a date until when the transmitted files will be available for download.
Select the Password checkbox and enter a password if you want the files to be password-protected.
Toggle the Send password switch to send the password via the published email to the selected recipients. If this switch is off, the password must be communicated to the recipients manually.
Enter any information you want the recipients to know in the Extra info field.
Select the required template for the download page from the Download Page list.
Select the Always show download page checkbox to view the download page for downloading the check box. If this checkbox is not selected, the transmitted files are downloaded directly to the recipient’s Downloads folder.
If your 12d Synergy Administrator allows you to send transmitted files from different email addresses, then the Send email as me checkbox is enabled. Select this checkbox to send the transmitted files via email from your email address.
In the Notifications section, click the Add
 button to add recipients who should be notified when the published file is downloaded.
Click the Publish button.
If the transmit mode is Manually, then click the Transmit button to zip the file set and download it to the default Downloads folder in your system.
If the transmit mode is Internally, then do the following in the 4 – Transmit Internally section.
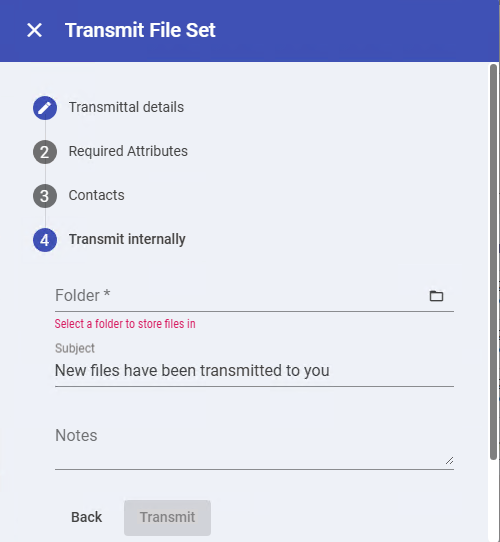
Click the folder icon
 in the Folder field to select a folder in 12d Synergy where you want to store the transmitted file set.
The Transmit button is enabled.Enter the subject of the email in the Subject field.
Enter extra information, if any, in the Notes field.
Click the Transmit button.
The selected file set is transmitted to the selected folder via the selected mode, and recipients are notified based on the selections made.
1.2. How to Modify a File Set
Transmitted file sets change over time as files are modified, added, and removed. Each time you transmit a file set, its contents are locked. The next time you modify the file set by adding, deleting, or changing the version number of a file, a new version of the file set is created. The different versions of the files in the file set are displayed in the File Set view > Files tab page.
If the latest version of the file set in the File Set view has NOT yet been transmitted, then all modifications you make will apply only to that version of the file set.
Click the Transmittals tab of the required job in the job tree.
The Transmittals Set Types view is displayed..png)
By default, the File Set Types created by your 12d Synergy Administrator to organize your transmitted files are displayed.Click the required File Set Type.
The File Set view, with the file sets created under the selected file set type, is displayed..png)
Click the file set you want to modify.
The contents of the file set are displayed. Click the Modify button.
The Modify File Set dialog box is displayed.
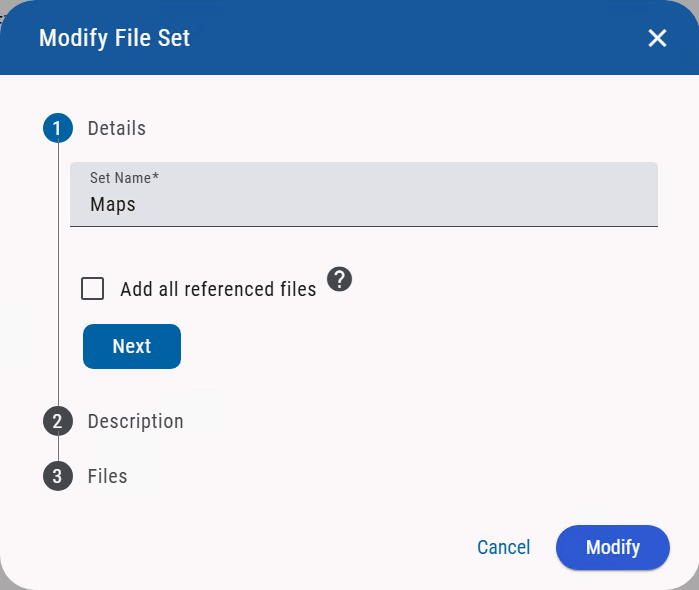
You can modify any of the following:
Set name field – change the name of the file set
Add all referenced files checkbox – whether or not to include the referenced files of the files included in the file set at transmit time.
Description – a description of the transmitted file set.
Files section – a section that enables you to do any of the following modifications.
To add files to the file set, click the Add file(s)
 icon to select more files from the Select File(s) dialog and click the Select button.
.png)
To delete files from the file set, click the Delete icon
 next to the file to be deleted.
To select a different version of the file in the file set, click the Update Version
 icon against the file to select the required version of the file from the Select Version dialog box.
When you modify the file set name in the Set Name field, select or clear the Add all referenced files checkbox, or add a description to the file set, a new version of the file set is NOT created. It is created only when you make changes to the files in a transmitted file set, such as adding or deleting files or changing the version numbers of the included files.
Click the Modify button.
The file set is modified and is displayed as the next version in the File Set view.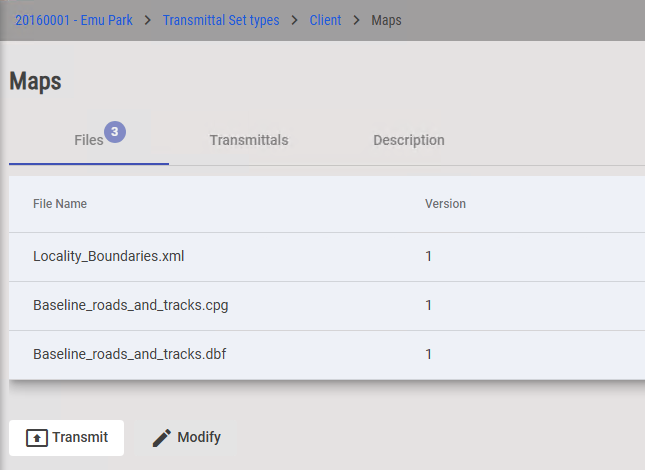
You can also add a file to a file set from the Folder view when using the Bulk Action button > Issue selected files option > Existing option > Add to an existing file set dialog box.
1.3. How to Download a Transmittal
Click the Transmittals tab of the required job in the job tree.
The Transmittals Set Types view is displayed..png)
Click the required File Set Type.
The list of file sets created under the selected file set type is displayed.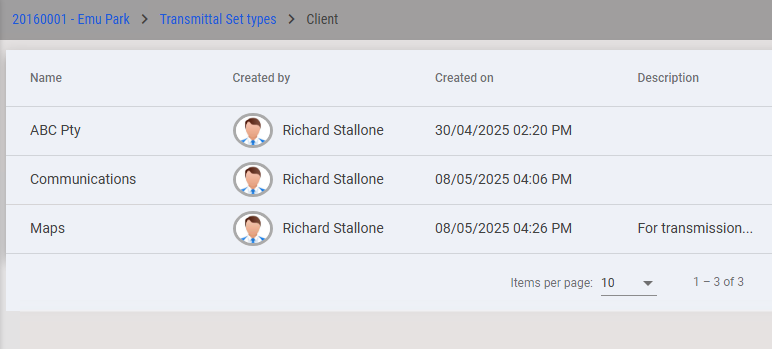
Click the file set whose transmittal you want to download.
The File Set view is displayed.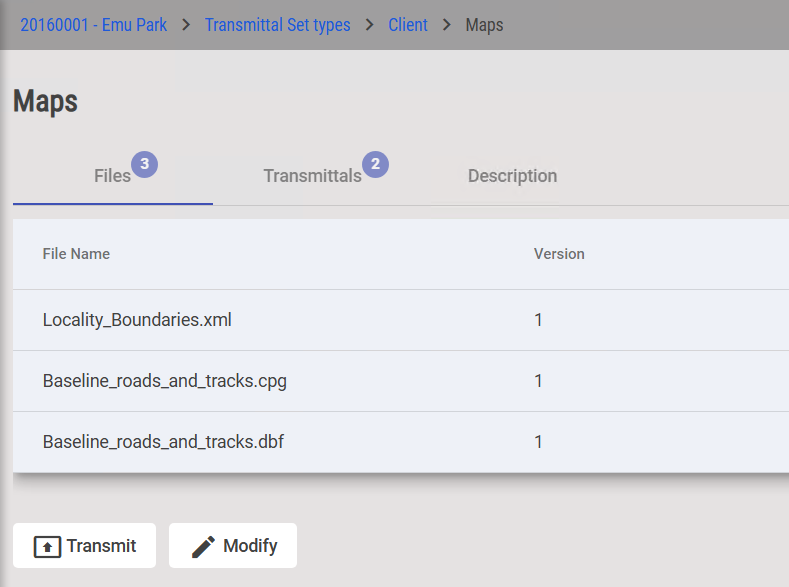
Click the Transmittals tab.
The transmitted file sets of the selected file set are displayed.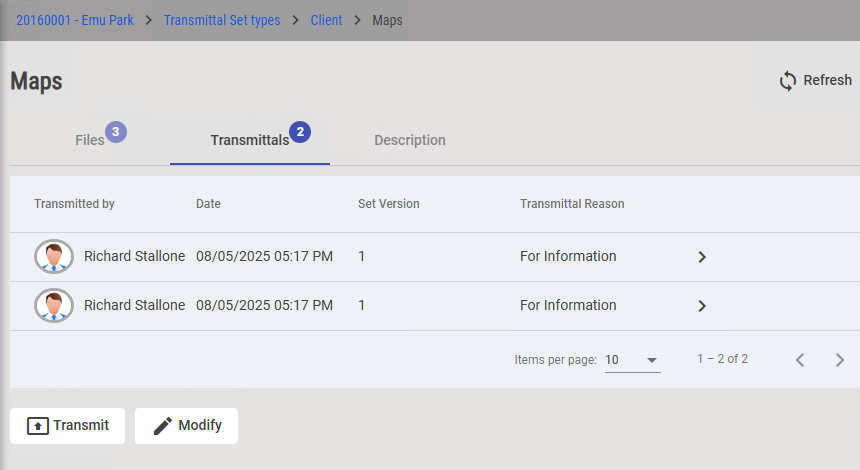
Click the transmitted file set whose transmittal you want to download.
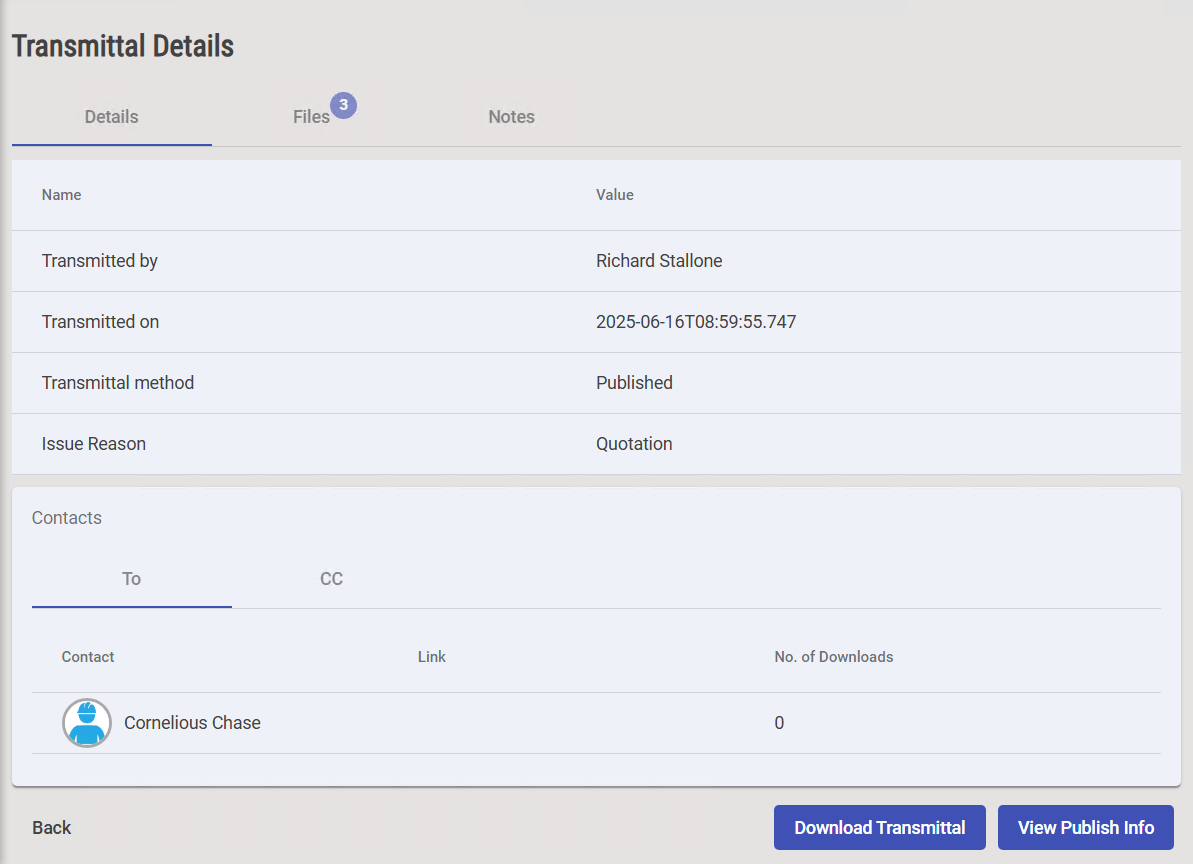
The Transmittal Details view, which displays all the transmittal details, is displayed.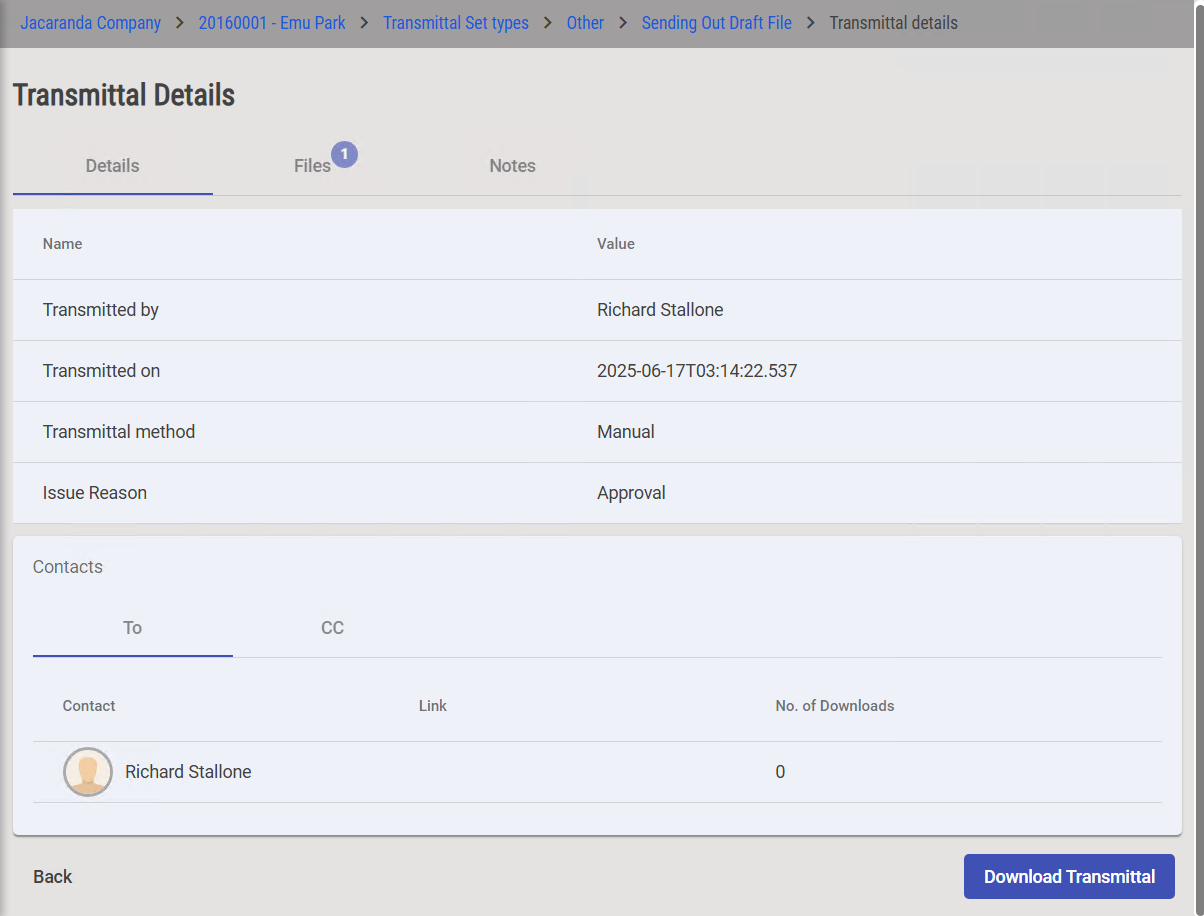
Click the Download Transmittal
 button.
The Transmittal File Name dialog box is displayed.
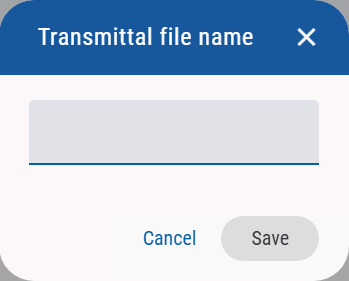
Enter a file name for the transmittal and click the Save button.
The transmittal is downloaded as an HTML page or a PDF file (depending on your system settings) and is saved in the Downloads folder of the system. You can view it in any browser of your choice.
1.4. How to View Published File Details
You can view all the published file details, such as who published it, when it was published, which mode it was transmitted in, whether it is still active or has expired, how many downloads have happened, etc.
Click the Transmittals tab of the required job in the job tree.
The Transmittals Set Types view is displayed..png)
Click the required File Set Type.
The list of file sets created under the selected file set type is displayed..png)
Click the file set whose published files you want to see.
Click the Transmittals tab.
.png)
Click the transmitted file set that was published.
To know whether or not a transmitted file set has been transmitted via publishing, click the required transmitted set, and in the Transmittal Details view, check the Transmittal Method. If it is Published, then it is a file set that has been transmitted via publishing.
Click the View Publish Info
 button.
The Publishing Info view is displayed..png)
Click the QR Code
.png) button to view the QR code on your mobile device to access the publishing details.
button to view the QR code on your mobile device to access the publishing details.
1.5. How to Cancel a Published Link
You can cancel a file set that has been transmitted via publishing. This means that the published files link is invalid, and an error message is displayed when trying to access it. However, this will not revoke any files that were transmitted to the recipient previously. It simply cancels an existing link, rendering it unstable in future.
Click the Transmittals tab of the required job in the job tree.
The Transmittals Set Types form is displayed.Click the required File Set Type.
The list of file sets created under the selected file set type is displayed.Click the file set whose published files you want to see.
Click the Transmittals tab.
Click the transmitted file set that was published.
To know whether or not a file set has been transmitted via publishing, click the required transmitted set, and in the Transmittal Details view, check the Transmittal Method. If it is Published, then it is a file set that has been transmitted via publishing.
.png)
Click the View Publish Info
button..png)
Click the Cancel Publish
 button.
A prompt asking you to confirm is displayed.
Click the Yes button.
The published file link is cancelled and is no longer valid.