12d Synergy Sheet Set commands are available in AutoCAD and some other selected Autodesk products.
The 12d Synergy Sheet Set Plugin for Autodesk is installed during the 12d Synergy Client application installation. See Installing the 12d Synergy Client for more information.
Please also see 12d Synergy Drawing Plugin for Autodesk, if it is applicable for your product.
Icon | Command | Description |
|---|---|---|
| Checks-in the currently active sheet set. | |
| Checks out the currently active sheet set. | |
| Cancels the checkout of a sheet set. | |
| Adds a sheet set to 12d Synergy. | |
| Opens a sheet set from 12d Synergy. | |
| Reloads the sheet set from 12d Synergy. | |
| Imports a layout from a 12d Synergy drawing file as a sheet. | |
| Sets a drawing file in 12d Synergy as the default sheet for a sheet set. | |
| Renames and renumbers a sheet in a sheet set. | |
| Enables the Sheet Set plotting mode. (This is a toggle button.) | |
| Disables the Sheet Set plotting mode. (This is a toggle button.) | |
The following commands are available without buttons in the plugin. | ||
NA | Enables sheet set plotting mode. | |
NA | Disables sheet set plotting mode. | |


At any given time, only one user can perform updates to a sheet set, much like the outside of a 12d Synergy environment.
1.1. How to Edit a Sheet Set
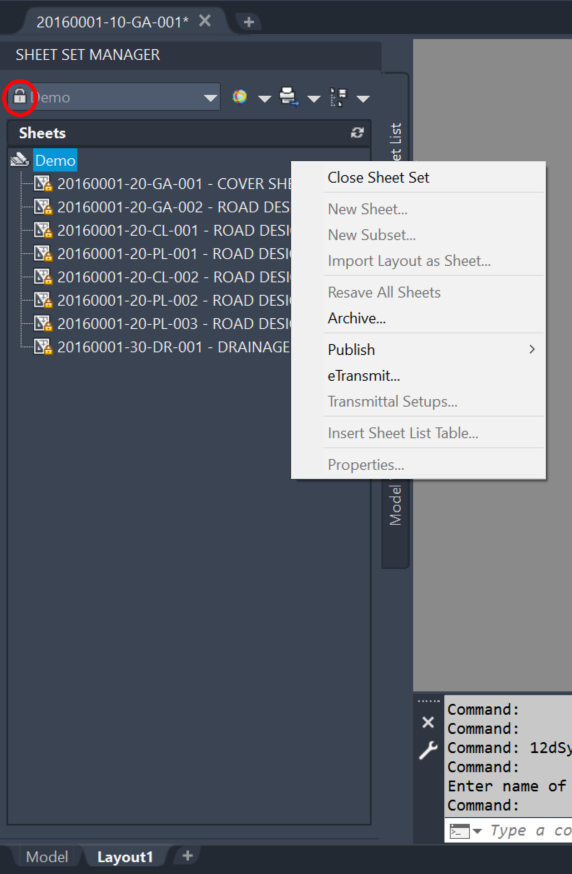
A sheet set is locked when it is checked-in to 12d Synergy (or when it is not checked out). The right-click options to add and remove sheets, and edit the sheet set properties will be greyed out and a lock symbol is displayed next to the name of the sheet set in the AutoCAD Sheet Set Manager when it is in a locked state.
1.2. How to Check-in to Lock a Sheet Set
When a sheet set is checked-in and locked for you, it is still available to other users for editing.
In CAD, select the 12d Synergy Sheet Set toolbar or ribbon.
Click the Check In Sheet Set
 button.
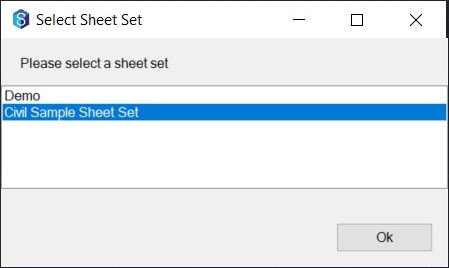
The currently active sheet set is checked-in. If there is more than one active sheet set, you will be prompted to select one from the Select Sheet Set window.

If required, select the desired sheet set and click the OK button.
Once the sheet set is checked-in, the lock symbol is displayed against the name of the sheet set in the Sheet Set Manager and all right-click options are greyed-out.
1.3. How to Check Out and Unlock a Sheet Set
In CAD, select the 12d Synergy Sheet Set toolbar or ribbon.
Click the Check Out Sheet Set
 button.
The currently active sheet set is checked out. If there is more than one active sheet set, you will be prompted to select one from the Select Sheet Set window.

If required, select the desired sheet set and click the OK button.
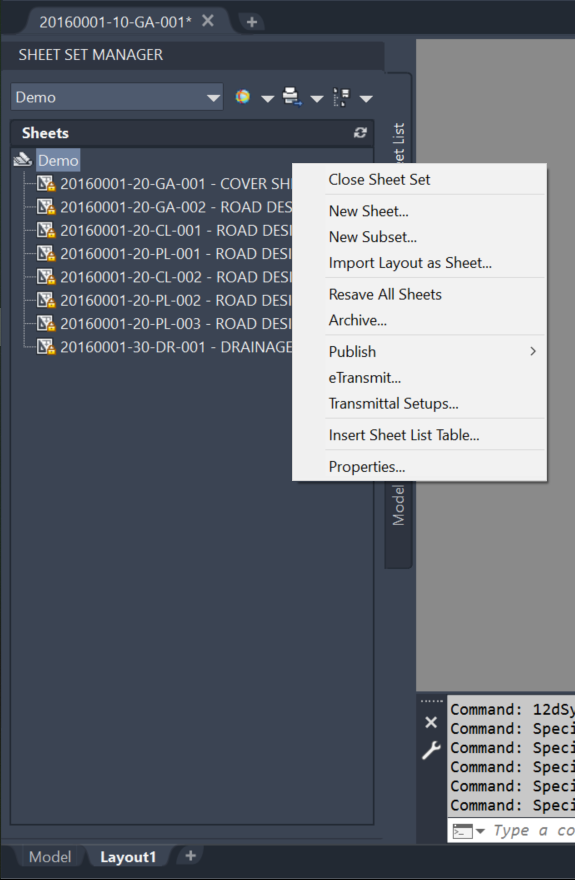
Once the sheet set is checked out, the lock symbol is no longer displayed against the name of the sheet set in the Sheet Set Manager and all the greyed-out right-click options are now active.
Make the necessary changes to the sheet set and, check it in using the Check In Sheet Set button on the 12d Synergy Sheet Set toolbar or ribbon. If there are other users with the CAD plugin, who have the same sheet set open in a locked state (not checked out), they will receive a notification that the sheet set has been updated. They can then choose to download the updated version.
1.4. How to Cancel a Check Out to Lock a Sheet Set
In CAD, select the 12d Synergy Sheet Set toolbar or ribbon.
Click the Cancel Sheet Set Check Out
 button.
The currently active sheet set is checked out. If there is more than one active sheet set, you will be prompted to select one from the Select Sheet Set window.

If required, select the desired sheet set and click the OK button.
The Sheet Set is released back to the server and any changes made to it are lost. The lock symbol is displayed against the name of the sheet set in the Sheet Set Manager and all right-click options are greyed-out.
1.5. How to Add a Sheet Set to 12d Synergy
In your CAD product, select the 12d Synergy Sheet Set toolbar or ribbon.
Click the Add Sheet Set To 12d Synergy
 button.
Do one of the following:
If the required .dst file is already associated with the active drawing file, then the currently active sheet set is selected.
If there is more than one active sheet set, you will be prompted to select one of them from the Select Sheet Set window.
In the Save As window, enter a new name for the sheet set, or keep the existing name and click the Save button.
Navigate to the required job and folder location in 12d Synergy to save the file and click the Save button.
The sheet set is saved in 12d Synergy at the selected location.
1.6. How to Open a Sheet Set in 12d Synergy
In CAD, select the 12d Synergy Sheet Set toolbar or ribbon.
Click the Open Sheet Set
 button.
Navigate to the job and folder where the sheet set is stored in 12d Synergy.
Select the required sheet set and click the Select button.
The sheet set is opened in the CAD application but is locked, as the .dst file is not checked out.
1.7. How to Reload a Sheet Set
When a sheet set is not checked out, another user may make changes to the sheet set. To reflect those changes in your own locked version of the Sheet Set Manager, click the Reload Sheet Set  button from the 12d Synergy Sheet Set toolbar or ribbon. This reloads the Sheet Set from 12d Synergy.
1.8. How to Import a Layout as a Sheet
You can add a layout from a drawing in 12d Synergy as a new sheet in a sheet set.
Check out the required sheet set from the 12d Synergy Client application, or via the 12d Synergy Sheet Set toolbar or ribbon.
In CAD, select the 12d Synergy Sheet Set toolbar or ribbon.
Click the Import Layout as Sheet button.
The currently active sheet set is imported. If there is more than one active sheet set, you will be prompted to select one of them from the Select Sheet Set window and click the Ok button.

The Import Layout as Sheet From 12d Synergy window and Browse for a file window are opened parallelly.In the Browse for a file window, navigate to the drawing or drawings containing the required layout(s) for import and select them.
Click the Select button.
The data in the Import Layout as Sheet From 12d Synergy window is displayed based on the drawing file(s) you have selected.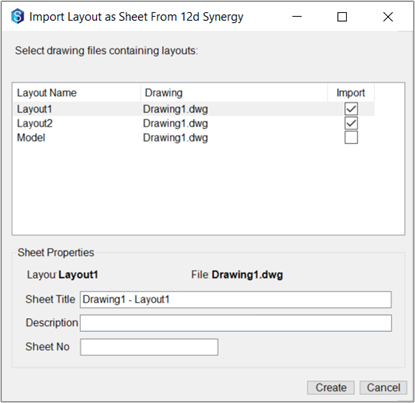
Select the checkboxes displayed against the layout(s) you want to add from the Layout box. You can also add details such as Sheet title, Description, and Sheet numbers in the subsequent boxes.
Click the Create button.
The sheet(s) is/are imported and displayed in the AutoCAD Sheet Set Manager.
1.9. How to Set a Default Sheet Layout
You can set a default sheet in 12d Synergy for use as the Default Sheet Layout from the sheet set.
Check out the required sheet set from the 12d Synergy Client application or on the 12d Synergy Sheet Set toolbar or ribbon.
In CAD, select the 12d Synergy Sheet Set toolbar or ribbon.
Click the Set Default Sheet Layout
 button.
The currently active sheet set is set as the default sheet layout. If there is more than one active sheet set, select one sheet from the Select Sheet Set window and click Ok.
The following prompt is displayed.
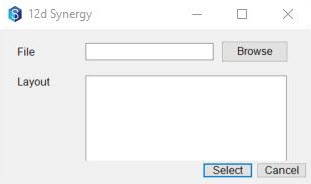
Click the Browse button. Navigate to the required job and folder and select the drawing file that contains the layout which you want to add as the default sheet layout.
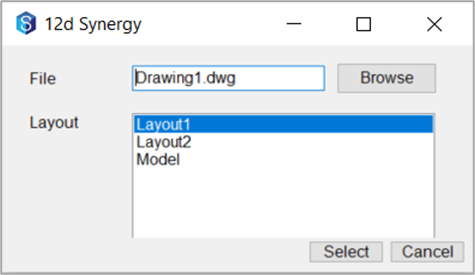
The layouts from the selected drawing file are displayed in the Layout box.Select the layout that you want to use as the default sheet layout from the Layout box.
Click the Select button.
This drawing will now be set as the default sheet creation template in the sheet set properties.
1.10. How to Rename and Renumber Sheets
Check out the required sheet set from the 12d Synergy Client application or on the 12d Synergy Sheet Set toolbar or ribbon.
In CAD, select the 12d Synergy Sheet Set toolbar or ribbon.
Select the Rename and Renumber Sheet
 button.
The currently active sheet set is selected. If there is more than one active sheet set, you will be prompted to select one of them from the Select Sheet Set window.

Select the required sheet set and click the Ok button.
The Rename & Renumber Sheet window is displayed.
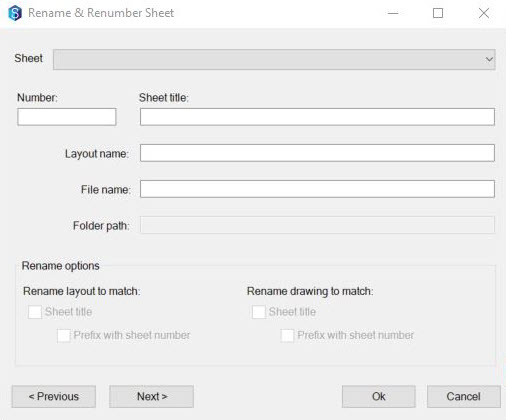
Select the required sheet from the Sheet list.
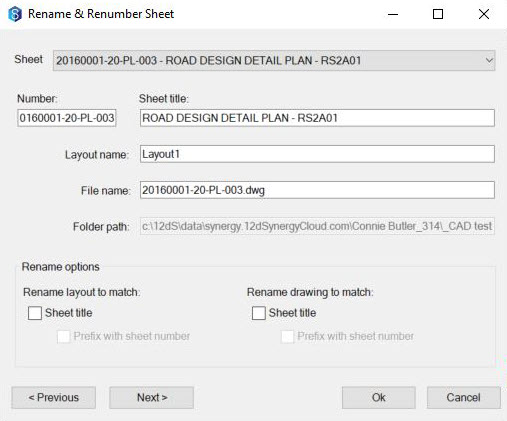
The details related to the selected sheet are displayed in the other fields of this window.You can edit the values displayed in the Number, Sheet title, Layout name and File name boxes.
In the Rename options section, under the Rename layouts to match: label, select the Sheet title checkbox if you want to rename the layout with the sheet title.
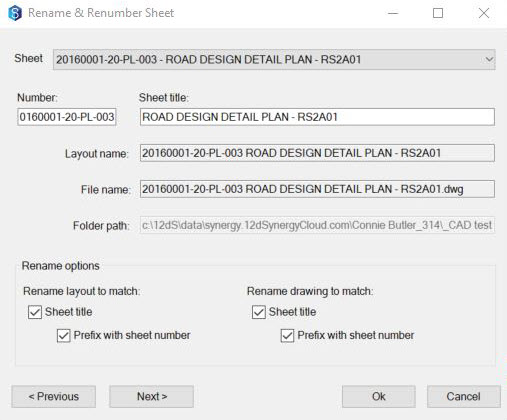
The Layout name: box displays the new name of the layout.Select the Prefix with sheet number if you want to add the number displayed in the Number: box as a prefix to the layout name.
The number in the Number: field is prefixed to the layout name.In the Rename options section, under the Rename drawing to match: label, select the Sheet title checkbox if you want to rename the drawing file with the sheet title.
The File name: box displays the new name of the drawing file.Select the Prefix with sheet number if you want to add the number displayed in the Number: box as a prefix to the name of the drawing file.
The number in the Number: field is prefixed to the name of the drawing file.If you want to make similar changes to other sheets in the sheet set, click the Next button (or Previous button) and make the necessary changes.
After making the changes, click Ok.
The renaming and renumbering details are updated as required.
1.11. How to Enable and Disable the Sheet Set Plotting Mode
To ensure you can access all the necessary sheet files and to prevent pop-ups during the plotting process, you will need to enable the sheet set plotting mode.
In CAD, select the 12d Synergy Sheet Set toolbar or ribbon.
Click the Plotting Mode (No Prompts)
 button.
The currently active sheet set is enabled for plotting. If there is more than one active sheet set, you will be prompted to select one of them from the Select Sheet Set window.
Select the required sheet set and click OK.
The Sheet set plotting mode is now enabled and you can plot/publish with the existing AutoCAD tools found in the Sheet Set Manager window.After plotting, select the Plotting Mode (Prompts)
 button on the 12d Synergy Sheet Set toolbar or ribbon.
The plotting mode is then disabled.The Plotting Mode (Prompts)
 button and Plotting Mode (No Prompts)
  button on the 12d Synergy Sheet Set toolbar or ribbon are toggle buttons.
You can alternatively use the 12dSynergyDisableSheetSetPlottingMode and 12dSynergyEnableSheetSetPlottingMode commands while scripting the commands to disable or enable the plotting mode, respectively.