WorkFlowMax is closing down its old API and releasing V3, which brings it under the Xero umbrella. This does bring significant change to how we can access the WorkflowMax system, so please read below carefully.
This page contains information on how to migrate from the old connector to the new system, as well as the broader ramifications of the change to the WorkFlowMax system
If you are an existing customer, you will need to upgrade before the 30th of November, 2020.
Please be aware that WorkflowMax has been shutting down its existing API keys ahead of schedule. This needs to be re-enabled before you can migrate. Please contact WorkflowMax/Xero support to ask them to re-enable it. Once that is done, we recommend you migrate as soon as possible.
Unfortunately, one of the significant changes made by WorkFlowMax was to reduce the number of times any third party system can talk to it in a 24 hour period.
This is restricted to 5000 calls - while this seems a large number, due to the nature of the WorkFlowMax API, we must make one call for each:
- Job
- Client (Company)
- Contact / Staff
In addition, we must make one additional call for each custom field for each of the above types.
Therefore, if a job has 5 custom fields, it will 6 API calls from the 5000 allowed per day.
In the past, we have been able to regularly synchronise all your data. With this change, and due to the limited nature of the API, continuing to do so would lock you out of the WorkFlowMax API.
On top of this, WorkFlowMax has not provided a way for third party systems to determine what data has changed within a certain time period, only what data was created, which limits what we can actually draw out from the system, given the above limitations.
While we appreciate that this is frustrating, we are doing our best to make sure you can continue to use WorkFlowMax, but there may be some manual steps required.
Please note that the number of calls is also limited to 60 calls per minute, which will slow down the speed at which the connector is able to run.
In addition to this, a number of items are missing from the new WorkFlowMax API, which means that the following restrictions are in place:
- Documents can not be synchronised via the connector
- Hyperlinks can not be created for Jobs, Companies and Contacts
- Notes created using the old connector can not be updated (please see the field Earliest Note Date below)
We have raised support requests with WorkFlowMax and keep you updated when they are resolved.
Migrating your Existing Connector
Migrating is easy, but it does involve a few steps.
What you will need
To perform the migration, you need:
- About thirty minutes to follow the steps below
- Access to WorkFlowMax
- Your current WorkFlowMax Connector API and Account Key
- Make sure your current WorkflowMax connector is still working as Xero may have disabled your account key - you can check your connector logs or try run a manual sync
- A copy of the new connector - Click here to download
- 12d Synergy Client v4.3.5.86 or later for anyone who will perform administrative tasks or manually sync the new connector - Click here to download
- Download our migration scripts - Click here to download
- 12d Synergy administrative access
- You should also open a copy of the 12d Synergy Client and connect to any job - you will need to leave this open for the duration of this process
Turn off the Existing Connector
The first thing you should do is
- Open your 12d Synergy Administrator
- Go to the Connectors Page
- Turn off the scheduling for your existing WorkFlowMax Connector
Create a new App in Xero
To start working with the new connector, you must allow 12d Synergy to access your data, using a new WorkFlowMax / Xero app.
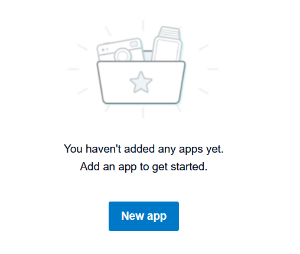
Create the App
You must create an app so that 12d Synergy can access the WorkFlowMax / Xero API.
- Login to Xero Developer Portal and create an App. You can do this via: https://developer.xero.com/myapps/
- Enter the name '12d Synergy WorkFlowMax Connector' as the App name
- Select 'OAuth 2.0 grant type - Auth code(Web app)' (This is the default)
- Enter your company url, such as: https://www.mycompany.com
- Enter the OAuth 2.0 redirect URI: http://localhost:5555/xero
- Create the app
- Look for the Client ID - make sure you take a copy
- Generate a secret and copy the secret to a safe place
- Click Save
Authorise 12d Synergy to access WorkFlowMax
You must login to WorkFlowMax and set the following setting for the user account used to login in WorkFlowMax connector.
- Go t: Business -> Settings -> Staff
- Select the user that will run the Connector
- Under 'API Access Privileges' set 'Authorise 3rd Party Full Access'

Automatically Migrate your WorkFlowMax IDs
WorkFlowMax now has a dedicated ID, or GUID, that represents each WorkFlowMax entity. The first thing we need to do is translate the old IDs to the new ones.
To do this, you must add a script from the zip file you would have downloaded earlier.
This will automatically find all WorkFlowMax entities and apply WorkFlowMax's new id system to them.
- Unzip the migration scripts zip file you downloaded earlier
- Open your 12d Synergy Administrator
- Select "Scripts"
- Select "Task Libraries"
- Add the DLL named from the script above: ConnectorWFMIDToGUIDConverter.dll
- Configure the script - Use the name "WorkFlowMax GUID" for the GUID Attribute Name format or choose your own name to store the new GUID format
You will need to remember this for later.
- Notes
- If you can't remember your old WorkflowMax API Key details, reach out to our support who can help you get them from your database
- The earliest job date should be the same as the earliest job date in your old WorkflowMax configuration
- Run the script
- This may take 10 minutes to run - you check its status by looking at the log and clicking 'show'.
It will tell you when it is finished.
Create the New Connector in 12d Synergy
- In the 12d Synergy Administrator, select Connectors
- In the Connectors pane, click Load New Connectors (found at the bottom of the screen
- Click the Upload Assembly button
- Browse to and upload the previously downloaded connector .dll file
- In the confirmation popup, click OK
- Click close
- At this point, make sure you click Save
Automatically Migrate your Connector Mappings
Now that the connector is installed, a script can be run to automatically migrate over all your old connector mappings.
- Open your 12d Synergy Admnistrator
- Select "Scripts"
- Select "Task Libraries"
- From the zip you downloaded earlier, add the dll: ConnectorWFMFieldMappingImport.dll
- Run the script
- Once you have run this, you should restart the Administrator and re-select your connector
Enter your WorkFlowMax / Xero APP details
- Go back to the Connectors section and select the new Connector
- You now need to configure all your connector details for access to WorkFlowMax
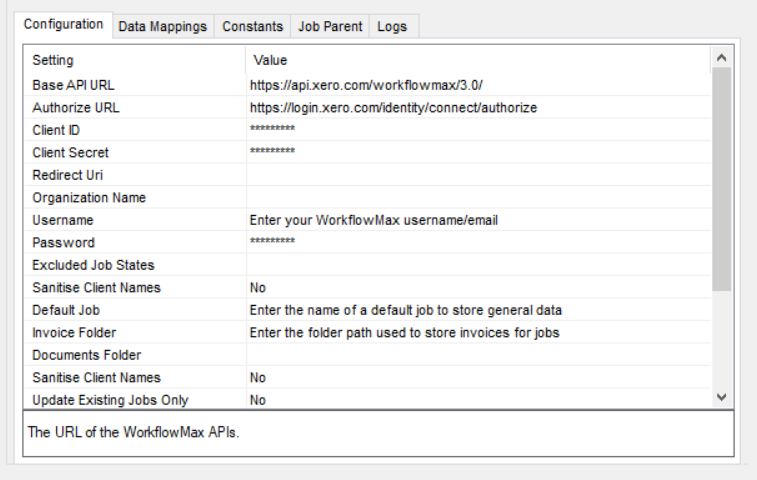
- Client ID - Enter the Client ID you copied when the app was created
- Client Secret - Enter the Client Secret you copied when the app was created
- Redirect Uri - Enter the redirect URI you entered when the app was created.
- Organisation Name - (Optional)
You only need to set this if your user account can connect to multiple WorkFlowMax accounts.
If you only have one account, don't enter this setting.
If the user running the connector does have multiple organizations, you must set this value.
This can be found in WorkFlowMax under
Business -> Settings -> Organisation Settings -> Payment Advice -> Details - Username and Password
If you want to run the connector from the same WorkFlowMax user account you used in the old connector, you can leave them as they are. Otherwise enter the new user account details - Earliest Note Date - Set this to today's date
This is a required step as WorkFlowMax is unable to provide us with a migration path for existing notes.
All future notes will be pulled to 12d Synergy, but older notes before this date cannot be updated.
Setting it earlier than the current date may cause duplicates to be created. - Set 'Only Sync Entities created in the last X days' to 5
You can see more info on this setting in the section below, 'Using the New Connector'
- Finally, go to Data Mappings and map each of the entity GUID fields to the attribute you nominated in the first script - Unless you changed it, this should be WorkFlowMax GUID
- Click 'Authorize' and login, then allow access to the app
If you receive an error, it may be because you have not opened a copy of the client and connected to a job - please make sure the client is open and try again - Turn on Manual Sync and click "Save" to allow the manual sync options
- At this point, you should consider running a test to ensure it is working as expected
- It's a good idea to turn off debug logging at this point
- Congratulations, you have successfully migrated to the new WorkFlowMax Connector
Please read the next section on scheduling.
Using the New Connector
Given the new changes, the best way to use WorkFlowMax is as follows:
- Set a schedule that always synchronises new entities created in WorkFlowMax within the last few days
- Manually synchronise recent changes by hand, using new UI mechanisms
Setting a Schedule
As the connector is now limited in the number of calls that it can make against WorkFlowMax, we recommend you should set a schedule to run at most every 4-6 hours.
Restricting the Data Set to a Date Range
You should now restrict WorkFlowMax to only look at data created after a given date, within a short date range, to prevent it from using too many calls against WorkFlowMax.
To get the best use out of the connector, you should aim to automatically synchronise data created recently and manually synchronise data that is changing.
You can set your date range / window in two ways:
- Set the field, 'Only Sync Entities Created in the Last X Days'
This allows the connector to only look at data, such as jobs, created in the last X days - Set the field 'Earliest Job Date'
This allows the connector to only look at data created after a certain date - such as the start of the current year.
Whether or not this is appropriate will depend on the number of entities you have in your WorkFlowMax system.
Be aware that any project in WorkFlowMax will utilise at least 2 calls against the API.
Using Manual Synchronisation
We are adding new ways to easily synchronise your data via the Connector.
You can sync jobs, contacts and companies easily as long as they have a WorkFlowMax GUID.
To make sure you can use this feature, make sure you turn on Manual Sync
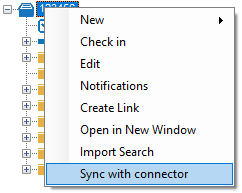
Sync a Job
To sync a job, simply right click it in the 12d Synergy Client and select "Sync with Connector"
Sync a Contact / Company
Contacts and Companies can be synchronised in the Contact and Company Editor windows.
Simply select the contact or company you want to update and click 'Sync with Connector'.

Using the Command Line
We are aiming to provide command line capabilities for users to script the run the connector for specific entities in WorkFlowMax, and we anticipate this will be released before the end of Q4 2020.