Using the 12d Synergy Client, you can import your layouts and their attributes from your drawing files. You can then edit the attribute values which will be updated in the actual drawings.
In v4.3 and on, 12d Synergy can also automatically track layouts for you.
See: Layout Tracking
1. Adding Layouts to 12d Synergy
1.1. Importing Layouts from a Drawing File
To import layouts from a drawing file into 12d Synergy:
- Right-click on the drawing file in the 12d Synergy Client
- Select CAD→Import Layouts
- Select the "Layouts" tab in the file details panel to view the imported layouts and attributes
1.2. Adding New Layouts
To manually add a new layout:
- Ensure the file is checked out
- Ensure the "Layouts" tab is selected
- Select Operations→Add Layout
- Select "Yes" to create a layout from a template, or "No" to create a new layout
1.3. Creating a Layout from a Template
After selecting "Yes" to create a layout from a template:
- Select the template you want to create from
- Select "Select"
1.4. Creating a New Layout
After selecting "No" to create a new layout:
- Enter the name of the layout
- Select the plus sign (+) to add attributes to this layout
- Select "Add" to finish creating the layout
1.5. Adding from Another Layout
To add a layout using the attributes from another layout you have already created:
- Ensure the file is checked out
- Ensuring the "Layouts" tab is selected
- Select the layout that you want to copy from
- Select Operations→Copy Layout
- Enter the name of the new layout
- Select the plus sign (+) to add additional attributes to this layout or the minus sign (-) to remove attributes
- Select "Add" to finish creating the layout
2. Editing Layouts
To edit a layout name or attributes:
- Ensure the file is checked out
- Ensure the "Layouts" tab is selected
- Select the layout that you want to edit
- Select Operations→ Edit Layout
3. Deleting Layouts
To delete one or more layout:
- Ensure the file is checked out
- Ensure the "Layouts" tab is selected
- Select the layouts that you want to delete
- Select Operations→ Delete Layout
- Confirm to delete the layouts
4. Editing Layout Attribute Values
With the file checked out, you can edit the values fo attributes in a layout directly in the "Layouts" tab.
4.1. Using the Bulk Attribute Editor
To edit the layouts from multiple files at the same time:
- Highlight the files you want to edit. Ensure that each selected file has at least one layout
- Select the "Edit layouts" button, or right click on a file and select CAD→ Edit Layouts
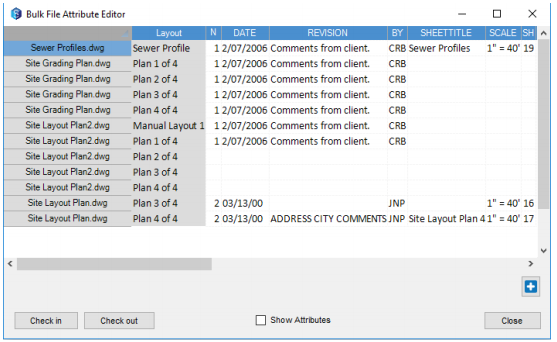
4.2. Checking In/Out
If any rows are greyed out, it means the file they belong to is not checked out. Highlight any of the greyed out rows and select "Check Out" to begin editing.
4.3. Copy/Paste
Use Ctrl+C and Ctrl+V to copy and paste values between cells or a range of cells. Ensure that the data type is the same between corresponding cells or the value will not copy.
4.4. Drag Fill
To quickly copy the value of a cell or range of cells into cells above or below:
- Select the cell or cell range that you want to copy from
- Rest your cursor in the lower-right corner of the selected range so that it turns into a plus sign (+)
- Drag the fill handle down or up across the cells that you want to fill
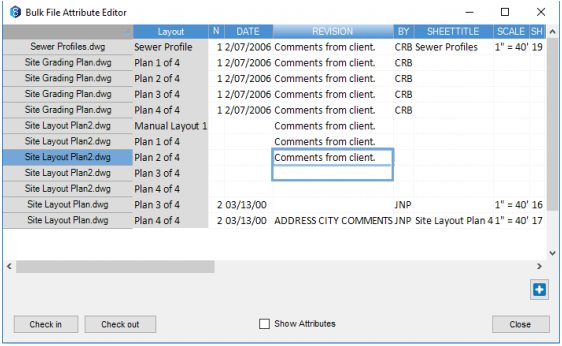
- When you let go, the values should be filled to the other cells
5. Layout Templates
You can create a folder, job or system template which can be used when adding new layouts to a drawing file.
To create a layout template at the folder or job level:
- In the 12d Synergy Administrator
- Select System Rules→ CAD Layout Templates
- Select the (+) sign to create a new layout template