Prerequisites
This guide assumes that the Windows machine, hosting 12d Synergy Server, already has a certificate installed.
If not, kindly follow the guide, How to add certificate(s) into Windows, to installing a certificate.
*The Certificate must have a private key and installed in both
MMC ➡️ Console Root ➡️ Certificates (Local Computer) ➡️ Personal
MMC ➡️ Console Root ➡️ Certificates (Local Computer) ➡️ Trusted People
- Go/login to the Server in which the existing certificate to be re-used has been installed.
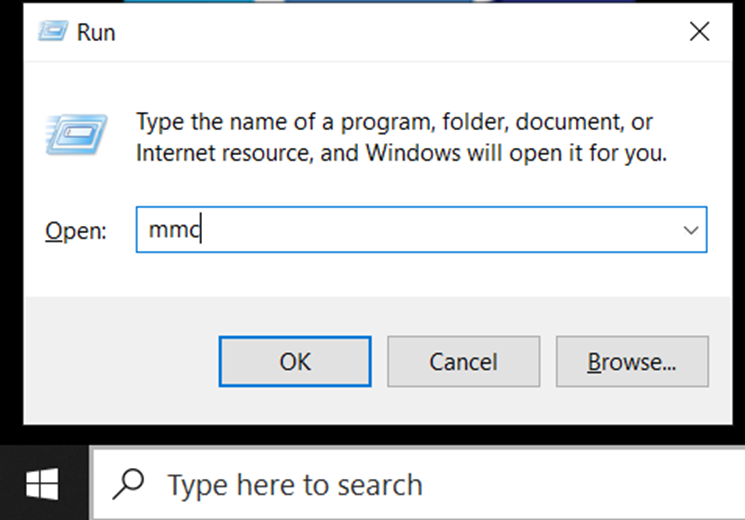
- Start > Run > MMC or Windows Key + R then type mmc
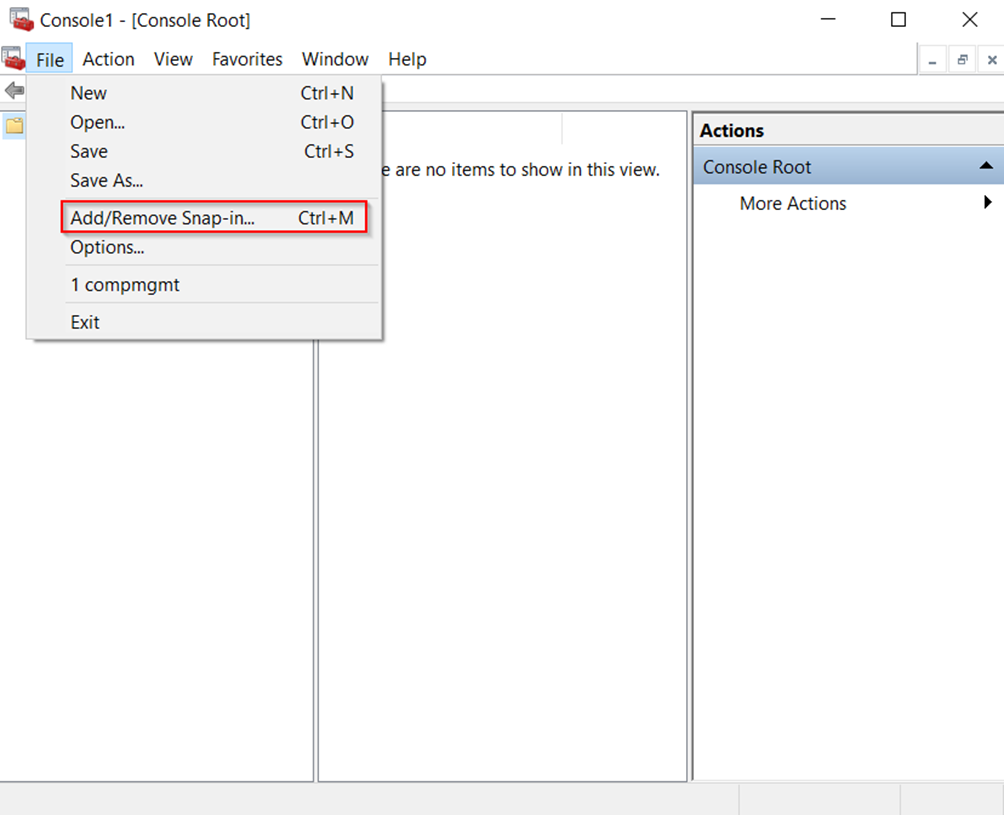
- In the Console Tab click File > Add/Remove Snap-in
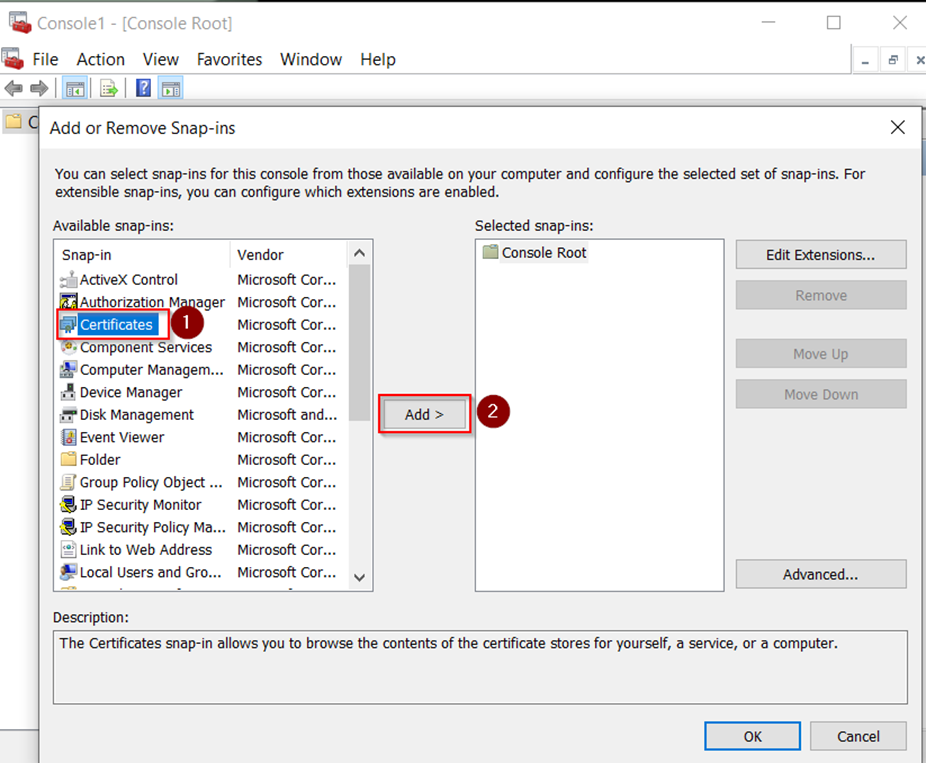
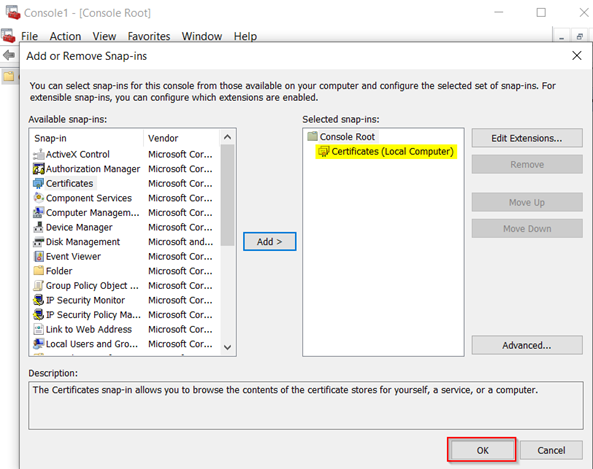
- Click on Certificates > Add
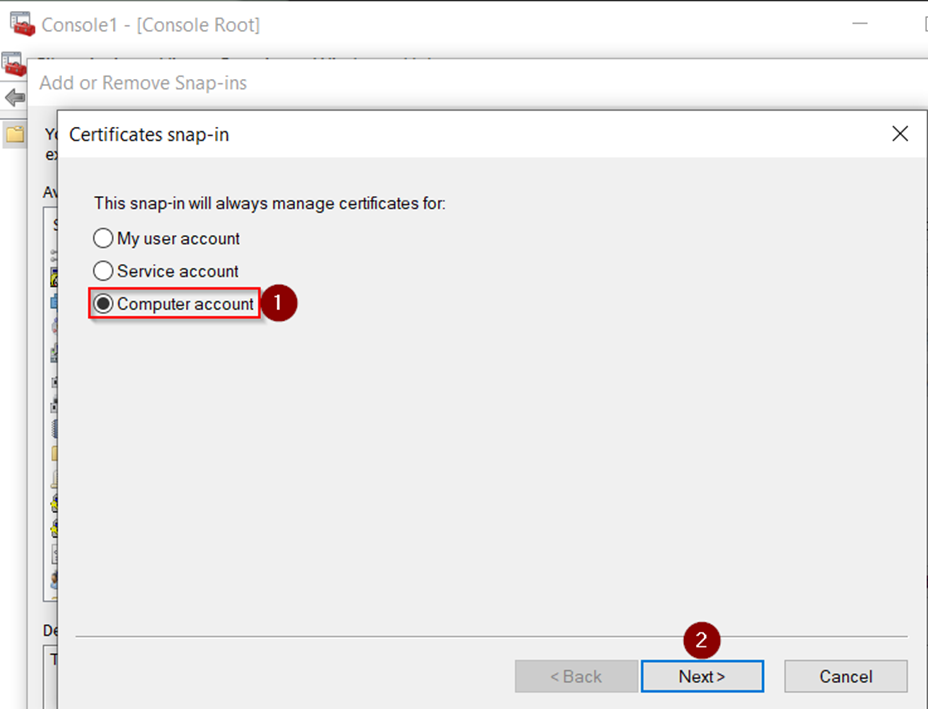
- Choose Computer Account and then click Next
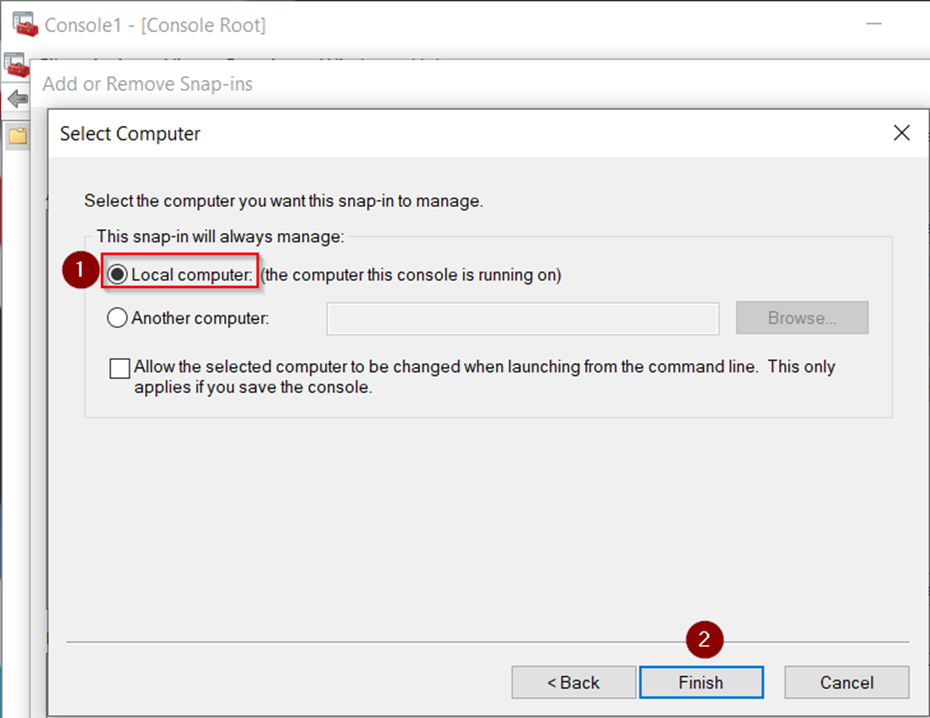
- Click Local Computer > Finish
- Click OK
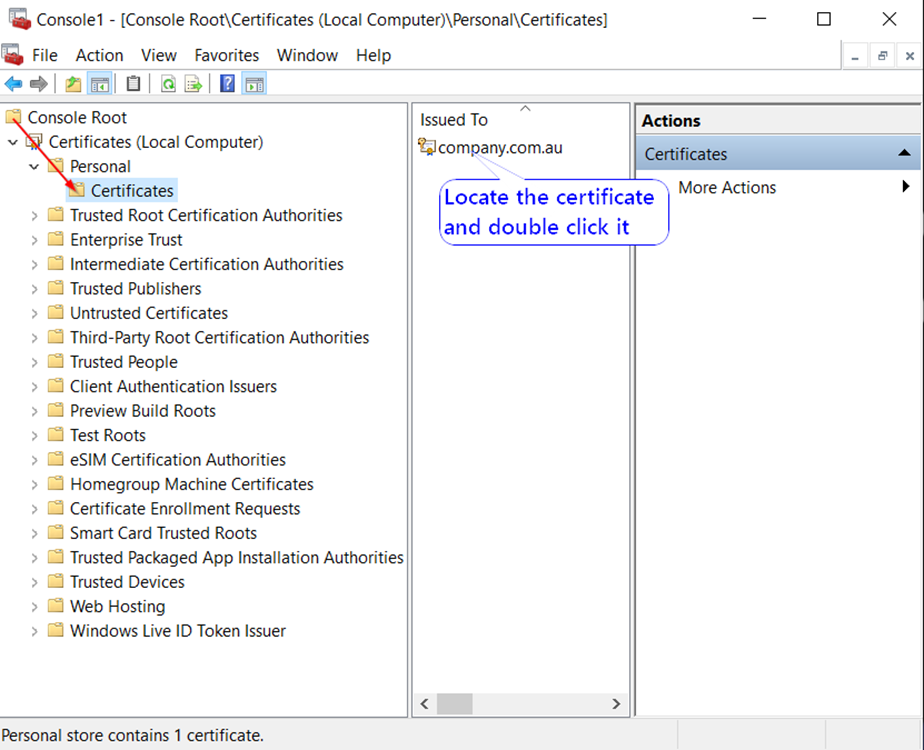
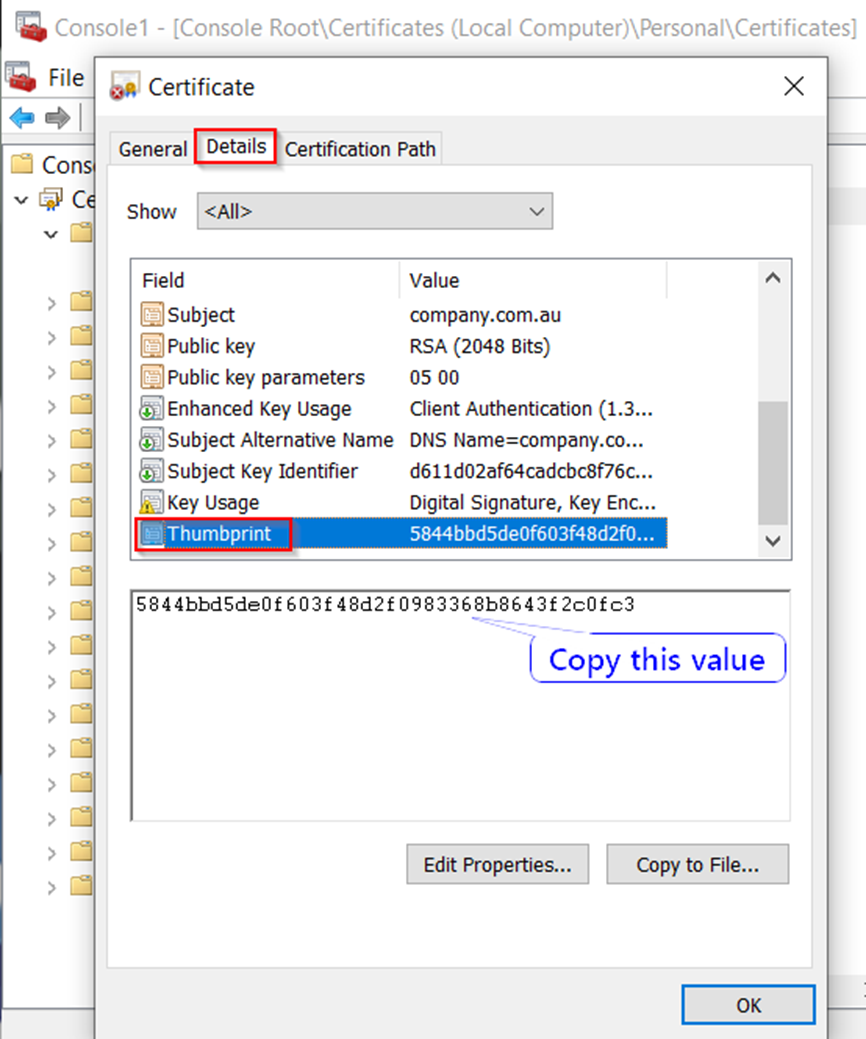
- In MMC, navigate through to Console Root > Certificates (Local Computer) > Personal > Certificates and locate your certificate and double click it
- In the next window Click on the Details tab > scroll down to the Thumbprint Field > Copy the value
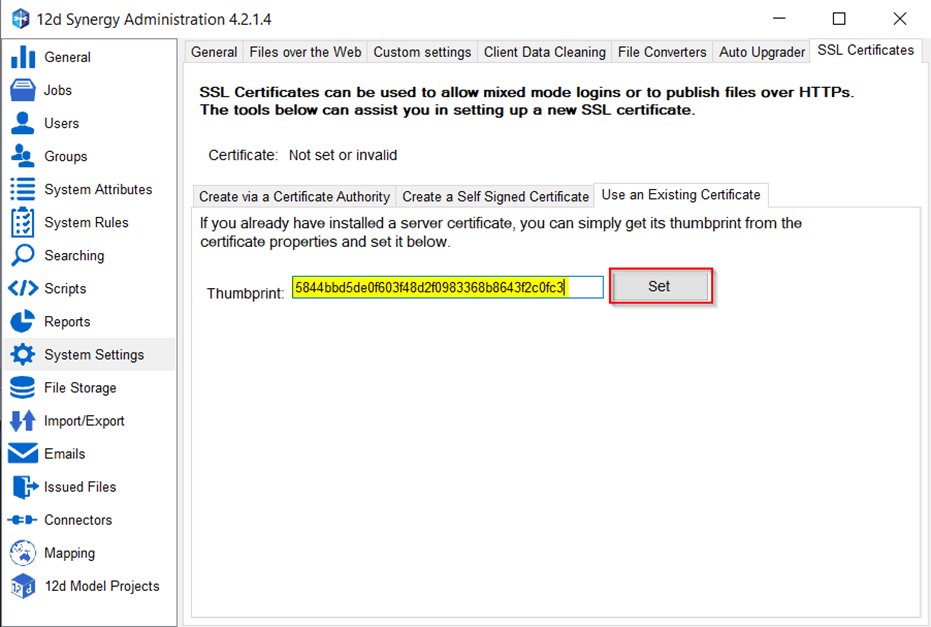
- Paste the value into Synergy Administration and click Set
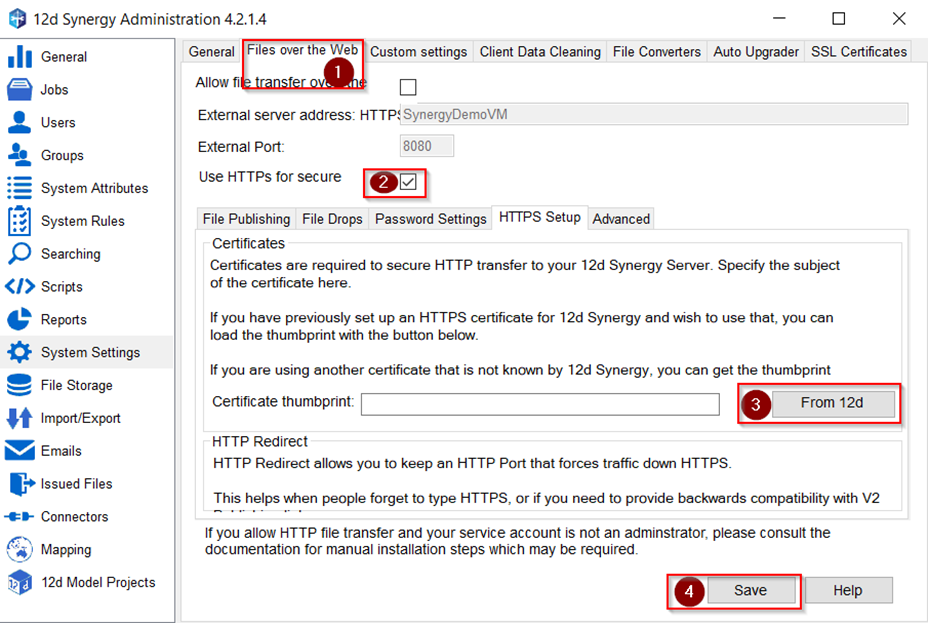
- Navigate to [Files over the Web], tick the [Use HTTPs for secure], Click [From 12d], Click Save
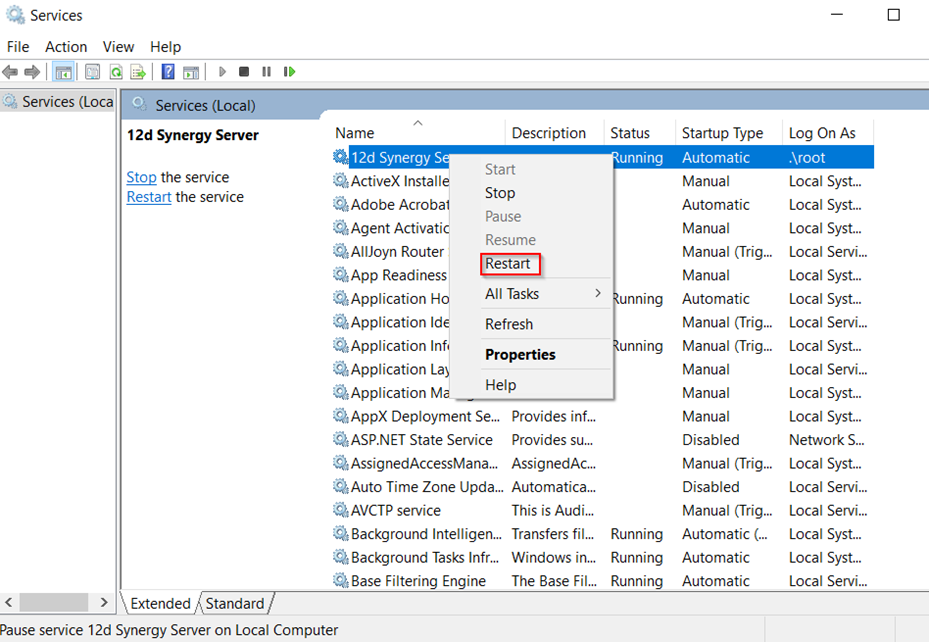
- Restart the 12d Synergy server service by Start > Run > services.msc or Windows Key + R then type services.msc
