Only 12d System Administrators can create a Workflow.
Before a Workflow can be created planning must be done
- Sketch out your workflow, think about the states and the flow.
- Look at the transitions, and note down the Activities, Conditions or Data capture required in each one.
- Define attributes used in the workflow
- Check the Users, roles involved
For this Workflow training we will develop one that handles the process of a drawing being developed, check and revised and ready for issue.
1.1 Creating the Attributes
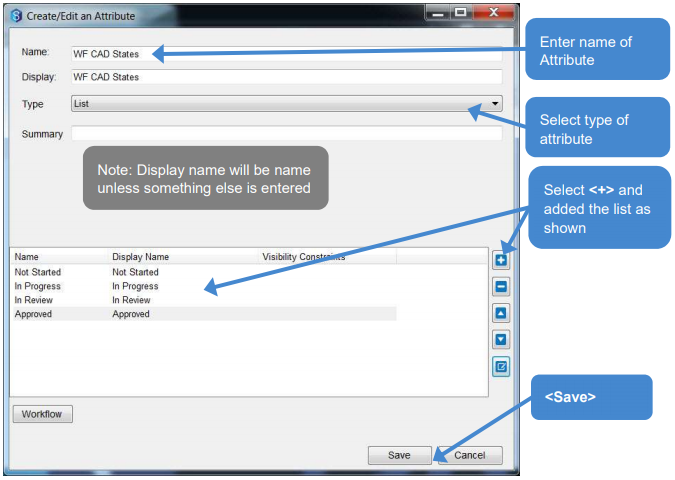
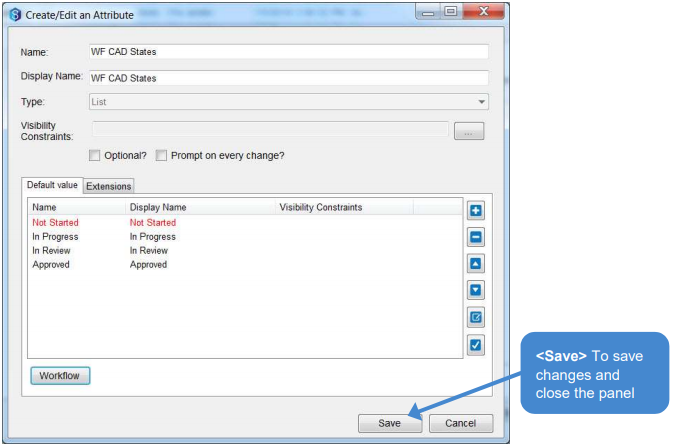
You will require an attribute to set your Workflow in. This attribute will set the States.
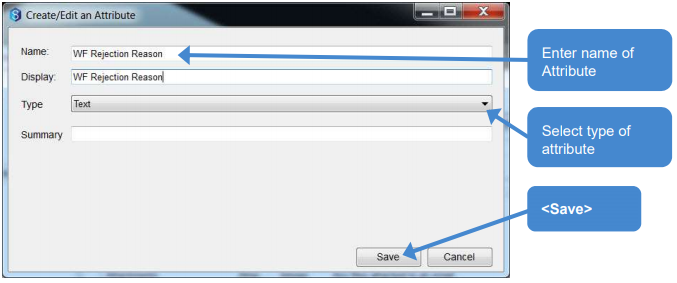
- Open the Admin Tool and go to the System Attributes=>All Attributes. Here is where an attribute called "WF CAD State" will be created. It is a list attribute.

- You may require other attributes, for this one I will also create an Attribute called "WF Rejection Reason" it will just be a text attribute.
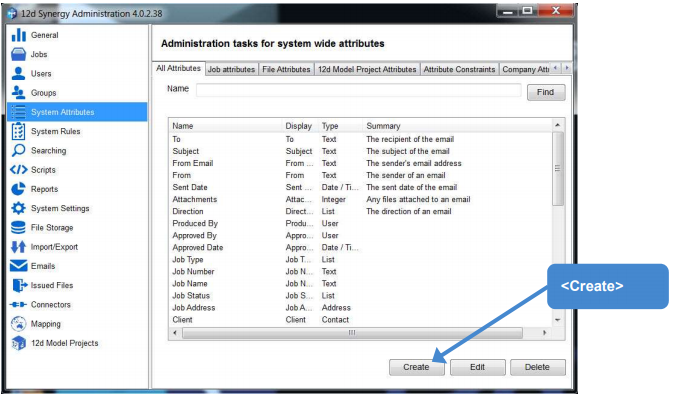

In my Attribute list I also have one called "Issue Revision"
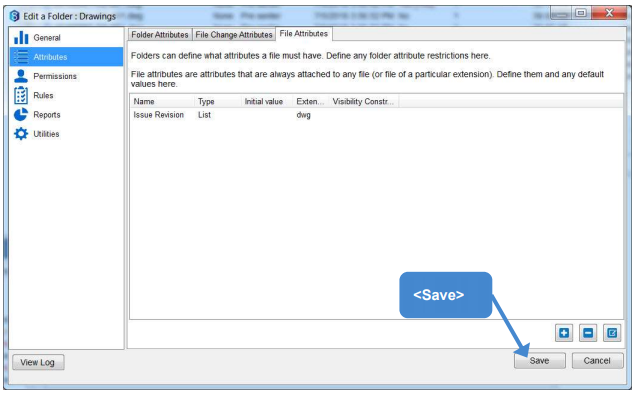
1.2 Set Folder Attributes
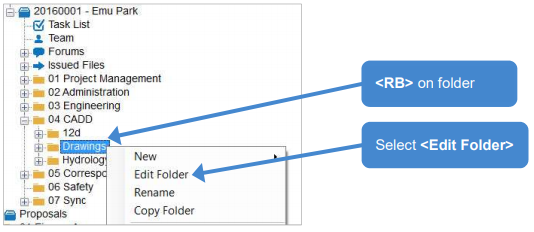
Now you can add the attributes to the Client area you wish to define the Workflow.
- In the 12d Synergy Client, open to the Emu Park job and proceed to folder 04 CADD→Drawings
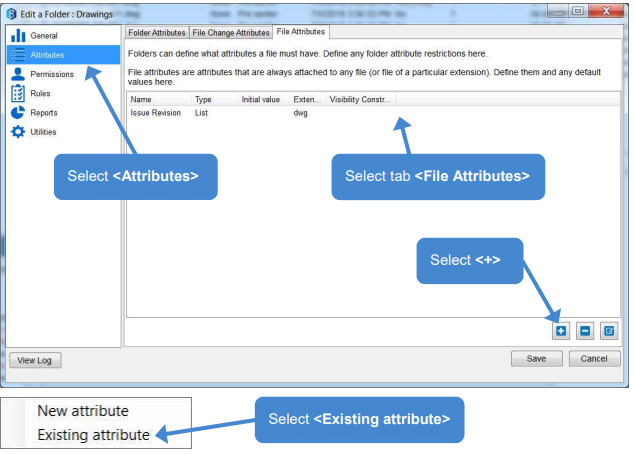
- In this case the "Issue Revision" attribute is already inserted.

1.3 Set the Workflow Transitions
The Attribute gets used to control the Workflow.
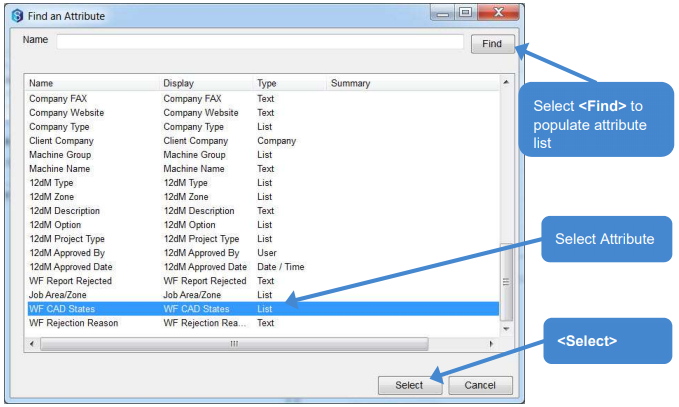
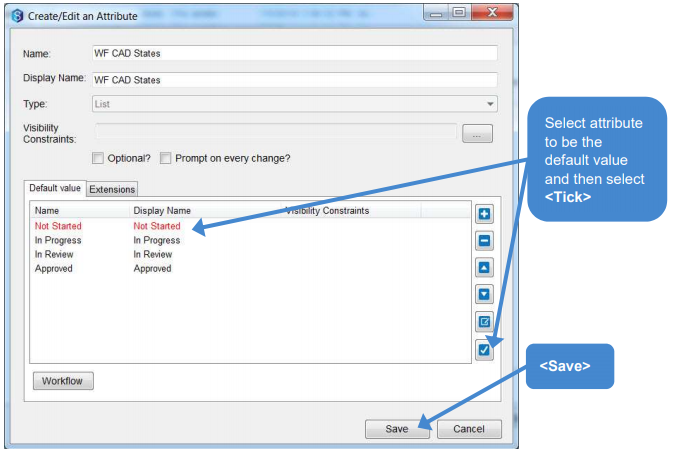
- Select the "WF CAD Status" Attribute and then edit it


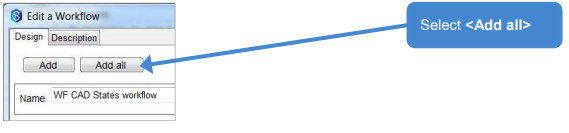
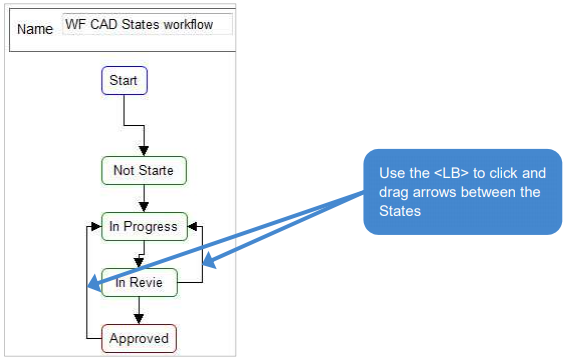
This will add the States to the flowchart
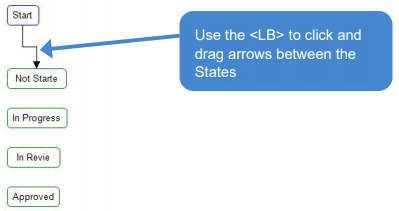
- Connect the "States" with arrows. The arrows represent the "Transitions"
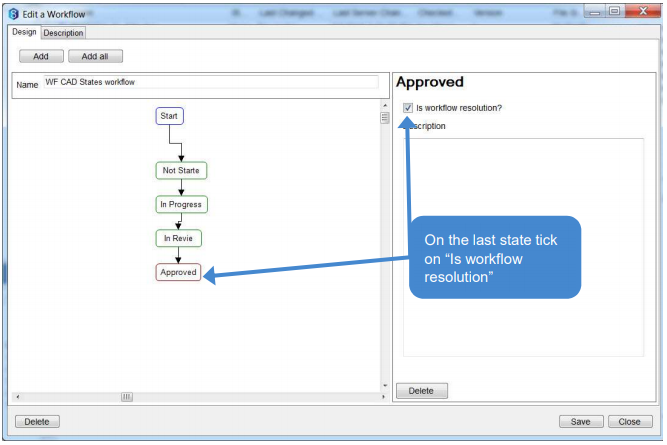
- Make sure you mark the last "State" as a Workflow resolution
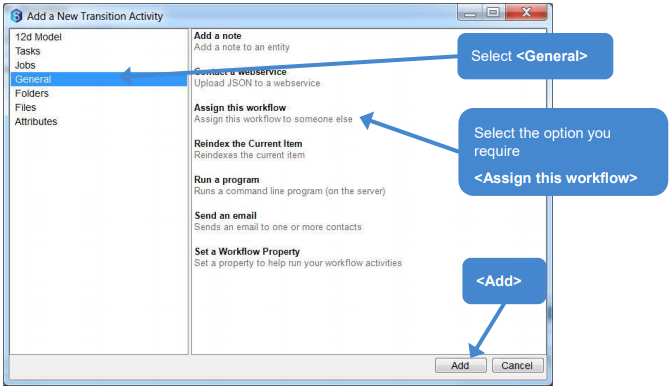
1.4 Set the Activities, Conditions and Data Capture
This is where you will set the details e.g. who can edit the file, Up revision the file, etc
1.4.1 Not Started to In Progress
- Select the Transitions between "Not Started" and "In Progress"
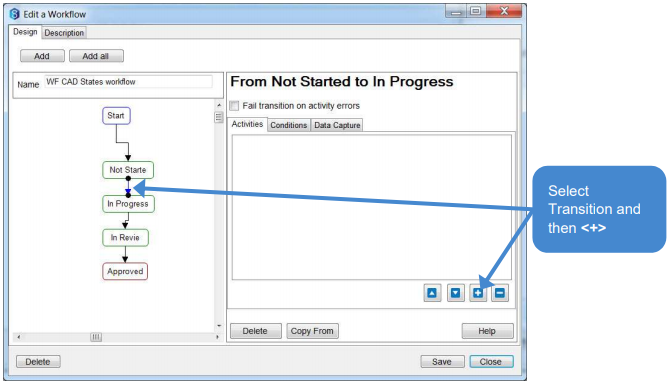

- Leave "Send Email" set to "Yes"

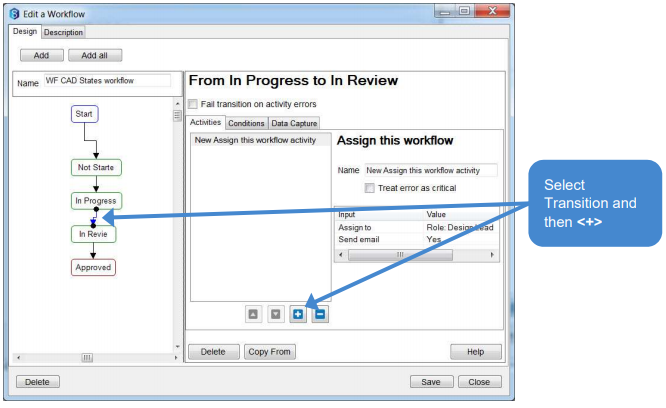
1.4.2 In Progress to In Review
- Select the Transitions between "In Progress" and "In Review"
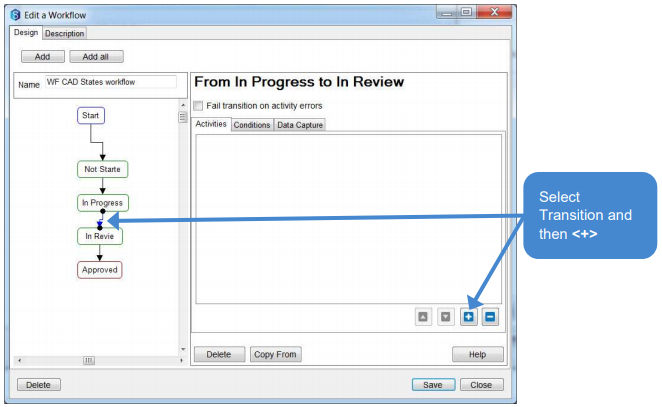
- Leave "Send Email" set to "Yes"
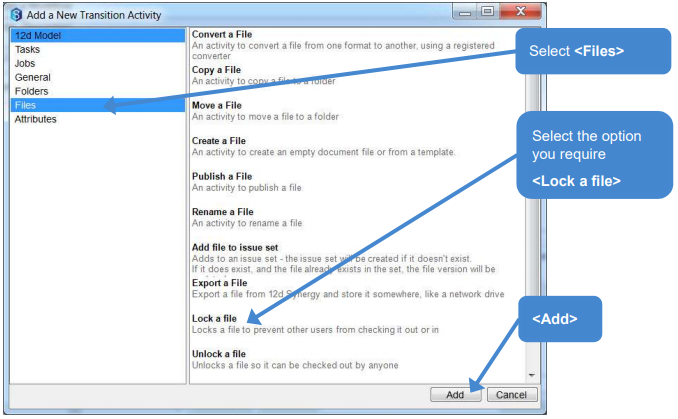
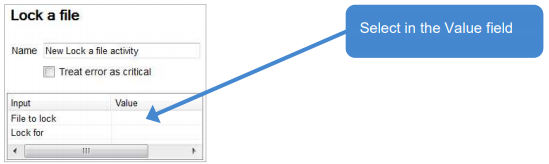
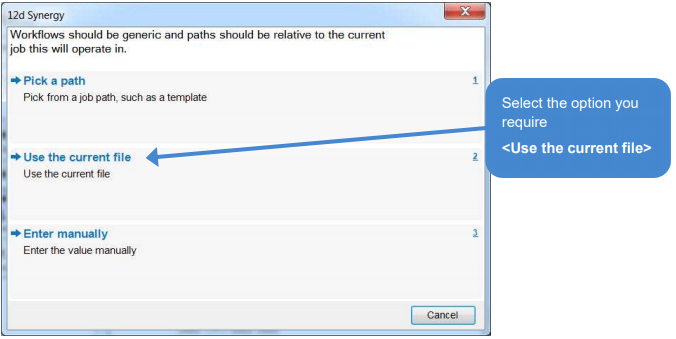
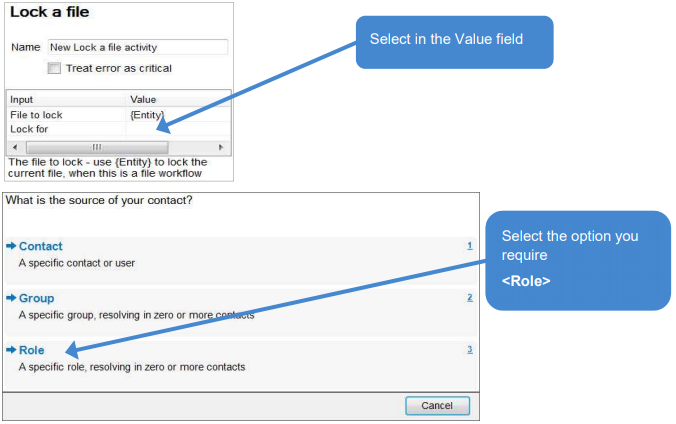
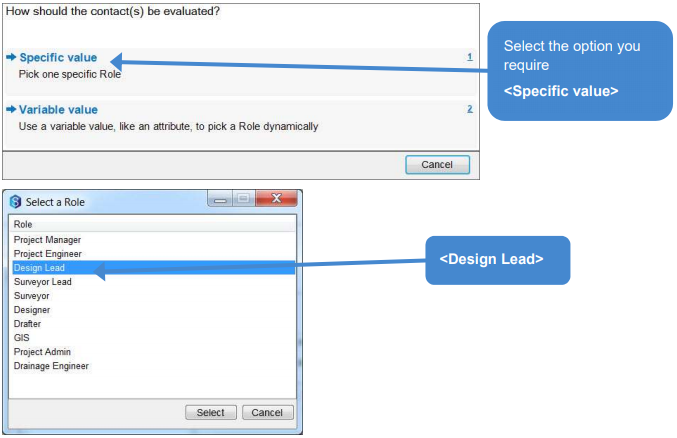
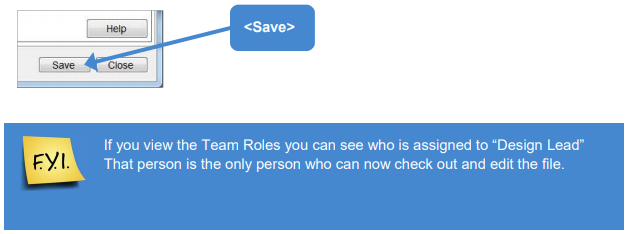
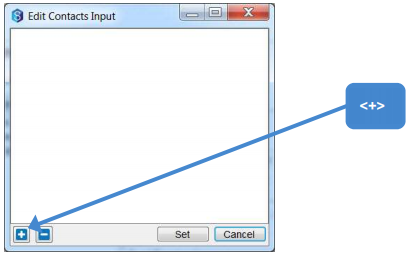
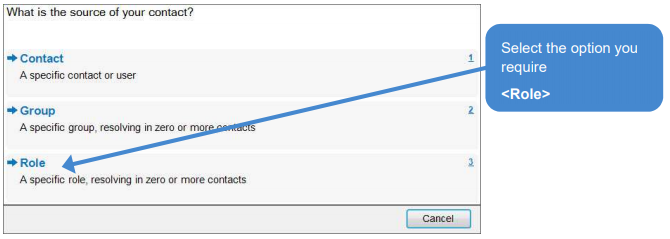
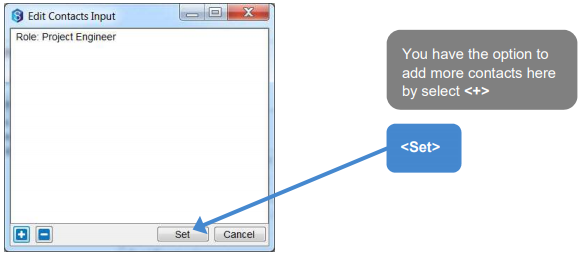
So that the file can't be edited while it is in review you can lock the file to a particular Contact or Role.
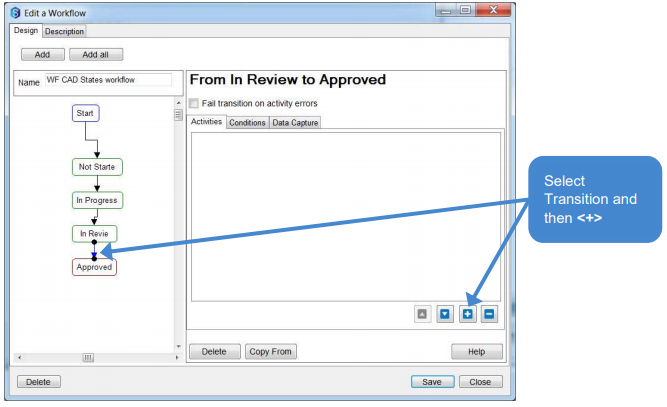
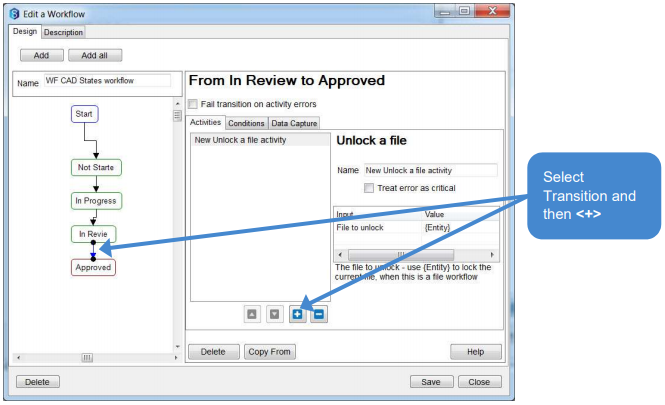
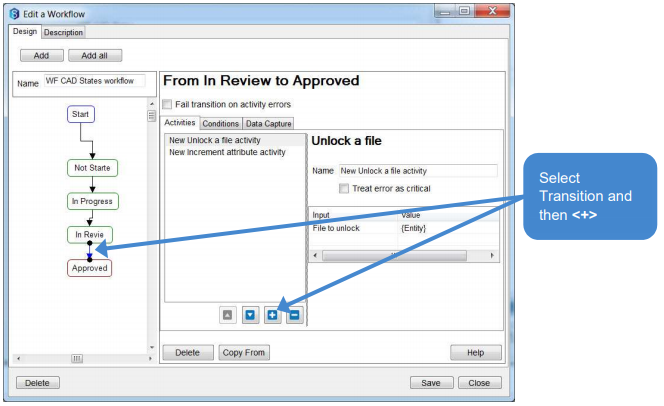
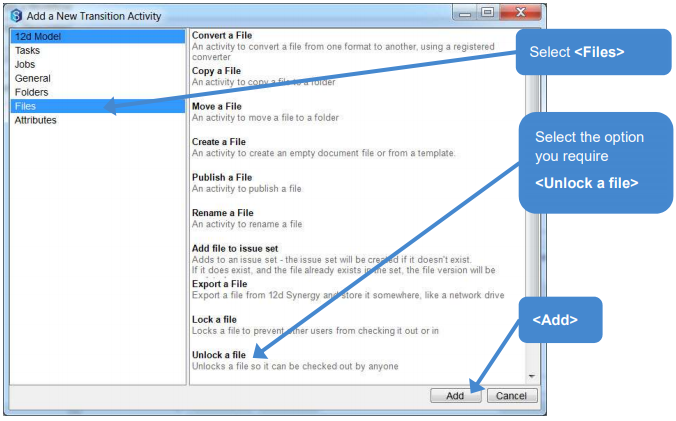
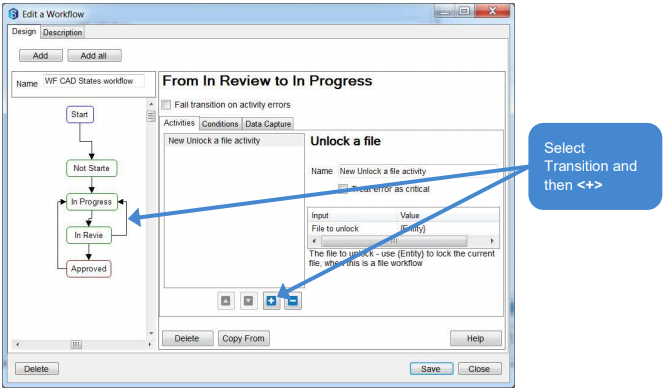
1.4.3 In Review to Approved
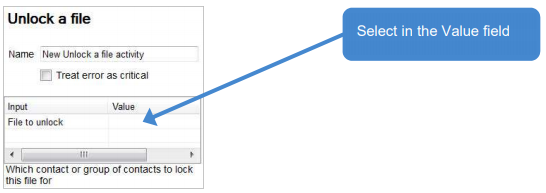
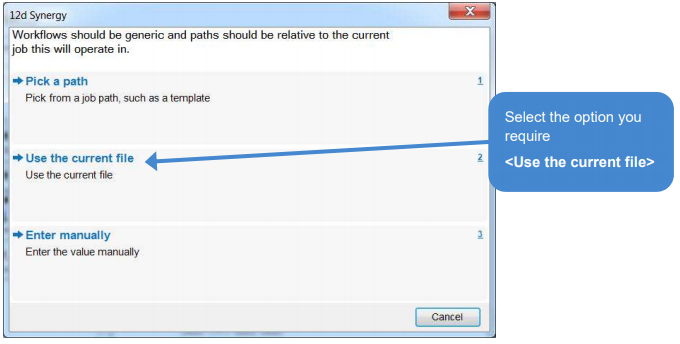
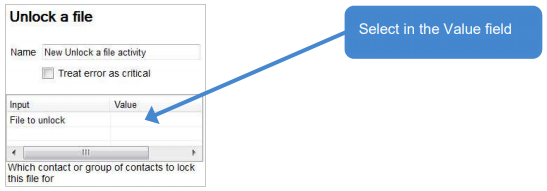
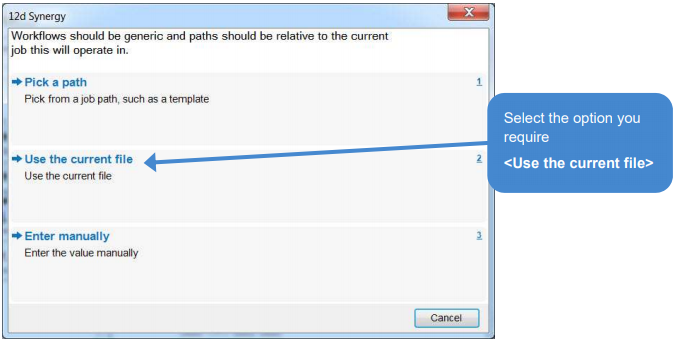
Several items are required here, first is to unlock the File.

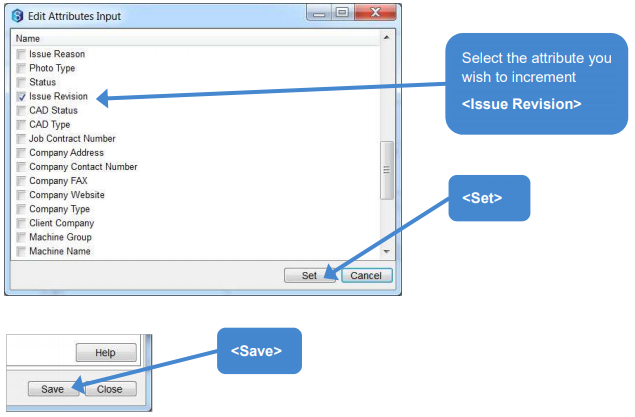
Because the file is now approved it can be revved up, e.g. for the next issue.
This means having the workflow change the attribute "issue revision"


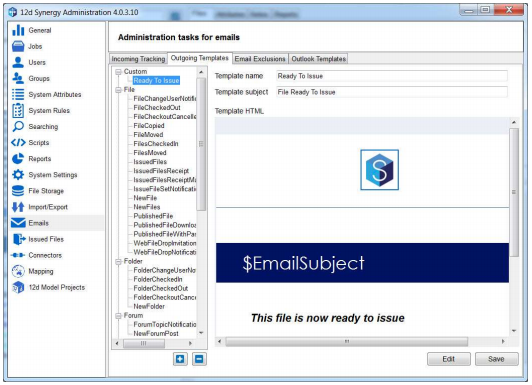
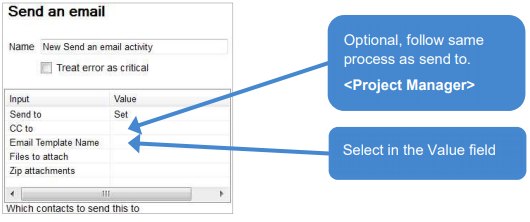
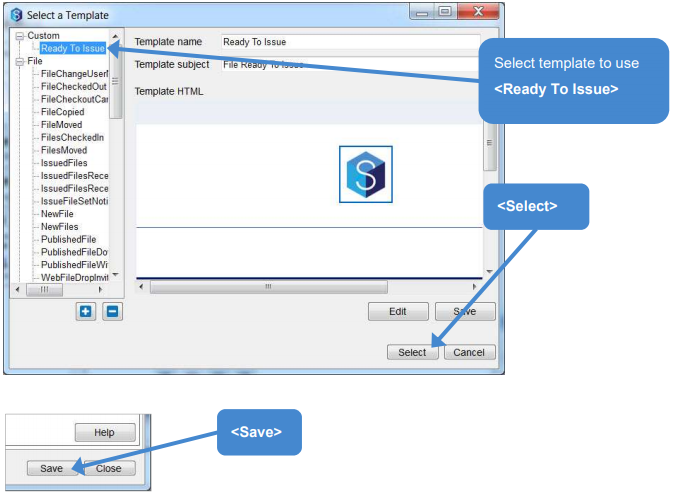
We will also send an email, this will require an email template.
This can be set in Administrator tool, we will use one already created "Ready for Issue"


1.5 Allow for Circular Work
However, things don't always go this smoothly and re-work maybe required.
Also, changes may occur and items like reports or drawings may require re-issuing. So files may have to go through the processes multiple times. E.g. From a Preliminary design to a Final design stage.
So let's add extra Transitions between, "In Review" to "In Progress" and "Approved" to "In Progress"
1.5.1 In Review to In Progress
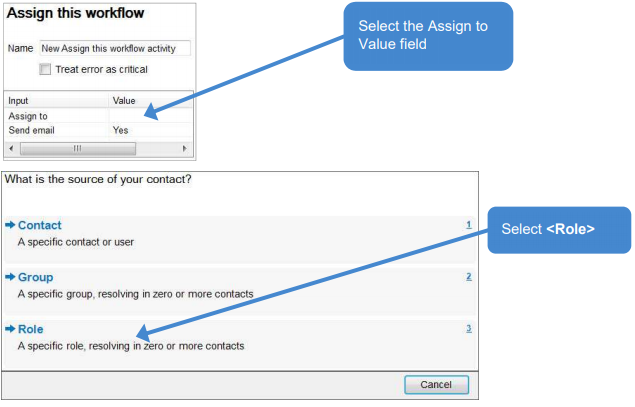
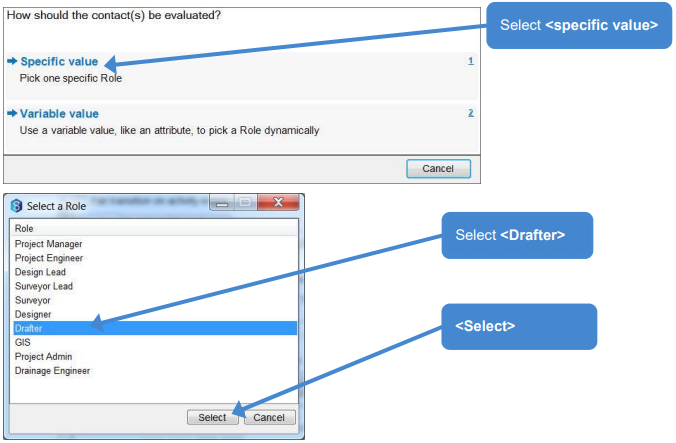
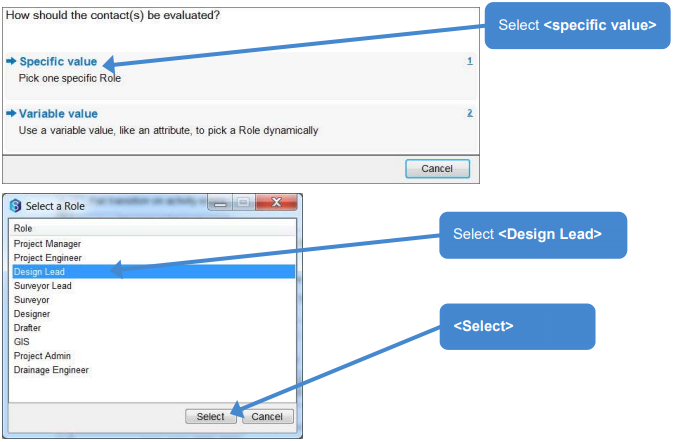
When the File goes to "In Review" it was locked to a Reviewer i.e. The Design Lead. The first step is to unlock the file so it can be sent back to the Drafter(s).
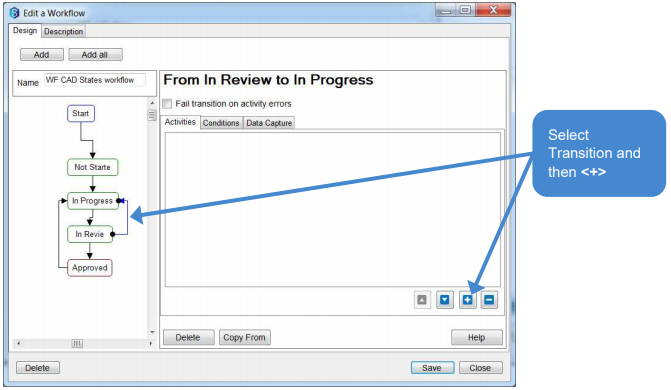

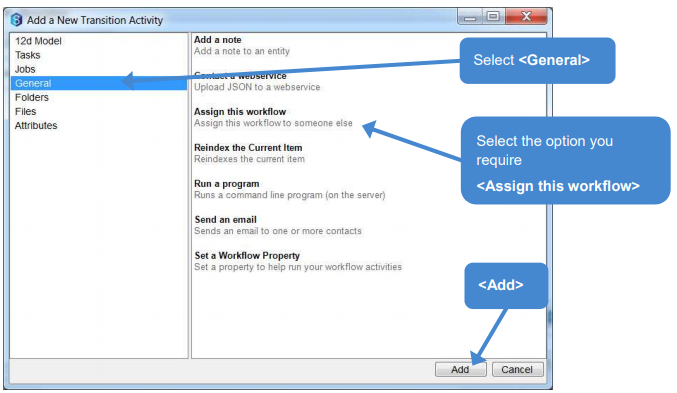
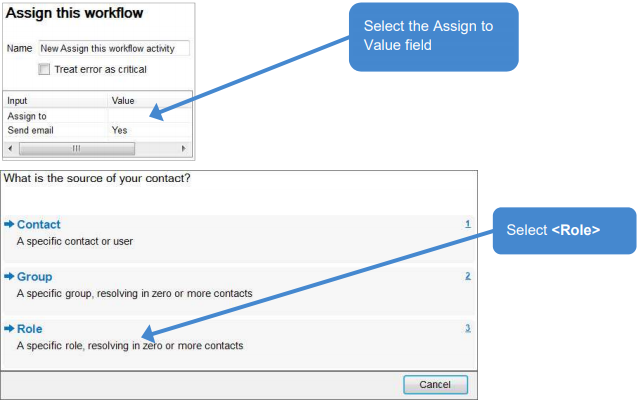
And re-assign the workflow


- Leave "Send Email" set to "Yes"
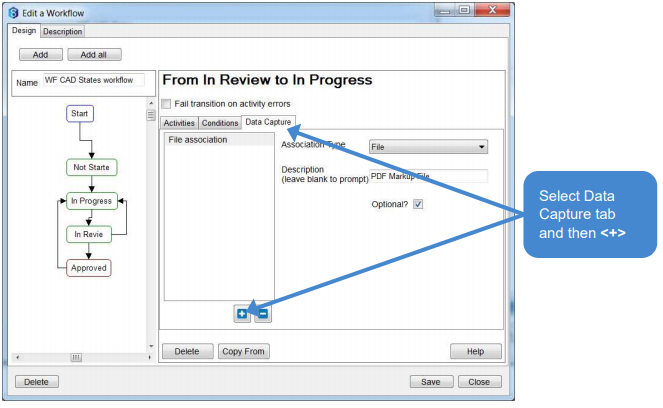
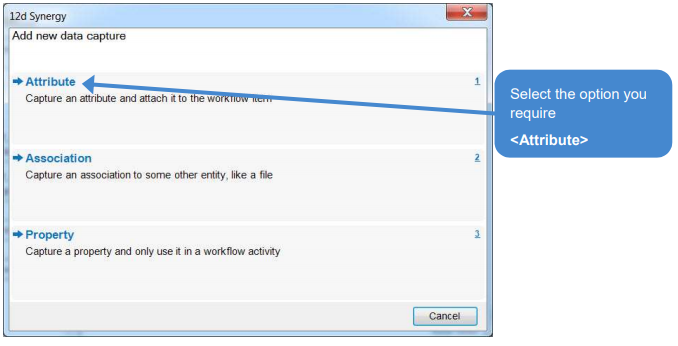
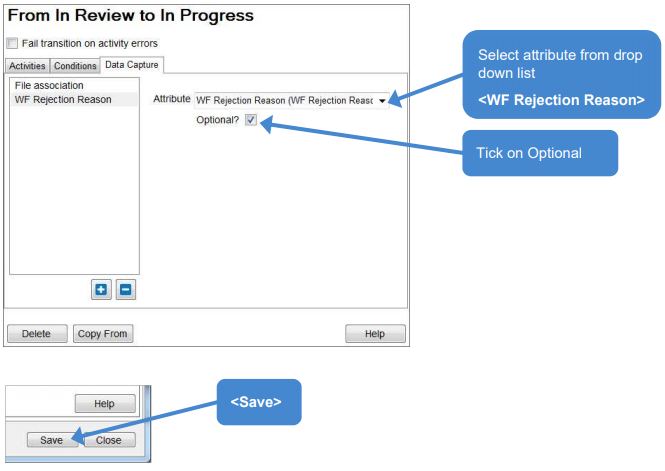
For this Transition we will also set some Data Capture.
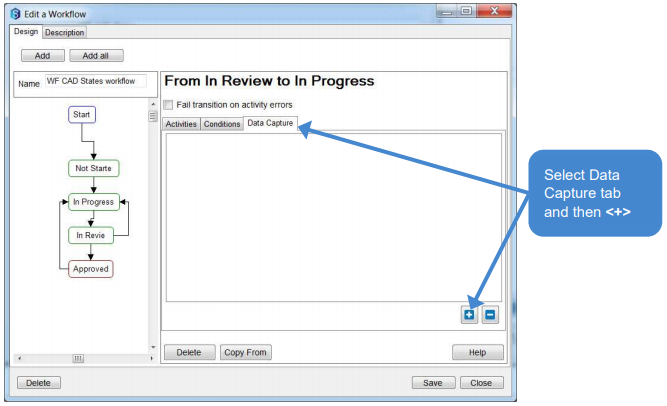
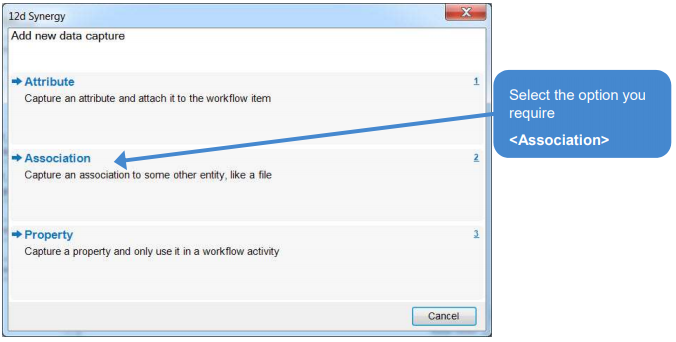
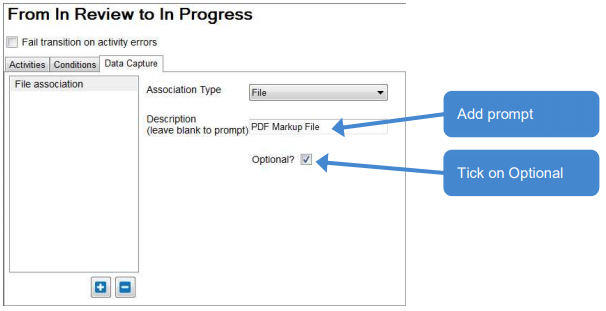
Earlier an Attribute was created for a rejection reason. It can be added here.
1.5.2 Approved to In Progress
This is required if a file is required, e.g to go from issue "A" to Issue "B"
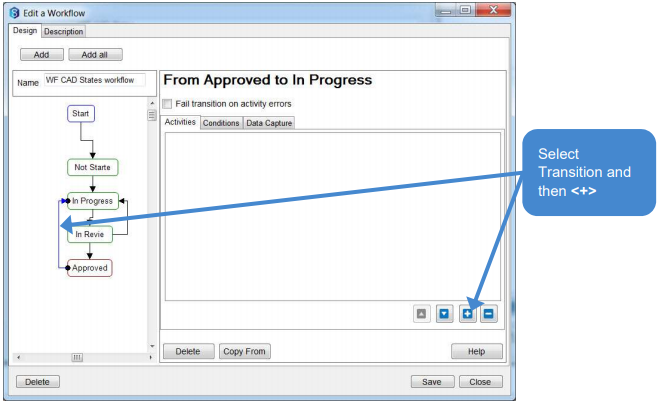


- Leave "Send Email" set to "Yes"

This will occur now when the Status attribute gets set back to "In Progress"
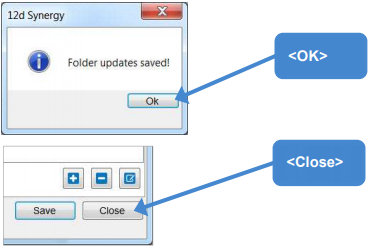
Save and Close the Edit attribute panel
Save and Close the Folder Editor panel