There are several levels in which map layers can be added into 12d Synergy. The examples used in the following instructions are all added at a system level (highest level) under the Mapping section in 12d Synergy Administrator. For more information on these levels, refer to the ‘Areas map layers can be added’ section of this document and the ‘Getting Started with Mapping’ guide.
Layer Types
- ArcGIS Server
- ArcGIS Online Base Map
- WMTS
- Shape File
- KML / KMZ File
1.1. Adding an ArcGIS Server Layer
There are numerous available ArcGIS map layers to choose from online with many being free. In this example we are going to use www.arcgis.com to obtain an ArcGIS Server layer.
Steps:
- Register a free account at www.arcgis.com
- Use the search bar at the top of the ArcGIS website to search for a layer. Click on the layer of your choice from the search results
In this example an aerial image of New Zealand has been selected to use as a layer 12d Synergy. - After searching for the ‘NZ – Imagery’ layer and selecting it from the search results list it will take you to a page displaying the URL that 12d Synergy requires to see the layer. In this case the URL is at the bottom of the ‘NZ – Imagery’ page (See image below)
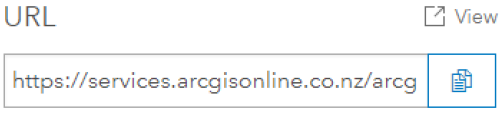
Full ‘NZ – Imagery’ layer URL:
https://services.arcgisonline.co.nz/arcgis/rest/services/Imagery/newzealand/MapServer - Copy the URL and open 12d Synergy Administrator
- Navigate to the Mapping section in 12d Synergy Administrator and under the Map Configuration tab click the + button down the bottom
- Change the Type drop down to ‘ArcGIS Server’ and enter any name into the Name box
- Paste the URL into the Path box that you copied in step 3
- If you would like this layer to be displayed on your current map, tick the Active box then click Set
You should now have something similar to the image below.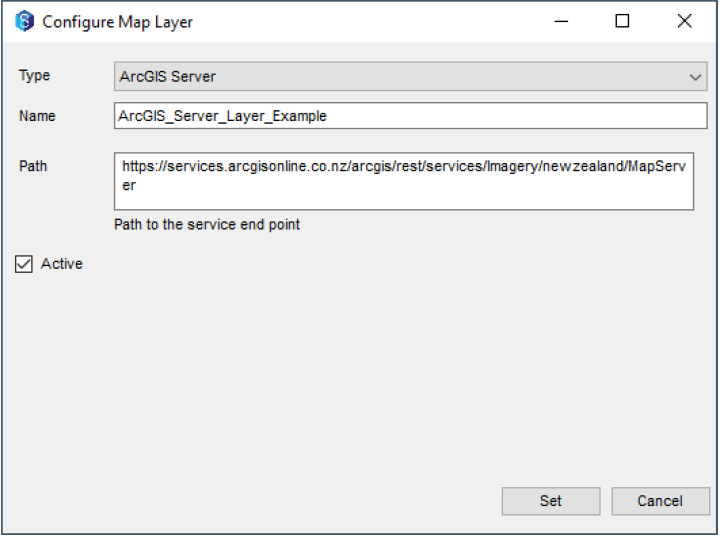
- To finalise the new layer, under the Active System Layers tab click Save down the bottom right of the window
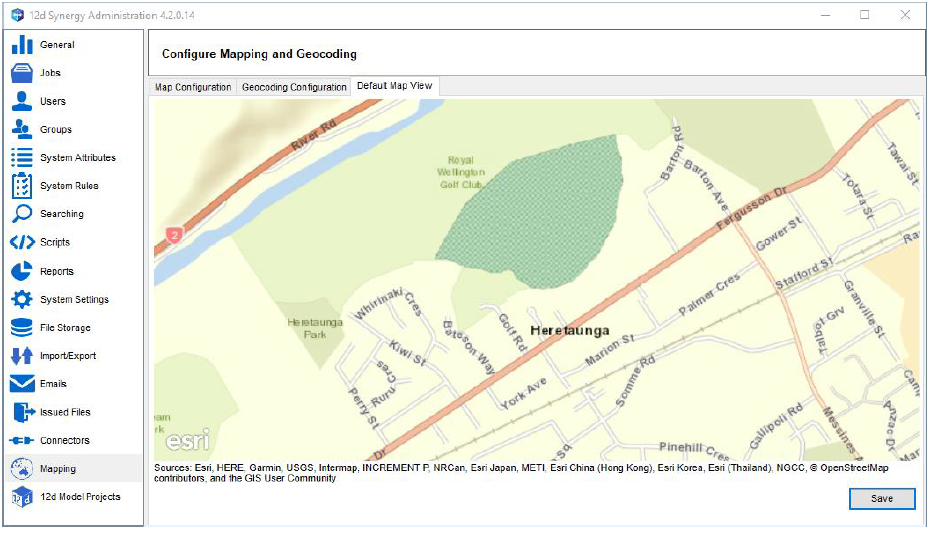
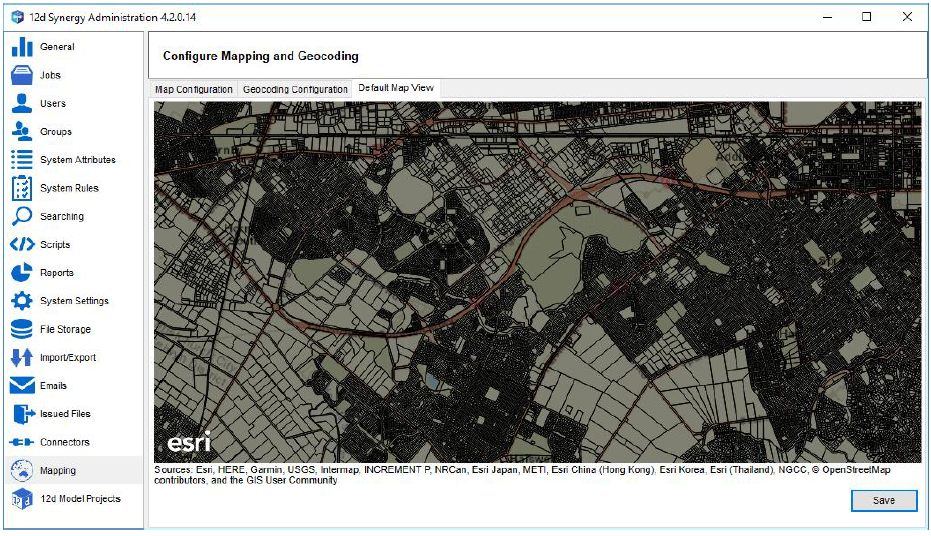
- To ensure your new layer has been added successfully, check in the Mapping section of 12d Synergy Administrator under the Default Map View tab. For any troubleshooting, refer to the ‘Troubleshooting’ section of this document.
1.2. Adding an ArcGIS Online Base Map
The ArcGIS Online Base Map layer comes pre-configured in 12d Synergy and is the default layer used in 12d Synergy. If this layer has been removed from the existing layers in 12d Synergy you can re-add it by following the steps below.
Steps:
- Navigate to the Mapping section in 12d Synergy Administrator and under the Map Configuration tab click the + button down the bottom
- Change the Type drop down to ‘ArcGIS Online Base Map’ and enter any name into the Name box
- If you would like this layer to be displayed on your current map, tick the Active box
- For this layer there are two options available to display the map, ‘Aerial’ and ‘Road’ view. Ticking the Aerial box will display the layer as an aerial image while leaving it un-ticked will display the default ‘Road’ view. Click the Set button to confirm your settings
You should now have something similar to the image below.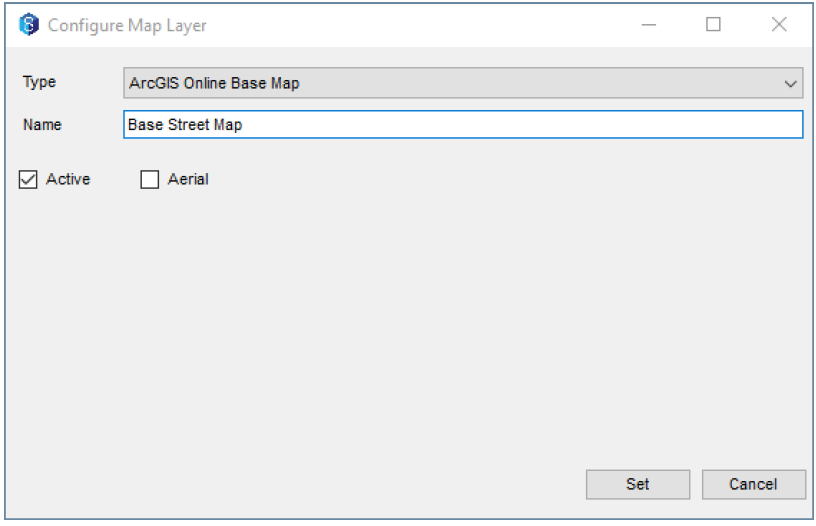
- To finalise the new layer, under the Active System Layers tab click Save down the bottom right of the window
- To ensure your new layer has been added successfully, check in the Mapping section of 12d Synergy Administrator under the Default Map View tab. For any troubleshooting, refer to the ‘Troubleshooting’ section of this document
1.3. Adding a WMTS Layer
There are numerous available WMTS map layers to choose from online with many being free. In this example we are going to obtain a WMTS layer from the data.linz.govt.nz website.
1.3.1. Before you Start (LINZ Only)
- You will need to create a Koordinates account at koordinates.com. This allows you to log on to the LINZ Data Service to obtain an API key and the relevant links to LINZ map layers
- You will need to create an API key to be able to use layers from the LINZ Data Service. This key will be used later on. To obtain an API key, follow the instructions in the following link
https://www.linz.govt.nz/data/linz-data-service/guides-and-documentation/creating-an-api-key
Steps:
- Use the search bar on the LINZ Data Service website data.linz.govt.nz to search for the layer of your choice, then select the layer from the list of search results
- To obtain the URL that 12d Synergy requires, navigate to the Services tab (See Image below). Under the Services tab you may find multiple URLs. The URL required in this example is displayed in the first URL box, see the following URL
"https://data.linz.govt.nz/services;key=YOUR_API_TOKEN/wmts/1.0.0/set/4769/WMTSCapabilities.xml".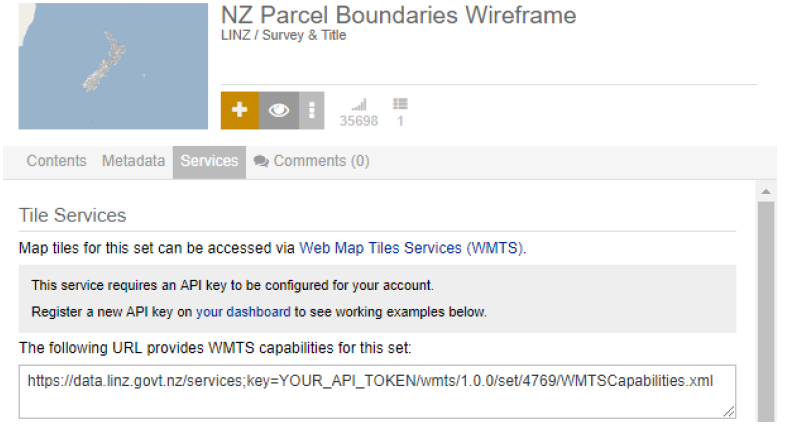
- Navigate to the Mapping section in 12d Synergy Administrator and under the Map Configuration tab click the + button down the bottom
- Change the Type drop down to ‘WMTS layer’ and enter any name into the Name box
- Copy the URL from step 2 and paste it into the Path box. You will also need to remove the ‘1.0.0/set/4769/WMTSCapabilities.xml’ section from the URL and replace the ‘YOUR_API_TOKEN’ section of the URL with the API key obtained in the previous ‘Before you start (LINZ Only)’ section
- Add the layer’s ‘Set ID’ into the Layer box, in this case it will be ‘set-4769’. This is taken from the URL (See the above image). If there is no ‘Set ID’ for the layer you are using, leave the Layer box empty
- Change the Service Mode to required mode for the layer, in this example it will be ‘Rest’
- If you would like this layer to be displayed on your current map, tick the Active box then click Set
You should now have something similar to the image below.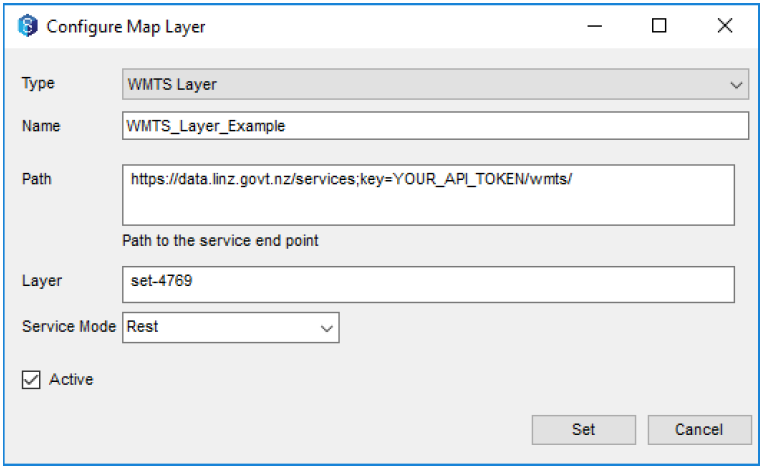
- To finalise the new layer, under the Active System Layers tab click Save down the bottom right of the window
- To ensure your new layer has been added successfully, check in the Mapping section of 12d Synergy Administrator under the Default Map View tab. For any troubleshooting, refer to the ‘Troubleshooting’ section of this document
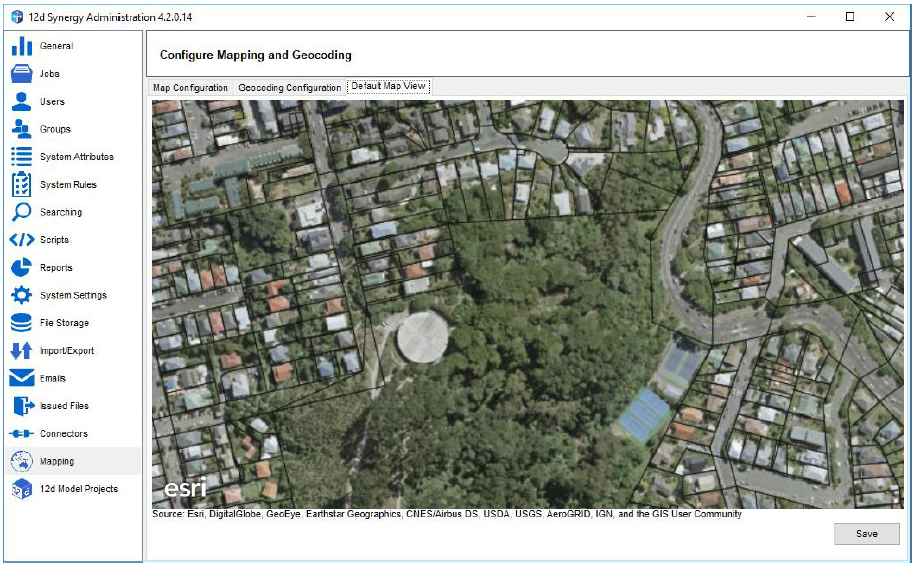
The following image displays the ‘NZ Parcel Boundaries Wireframe’ layer added in the previous steps projected overtop of an aerial image layer.
1.4. Adding a Shape File Layer
In the following steps we are going to use an example shape file obtained from the LINZ Data Service website called ‘NZ Primary Parcels’ (See link). [ https://data.linz.govt.nz/layer/50772-nz-primary-parcels/ ]
The process of adding shape file layers is much the same as adding a KML or KMZ layer.
Steps:
- Navigate to the Mapping section in 12d Synergy Administrator and under the Map Configuration tab click the + button down the bottom
- Change the Type drop down to ‘Shape File’ and enter any name into the Name box
- Enter the path to your shape file into the Path box. This can either be a network or local path, in this example it will be ‘C:\Users\SynergyDemo\Mapping\WGS84SHP\nz-primary-parcels.shp’
- If you would like this layer to be displayed on your current map, tick the Active box then click Set
You should now have something similar to the image below.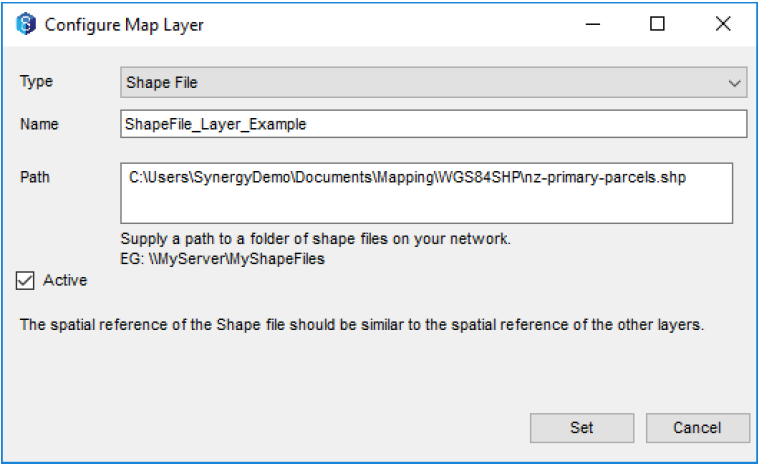
- To finalise the new layer, under the Active System Layers tab click Save down the bottom right of the window
- To ensure your new layer has been added successfully, check in the Mapping section of 12d Synergy Administrator under the Default Map View tab. For any troubleshooting, refer to the ‘Troubleshooting’ section of this document
The following image displays the ‘NZ Primary Parcels’ shape file layer added in the previous steps projected overtop of the ‘Base Street Map’ layer.
1.5. Adding a KML / KMZ File Layer
In the following steps we are going to use an example KMZ file that will be added in 12d Synergy as a map layer. The process of adding KML and KMZ layers is much the same as adding a shape file layer.
Steps:
- Navigate to the Mapping section in 12d Synergy Administrator and under the Map Configuration tab click the + button down the bottom
- Change the Type drop down to ‘KML / KMZ’ and enter any name into the Name box
- Enter the path to your KMZ or KML file into the Path box. This can be either a network or local path, in this example it will be ‘C:\Users\SynergyDemo\Mapping\GolfCourseDevelopment\DevelopmentArea.kmz’
- If you would like this layer to be displayed on your current map, tick the Active box then click Set
You should now have something similar to the image below.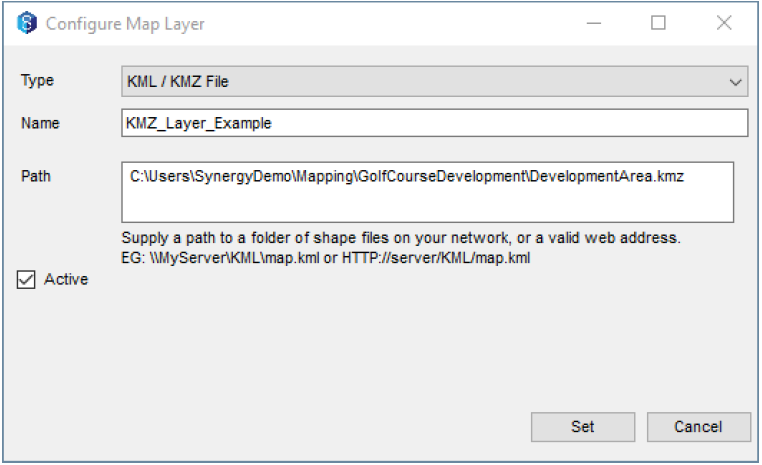
- To finalise the new layer, under the Active System Layers tab click Save down the bottom right of the window
- To ensure your new layer has been added successfully, check in the Mapping section of 12d Synergy Administrator under the Default Map View tab. For any troubleshooting, refer to the ‘Troubleshooting’ section of this document
The following image displays the ‘DevelopmentArea’ KMZ file layer added in the previous steps projected as a green chequered section overtop of the ‘Base Street Map’ layer.