Admin Content
Prerequisites
This guide assumes that the Windows machine, hosting 12d Synergy Server, already has a certificate installed.
If not, please install a certificate using the procedure mentioned in How to Add a Certificate(s) to Windows.
The Certificate must have a private key and it must be installed in the following locations.
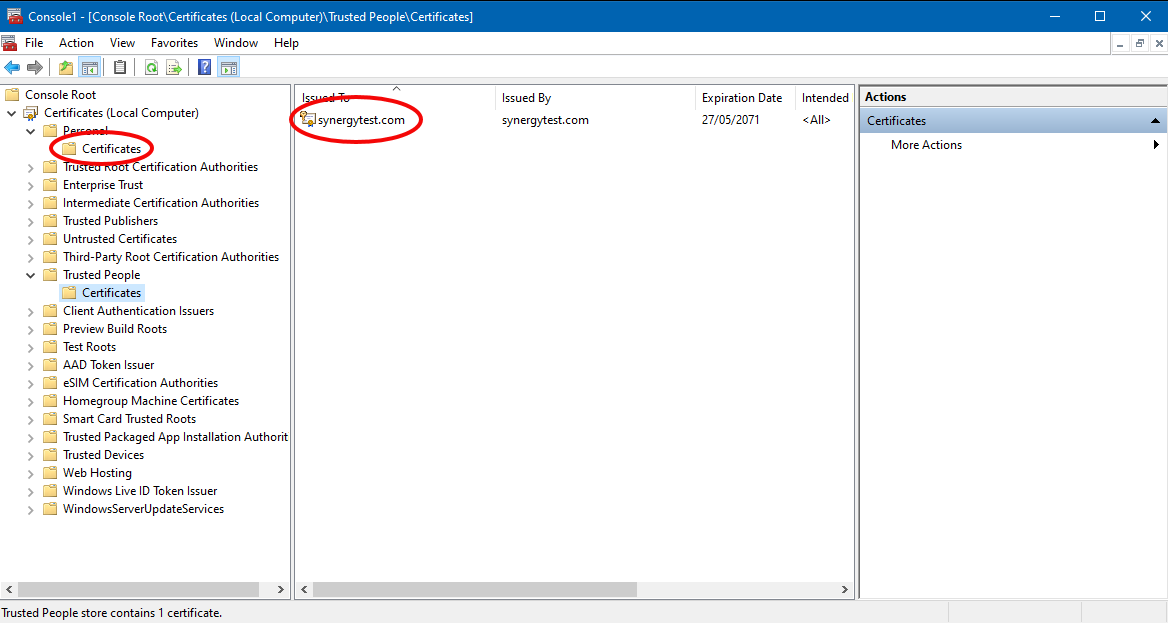
- Microsoft Management Console > Console Root > Certificates (Local Computer) > Personal
- Microsoft Management Console > Console Root > Certificates (Local Computer) > Trusted People
- Login to the Server in which the existing certificate to be re-used has been installed.
- Click the Windows Start button, type Run and select the Run app. Alternatively, press the Windows + R keys together.
- Type mmc.
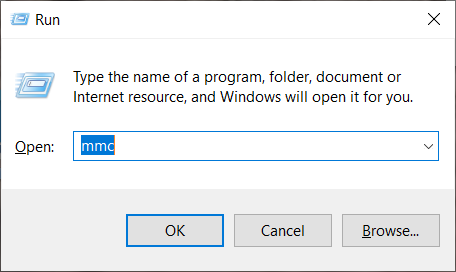
- Click the OK button.
The Microsoft Management Console window is displayed.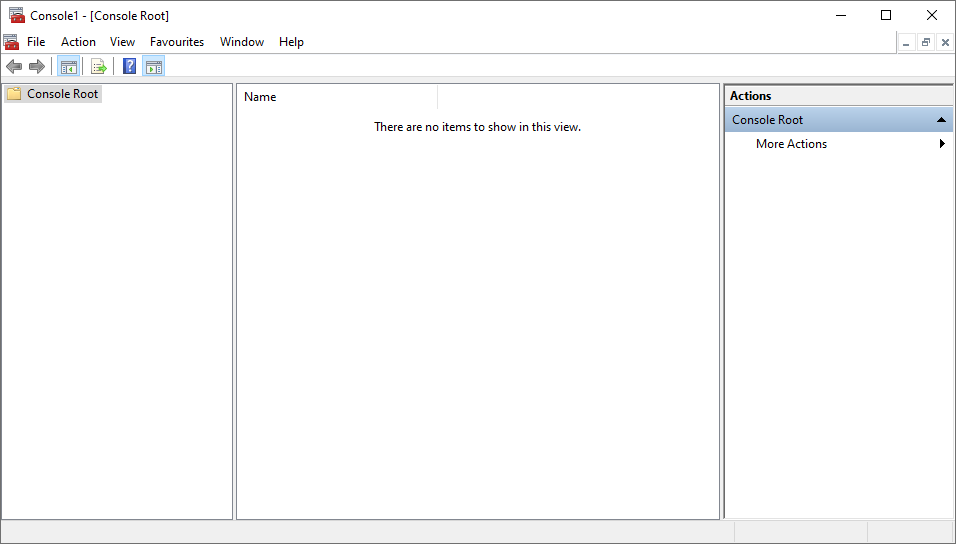
- In the File menu option, select the Add/Remove Snap-in option.
The Add or Remove Snap-ins prompt is displayed.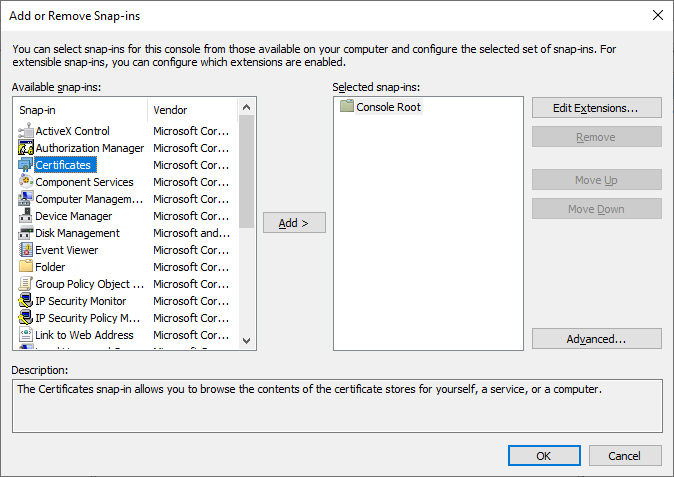
- In the Available Snap-ins section, click the Certificates snap-in.
- Click the Add > button.
The Certificates snap-in prompt is displayed.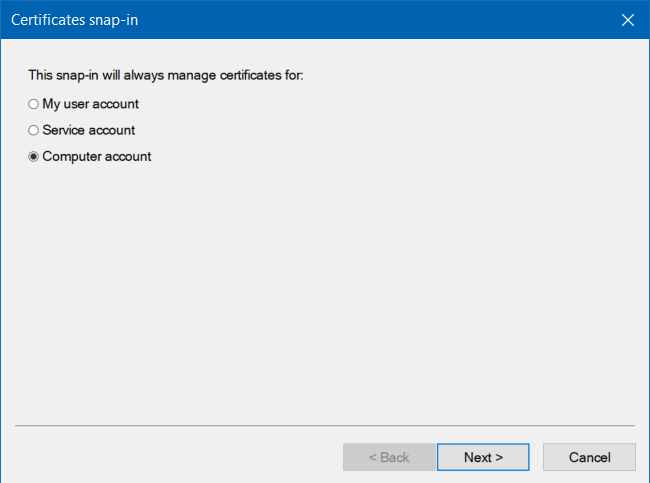
- Select the Computer account option and click the Next button.
The Select Computer prompt is displayed.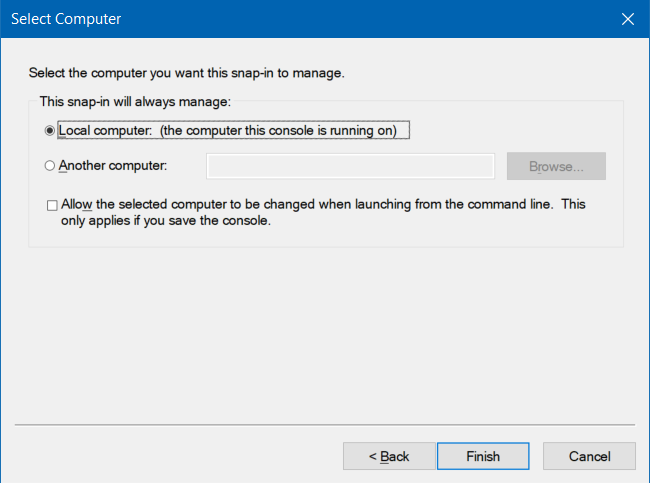
- Select the Local computer option and click the Finish button.
In the Add or Remove Snap-ins prompt, the Certificates (Local computer) snap-in is moved to the Selected snap-ins section.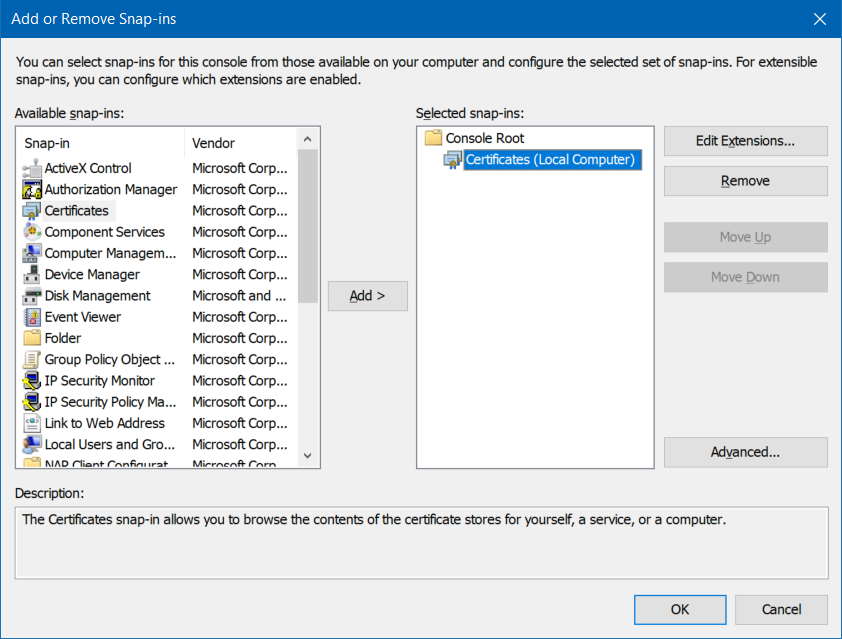
- Click the OK button.
- In the Microsoft Management Console window, navigate through to Console Root > Certificates (Local Computer) > Personal > Certificates and locate your certificate and double-click it.
The Certificate dialog is displayed. - Click the Details tab.
- Select the Thumbprint field.
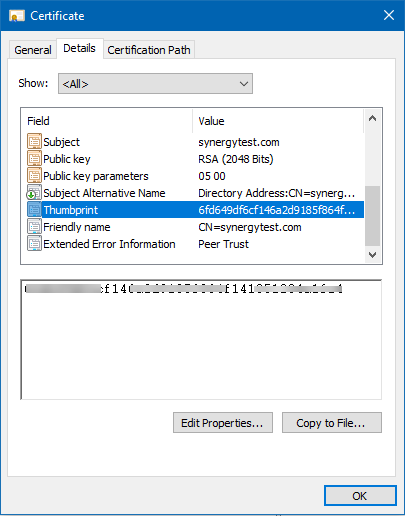
- Copy the value of the thumbprint from the box.
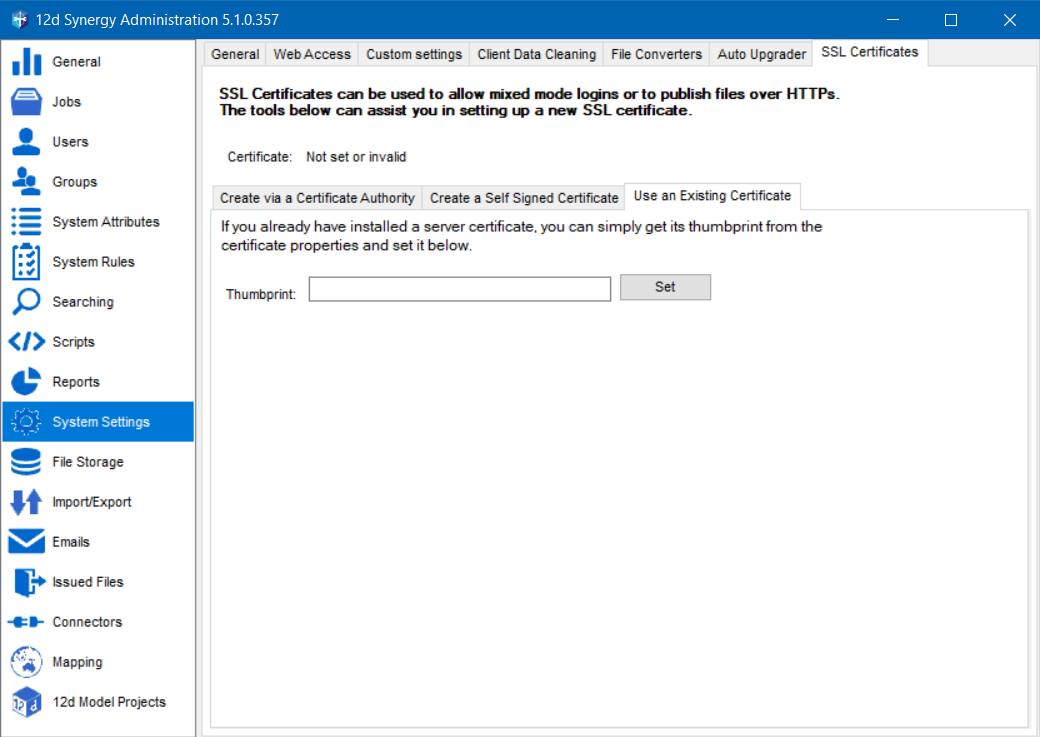
- In the 12d Synergy Administration application, select the System Settings tab > SSL Certificates tab > Use an Existing Certificate tab.
- Paste the value of the thumbprint in the Thumbprint box and click the Set button.
- In the System Settings tab > Web Access tab, do the following:
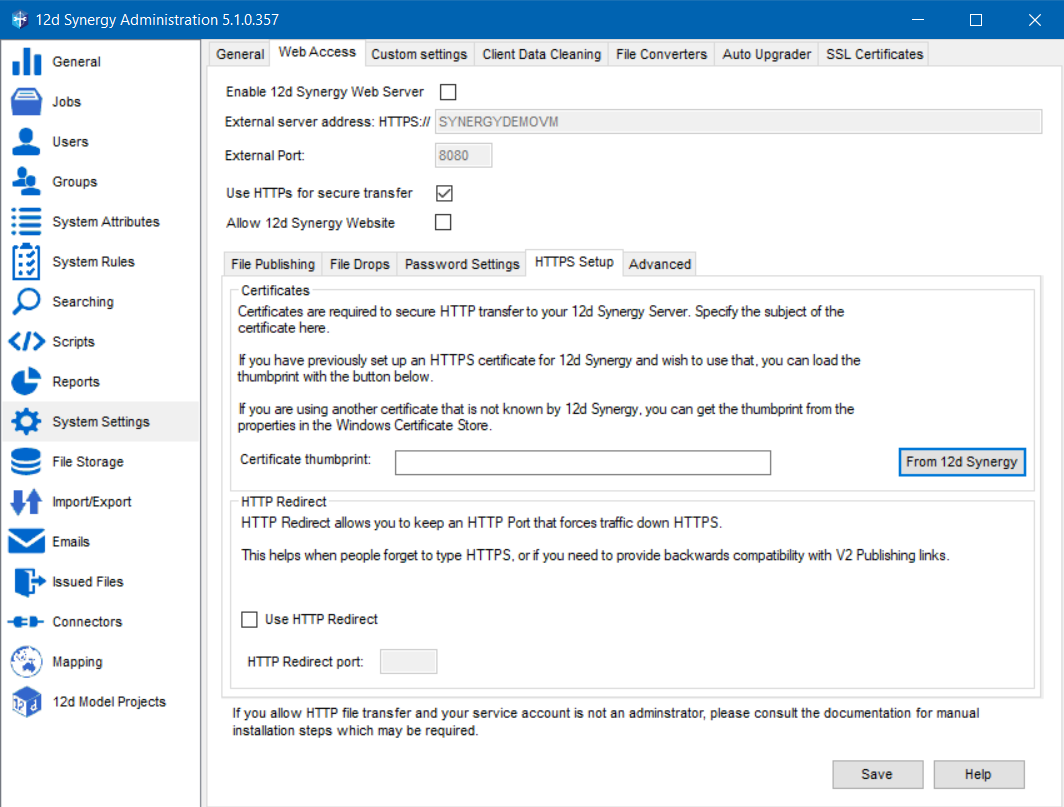
- Select the Use HTTPs for secure transfer check box.
- Select the HTTPS Setup tab.
- Click the From 12d Synergy button.
The thumbprint is displayed in the Certificate thumbprint box. - Click the Save button.
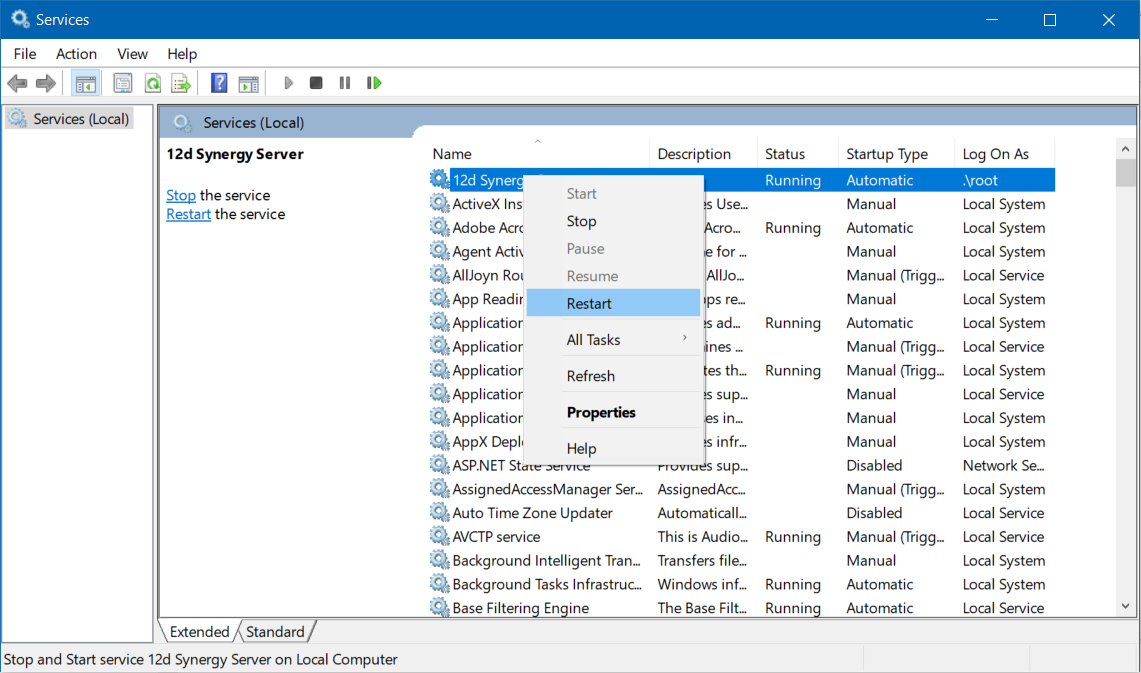
- Restart the 12d Synergy Server service by doing the following:
- Click the Window Start button > Run prompt > type services.msc. Alternatively, press the Windows+R keys simultaneously and then type services.msc.
The Services window is displayed. - Right-click the 12d Synergy Server service and select the Restart option.
- Click the Window Start button > Run prompt > type services.msc. Alternatively, press the Windows+R keys simultaneously and then type services.msc.
The 12d Synergy Server service is restarted and the new certificate is loaded.