Admin Content
Certificates must have a Private Key.
The Certificate must have a private key and be installed in the following locations.
Microsoft Management Console > Console Root > Certificates (Local Computer) > Personal
Microsoft Management Console > Console Root > Certificates (Local Computer) > Trusted People
Log in to the server on which the existing certificate to be re-used has been installed.
Click the Windows Start button, type Run and select the Run app. Alternatively, press the Windows + R keys together.
Instead of following steps 2-12 to access the Certificate Import Wizard to import the certificate, simply double-click the certificate in your Windows browser. Then follow step 13 onwards.
Type mmc.
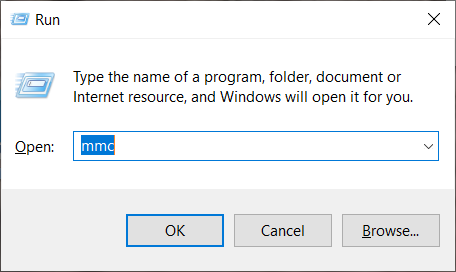
Click the OK button.
The Microsoft Management Console window is displayed.
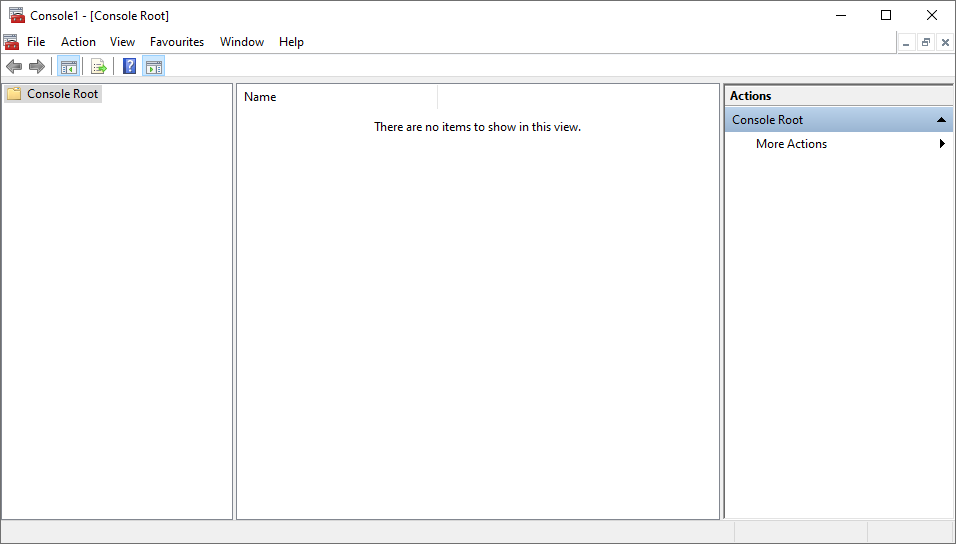
In the File menu option, select the Add/Remove Snap-in option.
The Add or Remove Snap-ins prompt is displayed.
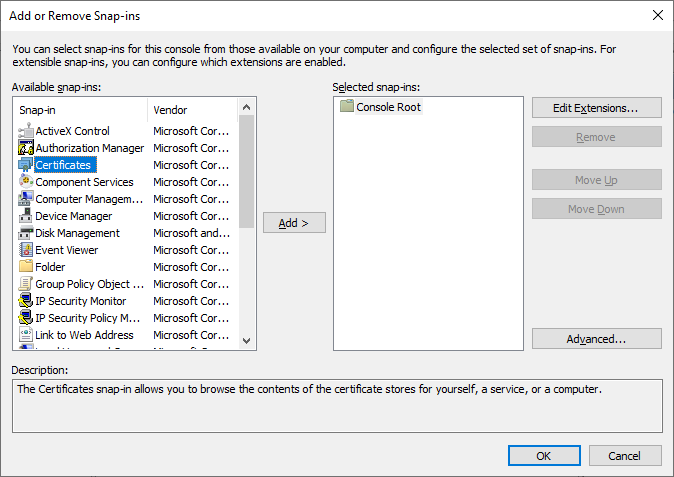
In the Available Snap-ins section, click the Certificates snap-in.
Click the Add > button.
The Certificates snap-in prompt is displayed.
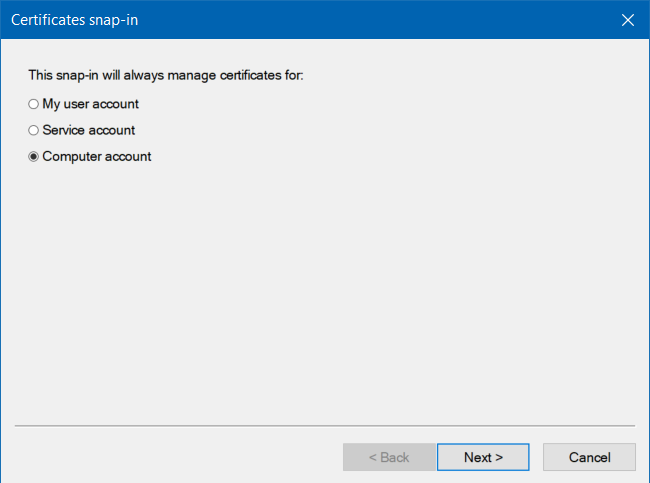
Select the Computer account option and click the Next button.
The Select Computer prompt is displayed.
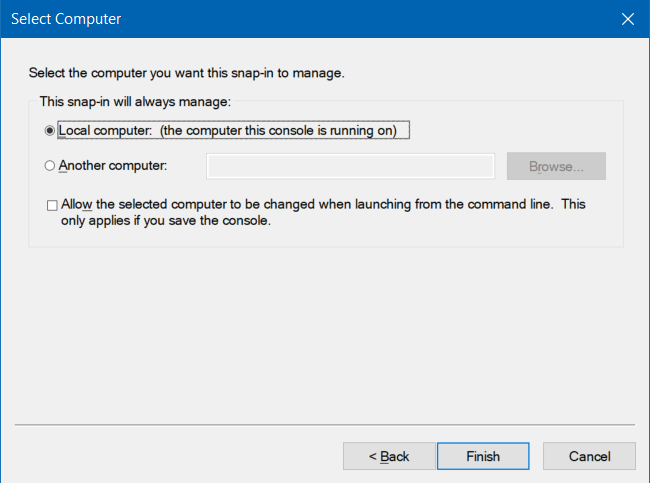
Select the Local computer option and click the Finish button.
In the Add or Remove Snap-ins prompt, the Certificates (Local computer) snap-in is moved to the Selected snap-ins section.
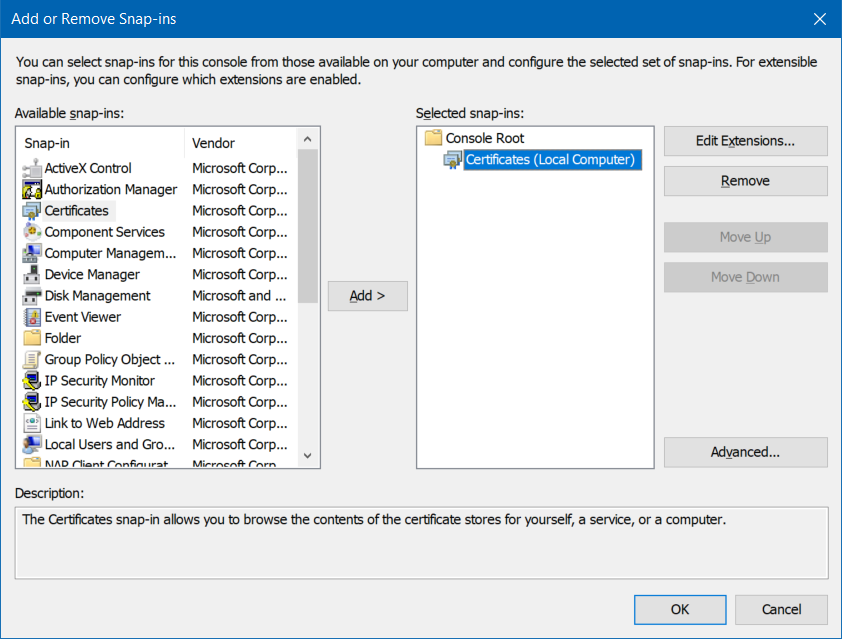
Click the OK button.
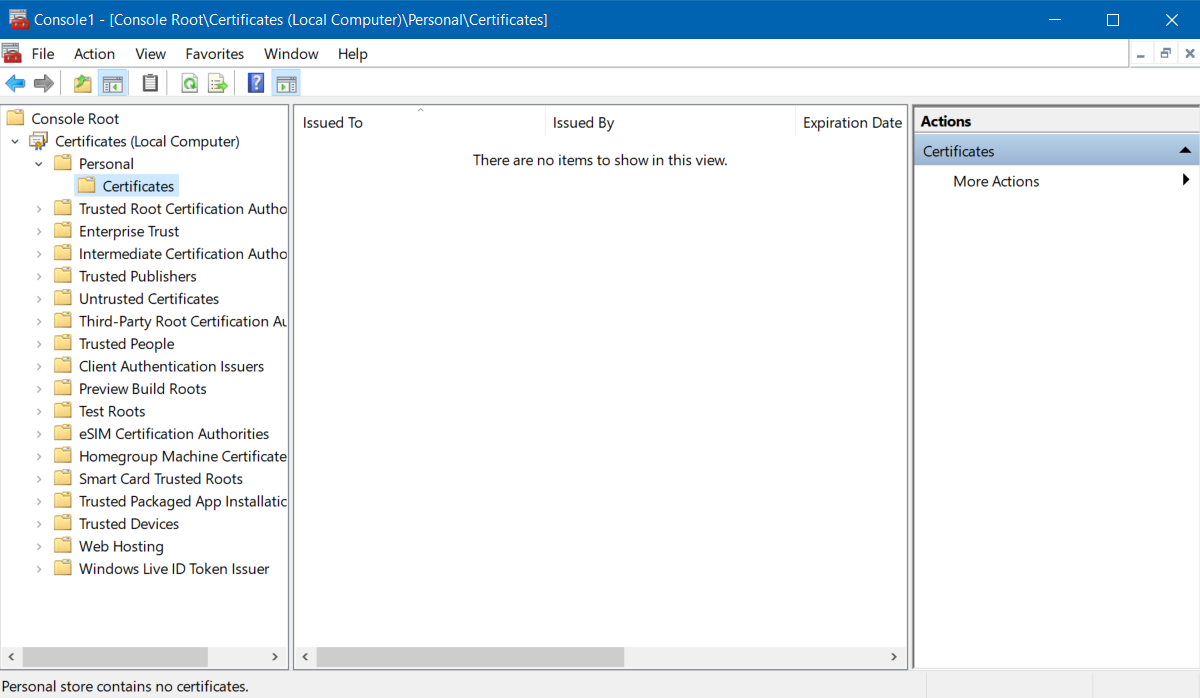
In the Microsoft Management Console window, navigate through to Console Root > Certificates (Local Computer) > Personal > Certificates folder.
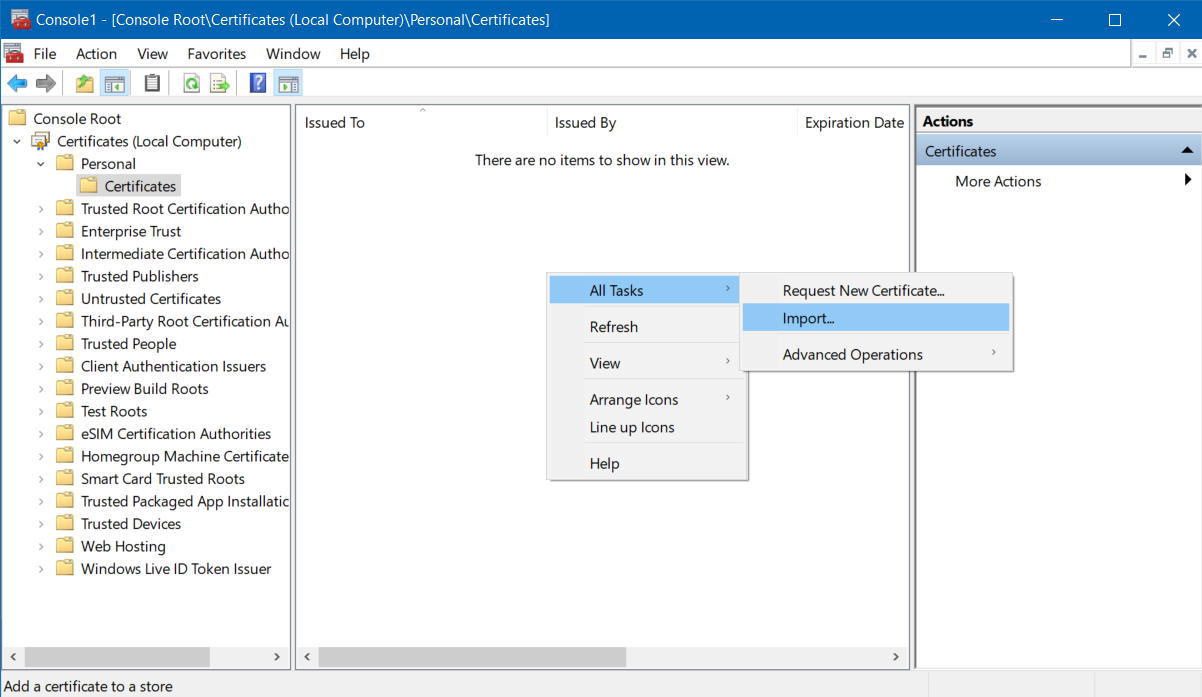
Right-click anywhere in the middle panel of the above window and select the All Tasks > Import option.
The Certificate Import Wizard prompt is displayed.
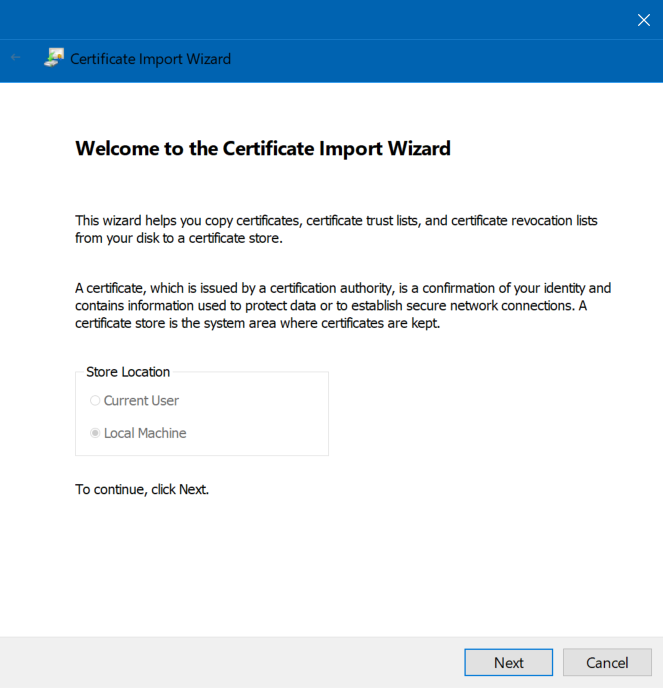
Click the Next button.
The Open dialog is displayed.
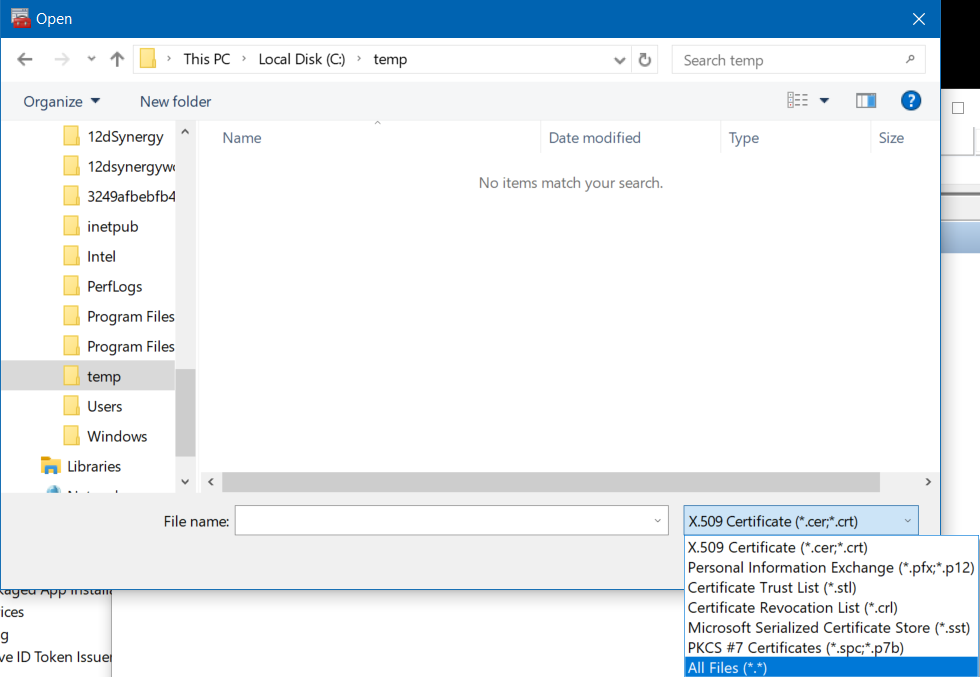
Browse and select the certificate to be added.
While browsing for the required certificate, ensure to look for files of all types (extensions) by selecting the All files option from the list against the File Name box.
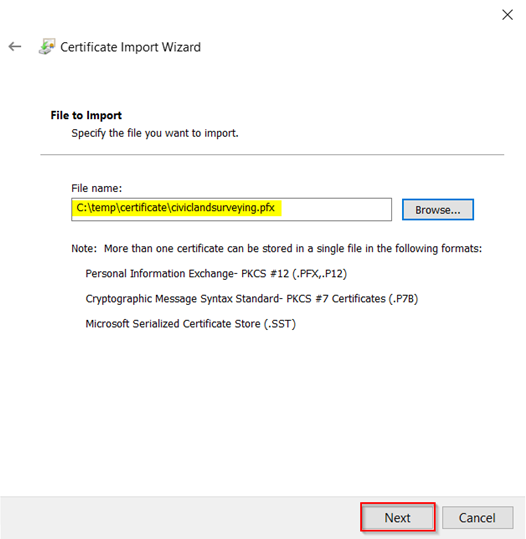
The certificate to be added is displayed in the File name box in the Certificate Import Wizard prompt.Click the Next button.
If the certificate is password-protected, then it will prompt for the password. Enter the password in the Password section.
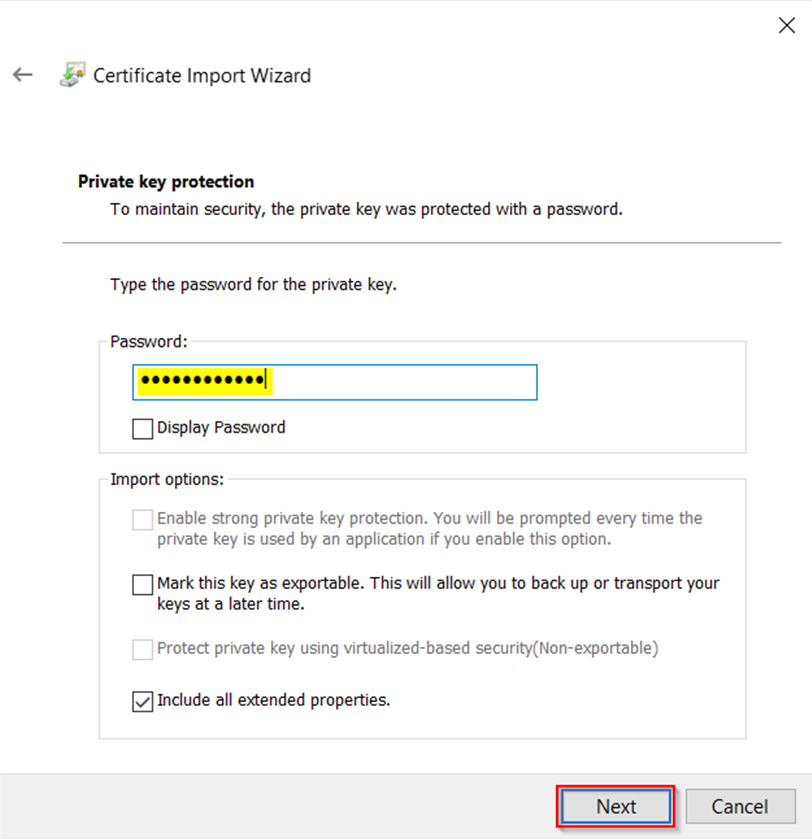
Click the Next button.
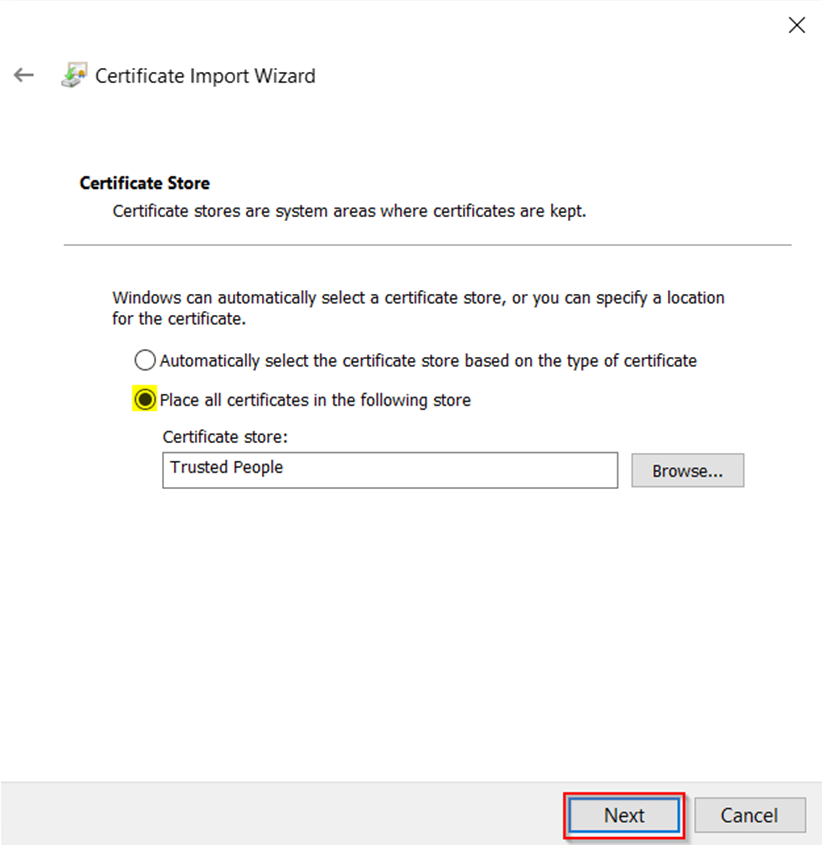
Select the Place all certificates in the following store option.

Click the Next button.
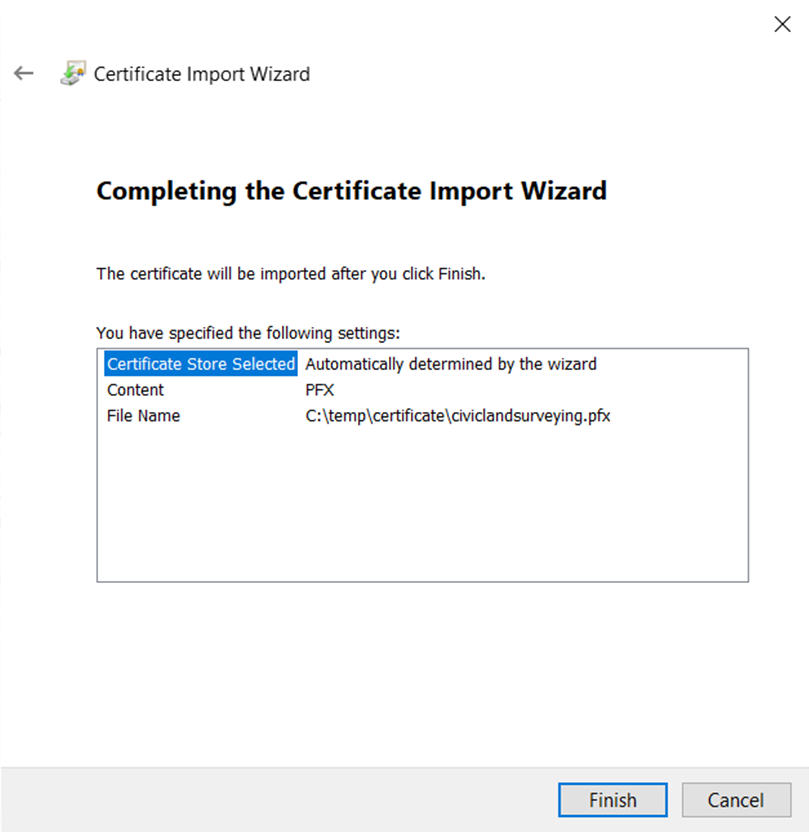
Click the Finish button.
Follow steps 11-20 to import the certificate from the Microsoft Management Console > Console Root > Certificates (Local Computer) > Trusted People > Certificates.
Ensure that in step 18, the Certificate Store is Trusted People, as mentioned in the prompt below.
Restart the 12d Synergy Server service by doing the following:
Click the Windows Start button > Run prompt > type services.msc. Alternatively, press the Windows+R keys simultaneously, and then type services.msc.
The Services window is displayed.Right-click the 12d Synergy Server service and select the Restart option.
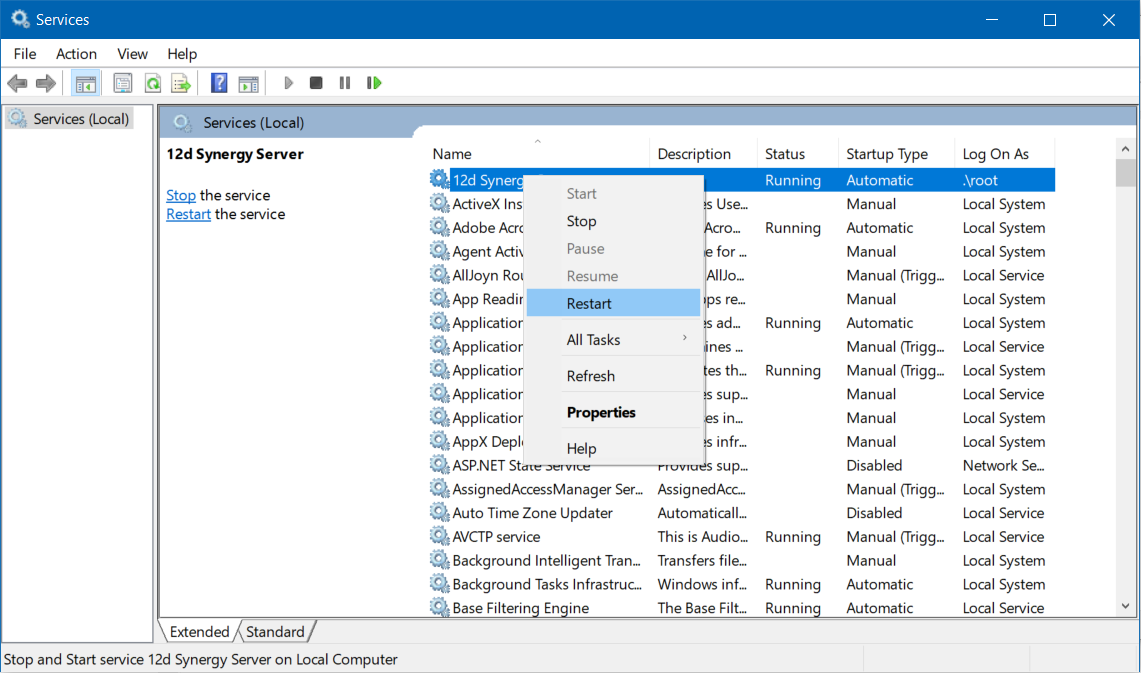
The 12d Synergy Server service is restarted, and the new certificates are loaded.