1.1. Adding a Data Shortcuts Project to 12d Synergy
If you do not yet have a data shortcuts project folder:
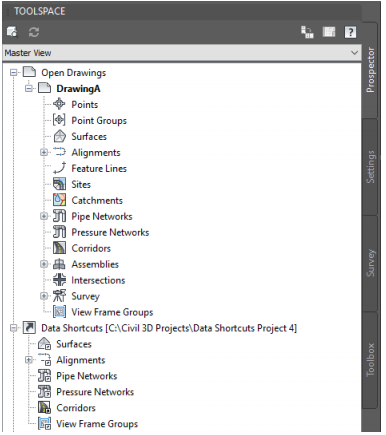
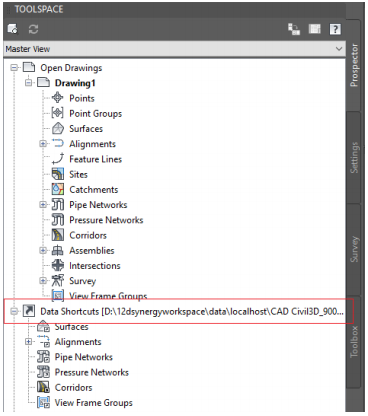
- Open the Toolspace, and in the Prospector tab, select the Master View
- Right-Click on the "Data Shortcuts" collection, and select "New Data Shortcuts Project Folder"
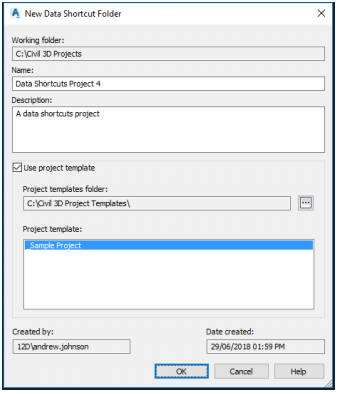
- Enter the name, description nd optionally a project template
To add our data shortcuts project to 12d Synergy:
- Ensure that the active drawing has been added to 12d Synergy and is currently checked out
- Open the Toolspace, and in the Prospector tab, select the Master View
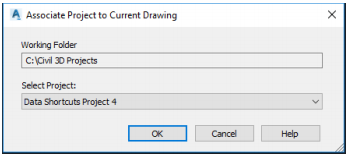
- Right-Click on the "Data Shortcuts" collection, and select "Associate Project to Current Drawing"
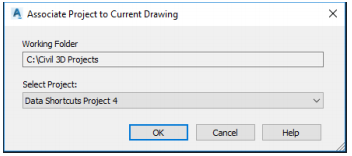
- In the "Select Project" drop down menu, select your data shortcuts project
- Select "Ok"
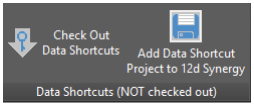
- Select "12d Synergy Data Shortcuts" button group
- Select "Add Data Shortcut Project to 12d Synergy"
- Select a folder location in 12d Synergy where the data shortcuts project will be stored
- The Civil 3D plugin will now add the data shortcuts project folder to 12d Synergy
- Once the project has been added, a message will appear in Civil 3D notifying that your data shortcuts path has been changed

- Select "Ok"
- Save your drawing file, but keep it checked out
- Restart AutoCAD Civil 3D
- Ensure that you open the drawing file that was associated with your data shortcuts project
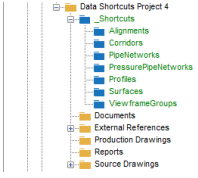
- The Tool space should now show the local workspace location of the data shortcuts project folder in the "Data Shortcuts" collection
1.2. Editing a Data Shortcuts Project
Note: The data shortcuts project folder must be checked out before you can start adding data shortcuts to the project.
Before editing a data shortcuts project:
- Select the "12d Synergy Data Shortcuts" button group
- If the data shortcuts project is not checked out, select "Check Out Data shortcuts"
To add objects in the active drawing file to your data shortcuts project:
- Go to the Toolspace and in the Prospector tab, select the Master View

- Right-Click on the "Data Shortcuts" collection and select "Create Data Shortcuts"
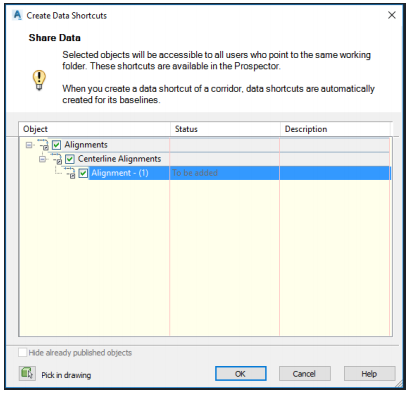
- Select the objects that you want to add as data shortcuts
- Select "Ok"
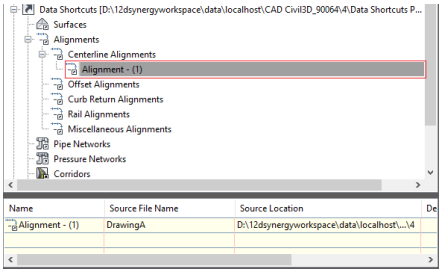
- The select object/s should bow appear under their object type in the "Data Shortcuts" collection
- If you are finished making changes, you can now check in the data shortcuts project by selecting "Check In Data Shortcuts" in the "12d Synergy Data Shortcuts" button group
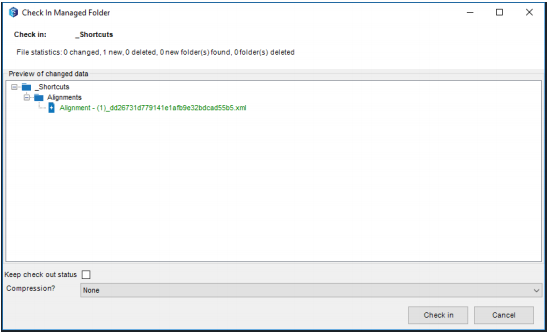
- A dialog containing the modified data shortcuts will appear. Select "Check In" to continue
1.3. Adding Data Shortcuts to Your Drawings
To add data shortcuts to your drawings from an associated data shortcuts project:
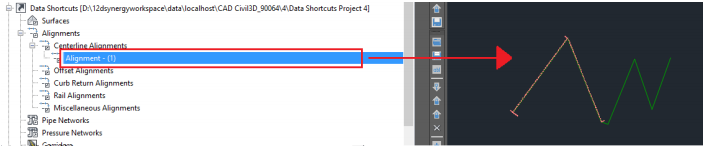
- Go to the Toolspace and in the prospector tab, select the Master View
- Simply drag the data shortcut object into the drawing
If your drawing is not yet associated with a data shortcut project that has been added to 12d Synergy:
- In the 12d Synergy Client, right-click on the data shortcuts project folder and select "Get All"
- In AutoCAD Civil 3D, go to the Toolspace and in the Prospector tab, select the Master View
- Right-Click on the "Data Shortcuts" collection and select "Set Working Folder"
- Select the parent folder of the data shortcuts project folder
- Right-Click on the "Data Shortcuts" collection and select "Associate Project to Current Drawing"
- Select the data shortcuts project