- 05 Nov 2024
- 4 Minutes to read
- Print
- PDF
Define the Transitions
- Updated on 05 Nov 2024
- 4 Minutes to read
- Print
- PDF
Admin Content
As you progress in the workflow, you can perform any of the following transitional actions.
Perform activities to transition to the next state
Set a condition, to move to the next state in the workflow
Capture data such as an attribute, association or a property
You can define any number of activities, conditions and/or data captures for a transition.
Select the transition (arrow between two states).
The right panel for defining the transition is displayed..png)
To define an activity, do the following:
After selecting the transition between Start and WIP states, the Activities tab is displayed to the right side of the workflow. Click the
.png) button.
button.
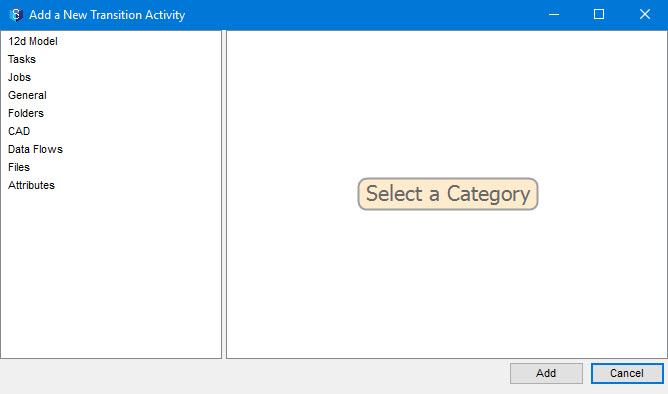
The Add a New Transition Activity window is displayed. All categories are displayed in this window.
Select the required category from the left panel.
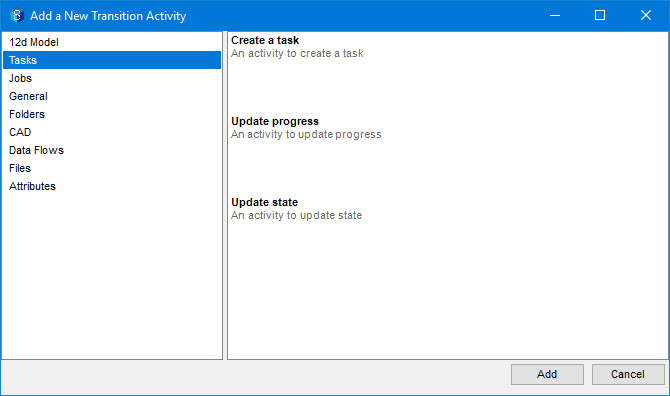
The activities related to the selected category are displayed in the right panel. A list of all the categories and available activities are listed in this page.
Double-click the required activity or select it and click the Add button. Let us, double-click the Create a task activity as an example.
The <activity name> panel is displayed to the right side in the Activities tab and a new entry New <activity name> activity is displayed in the left panel of the Activities tab. The same name is displayed in the Name box, by default. You can rename the activity in the Name box..png)
Select the Fail transition on activity error check box (highlighted in the above image) if you want the workflow to fail if errors occur while the activity is running.
If you want to consider an error that occurs while performing the activity (in this case, it is creating a task) as a critical one, then select the Treat error as critical checkbox(highlighted in the above image).
Double-click each cell under the Value column and enter the required inputs. When you select a cell in the Value column, the entry for the cell is described below the input-value table for your reference. They are also listed in this table.
Click the Save button.
The activity that has to be performed to progress to the WIP state in the workflow is defined and saved.You can add multiple activities by repeating the above procedure.
To define a condition, do the following:
After selecting the transition between the Start and WIP states, the Conditions tab is displayed to the right side of the workflow. Click the
.png) button.
button..png)
The Add a New Transition Condition window is displayed. All categories and the possible conditions related to the categories are displayed in this window.
Select the category (General) from the left panel.
All the conditions that you can choose from are displayed in the right panel of this window and explained here..jpg)
Double-click the required condition or select it and click the Add button. Let us, double-click the Compare property condition as an example.
The <condition name> panel is displayed to the right side in the Conditions tab and a new entry New <condition name> condition is displayed in the left panel. The same name is displayed in the Name box, by default. You can rename the condition in the Name box..png)
Double-click each cell under the Value column and enter the required inputs. The value that needs to be entered in the cell is described below the input-value table for your reference. A link to the Expression builder (link) is also available for you to select a required attribute, if need be. In the above example, the value of Compare (1) is the revision number of the file and the value of Compare (2) is “1”. So the condition stated above is that the revision number should be equal to 1.
If you want to negate the condition you are defining, then select the Not? check box. (For example, if you want to set the condition as property1 IS NOT EQUAL to property2, then you can select property1 = property2 as the inputs and then select the Not? check box to make the operator NOT EQUAL TO). In the above example, the value of Compare (1) is the revision number of the file and the value of Compare (2) is “1”. So if your condition is that the revision number should NOT be equal to 1, then select the Not? check box.
Click the Save button.
You can add multiple conditions by following the procedure above.
To define a data capture, do the following:
After selecting the link between Start and WIP states, the Data Capture tab is displayed to the right side of the workflow. Click the
.png) button.
button..png)
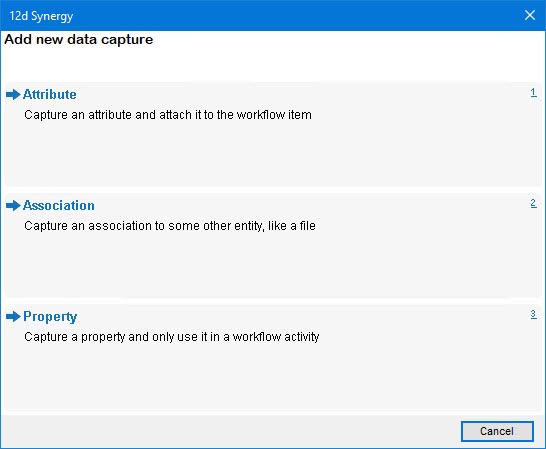
The 12d Synergy prompt is displayed with the possible kinds of data that can be captured while transitioning from one state to another.
Double-click the required data capture option. All the data capture options that you can choose from are explained here.
A new entry name <data capture name> is displayed in the left panel..png)
Select/Enter the required inputs. When the workflow runs, a prompt will be displayed asking you to enter/select the value for the defined data capture.
Click the Save button.
The data capture is saved.


.png)


.png)
.png)

.jpg)
.png)
.png)

.png)